Download to read offline


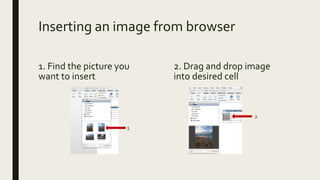
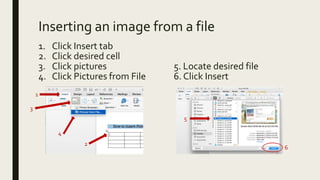


The document provides a step-by-step guide on how to insert images into a table in Microsoft Word. It includes instructions for inserting images from a browser or a file, as well as tips for formatting and cropping images. Additionally, there are comments on pasting the document into Blackboard while clearing formatting.