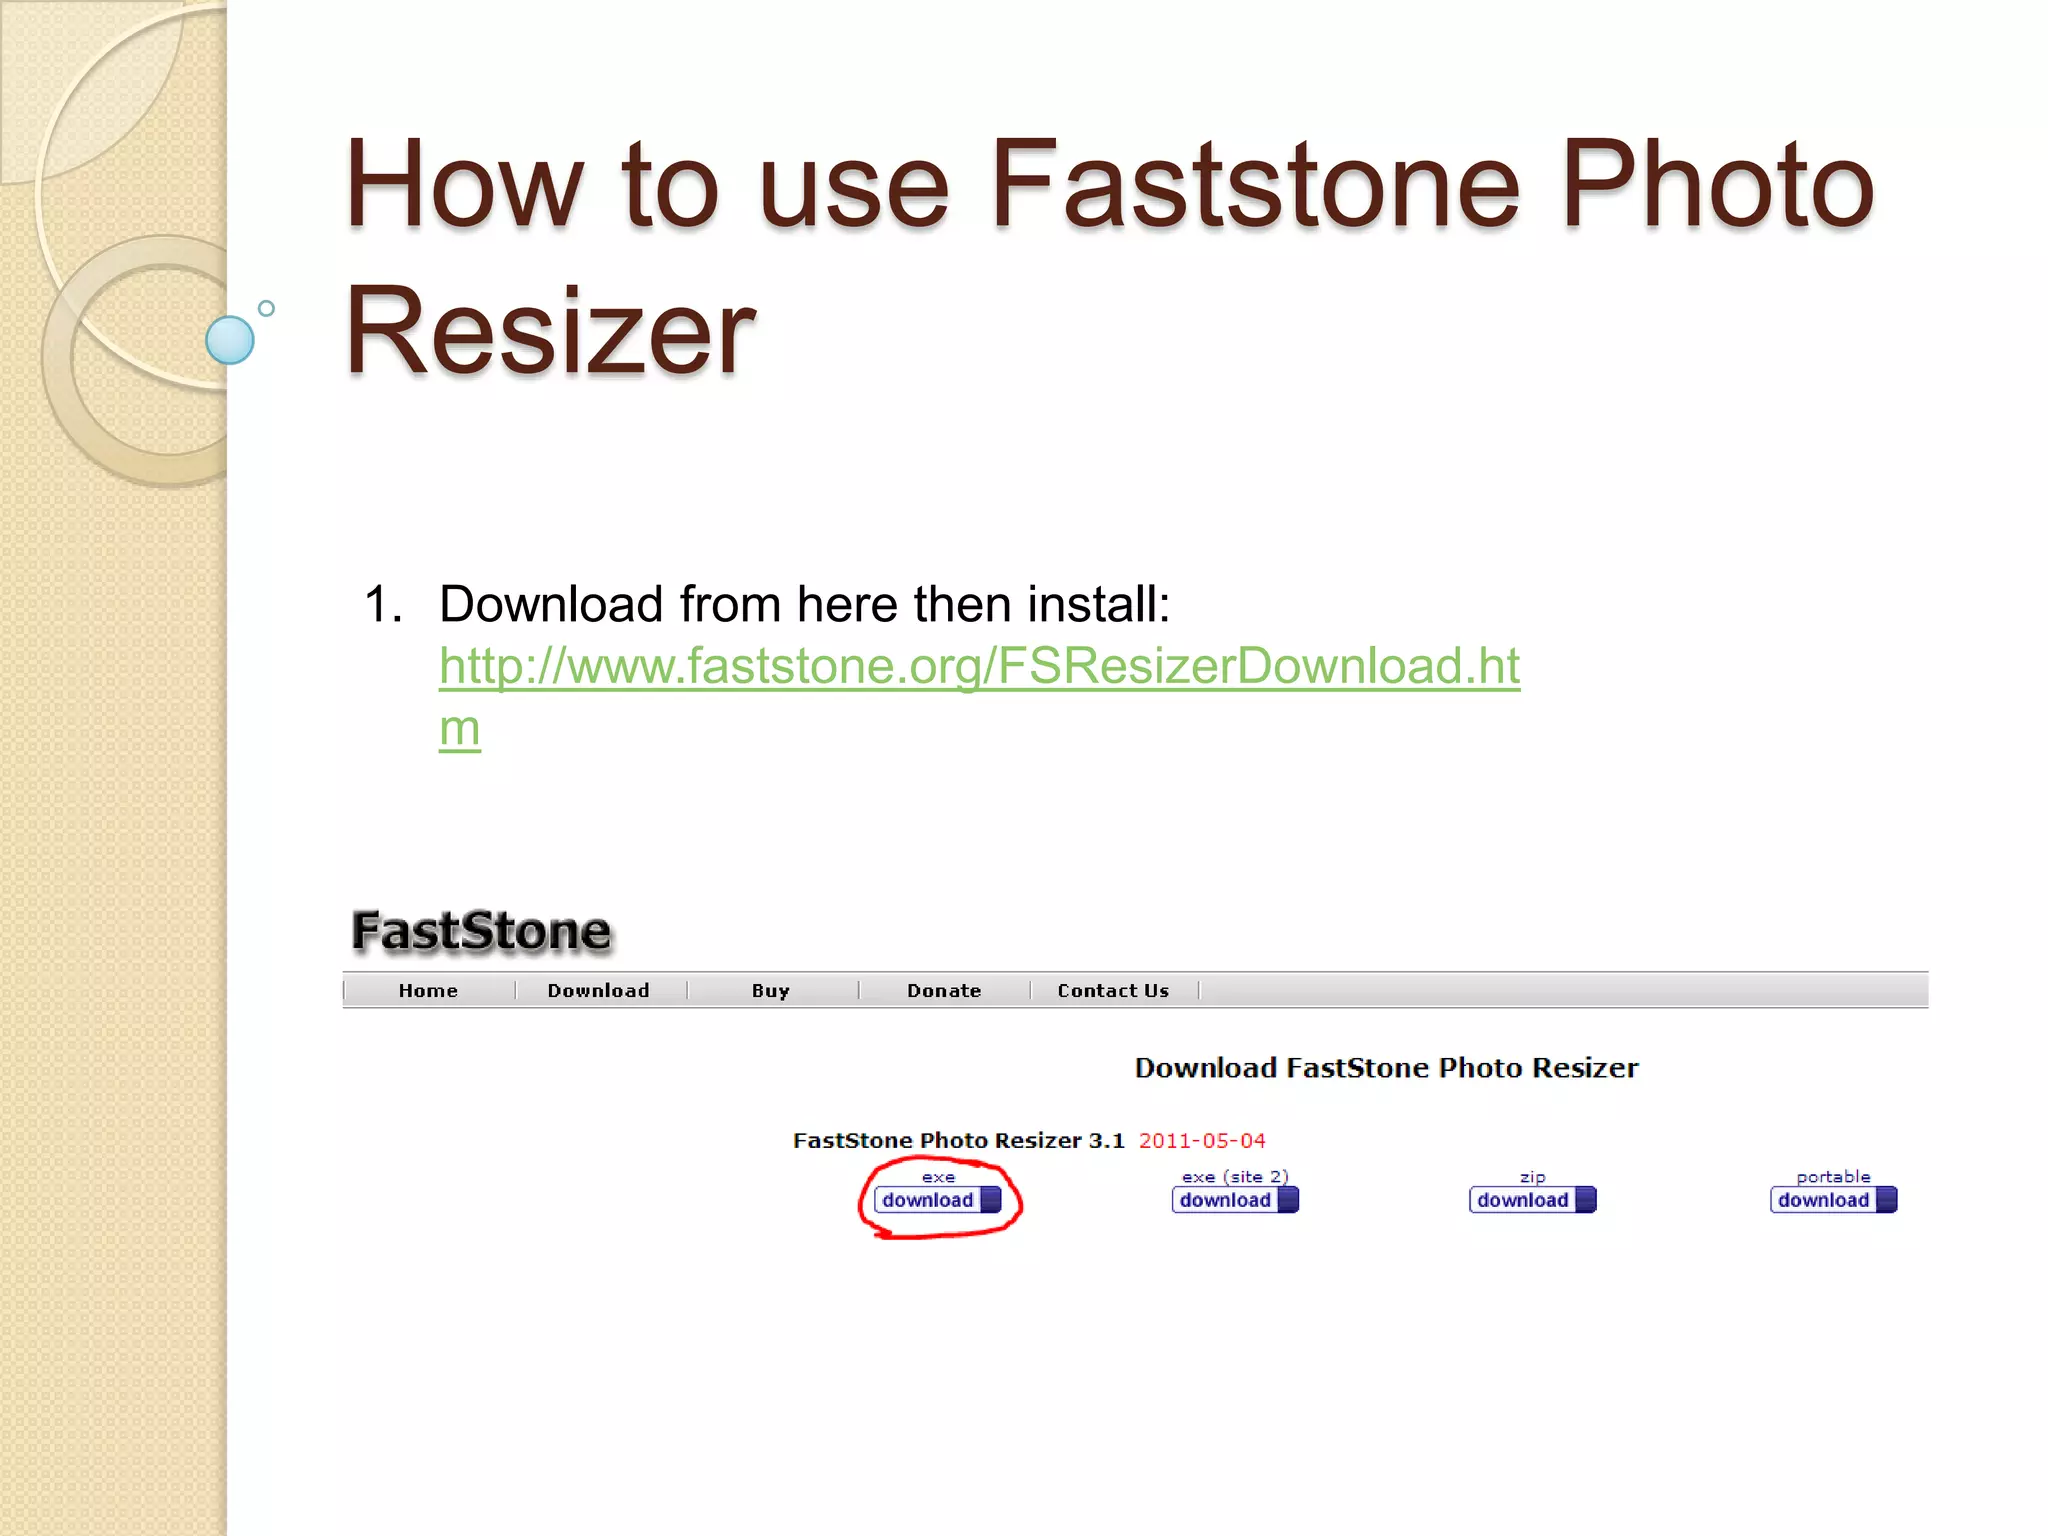
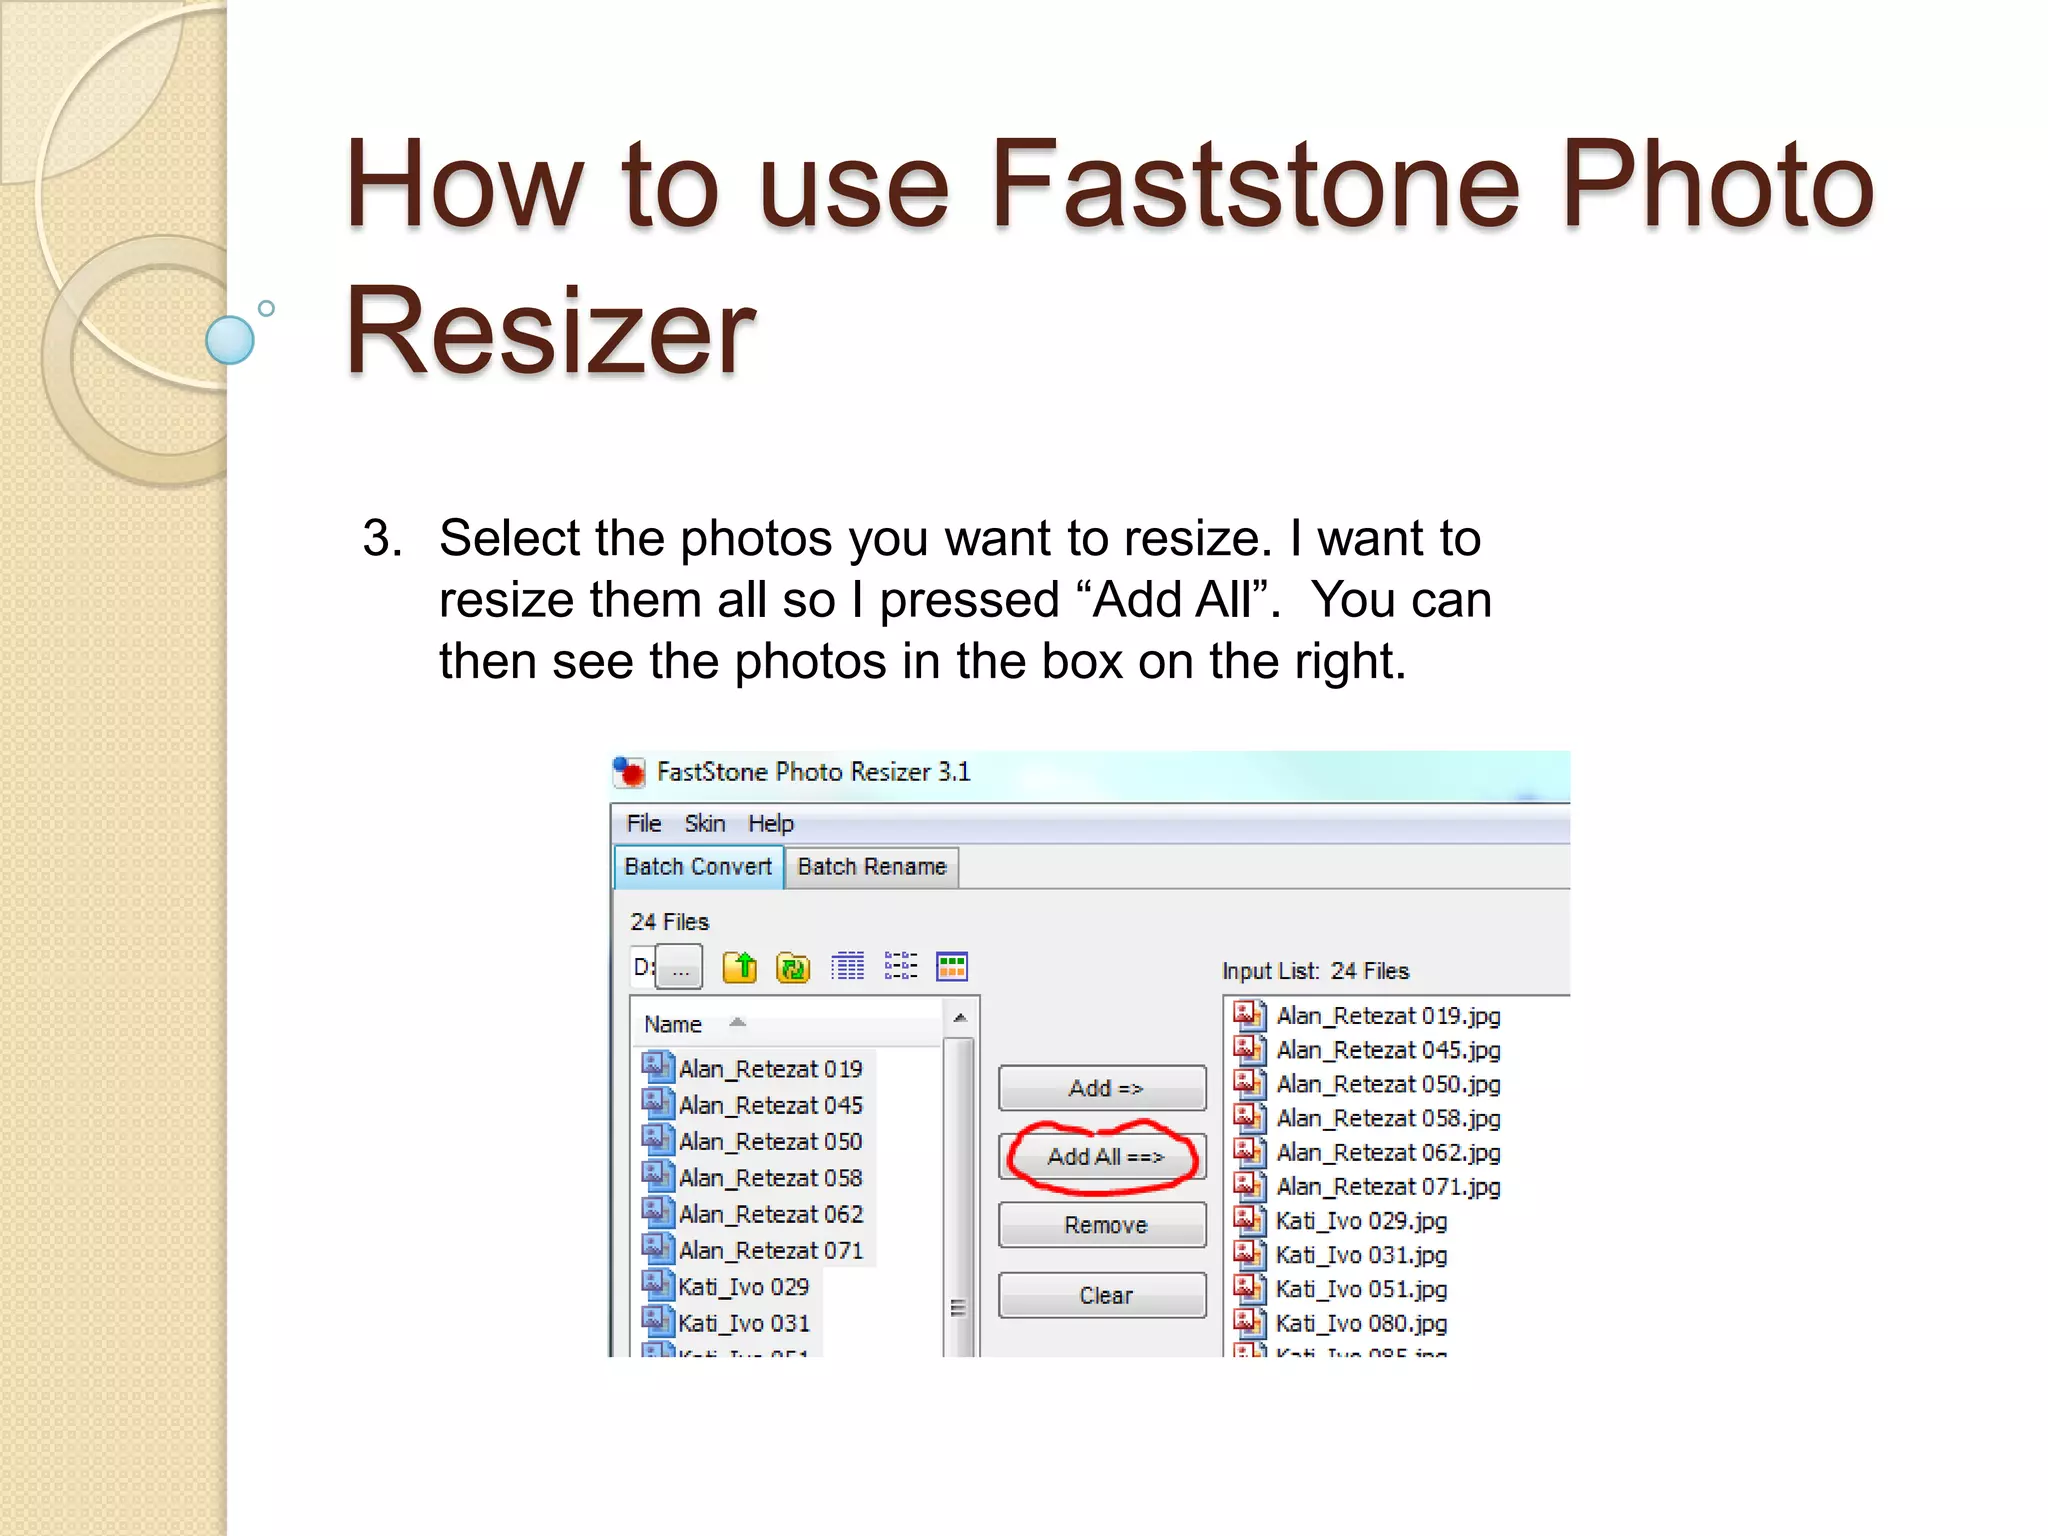
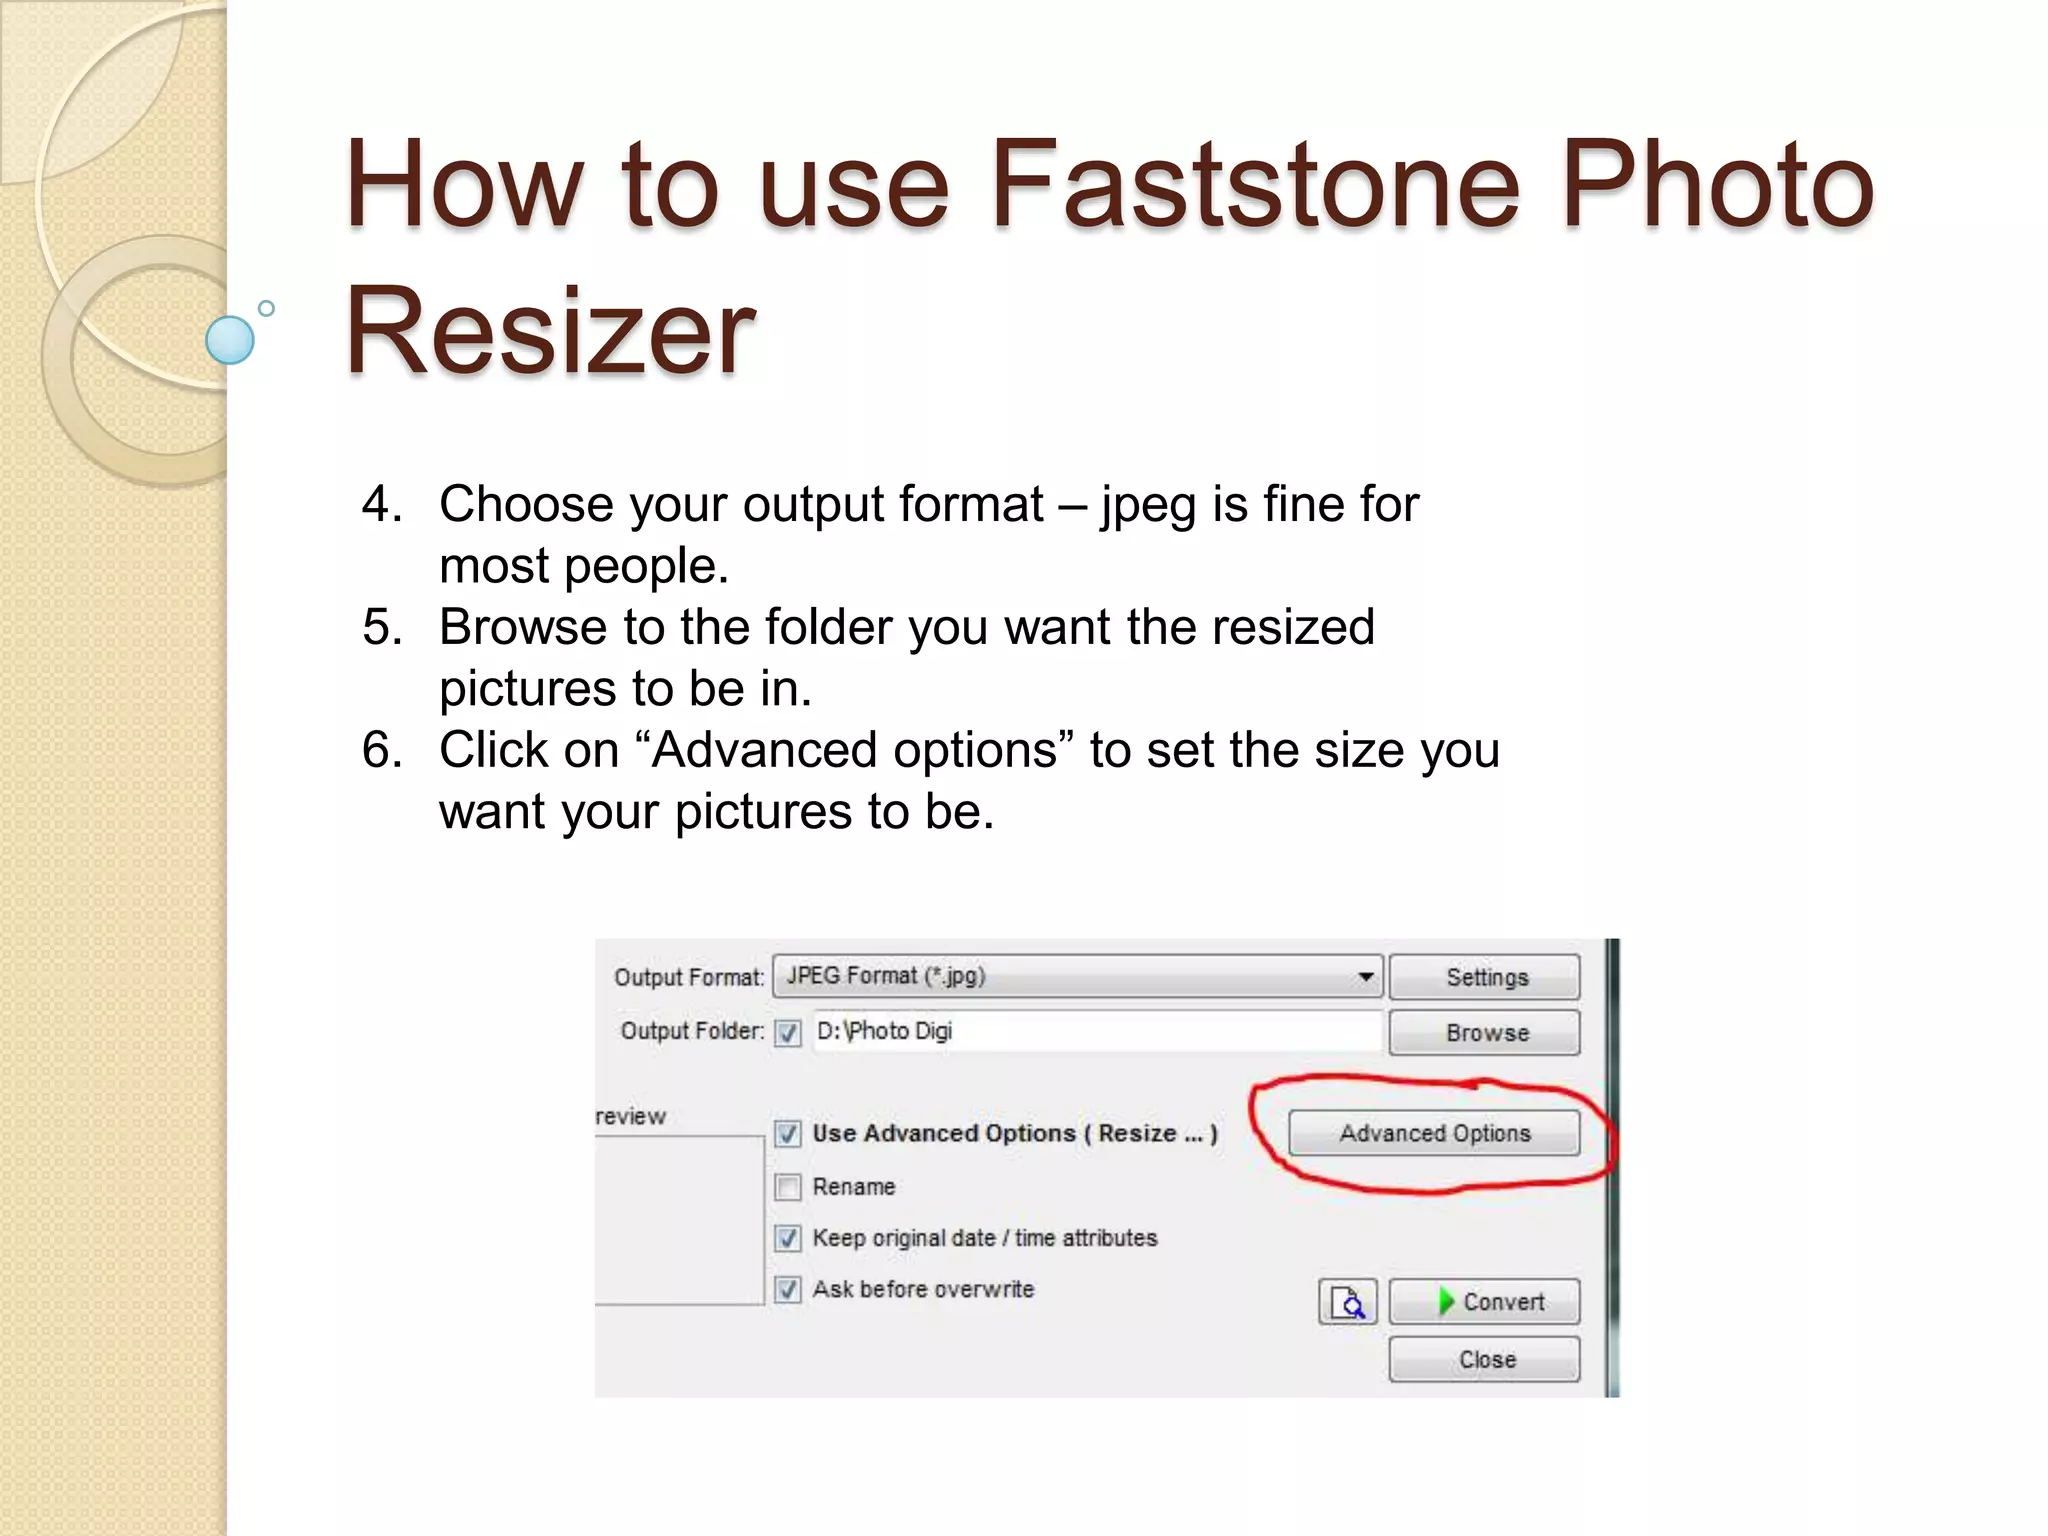
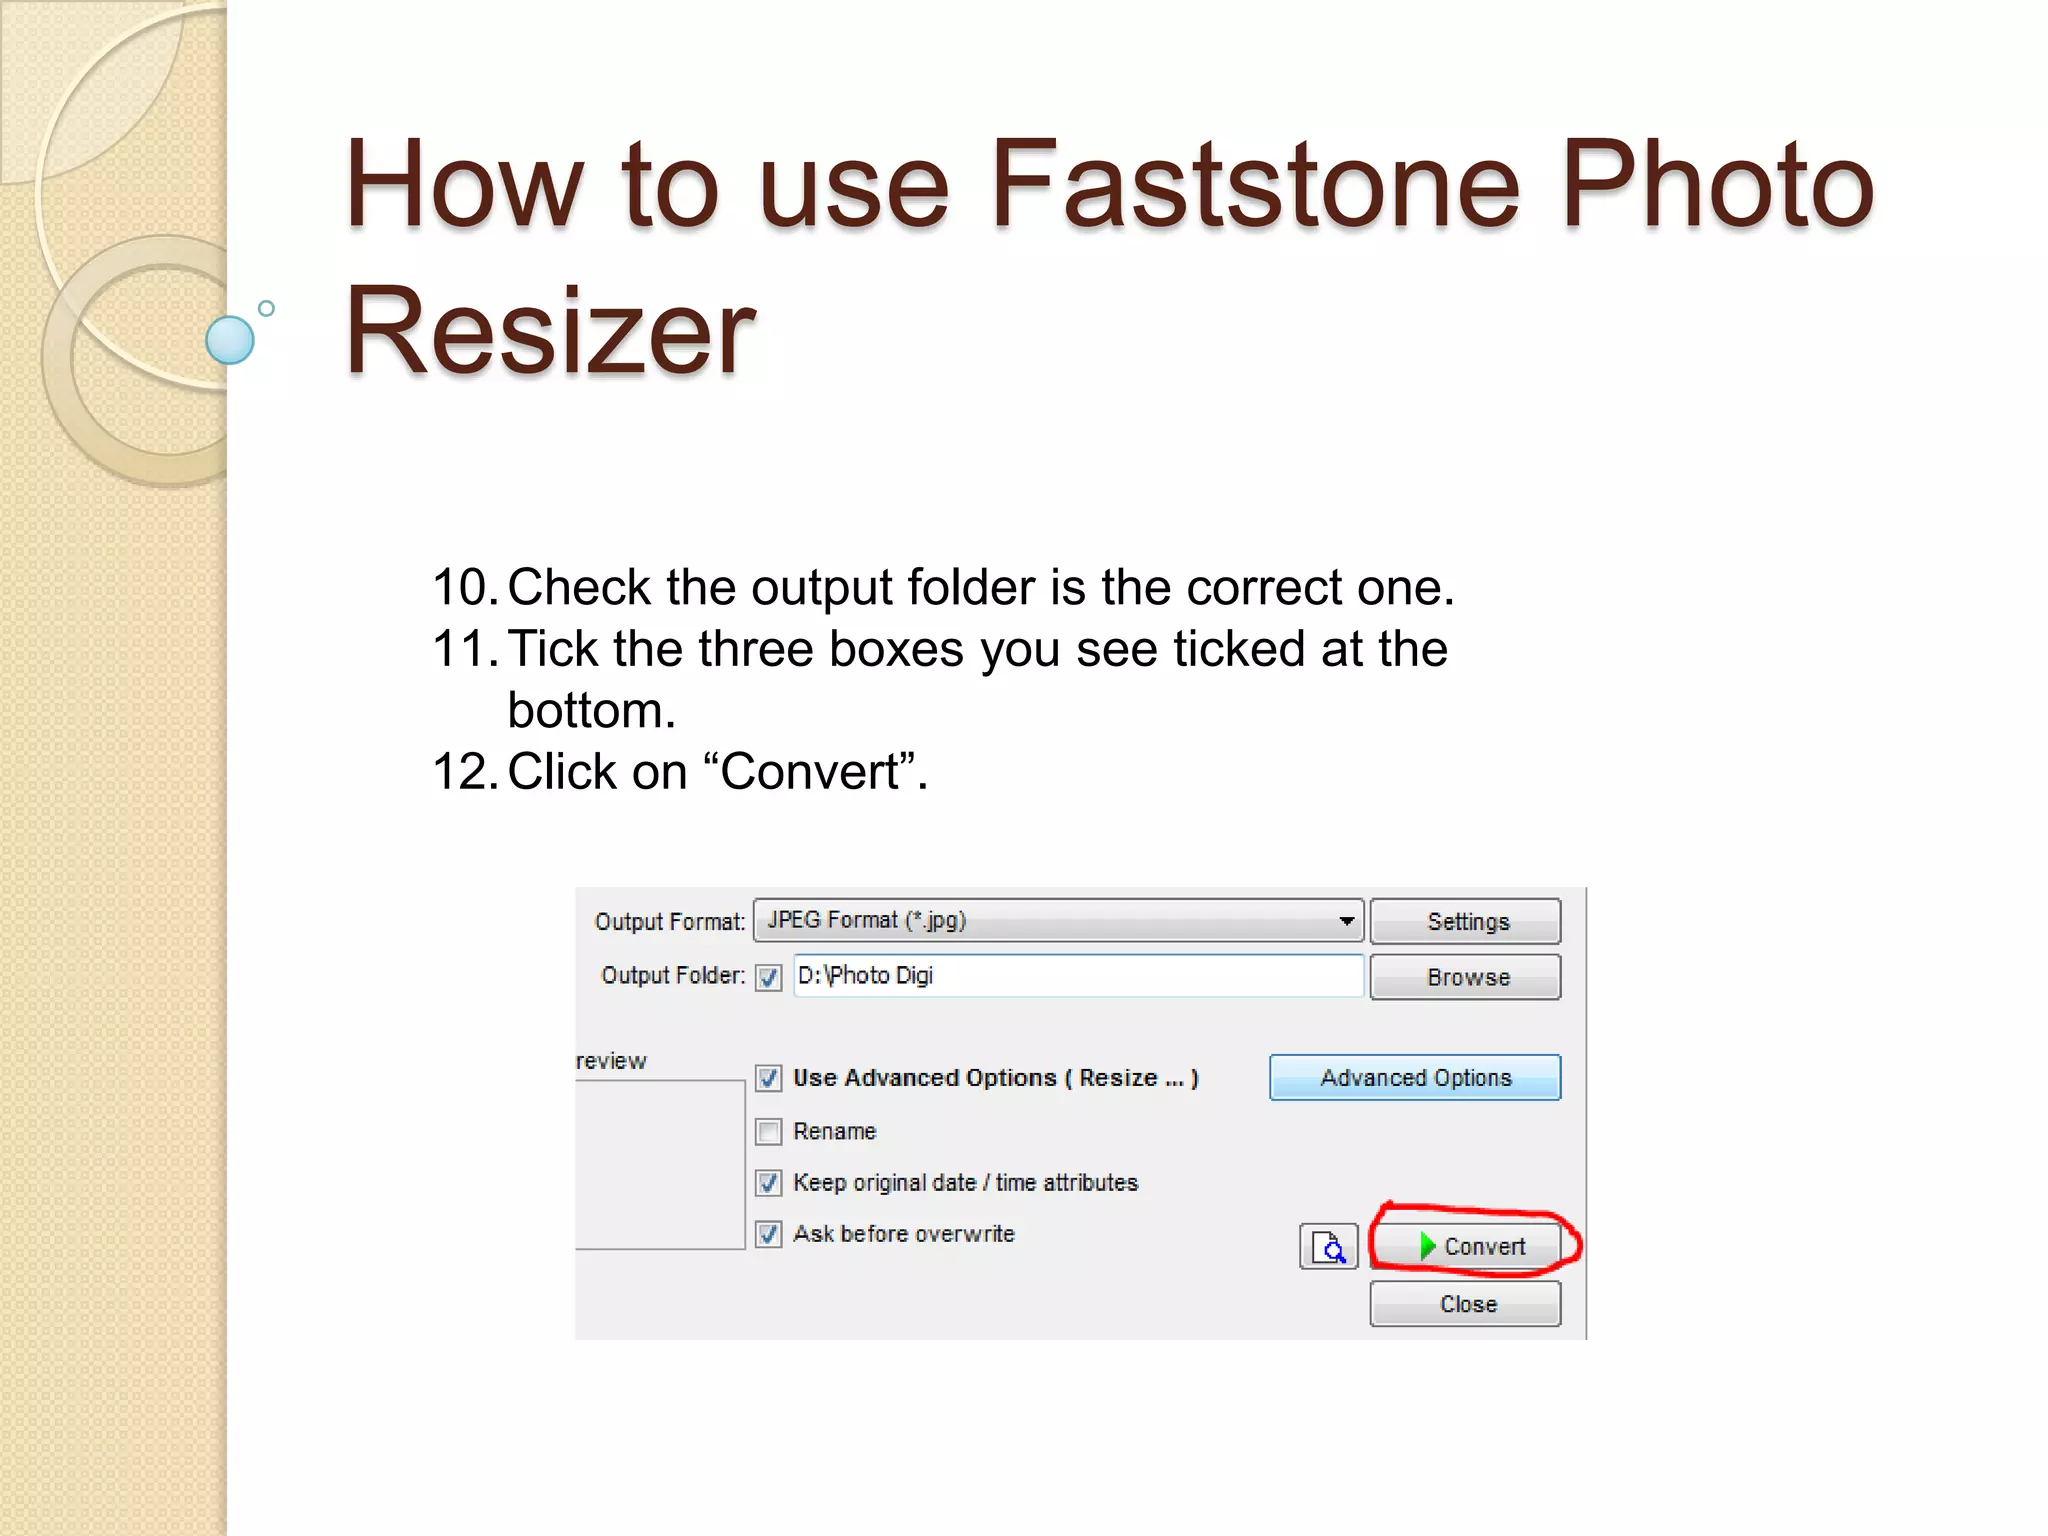
How to use Faststone Photo
    Resizer
   Resize photos quickly without losing
    quality.
        Which photo is 1513 KB and which is only 393 KB?
How to use Faststone Photo
Resizer

1. Download from here then install:
   http://www.faststone.org/FSResizerDownload.ht
   m
How to use Faststone Photo
Resizer

2. Browse to the folder where the large pictures
   are that you want to resize.

   In this case they are in D:photo nature.
How to use Faststone Photo
Resizer
3. Select the photos you want to resize. I want to
   resize them all so I pressed “Add All”. You can
   then see the photos in the box on the right.
How to use Faststone Photo
Resizer
4. Choose your output format – jpeg is fine for
   most people.
5. Browse to the folder you want the resized
   pictures to be in.
6. Click on “Advanced options” to set the size you
   want your pictures to be.
How to use Faststone Photo
Resizer
 7. Click on Resize in the top left corner.
 8. Click on the dropdown menu and choose the size you want
    your pictures to be. 800 x 600 px is a good size. Anything
    larger than 1280 x 1024 is unlikely to fit on any screen at
    100%.
 9. Select the three tick boxes at the bottom.
How to use Faststone Photo
Resizer
 10. Check the output folder is the correct one.
 11. Tick the three boxes you see ticked at the
     bottom.
 12. Click on “Convert”.
How to use Faststone Photo
Resizer
 13. You will notice how much smaller the pictures
     are by comparing the old size to the new size.
 14. Click on “Done”.
How to use Faststone Photo
   Resizer
The picture on the left is the large 1513KB. The picture on the right is only
393KB.
Can you really tell the difference?

How to use faststone photo resizer

  • 1.
    How to useFaststone Photo Resizer  Resize photos quickly without losing quality. Which photo is 1513 KB and which is only 393 KB?
  • 2.
    How to useFaststone Photo Resizer 1. Download from here then install: http://www.faststone.org/FSResizerDownload.ht m
  • 3.
    How to useFaststone Photo Resizer 2. Browse to the folder where the large pictures are that you want to resize. In this case they are in D:photo nature.
  • 4.
    How to useFaststone Photo Resizer 3. Select the photos you want to resize. I want to resize them all so I pressed “Add All”. You can then see the photos in the box on the right.
  • 5.
    How to useFaststone Photo Resizer 4. Choose your output format – jpeg is fine for most people. 5. Browse to the folder you want the resized pictures to be in. 6. Click on “Advanced options” to set the size you want your pictures to be.
  • 6.
    How to useFaststone Photo Resizer 7. Click on Resize in the top left corner. 8. Click on the dropdown menu and choose the size you want your pictures to be. 800 x 600 px is a good size. Anything larger than 1280 x 1024 is unlikely to fit on any screen at 100%. 9. Select the three tick boxes at the bottom.
  • 7.
    How to useFaststone Photo Resizer 10. Check the output folder is the correct one. 11. Tick the three boxes you see ticked at the bottom. 12. Click on “Convert”.
  • 8.
    How to useFaststone Photo Resizer 13. You will notice how much smaller the pictures are by comparing the old size to the new size. 14. Click on “Done”.
  • 9.
    How to useFaststone Photo Resizer The picture on the left is the large 1513KB. The picture on the right is only 393KB. Can you really tell the difference?