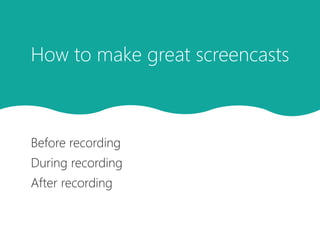
How to make great screencasts
•
0 likes•1,998 views
Guidance on what to do before recording the screencast, during the recording and then after recording.
Report
Share
Report
Share

Recommended
Screencasting - Tips on how to make a great screencast
1. Before recording a screencast, plan ahead by creating a storyboard and script if needed. Also open any files and windows you will need and tidy your desktop to avoid distractions.
2. During recording, practice first to work out any kinks. Speak naturally and use gestures like the mouse cursor to draw attention to parts of the screen.
3. After recording, don't over-edit as it can make the video seem artificial. Watch it through before sharing and save and name the file in a logical way depending on your intended audience.
Screencasts
A screencast is a digital recording of computer screen activity, often including audio narration and sometimes webcam video. It allows for creating instructional videos that can enrich online learning materials. While screencasts provide an accessible way to create multimedia content, they require preparation, technical skills, and time to produce quality recordings. Effective screencasts are short, focused on key points, and make use of editing to support the narration. Proper audio, lighting, and environment are important for a professional finished product.
Power Point Presentations How To
- Check your equipment and match your laptop and projector resolutions before your presentation to avoid issues with cropped or jumping slides.
- Disable your laptop's screen saver and standby power management settings so your laptop doesn't sleep during your presentation.
- Use large, easily readable fonts and avoid busy backgrounds, animations, or clip art that distract from your content.
- Don't rely on mouse clicks or movements during your presentation as they can be distracting and hard to see from the audience perspective.
Recorda presentationpackage
This 3-step guide shows how to make a PowerPoint presentation with animations and record narration. First, create the presentation with slides. Second, add animations to the slides. Third, record narration by going to slide show view and using the record narration feature.
Recorda presentation
This 3-step guide shows how to make a PowerPoint presentation with animations and record narration. First, create the presentation with slides. Second, add animations to the slides. Third, record narration by going to slide show view and using the record narration feature.
Video Project Production Guidelines
This document provides guidelines for video projects, covering both production and post-production tips. For production, it recommends preparing by considering lighting, sound, composition and background. It suggests using a tripod or stabilizing the camera, capturing establishing shots, angles and b-roll. For post-production, it advises sticking to the storyboard, keeping effects simple, allowing time for exporting and ensuring copyright compliance when publishing. The document concludes by offering additional resources for video guidance.
Video Conferencing Etiquette - Thiyagu
This document provides etiquette guidelines for video conferencing. It discusses key dos such as muting your microphone when not speaking, being on time, ensuring proper lighting and camera framing, dressing professionally, speaking clearly, maintaining minimal movements, making eye contact with the camera, switching off mobile phones, keeping the session animated, being yourself and having fun, and maintaining others' privacy by not recording without permission or discussing personal issues. The tools mentioned for video conferencing include Facebook Live, YouTube Live, Google Hangouts, Skype, Zoom, Appear.in, Slack video calls, UberConference, and TrueConf Online.
10 tips for online presentations
The document provides 10 tips for improving online presentations. The tips include checking audio quality beforehand, eliminating background noise, positioning lighting in front of your face, choosing a simple background without distractions, positioning the camera at eye level, wearing professional clothing, using hand gestures intentionally, maintaining good posture by standing, practicing frequently, and maintaining eye contact with the camera rather than looking at yourself on screen.
P4 lecture3 screencasting_to_analyze_apology_video
- The document provides instructions for creating a screencast analyzing the body language of a spokesperson in a crisis communication video.
- Students are instructed to use Screencast-O-Matic to record their screen and audio as they analyze the video. They must write a script and practice their presentation style before recording.
- The script should include a 10-second introduction, 3 minutes of key analysis points, and a 10-second conclusion thanking the audience. Students are advised to pause the video as needed to clearly explain their analysis of the spokesperson's body language.
Learning Camtasia - Session 1
The document provides guidance on creating instructional videos using Camtasia Studio. It discusses signing in, writing a script, using the timeline, clip bin and canvas. Best practices are outlined such as creating an outline, keeping text legible, having a calm narration pace, focusing on one objective per video, and keeping the video short, simple and interesting. Attendees are instructed to select a topic for their video, such as a calculator example, and write a script using the template provided.
Learning camtasia 2
The document provides guidance on creating instructional videos using Camtasia Studio. It outlines the key steps in the process, including signing in, writing a script, preparing the screen content, and best practices. Attendees are encouraged to select a topic for their first practice video, such as a calculator example or teaching a math problem. The best practices section emphasizes creating an outline, using clear text and images, speaking at an appropriate pace, focusing each video on one objective, keeping the content interesting, and keeping videos short and simple.
Introduction to editing
The document provides instructions for setting up and using Final Cut Pro video editing software. It includes steps for:
1. Creating a student folder and new project in Final Cut Pro.
2. Opening the software and understanding the interface which includes the browser, viewer, canvas, and timeline windows.
3. Setting preferences like the scratch disk location and project format.
4. Logging and capturing video clips from a camera into the browser.
5. Editing clips on the timeline using tools like the blade to cut and delete portions of footage.
6. Exporting the finished sequence as a QuickTime movie.
UbiTips - how to make a good screencast?
Have you been asked to train your staff on a new software? Great!
Here some tips to succeed your first screencast...
P2 lecture3 screencasting_design_justification_billboardorposter
Borrowed from Karen Thompson, this slidecast shows how to create a screencast that justifies design choices when desigining a PSA for a business writing class.
Engl 313 ADA Project 3 Slidedoc 2
This document provides instructions for creating a slidecast, which is a slideshow with voice narration. It discusses slidecasting tool options like Knovio, PowerPoint, Keynote, and Screencast-O-Matic. The document advises deciding whether to write the script or design slides first. It offers tips for writing the script, such as using short sentences and signposts. Design recommendations include using bold visuals, minimal text, aligned elements, and effective use of images, fonts, colors and templates. The goal is to engage viewers and avoid long reads from slides.
If khan can so can I - students learning by making tutorial videos
The document provides guidance for students creating tutorial videos, including identifying key concepts, planning the lesson sequence, writing a script, and considering visuals. It recommends drawing and writing software, switching between windows, keeping videos succinct, and publishing videos to Screenr and YouTube, then sharing the links to maximize their usefulness.
P2lecture3deliverable2composingslidecastexttechdefinitionengl317 160313001414
The document provides guidance on how to compose an effective slidecast. It discusses choosing slidecast creation tools, testing recordings, determining an appropriate number of slides, writing a script, and designing visual slides. For the script, it recommends separating it into an introduction, body, and conclusion with signposts. For slide design, it emphasizes keeping text brief and impactful through techniques like bold fonts, limited bullets, sizing text for impact, balanced layouts, limiting colors, and effective contrasts. The overall goal is to engage viewers through a combination of narration and visual slides.
Intro to Web Video
This is the Powerpoint from the Intro to Web Video Workshop, most recently at Grassroots Tech X. this is a production of the Boston Web Video Workshop. For more information go to www.foxogg.com or look it up on Facebook under Boston Web Video Workshop.
Screencasting: Best Practice
The document provides best practices for creating effective screencasts. It recommends practicing screencasting to learn how to position applications and smoothly move the cursor. It also suggests writing a script, speaking slowly and clearly, and keeping the desktop clean and uncluttered. The document also describes features of the BBFlashback Pro screencasting software such as high quality recording, webcam integration, annotation tools, and exporting to multiple formats.
Engl313 ada project4_slidedoc4
This document provides instructions for creating a screencast that analyzes the body language in an apology video. It discusses choosing a video, writing a script that introduces the topic and provides a conclusion, and using screen capture software to record while narrating over the video. The screencast should be 3 minutes or less, with the narrator pausing the video periodically to point out and analyze body language cues.
10 tips for live streaming an event on location
Having a successful on-site live stream all starts with planning! This presentation reviews in detail 10 keys to planning the perfect live stream at your next on-site location.
Speaker Check-in - 3 - Munich
This document provides guidance for presenters at DrupalCon on preparing for and delivering presentations. It covers room setup details, managing nerves, dealing with potential technical failures, and handling audience questions. Presenters are advised to practice their presentation multiple times, prepare backup options if technology fails, and focus on telling their story with passion despite potential issues.
Engl 313 ADA Project 4 Slidedoc 4
This document provides instructions for creating a screencast that analyzes the body language in an apology video. It recommends using Screencast-O-Matic to record the screen and microphone. The screencast should have an introduction, key analysis points about body language in the selected video, and a conclusion. When recording, the video will be played and paused periodically while commentary is provided. Delivery of the screencast should use vocal variety and pauses for clarity.
How to add your own voice into student feedback
Several studies have found that students perceive video feedback as useful and preferable to written feedback. Using screen-capture video feedback also helps us, as educators, communicate more clearly and constructively.
In this presentation, Michelle takes you through the process of recording short, individual feedback videos for students using the screen-capture program, Jing. Each phase will be explained step-by-step including preparing to record, recording your video, saving and sending your video, and viewing your video library.
Michelle also discuss alternative ways to provide feedback using Jing, such as creating a general feedback video for a whole class.
Screencasting 101
This document defines screencasting as a video of your computer screen with or without audio. It identifies several paid and free screencasting tools like Camtasia Studio, Screenjelly, and Jing. The document provides tips for creating screencasts, such as making them short, pausing, and practicing. It instructs the reader to install Jing, practice using its screen capture tools, create a sample screencast demonstrating a task, and share the screencast by email.
Using QuickTime Player for Screencasting
Screencasting allows teachers to record lessons using the QuickTime Player to provide students instructional material to review concepts. It lets teachers demonstrate steps for software programs and solving math problems. This is helpful for absent students. To screencast, open QuickTime Player, select new screen recording, choose audio input, hide unnecessary screens, start recording, and save the file. Narration helps explain what is being shown. Multiple takes may be needed, and it is best to act naturally and show steps visually rather than using keystrokes. More information is available from Educause Learning Initiative.
How to Build a Slidecast
A step-by-step of how to build a slidecast. Includes tips for reducing file sizes on PDFs and syncing audio file. By Wm Pitzer - West Virginia University
RHEOLOGY Physical pharmaceutics-II notes for B.pharm 4th sem students
Physical pharmaceutics notes for B.pharm students
Level 3 NCEA - NZ: A Nation In the Making 1872 - 1900 SML.ppt
The History of NZ 1870-1900.
Making of a Nation.
From the NZ Wars to Liberals,
Richard Seddon, George Grey,
Social Laboratory, New Zealand,
Confiscations, Kotahitanga, Kingitanga, Parliament, Suffrage, Repudiation, Economic Change, Agriculture, Gold Mining, Timber, Flax, Sheep, Dairying,
More Related Content
Similar to How to make great screencasts
P4 lecture3 screencasting_to_analyze_apology_video
- The document provides instructions for creating a screencast analyzing the body language of a spokesperson in a crisis communication video.
- Students are instructed to use Screencast-O-Matic to record their screen and audio as they analyze the video. They must write a script and practice their presentation style before recording.
- The script should include a 10-second introduction, 3 minutes of key analysis points, and a 10-second conclusion thanking the audience. Students are advised to pause the video as needed to clearly explain their analysis of the spokesperson's body language.
Learning Camtasia - Session 1
The document provides guidance on creating instructional videos using Camtasia Studio. It discusses signing in, writing a script, using the timeline, clip bin and canvas. Best practices are outlined such as creating an outline, keeping text legible, having a calm narration pace, focusing on one objective per video, and keeping the video short, simple and interesting. Attendees are instructed to select a topic for their video, such as a calculator example, and write a script using the template provided.
Learning camtasia 2
The document provides guidance on creating instructional videos using Camtasia Studio. It outlines the key steps in the process, including signing in, writing a script, preparing the screen content, and best practices. Attendees are encouraged to select a topic for their first practice video, such as a calculator example or teaching a math problem. The best practices section emphasizes creating an outline, using clear text and images, speaking at an appropriate pace, focusing each video on one objective, keeping the content interesting, and keeping videos short and simple.
Introduction to editing
The document provides instructions for setting up and using Final Cut Pro video editing software. It includes steps for:
1. Creating a student folder and new project in Final Cut Pro.
2. Opening the software and understanding the interface which includes the browser, viewer, canvas, and timeline windows.
3. Setting preferences like the scratch disk location and project format.
4. Logging and capturing video clips from a camera into the browser.
5. Editing clips on the timeline using tools like the blade to cut and delete portions of footage.
6. Exporting the finished sequence as a QuickTime movie.
UbiTips - how to make a good screencast?
Have you been asked to train your staff on a new software? Great!
Here some tips to succeed your first screencast...
P2 lecture3 screencasting_design_justification_billboardorposter
Borrowed from Karen Thompson, this slidecast shows how to create a screencast that justifies design choices when desigining a PSA for a business writing class.
Engl 313 ADA Project 3 Slidedoc 2
This document provides instructions for creating a slidecast, which is a slideshow with voice narration. It discusses slidecasting tool options like Knovio, PowerPoint, Keynote, and Screencast-O-Matic. The document advises deciding whether to write the script or design slides first. It offers tips for writing the script, such as using short sentences and signposts. Design recommendations include using bold visuals, minimal text, aligned elements, and effective use of images, fonts, colors and templates. The goal is to engage viewers and avoid long reads from slides.
If khan can so can I - students learning by making tutorial videos
The document provides guidance for students creating tutorial videos, including identifying key concepts, planning the lesson sequence, writing a script, and considering visuals. It recommends drawing and writing software, switching between windows, keeping videos succinct, and publishing videos to Screenr and YouTube, then sharing the links to maximize their usefulness.
P2lecture3deliverable2composingslidecastexttechdefinitionengl317 160313001414
The document provides guidance on how to compose an effective slidecast. It discusses choosing slidecast creation tools, testing recordings, determining an appropriate number of slides, writing a script, and designing visual slides. For the script, it recommends separating it into an introduction, body, and conclusion with signposts. For slide design, it emphasizes keeping text brief and impactful through techniques like bold fonts, limited bullets, sizing text for impact, balanced layouts, limiting colors, and effective contrasts. The overall goal is to engage viewers through a combination of narration and visual slides.
Intro to Web Video
This is the Powerpoint from the Intro to Web Video Workshop, most recently at Grassroots Tech X. this is a production of the Boston Web Video Workshop. For more information go to www.foxogg.com or look it up on Facebook under Boston Web Video Workshop.
Screencasting: Best Practice
The document provides best practices for creating effective screencasts. It recommends practicing screencasting to learn how to position applications and smoothly move the cursor. It also suggests writing a script, speaking slowly and clearly, and keeping the desktop clean and uncluttered. The document also describes features of the BBFlashback Pro screencasting software such as high quality recording, webcam integration, annotation tools, and exporting to multiple formats.
Engl313 ada project4_slidedoc4
This document provides instructions for creating a screencast that analyzes the body language in an apology video. It discusses choosing a video, writing a script that introduces the topic and provides a conclusion, and using screen capture software to record while narrating over the video. The screencast should be 3 minutes or less, with the narrator pausing the video periodically to point out and analyze body language cues.
10 tips for live streaming an event on location
Having a successful on-site live stream all starts with planning! This presentation reviews in detail 10 keys to planning the perfect live stream at your next on-site location.
Speaker Check-in - 3 - Munich
This document provides guidance for presenters at DrupalCon on preparing for and delivering presentations. It covers room setup details, managing nerves, dealing with potential technical failures, and handling audience questions. Presenters are advised to practice their presentation multiple times, prepare backup options if technology fails, and focus on telling their story with passion despite potential issues.
Engl 313 ADA Project 4 Slidedoc 4
This document provides instructions for creating a screencast that analyzes the body language in an apology video. It recommends using Screencast-O-Matic to record the screen and microphone. The screencast should have an introduction, key analysis points about body language in the selected video, and a conclusion. When recording, the video will be played and paused periodically while commentary is provided. Delivery of the screencast should use vocal variety and pauses for clarity.
How to add your own voice into student feedback
Several studies have found that students perceive video feedback as useful and preferable to written feedback. Using screen-capture video feedback also helps us, as educators, communicate more clearly and constructively.
In this presentation, Michelle takes you through the process of recording short, individual feedback videos for students using the screen-capture program, Jing. Each phase will be explained step-by-step including preparing to record, recording your video, saving and sending your video, and viewing your video library.
Michelle also discuss alternative ways to provide feedback using Jing, such as creating a general feedback video for a whole class.
Screencasting 101
This document defines screencasting as a video of your computer screen with or without audio. It identifies several paid and free screencasting tools like Camtasia Studio, Screenjelly, and Jing. The document provides tips for creating screencasts, such as making them short, pausing, and practicing. It instructs the reader to install Jing, practice using its screen capture tools, create a sample screencast demonstrating a task, and share the screencast by email.
Using QuickTime Player for Screencasting
Screencasting allows teachers to record lessons using the QuickTime Player to provide students instructional material to review concepts. It lets teachers demonstrate steps for software programs and solving math problems. This is helpful for absent students. To screencast, open QuickTime Player, select new screen recording, choose audio input, hide unnecessary screens, start recording, and save the file. Narration helps explain what is being shown. Multiple takes may be needed, and it is best to act naturally and show steps visually rather than using keystrokes. More information is available from Educause Learning Initiative.
How to Build a Slidecast
A step-by-step of how to build a slidecast. Includes tips for reducing file sizes on PDFs and syncing audio file. By Wm Pitzer - West Virginia University
Similar to How to make great screencasts (20)
P4 lecture3 screencasting_to_analyze_apology_video
P4 lecture3 screencasting_to_analyze_apology_video
P2 lecture3 screencasting_design_justification_billboardorposter
P2 lecture3 screencasting_design_justification_billboardorposter
If khan can so can I - students learning by making tutorial videos
If khan can so can I - students learning by making tutorial videos
P2lecture3deliverable2composingslidecastexttechdefinitionengl317 160313001414
P2lecture3deliverable2composingslidecastexttechdefinitionengl317 160313001414
Recently uploaded
RHEOLOGY Physical pharmaceutics-II notes for B.pharm 4th sem students
Physical pharmaceutics notes for B.pharm students
Level 3 NCEA - NZ: A Nation In the Making 1872 - 1900 SML.ppt
The History of NZ 1870-1900.
Making of a Nation.
From the NZ Wars to Liberals,
Richard Seddon, George Grey,
Social Laboratory, New Zealand,
Confiscations, Kotahitanga, Kingitanga, Parliament, Suffrage, Repudiation, Economic Change, Agriculture, Gold Mining, Timber, Flax, Sheep, Dairying,
Gender and Mental Health - Counselling and Family Therapy Applications and In...
A proprietary approach developed by bringing together the best of learning theories from Psychology, design principles from the world of visualization, and pedagogical methods from over a decade of training experience, that enables you to: Learn better, faster!
skeleton System.pdf (skeleton system wow)
🔥🔥🔥🔥🔥🔥🔥🔥🔥
إضغ بين إيديكم من أقوى الملازم التي صممتها
ملزمة تشريح الجهاز الهيكلي (نظري 3)
💀💀💀💀💀💀💀💀💀💀
تتميز هذهِ الملزمة بعِدة مُميزات :
1- مُترجمة ترجمة تُناسب جميع المستويات
2- تحتوي على 78 رسم توضيحي لكل كلمة موجودة بالملزمة (لكل كلمة !!!!)
#فهم_ماكو_درخ
3- دقة الكتابة والصور عالية جداً جداً جداً
4- هُنالك بعض المعلومات تم توضيحها بشكل تفصيلي جداً (تُعتبر لدى الطالب أو الطالبة بإنها معلومات مُبهمة ومع ذلك تم توضيح هذهِ المعلومات المُبهمة بشكل تفصيلي جداً
5- الملزمة تشرح نفسها ب نفسها بس تكلك تعال اقراني
6- تحتوي الملزمة في اول سلايد على خارطة تتضمن جميع تفرُعات معلومات الجهاز الهيكلي المذكورة في هذهِ الملزمة
واخيراً هذهِ الملزمة حلالٌ عليكم وإتمنى منكم إن تدعولي بالخير والصحة والعافية فقط
كل التوفيق زملائي وزميلاتي ، زميلكم محمد الذهبي 💊💊
🔥🔥🔥🔥🔥🔥🔥🔥🔥
BÀI TẬP BỔ TRỢ TIẾNG ANH LỚP 9 CẢ NĂM - GLOBAL SUCCESS - NĂM HỌC 2024-2025 - ...
BÀI TẬP BỔ TRỢ TIẾNG ANH LỚP 9 CẢ NĂM - GLOBAL SUCCESS - NĂM HỌC 2024-2025 - ...Nguyen Thanh Tu Collection
https://app.box.com/s/tacvl9ekroe9hqupdnjruiypvm9rdanePhilippine Edukasyong Pantahanan at Pangkabuhayan (EPP) Curriculum
(𝐓𝐋𝐄 𝟏𝟎𝟎) (𝐋𝐞𝐬𝐬𝐨𝐧 𝟏)-𝐏𝐫𝐞𝐥𝐢𝐦𝐬
𝐃𝐢𝐬𝐜𝐮𝐬𝐬 𝐭𝐡𝐞 𝐄𝐏𝐏 𝐂𝐮𝐫𝐫𝐢𝐜𝐮𝐥𝐮𝐦 𝐢𝐧 𝐭𝐡𝐞 𝐏𝐡𝐢𝐥𝐢𝐩𝐩𝐢𝐧𝐞𝐬:
- Understand the goals and objectives of the Edukasyong Pantahanan at Pangkabuhayan (EPP) curriculum, recognizing its importance in fostering practical life skills and values among students. Students will also be able to identify the key components and subjects covered, such as agriculture, home economics, industrial arts, and information and communication technology.
𝐄𝐱𝐩𝐥𝐚𝐢𝐧 𝐭𝐡𝐞 𝐍𝐚𝐭𝐮𝐫𝐞 𝐚𝐧𝐝 𝐒𝐜𝐨𝐩𝐞 𝐨𝐟 𝐚𝐧 𝐄𝐧𝐭𝐫𝐞𝐩𝐫𝐞𝐧𝐞𝐮𝐫:
-Define entrepreneurship, distinguishing it from general business activities by emphasizing its focus on innovation, risk-taking, and value creation. Students will describe the characteristics and traits of successful entrepreneurs, including their roles and responsibilities, and discuss the broader economic and social impacts of entrepreneurial activities on both local and global scales.
Andreas Schleicher presents PISA 2022 Volume III - Creative Thinking - 18 Jun...
Andreas Schleicher, Director of Education and Skills at the OECD presents at the launch of PISA 2022 Volume III - Creative Minds, Creative Schools on 18 June 2024.
Chapter wise All Notes of First year Basic Civil Engineering.pptx
Chapter wise All Notes of First year Basic Civil Engineering
Syllabus
Chapter-1
Introduction to objective, scope and outcome the subject
Chapter 2
Introduction: Scope and Specialization of Civil Engineering, Role of civil Engineer in Society, Impact of infrastructural development on economy of country.
Chapter 3
Surveying: Object Principles & Types of Surveying; Site Plans, Plans & Maps; Scales & Unit of different Measurements.
Linear Measurements: Instruments used. Linear Measurement by Tape, Ranging out Survey Lines and overcoming Obstructions; Measurements on sloping ground; Tape corrections, conventional symbols. Angular Measurements: Instruments used; Introduction to Compass Surveying, Bearings and Longitude & Latitude of a Line, Introduction to total station.
Levelling: Instrument used Object of levelling, Methods of levelling in brief, and Contour maps.
Chapter 4
Buildings: Selection of site for Buildings, Layout of Building Plan, Types of buildings, Plinth area, carpet area, floor space index, Introduction to building byelaws, concept of sun light & ventilation. Components of Buildings & their functions, Basic concept of R.C.C., Introduction to types of foundation
Chapter 5
Transportation: Introduction to Transportation Engineering; Traffic and Road Safety: Types and Characteristics of Various Modes of Transportation; Various Road Traffic Signs, Causes of Accidents and Road Safety Measures.
Chapter 6
Environmental Engineering: Environmental Pollution, Environmental Acts and Regulations, Functional Concepts of Ecology, Basics of Species, Biodiversity, Ecosystem, Hydrological Cycle; Chemical Cycles: Carbon, Nitrogen & Phosphorus; Energy Flow in Ecosystems.
Water Pollution: Water Quality standards, Introduction to Treatment & Disposal of Waste Water. Reuse and Saving of Water, Rain Water Harvesting. Solid Waste Management: Classification of Solid Waste, Collection, Transportation and Disposal of Solid. Recycling of Solid Waste: Energy Recovery, Sanitary Landfill, On-Site Sanitation. Air & Noise Pollution: Primary and Secondary air pollutants, Harmful effects of Air Pollution, Control of Air Pollution. . Noise Pollution Harmful Effects of noise pollution, control of noise pollution, Global warming & Climate Change, Ozone depletion, Greenhouse effect
Text Books:
1. Palancharmy, Basic Civil Engineering, McGraw Hill publishers.
2. Satheesh Gopi, Basic Civil Engineering, Pearson Publishers.
3. Ketki Rangwala Dalal, Essentials of Civil Engineering, Charotar Publishing House.
4. BCP, Surveying volume 1
Wound healing PPT
This document provides an overview of wound healing, its functions, stages, mechanisms, factors affecting it, and complications.
A wound is a break in the integrity of the skin or tissues, which may be associated with disruption of the structure and function.
Healing is the body’s response to injury in an attempt to restore normal structure and functions.
Healing can occur in two ways: Regeneration and Repair
There are 4 phases of wound healing: hemostasis, inflammation, proliferation, and remodeling. This document also describes the mechanism of wound healing. Factors that affect healing include infection, uncontrolled diabetes, poor nutrition, age, anemia, the presence of foreign bodies, etc.
Complications of wound healing like infection, hyperpigmentation of scar, contractures, and keloid formation.
How to deliver Powerpoint Presentations.pptx
"How to make and deliver dynamic presentations by making it more interactive to captivate your audience attention"
Beyond Degrees - Empowering the Workforce in the Context of Skills-First.pptx
Iván Bornacelly, Policy Analyst at the OECD Centre for Skills, OECD, presents at the webinar 'Tackling job market gaps with a skills-first approach' on 12 June 2024
مصحف القراءات العشر أعد أحرف الخلاف سمير بسيوني.pdf
مصحف أحرف الخلاف للقراء العشرةأعد أحرف الخلاف بالتلوين وصلا سمير بسيوني غفر الله له
Leveraging Generative AI to Drive Nonprofit Innovation
In this webinar, participants learned how to utilize Generative AI to streamline operations and elevate member engagement. Amazon Web Service experts provided a customer specific use cases and dived into low/no-code tools that are quick and easy to deploy through Amazon Web Service (AWS.)
THE SACRIFICE HOW PRO-PALESTINE PROTESTS STUDENTS ARE SACRIFICING TO CHANGE T...
The recent surge in pro-Palestine student activism has prompted significant responses from universities, ranging from negotiations and divestment commitments to increased transparency about investments in companies supporting the war on Gaza. This activism has led to the cessation of student encampments but also highlighted the substantial sacrifices made by students, including academic disruptions and personal risks. The primary drivers of these protests are poor university administration, lack of transparency, and inadequate communication between officials and students. This study examines the profound emotional, psychological, and professional impacts on students engaged in pro-Palestine protests, focusing on Generation Z's (Gen-Z) activism dynamics. This paper explores the significant sacrifices made by these students and even the professors supporting the pro-Palestine movement, with a focus on recent global movements. Through an in-depth analysis of printed and electronic media, the study examines the impacts of these sacrifices on the academic and personal lives of those involved. The paper highlights examples from various universities, demonstrating student activism's long-term and short-term effects, including disciplinary actions, social backlash, and career implications. The researchers also explore the broader implications of student sacrifices. The findings reveal that these sacrifices are driven by a profound commitment to justice and human rights, and are influenced by the increasing availability of information, peer interactions, and personal convictions. The study also discusses the broader implications of this activism, comparing it to historical precedents and assessing its potential to influence policy and public opinion. The emotional and psychological toll on student activists is significant, but their sense of purpose and community support mitigates some of these challenges. However, the researchers call for acknowledging the broader Impact of these sacrifices on the future global movement of FreePalestine.
How Barcodes Can Be Leveraged Within Odoo 17
In this presentation, we will explore how barcodes can be leveraged within Odoo 17 to streamline our manufacturing processes. We will cover the configuration steps, how to utilize barcodes in different manufacturing scenarios, and the overall benefits of implementing this technology.
Recently uploaded (20)
RHEOLOGY Physical pharmaceutics-II notes for B.pharm 4th sem students
RHEOLOGY Physical pharmaceutics-II notes for B.pharm 4th sem students
Level 3 NCEA - NZ: A Nation In the Making 1872 - 1900 SML.ppt
Level 3 NCEA - NZ: A Nation In the Making 1872 - 1900 SML.ppt
Gender and Mental Health - Counselling and Family Therapy Applications and In...
Gender and Mental Health - Counselling and Family Therapy Applications and In...
spot a liar (Haiqa 146).pptx Technical writhing and presentation skills
spot a liar (Haiqa 146).pptx Technical writhing and presentation skills
BÀI TẬP BỔ TRỢ TIẾNG ANH LỚP 9 CẢ NĂM - GLOBAL SUCCESS - NĂM HỌC 2024-2025 - ...
BÀI TẬP BỔ TRỢ TIẾNG ANH LỚP 9 CẢ NĂM - GLOBAL SUCCESS - NĂM HỌC 2024-2025 - ...
Philippine Edukasyong Pantahanan at Pangkabuhayan (EPP) Curriculum
Philippine Edukasyong Pantahanan at Pangkabuhayan (EPP) Curriculum
Andreas Schleicher presents PISA 2022 Volume III - Creative Thinking - 18 Jun...
Andreas Schleicher presents PISA 2022 Volume III - Creative Thinking - 18 Jun...
Chapter wise All Notes of First year Basic Civil Engineering.pptx
Chapter wise All Notes of First year Basic Civil Engineering.pptx
Juneteenth Freedom Day 2024 David Douglas School District
Juneteenth Freedom Day 2024 David Douglas School District
Beyond Degrees - Empowering the Workforce in the Context of Skills-First.pptx
Beyond Degrees - Empowering the Workforce in the Context of Skills-First.pptx
مصحف القراءات العشر أعد أحرف الخلاف سمير بسيوني.pdf
مصحف القراءات العشر أعد أحرف الخلاف سمير بسيوني.pdf
Leveraging Generative AI to Drive Nonprofit Innovation
Leveraging Generative AI to Drive Nonprofit Innovation
THE SACRIFICE HOW PRO-PALESTINE PROTESTS STUDENTS ARE SACRIFICING TO CHANGE T...
THE SACRIFICE HOW PRO-PALESTINE PROTESTS STUDENTS ARE SACRIFICING TO CHANGE T...
How to make great screencasts
- 1. Before recording During recording After recording How to make great screencasts
- 2. Open relevant files and windows - save time during the screencast by opening what you want to show before recording. zz Use ‘Alt’ and ‘Tab’ on the keyboard to cycle through the open windows during the screencast or make use of the pause button to prepare the next screen. 2 1 Plan ahead - prepare what you will say and show on screen. zz Create a storyboard for the screencast, noting down the points you want to cover for each section. zz Include a short introduction on what the screencast will cover and a closing summary. zz You may want to create a script if your screencast is going to be fairly long. Before recording
- 3. Before recording zz Your desktop may be visible during the screencast if you are flicking between files and windows so it is a good idea to have it clutter free. zz Close emails to avoid them popping up during the screencast and perhaps revealing personal information. Tidy your desktop and close emails - avoid distractions during the screencast. 3 4 Consider the length of your screencast - several shorter videos are often preferred to a longer one if possible. zz Check that you have enough space on your computer to save a longer and therefore larger video file. zz Shorter screencasts help keep the attention of the viewer.
- 4. During recording Practice - a practice run can help to get you in the flow of screencasting and save you time editing mistakes afterwards. 1 Talk naturally - imagine you are actually talking to your audience in person. zz Students like a non-scripted response, and don’t mind the odd pause, “um” and “ah’s” or even background noise as they can sound more natural and relatable. 2 Highlight areas on-screen - use the mouse cursor or pen tool to draw your viewer’s attention to a specific part of the screen. zz Keep the mouse movements slow enough for the viewer to follow. 3
- 5. After recording Don’t over-edit or be too critical of the results - excessive editing can make the recording sound too artificial. 1 Watch the screencast from start to finish before you share - make sure you are happy with it before sending to the viewer. 3 Save the video file2 Consider where you will store the screencast - this will depend on who your intended audience is. zz Decide on naming conventions if you are creating multiple screencasts. This will help you keep track. 4