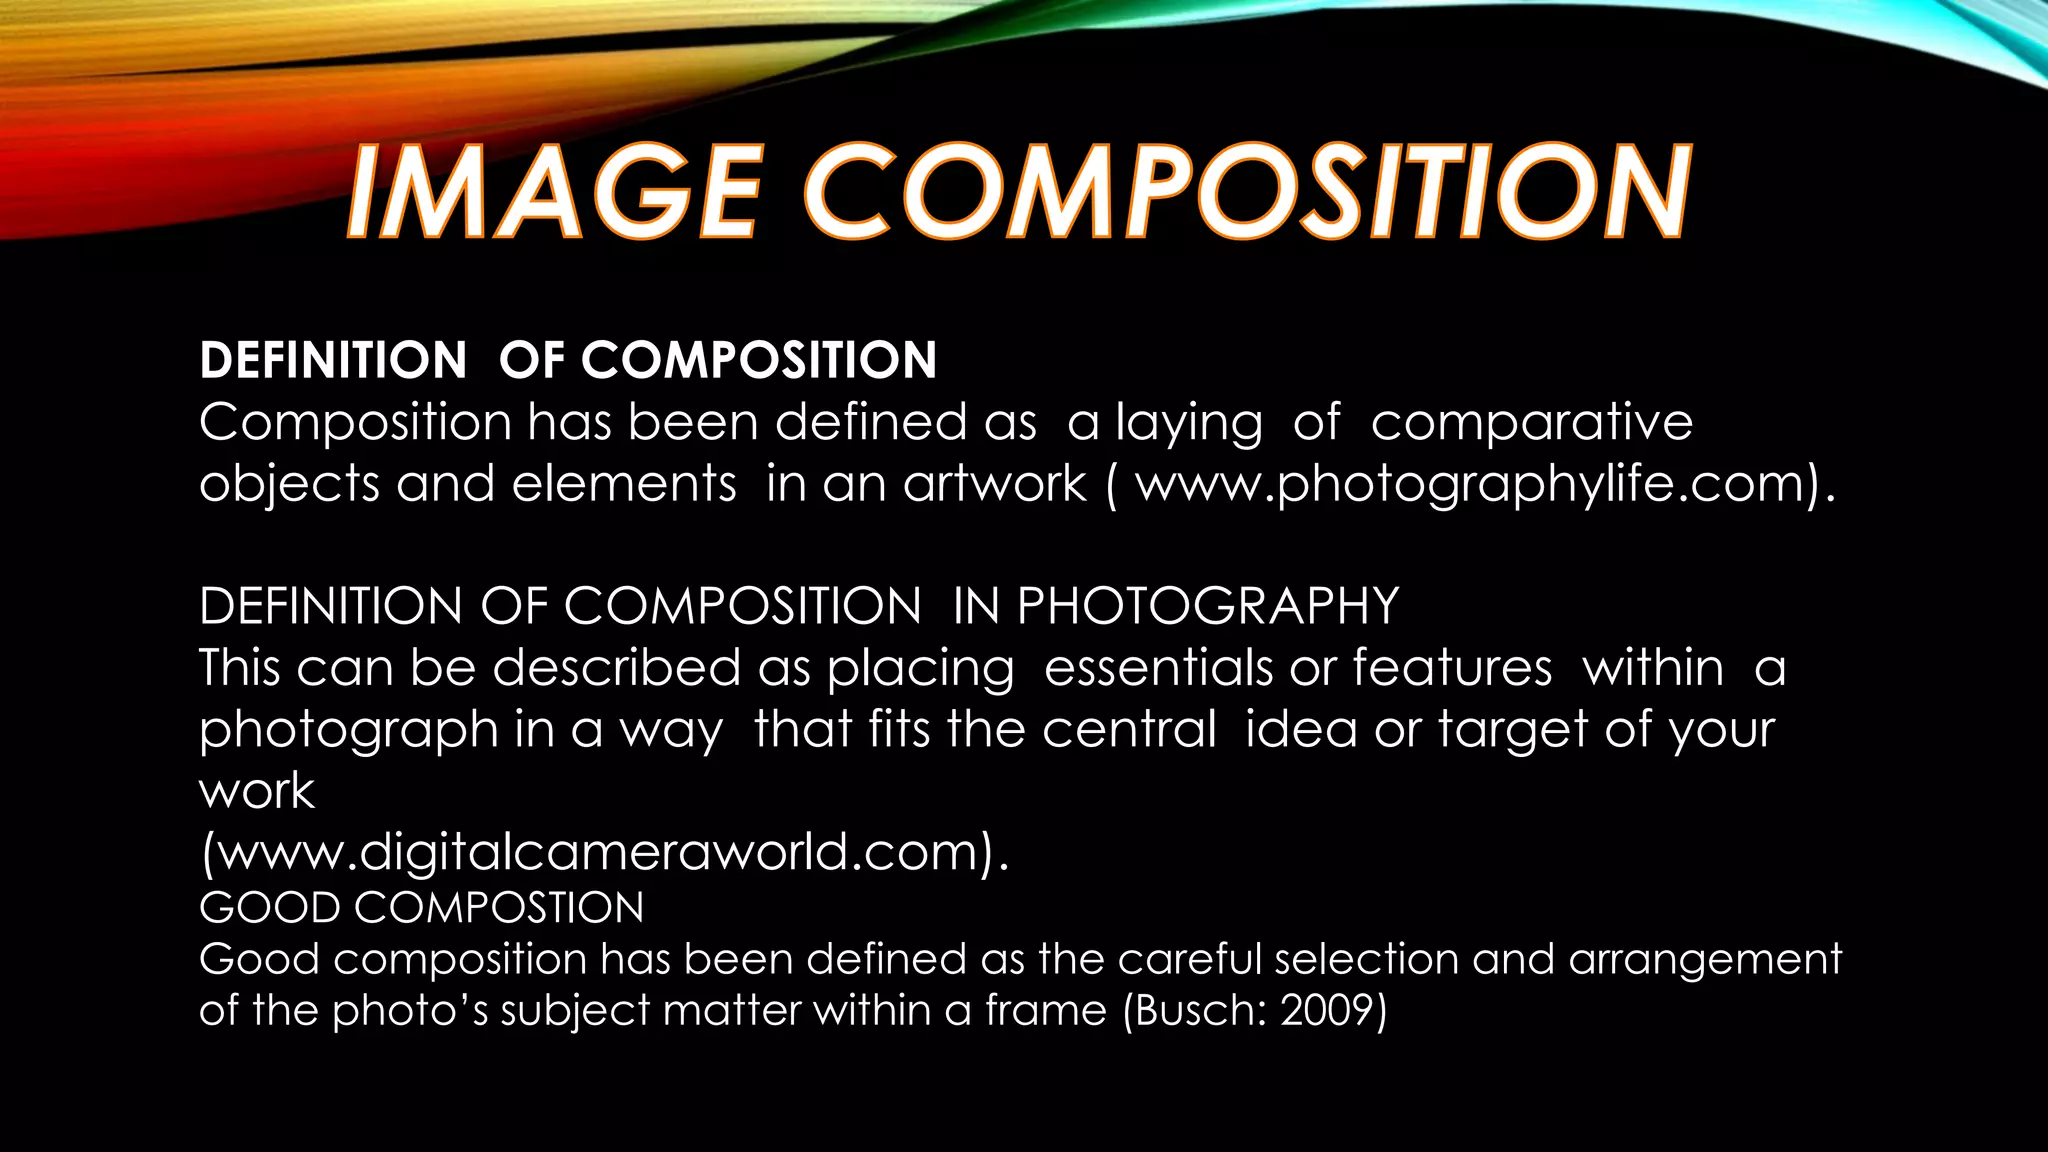
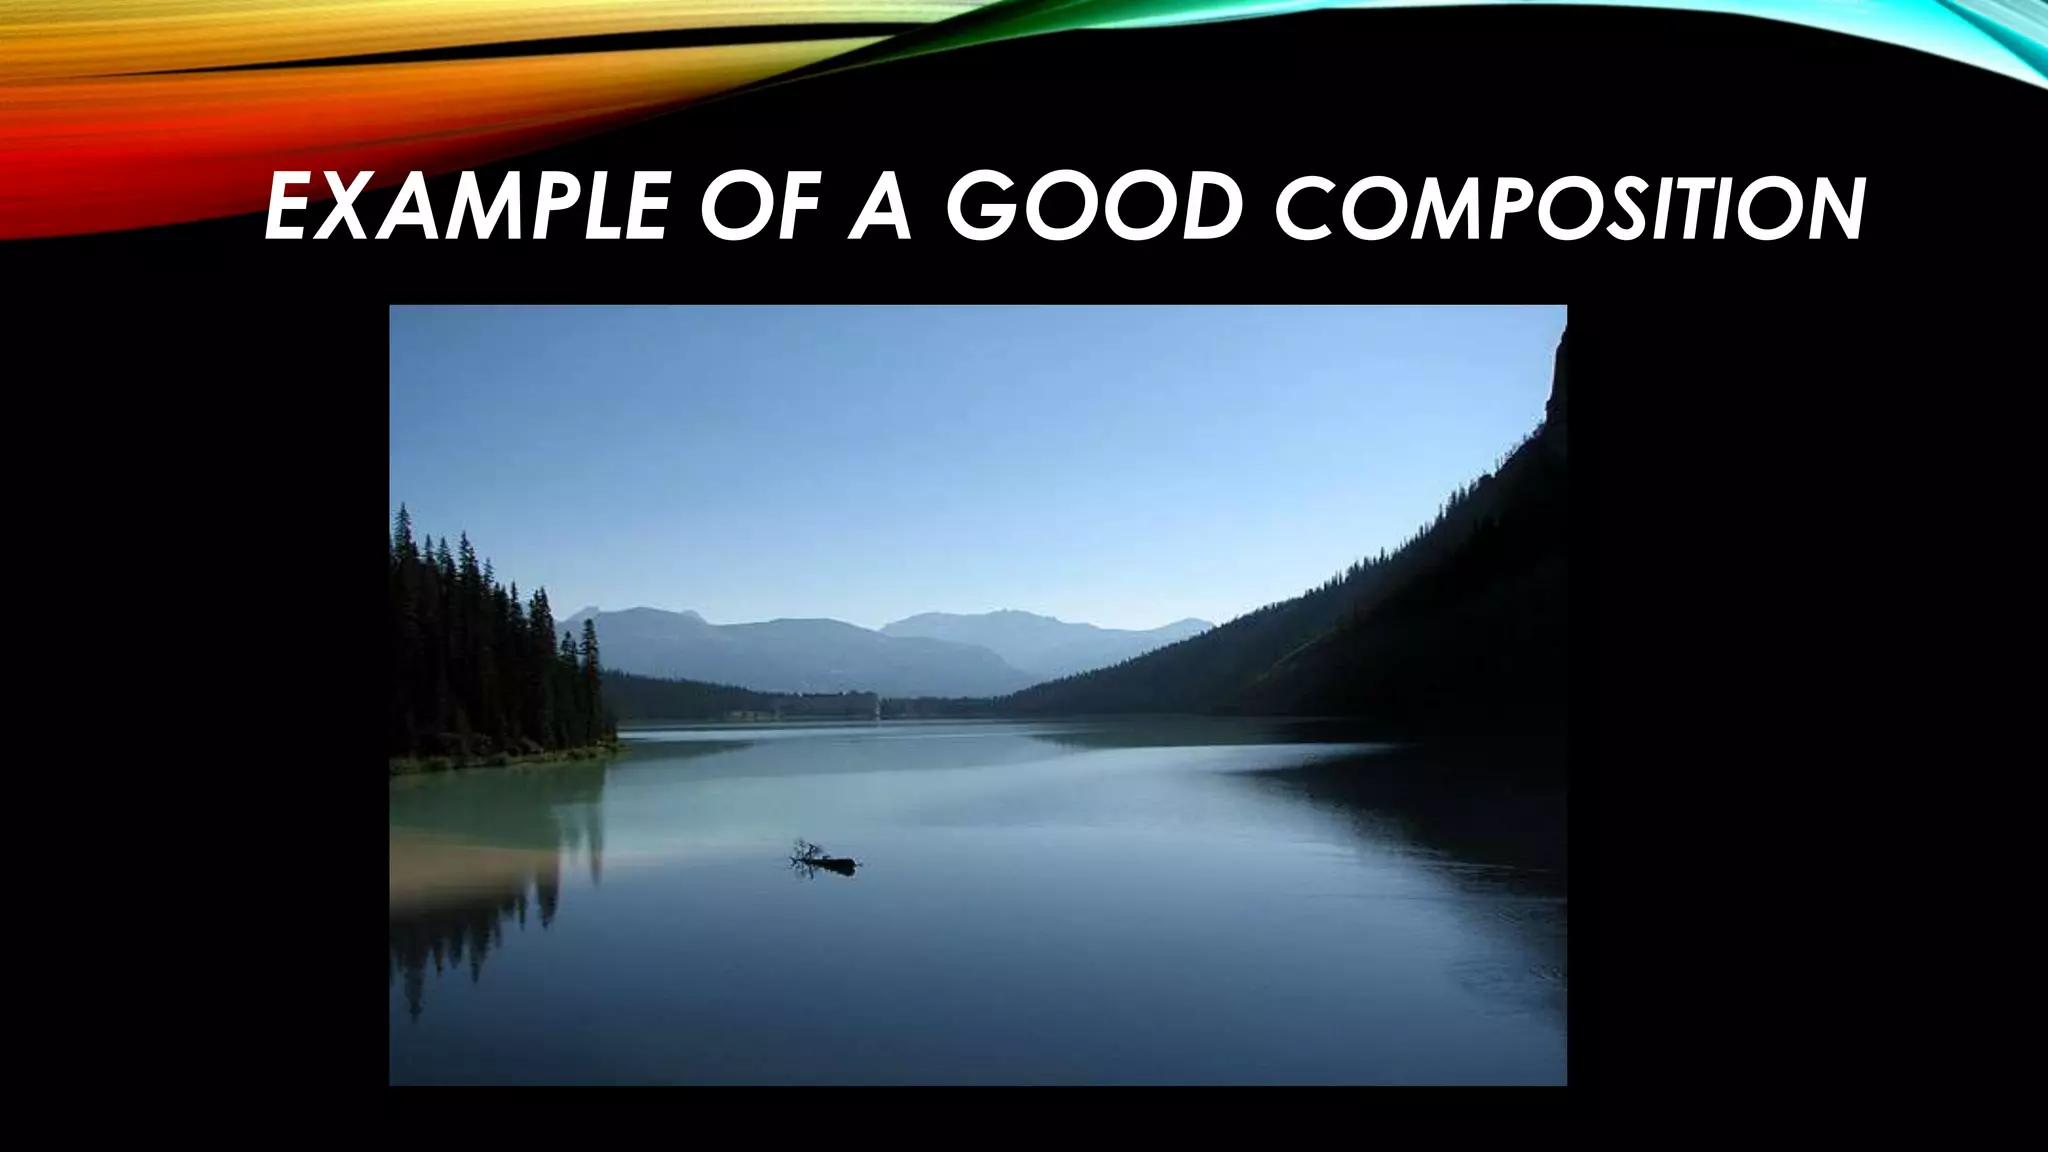
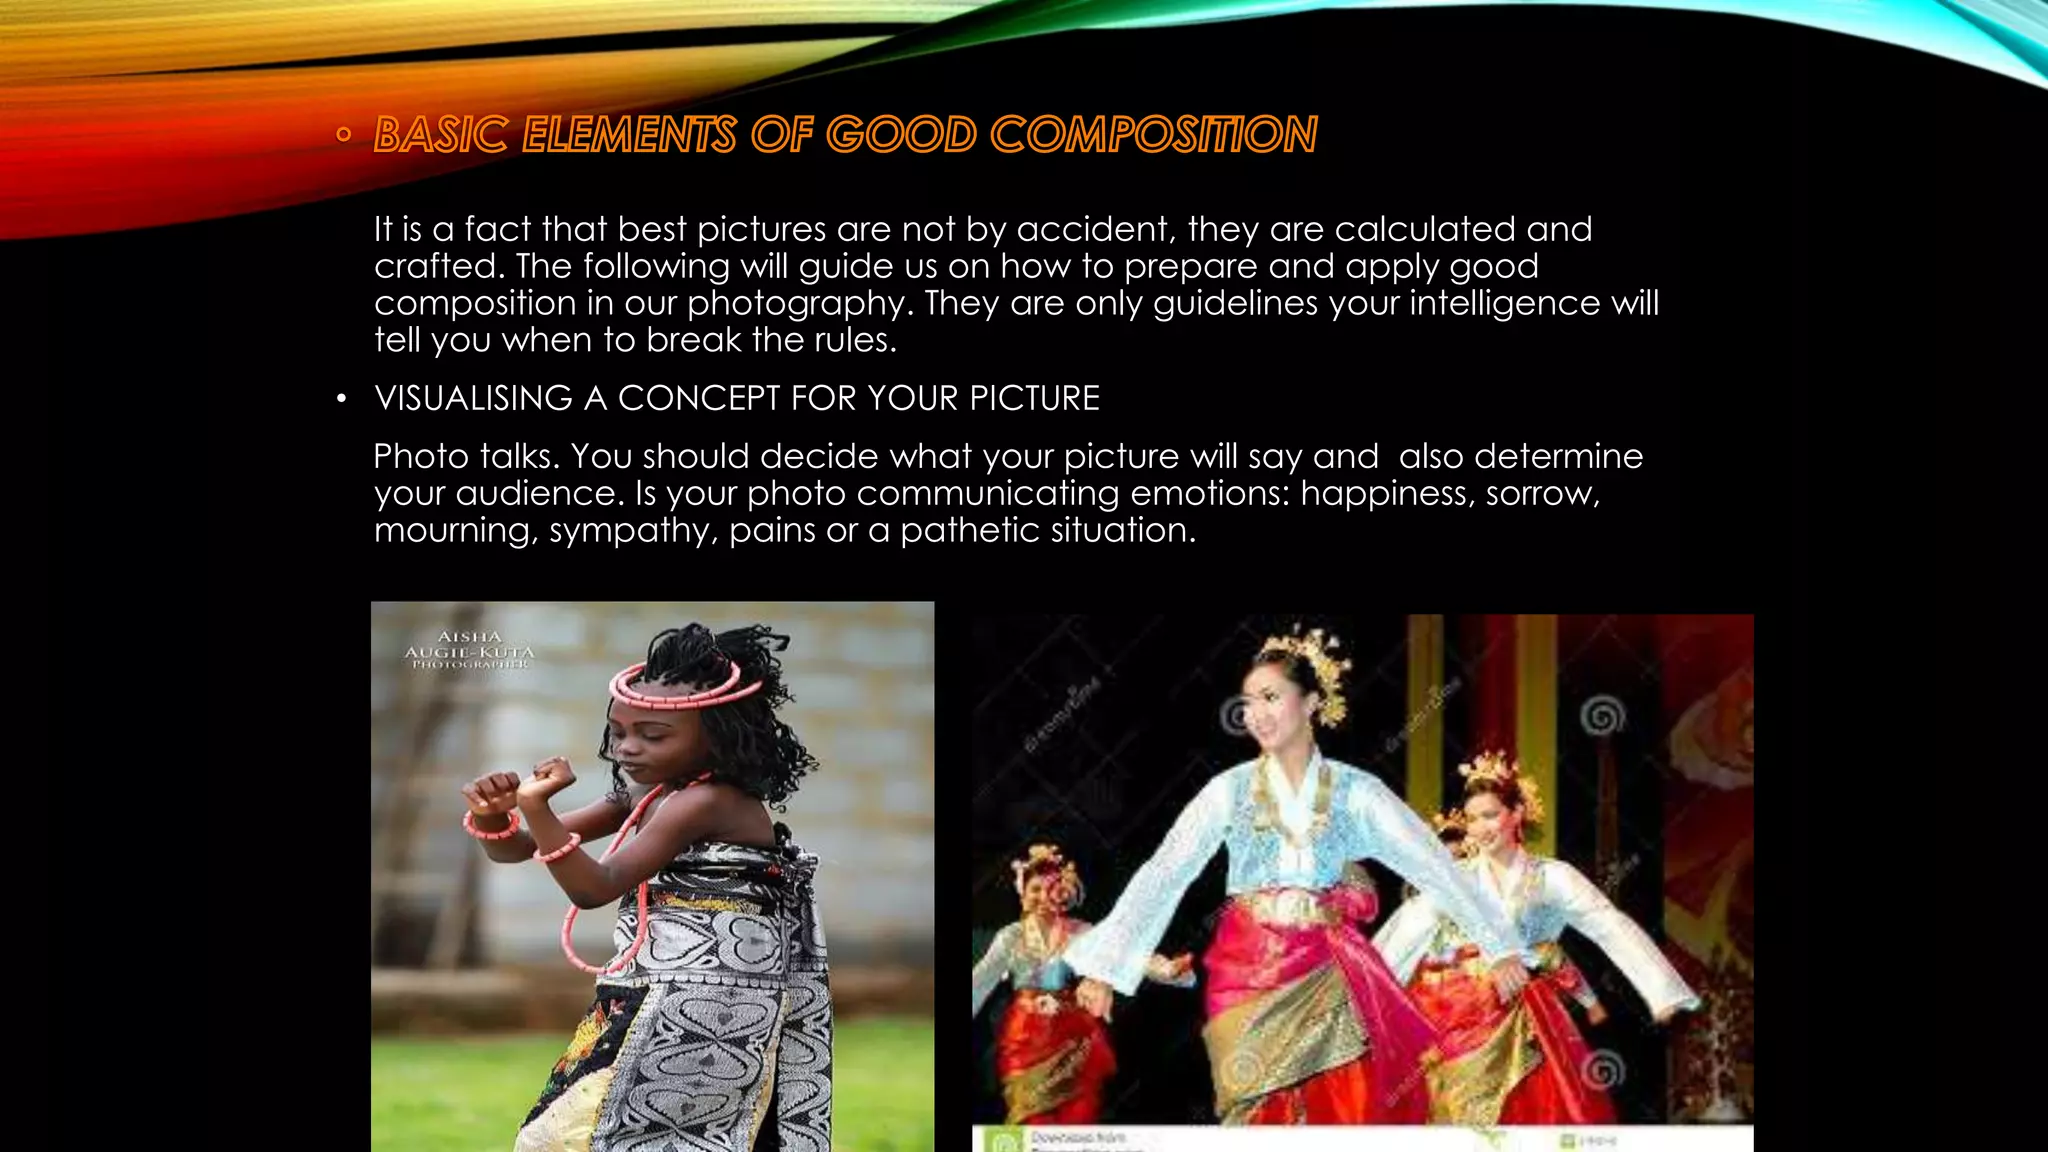
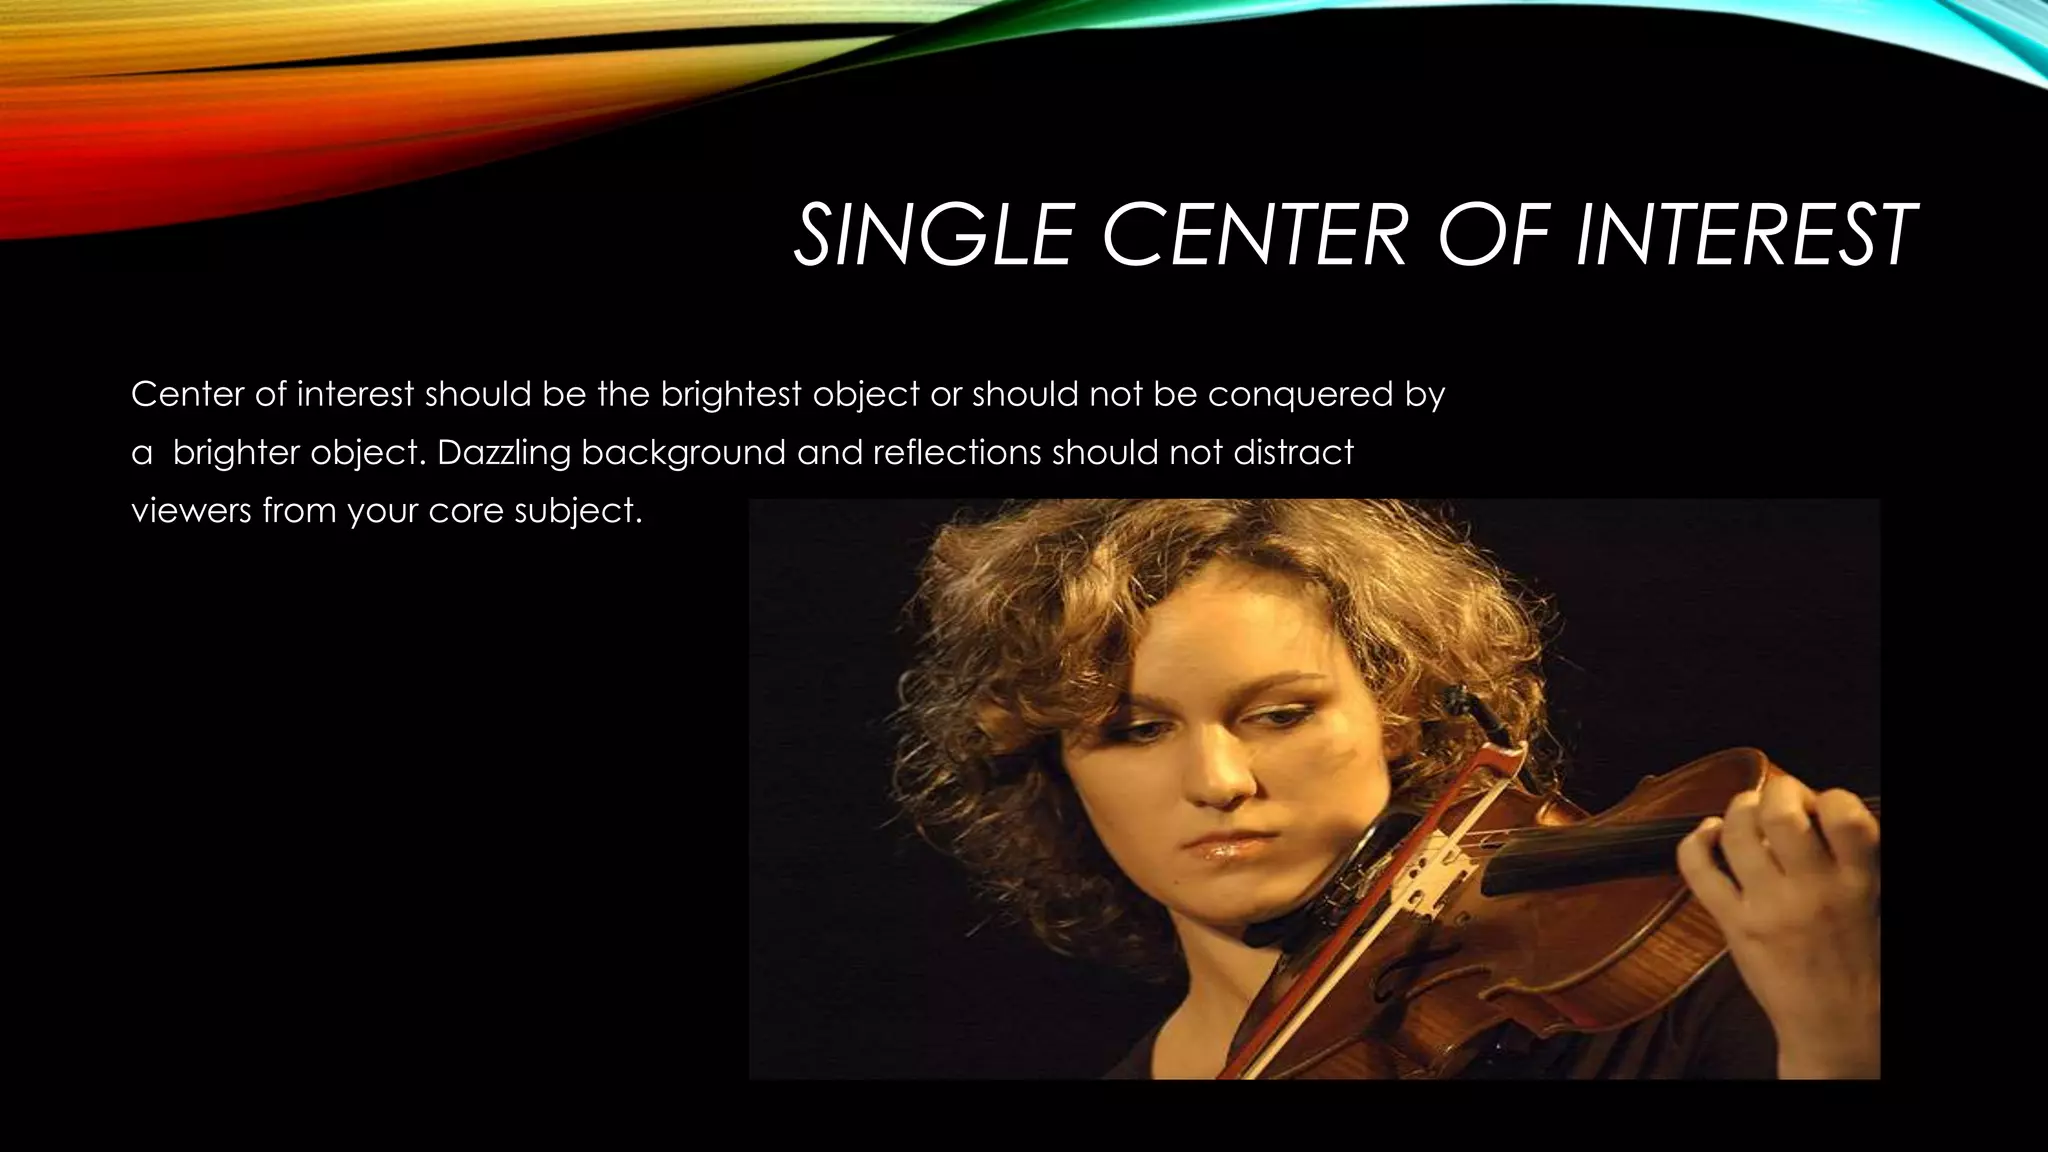
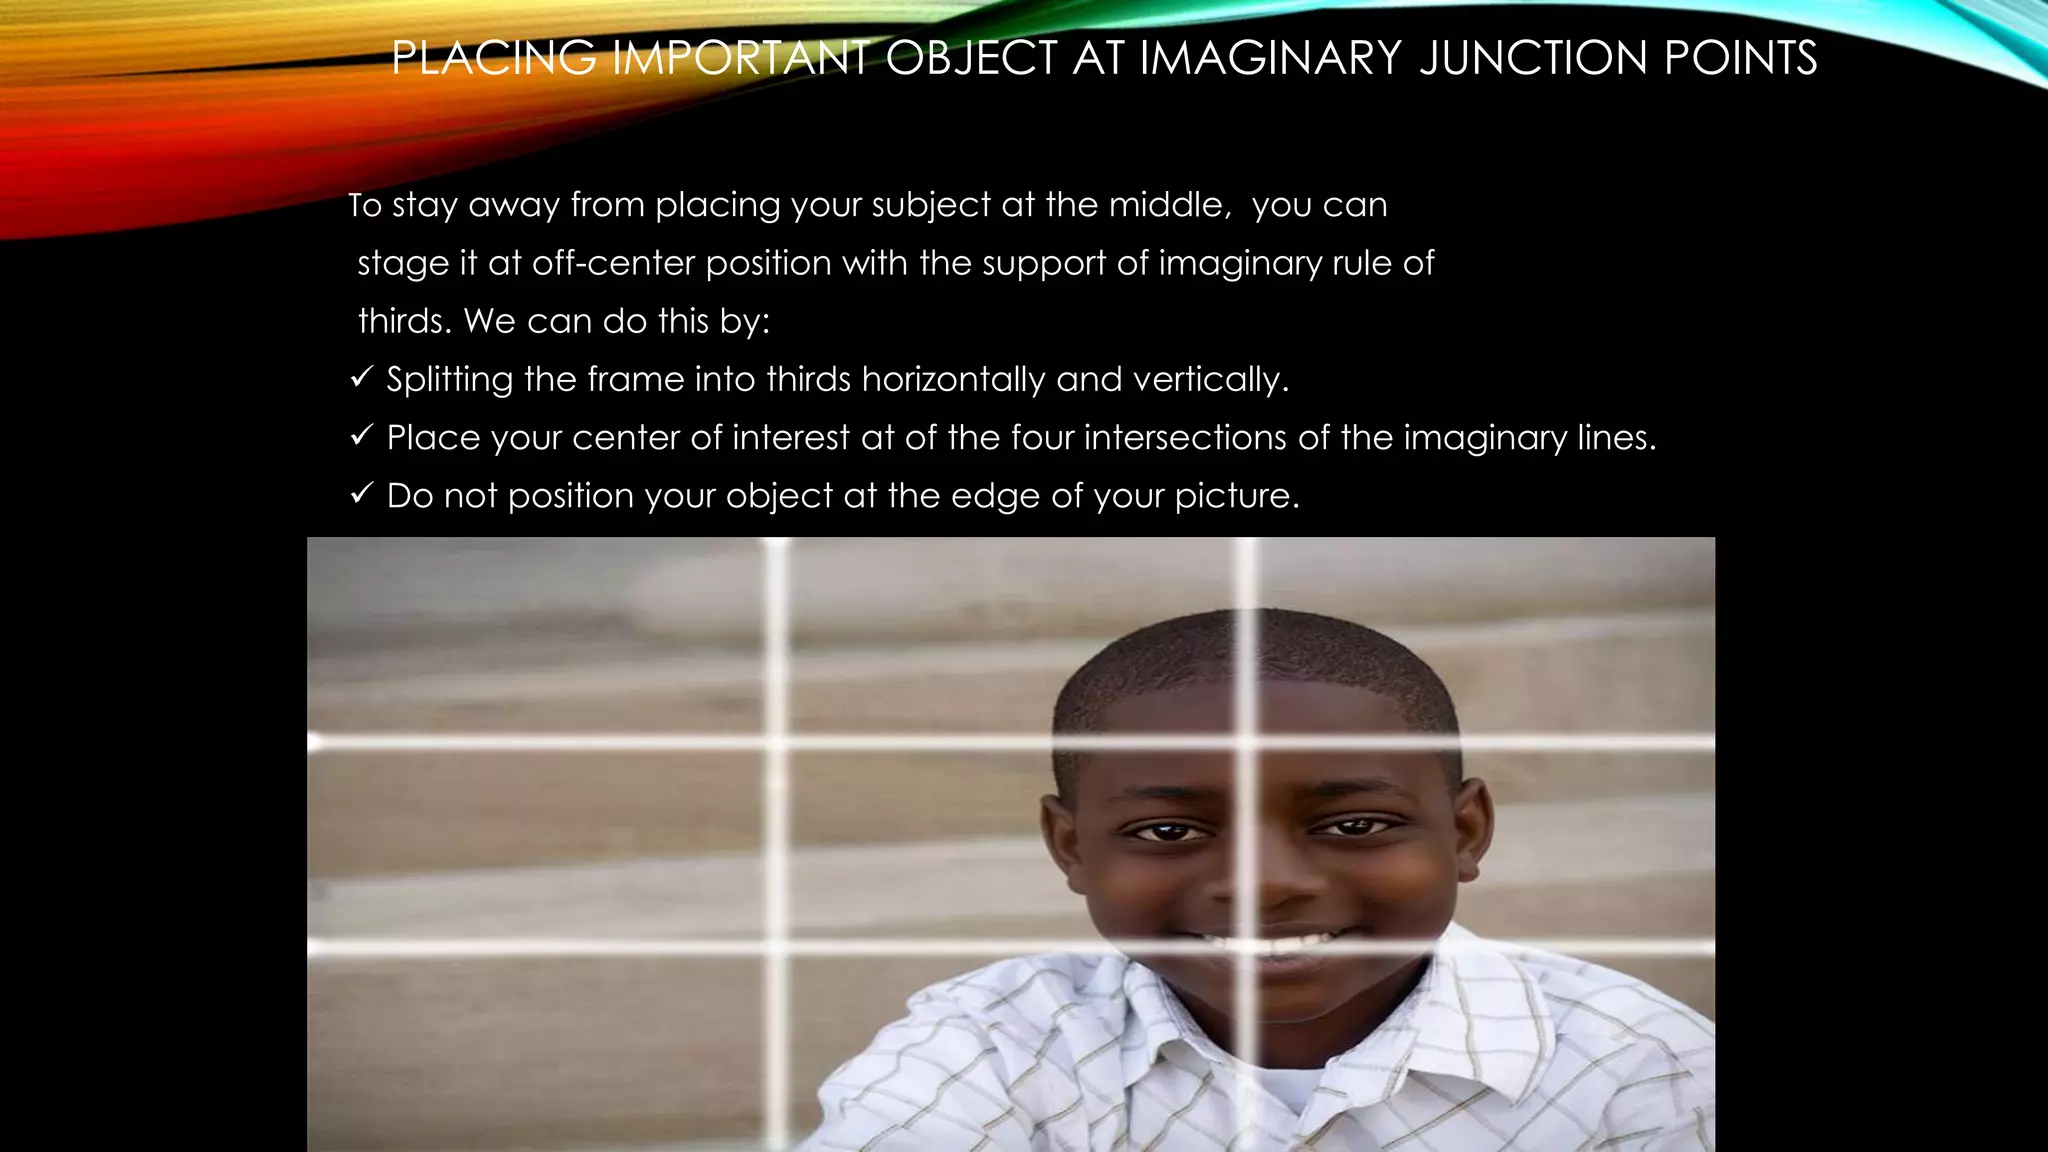
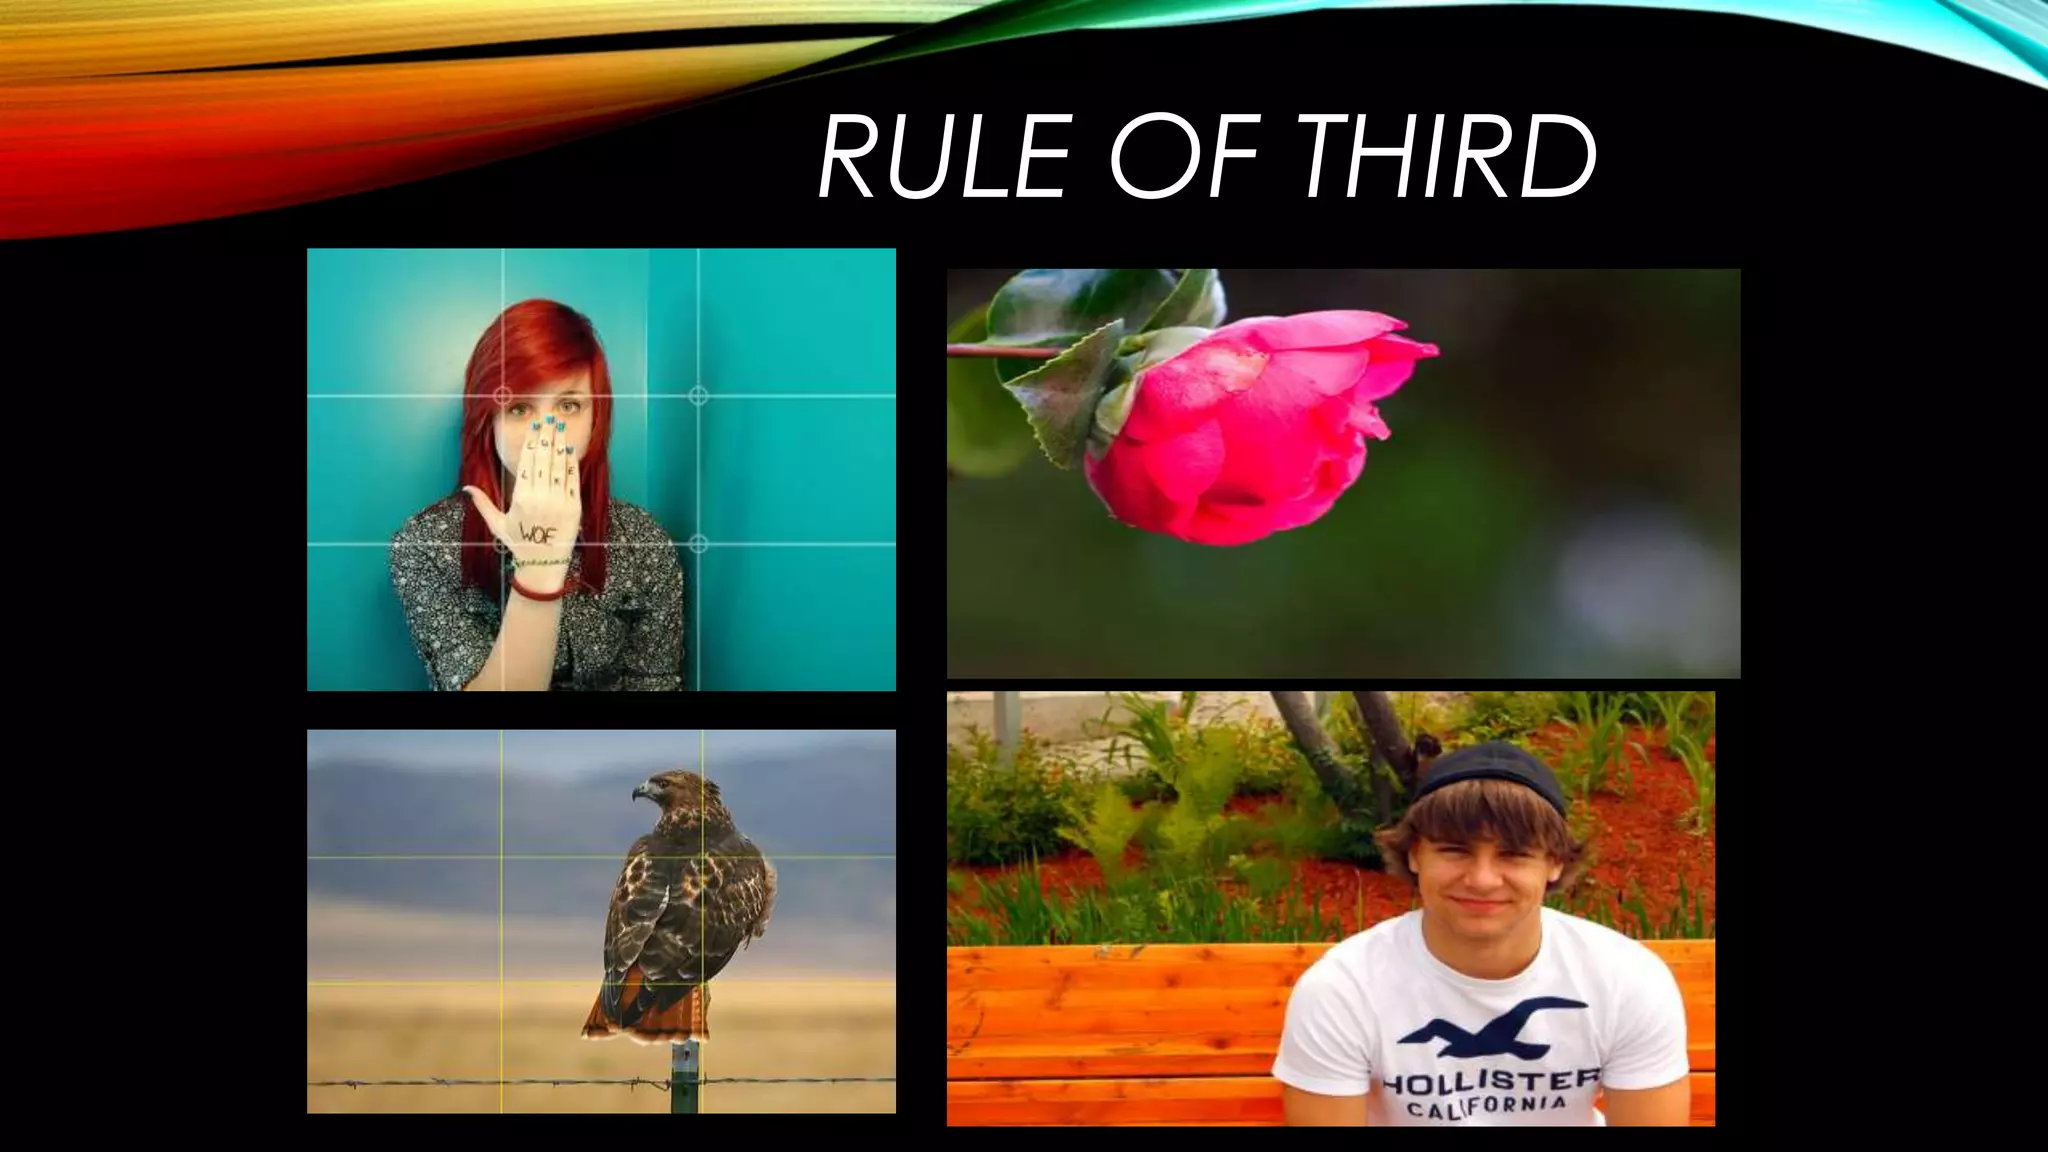
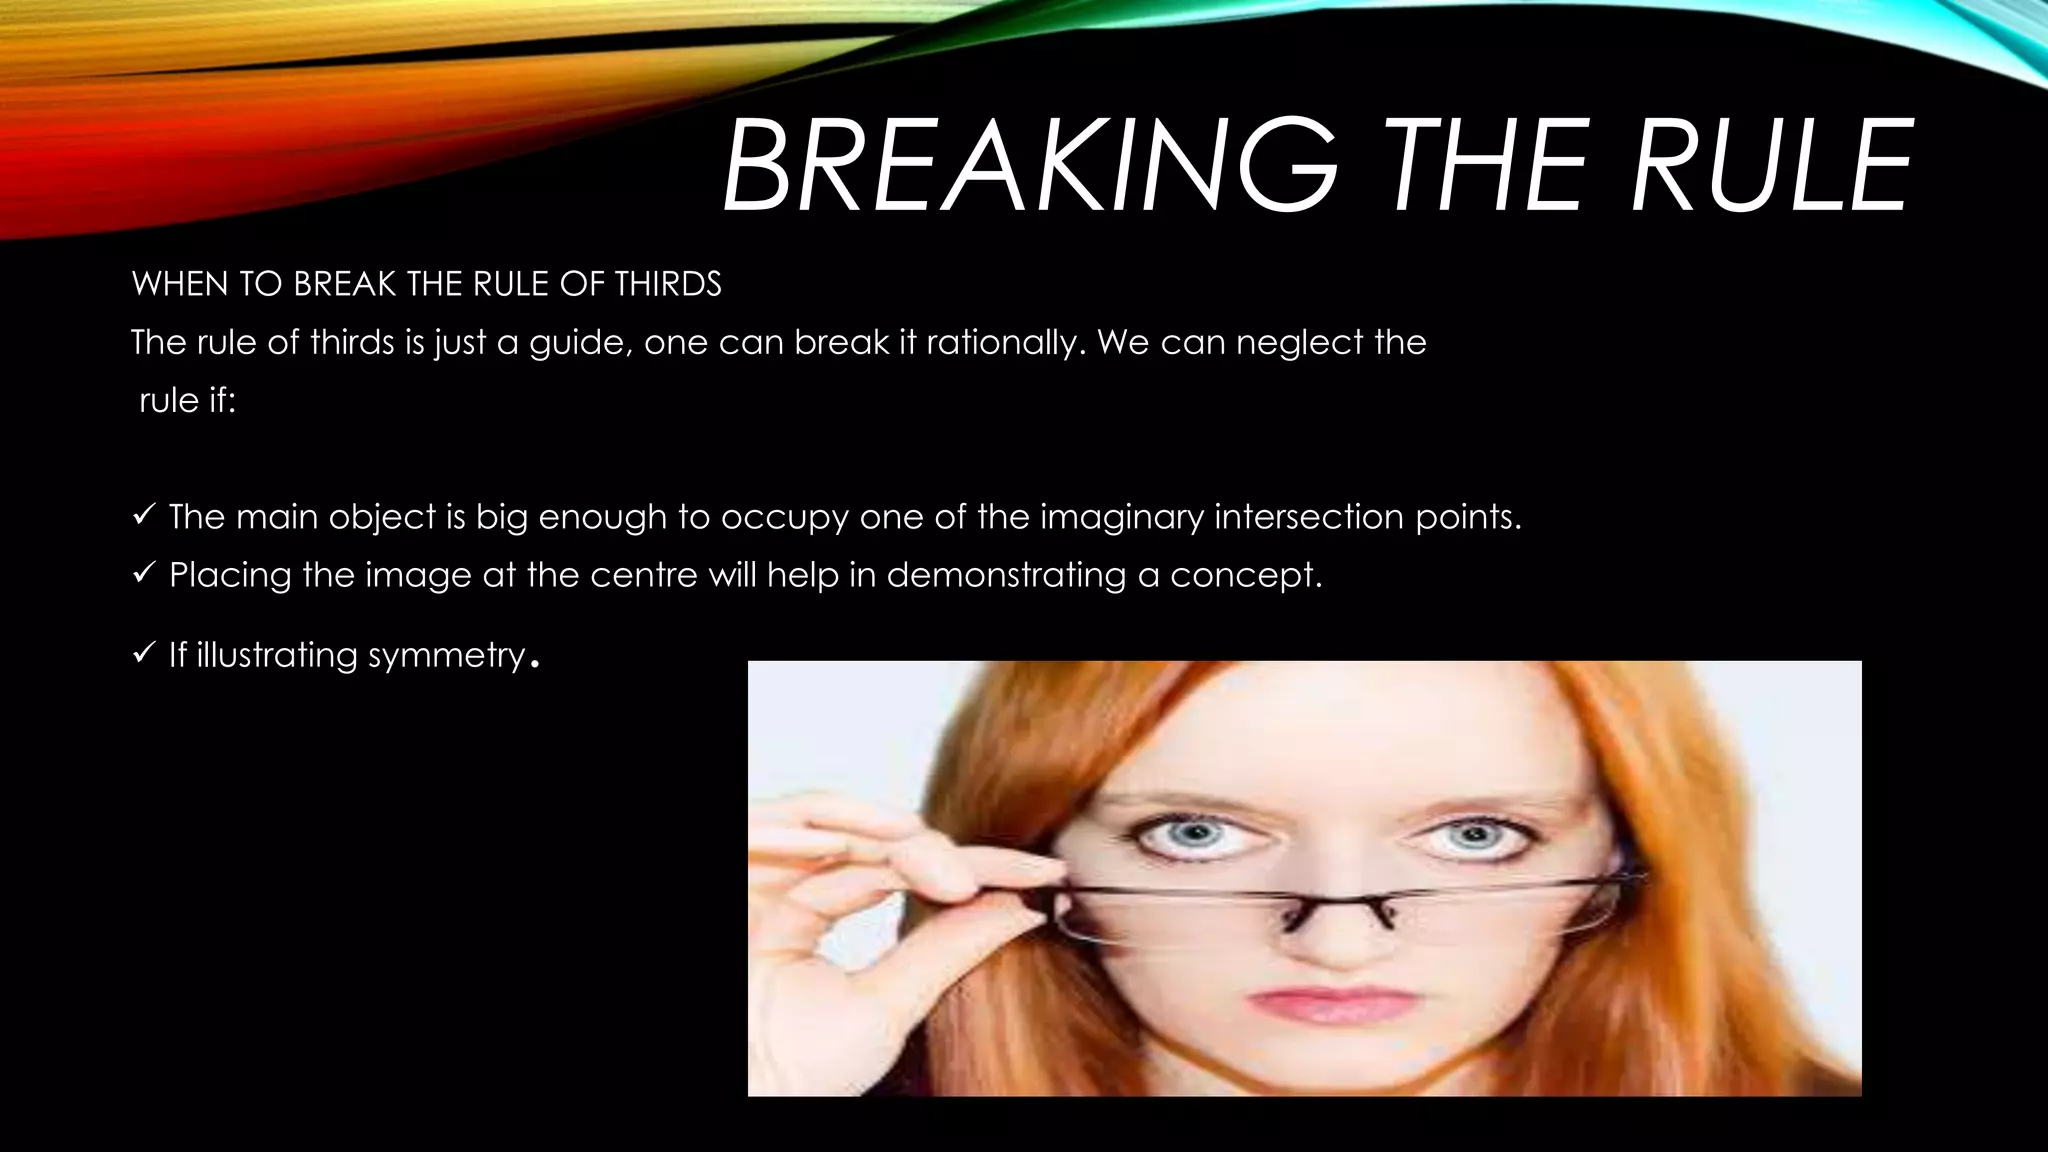
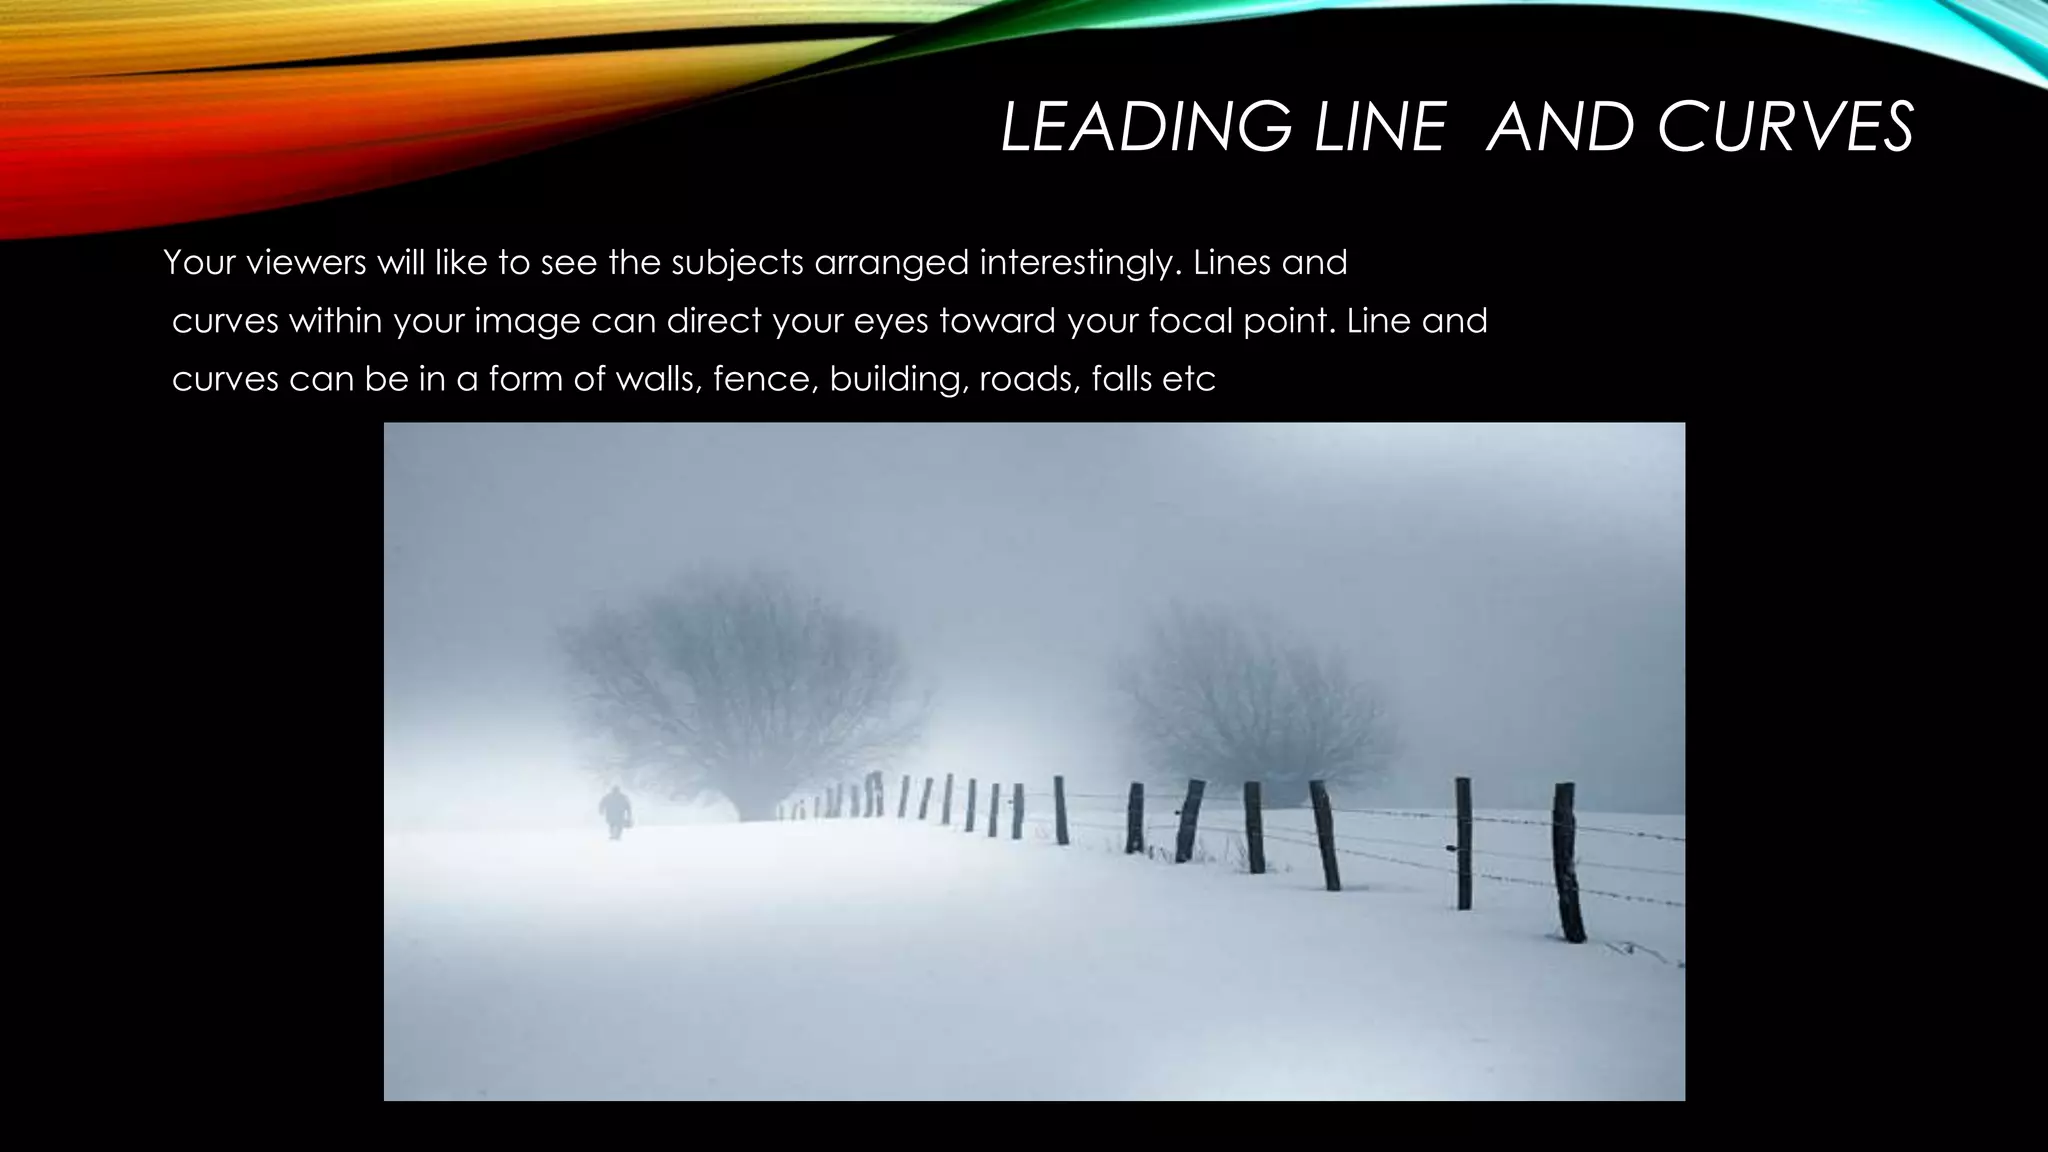
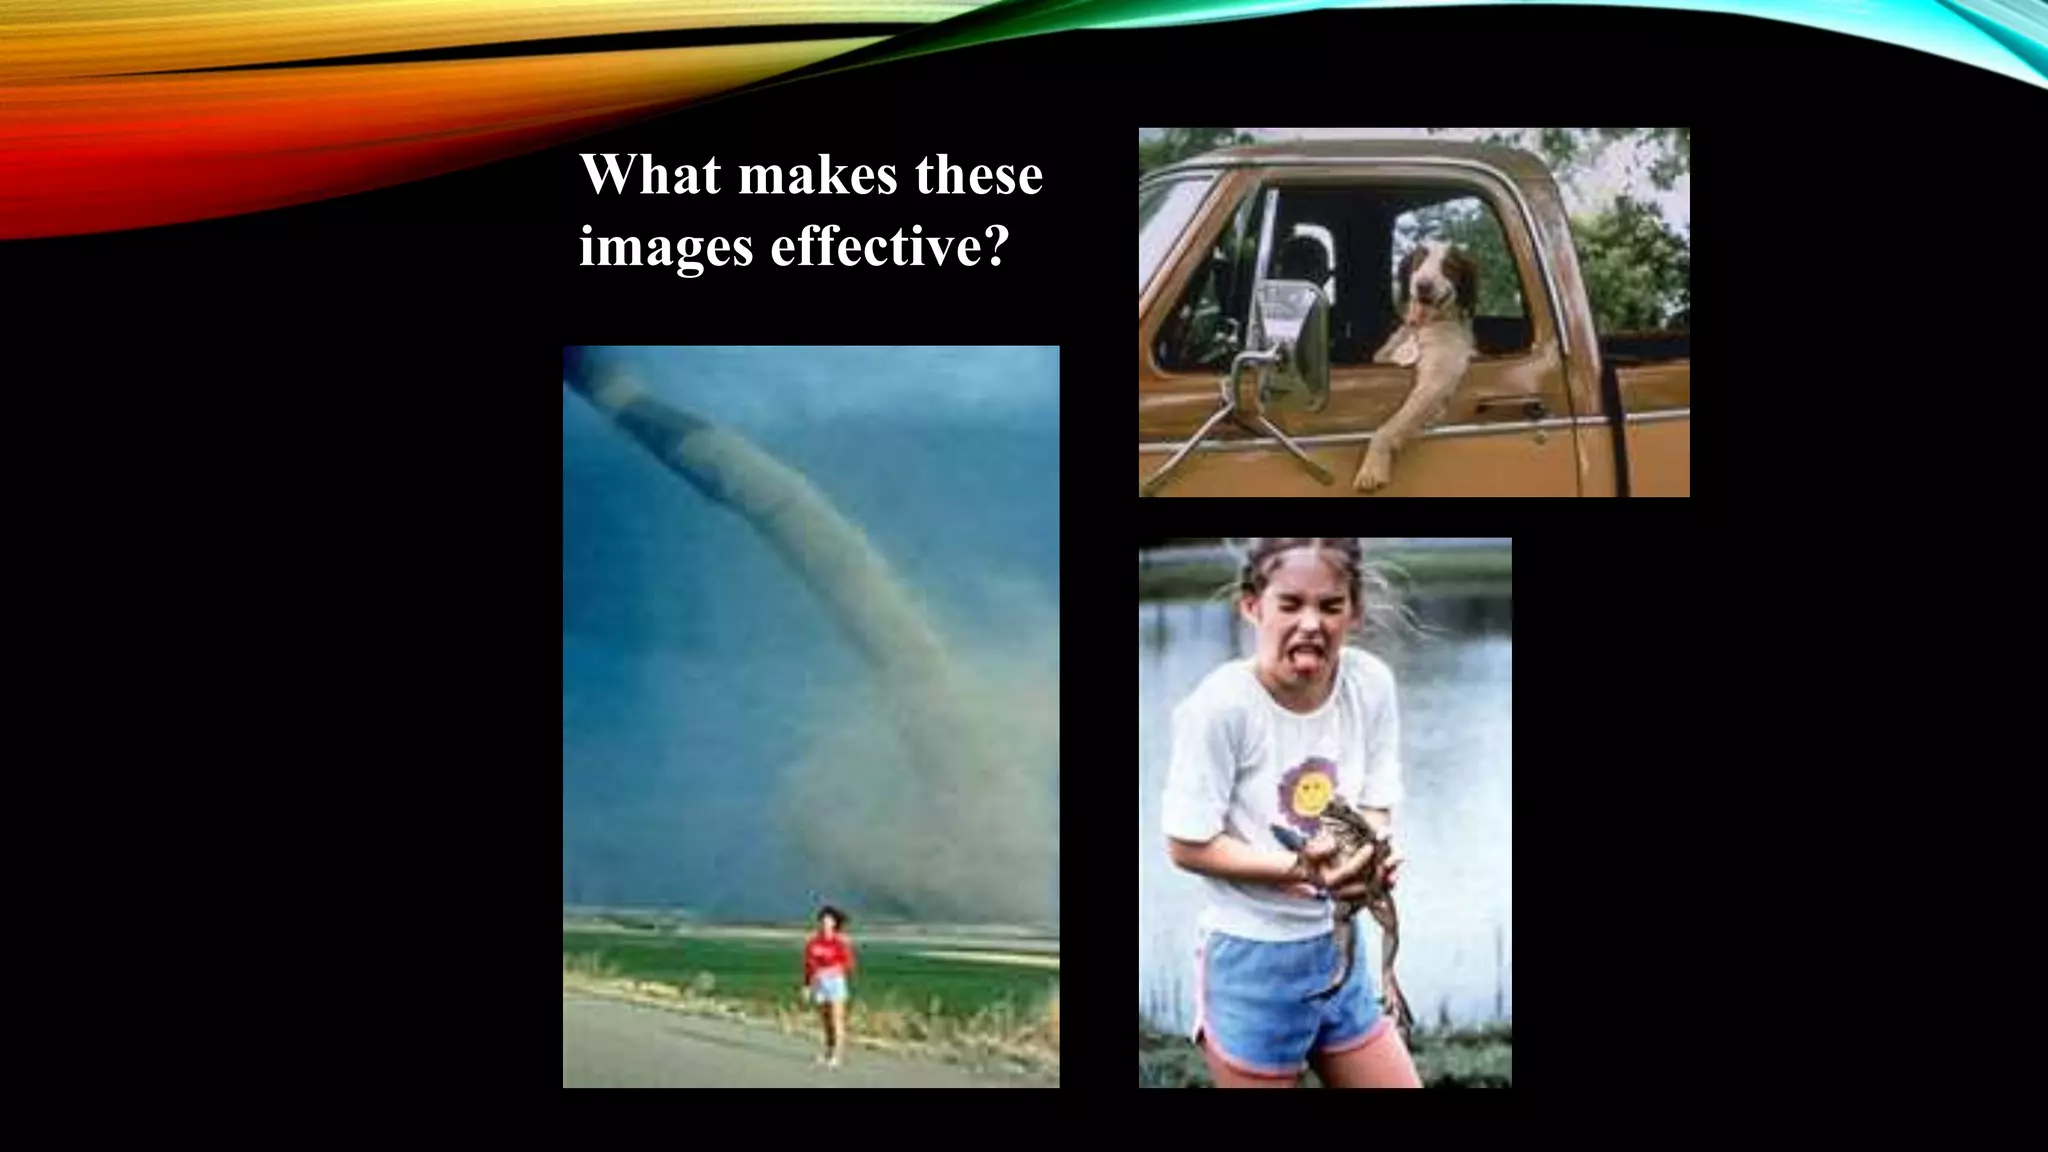
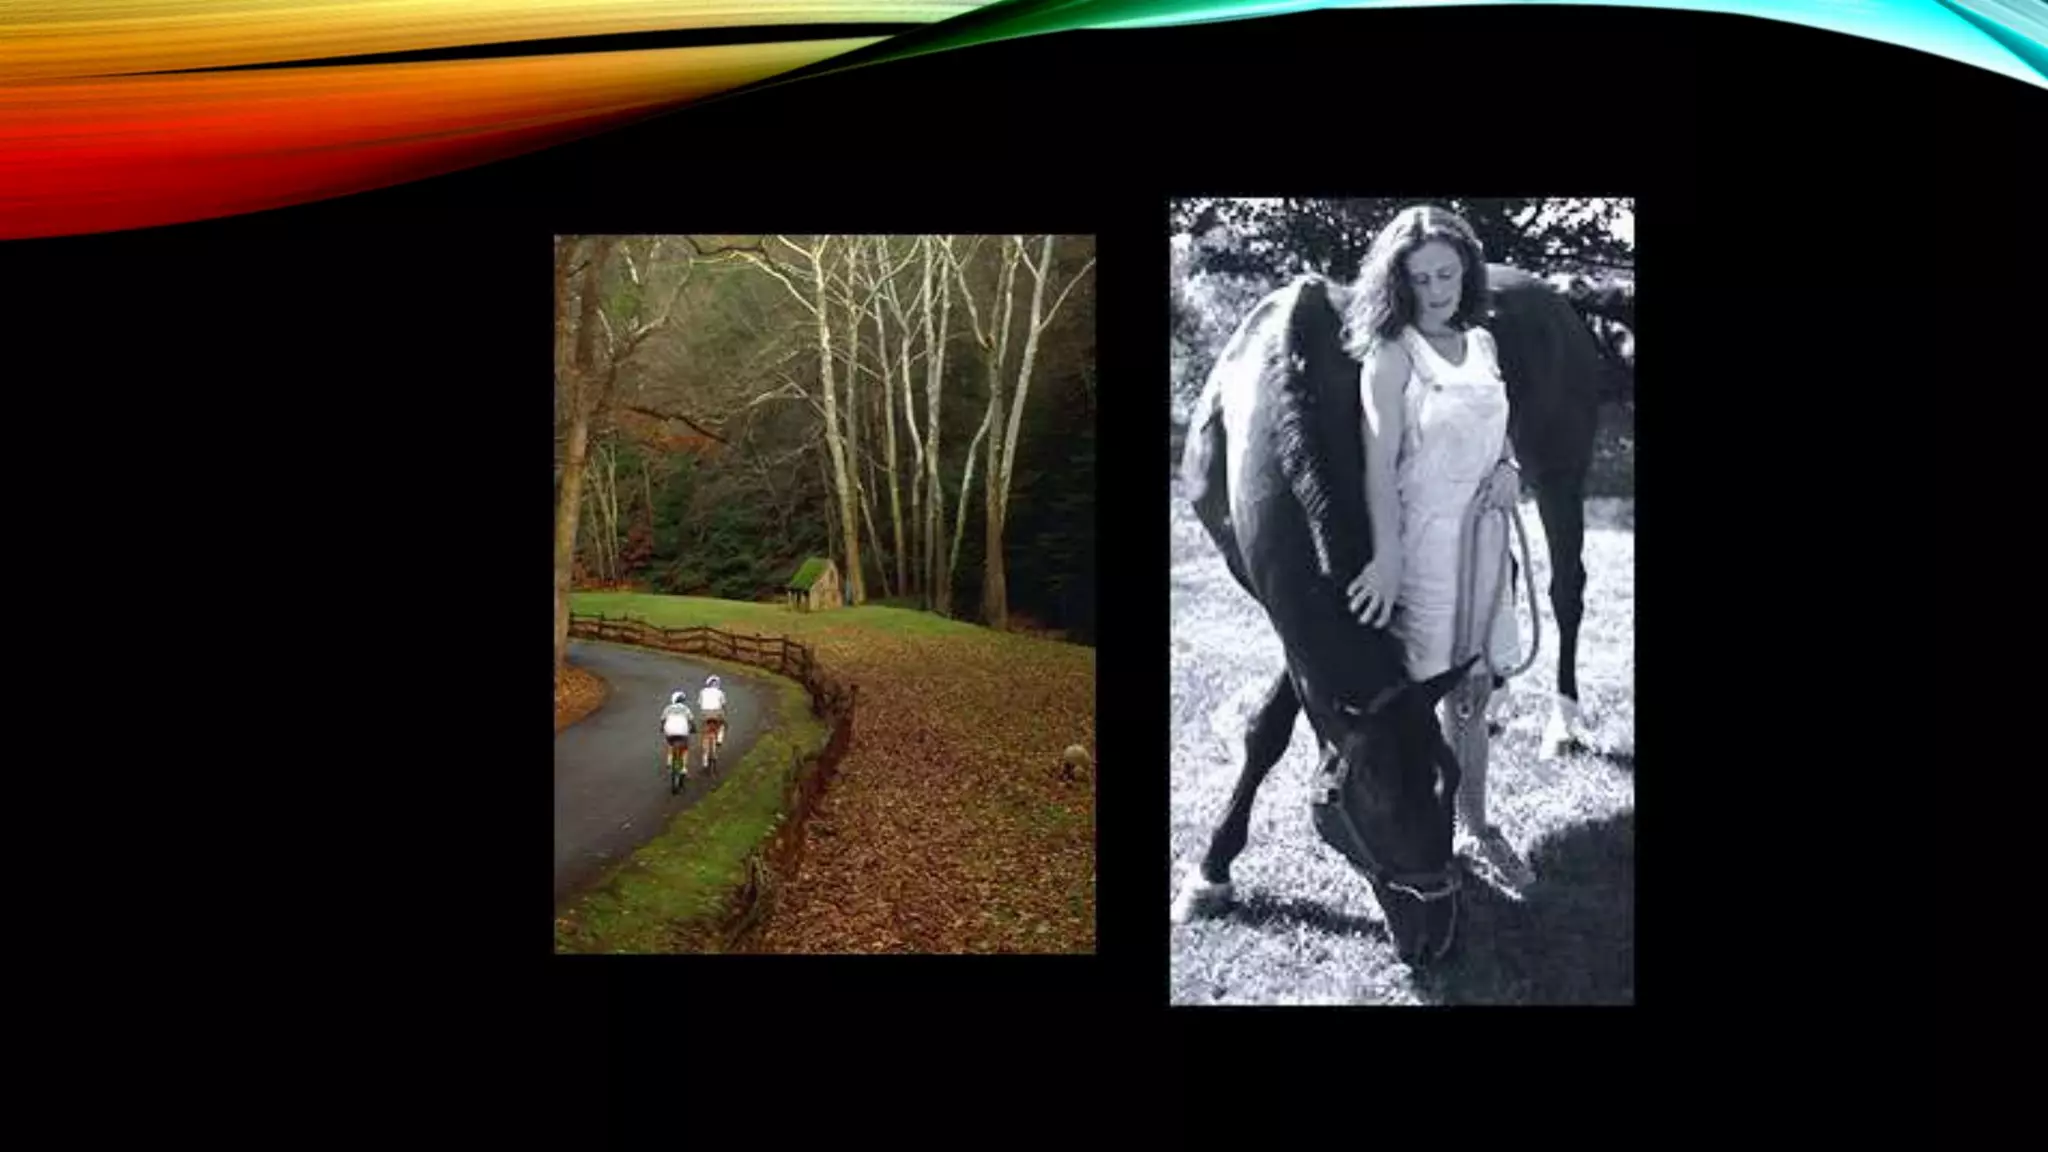
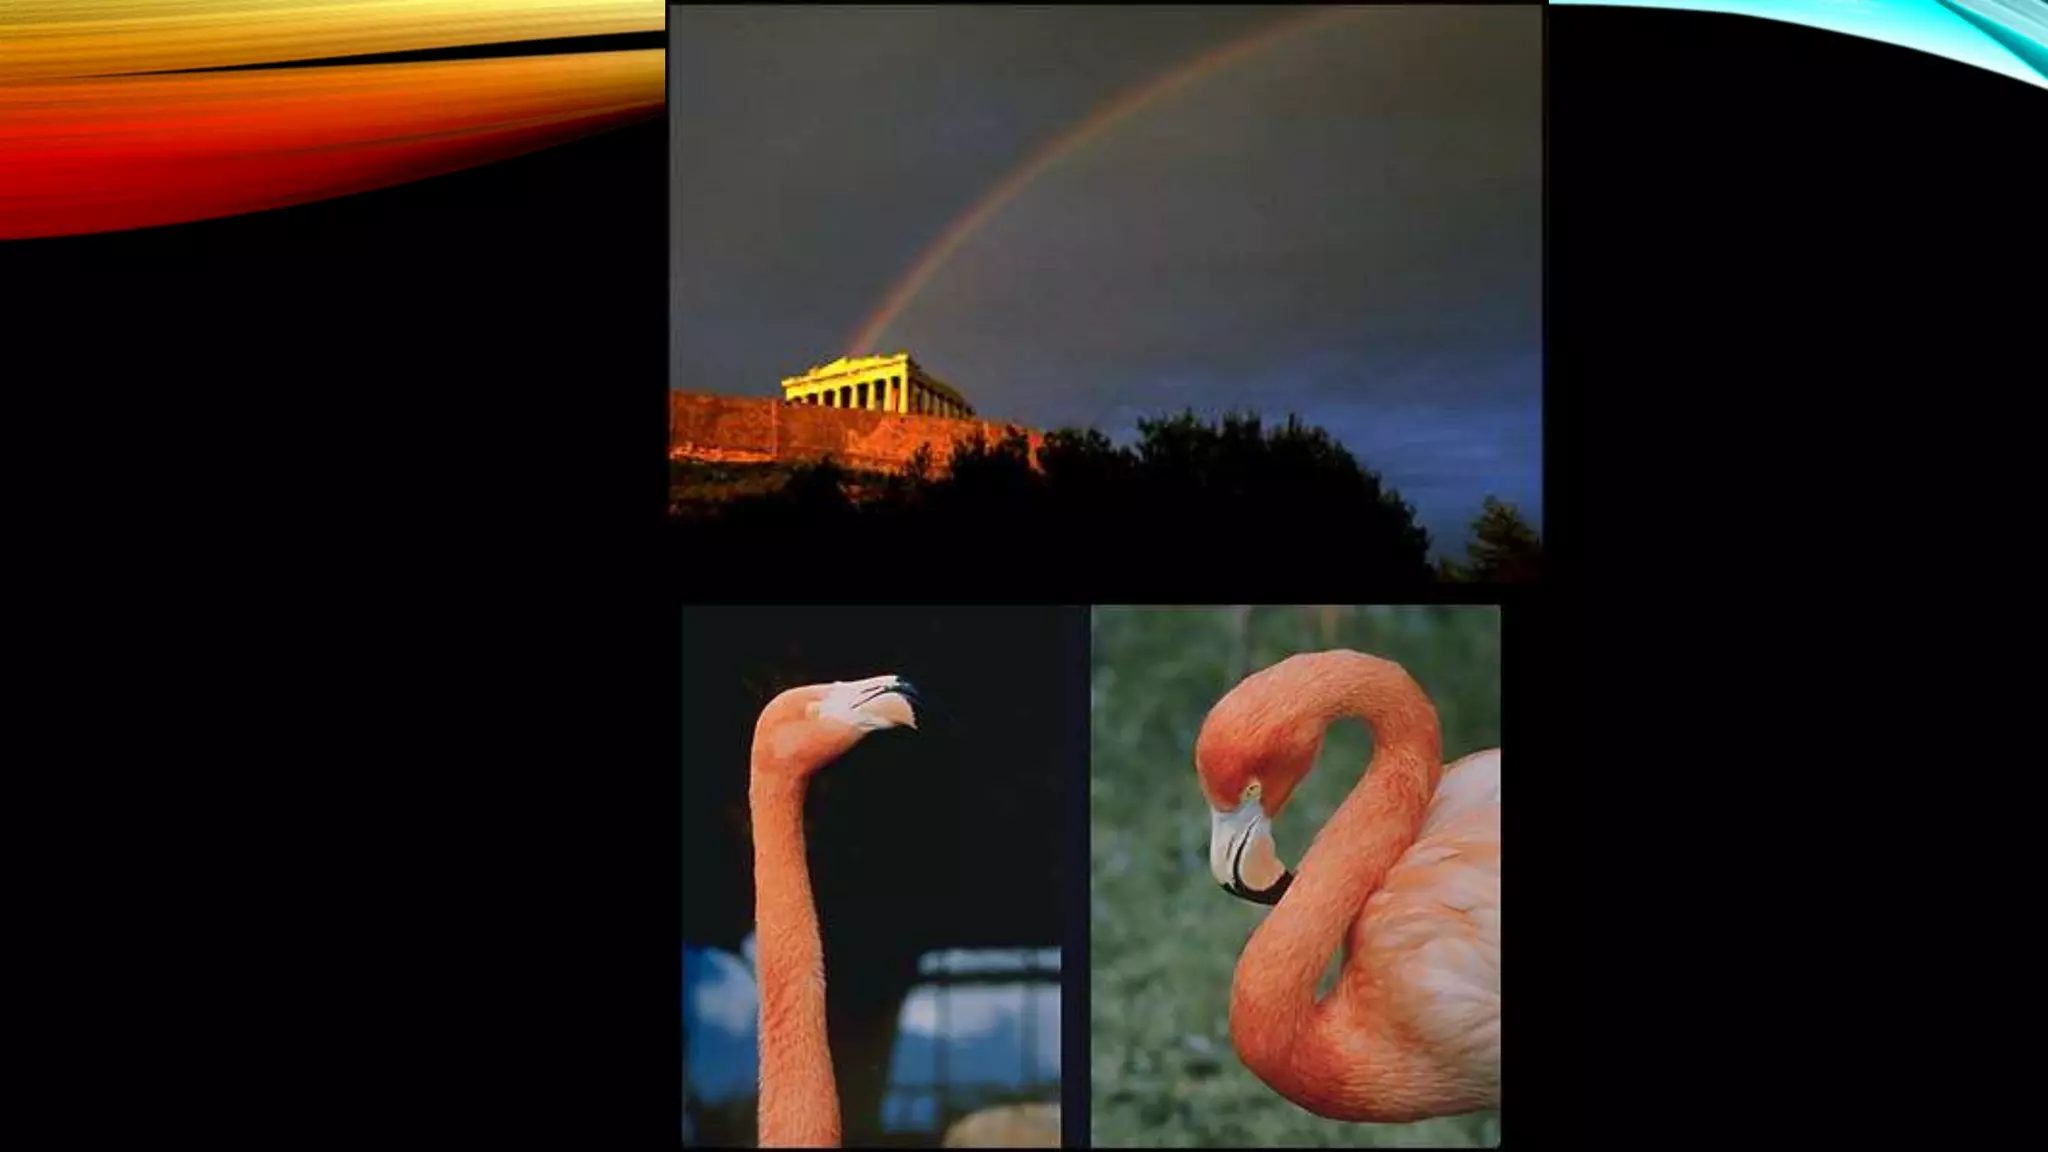
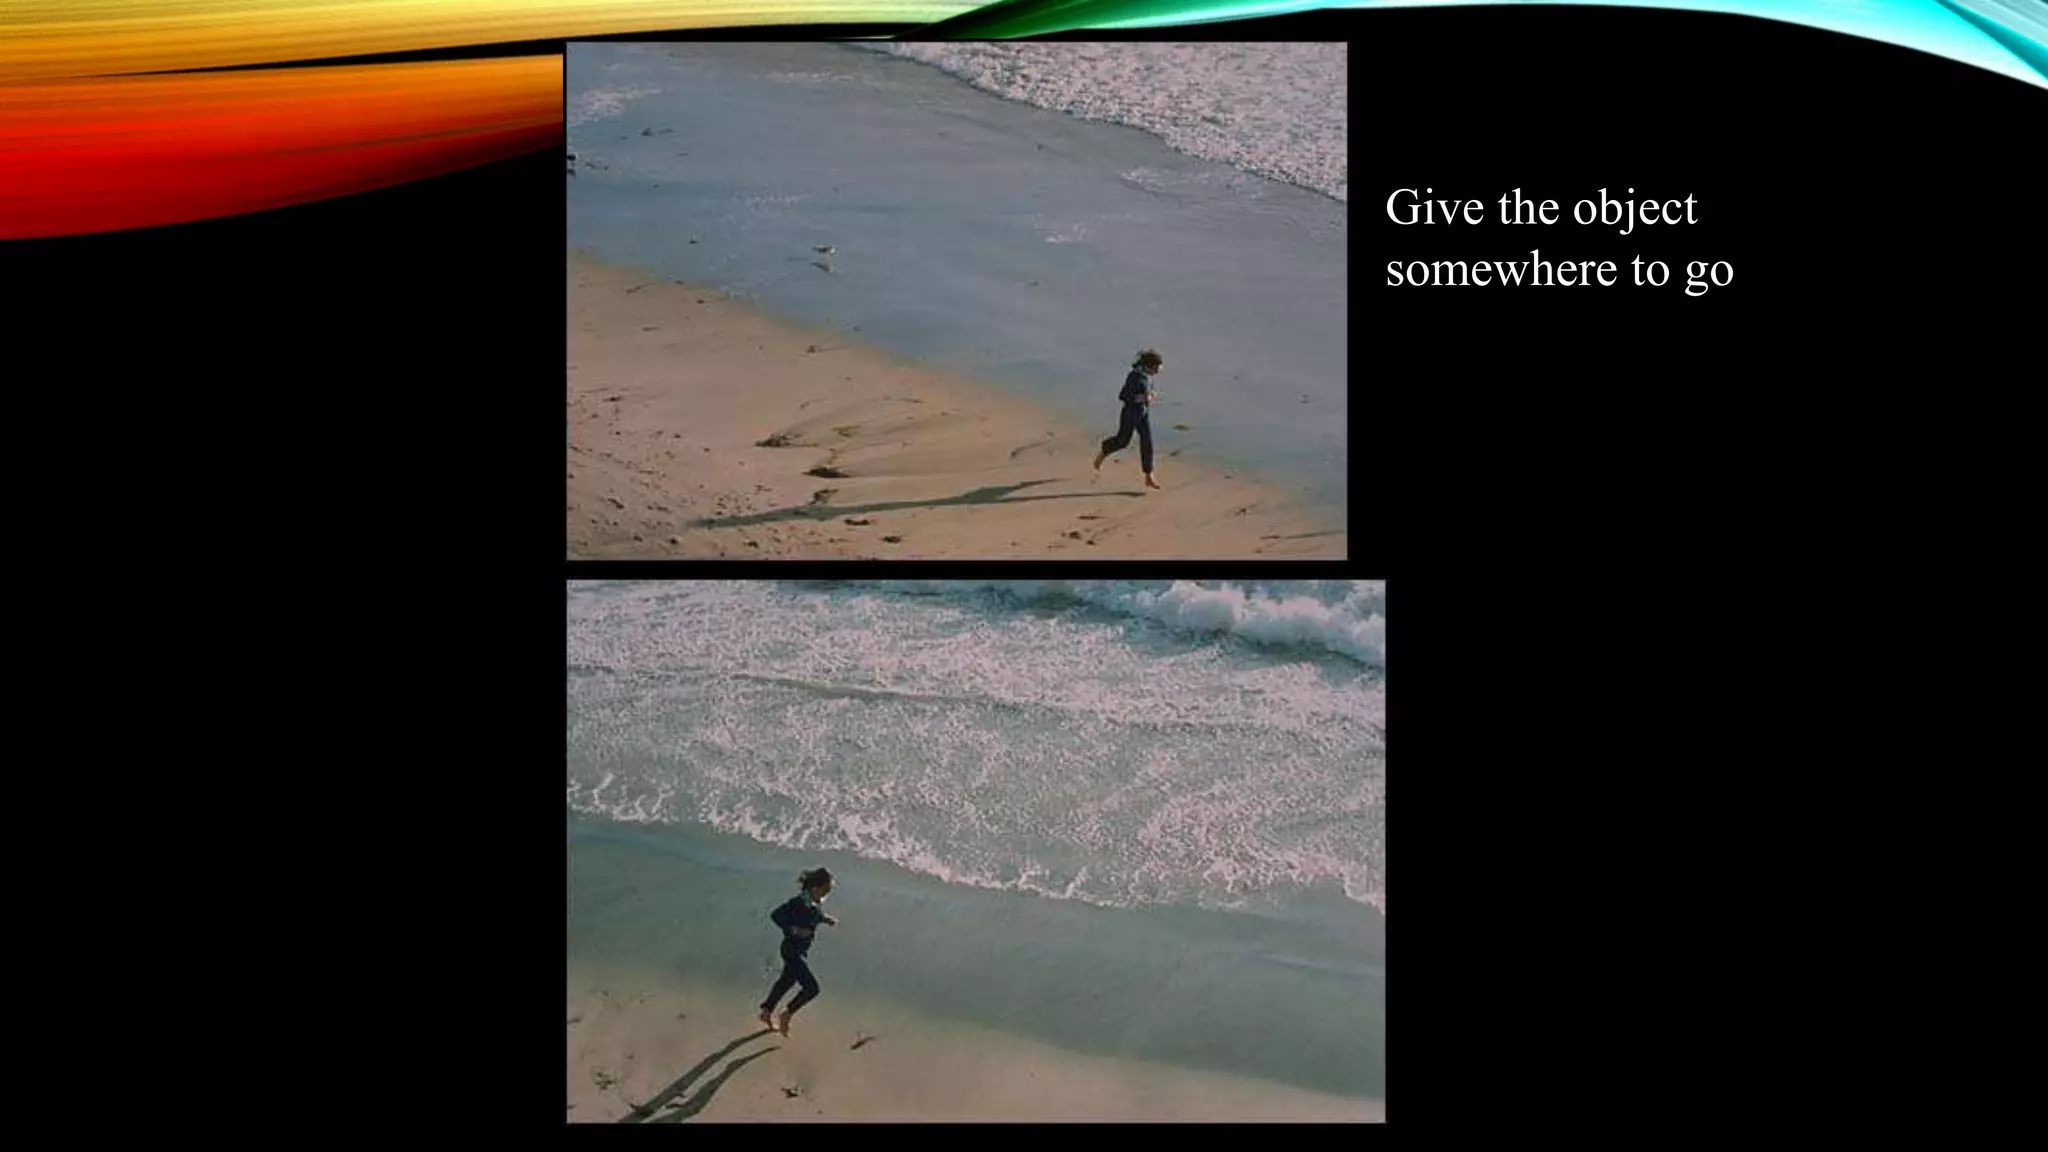
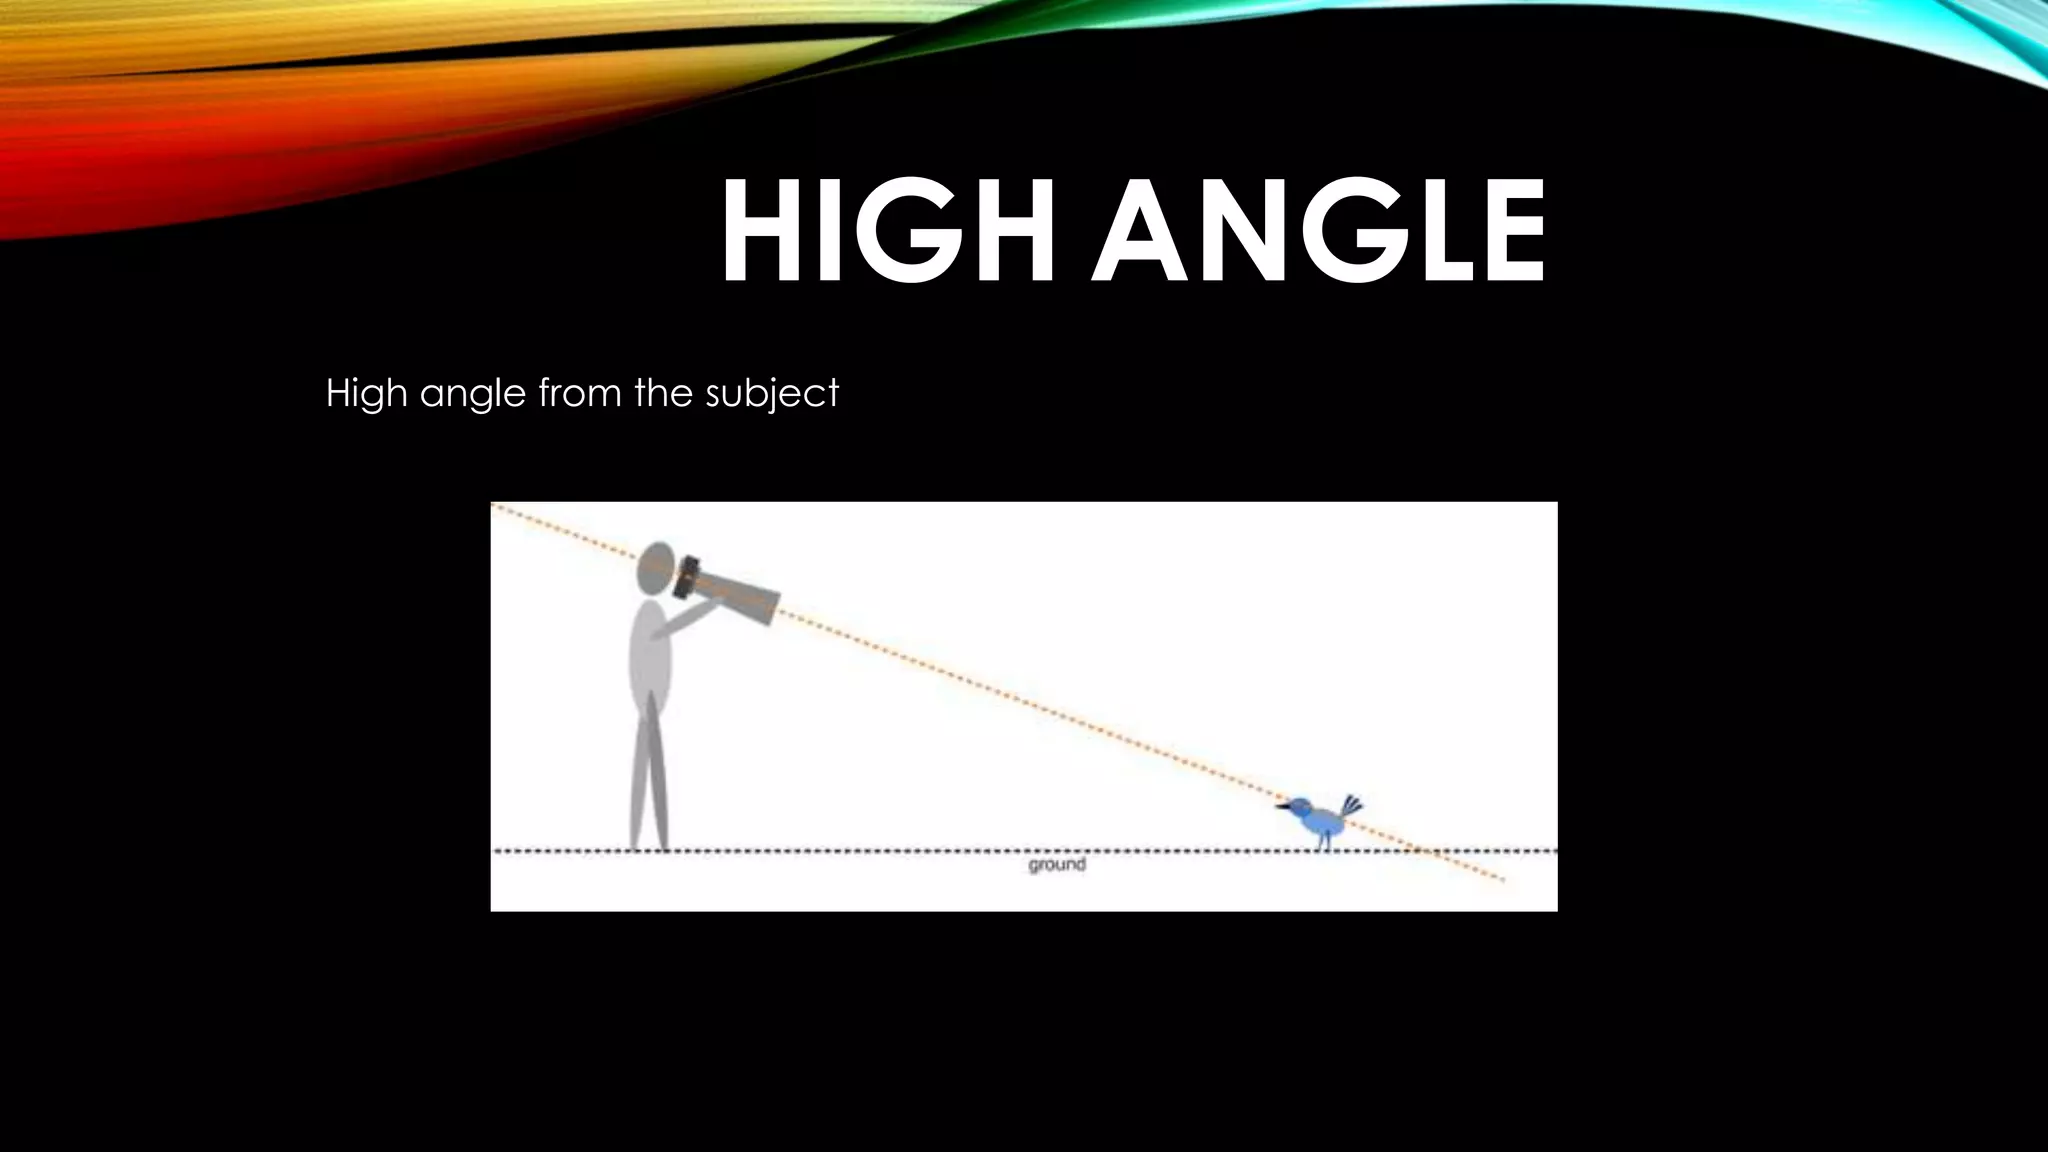
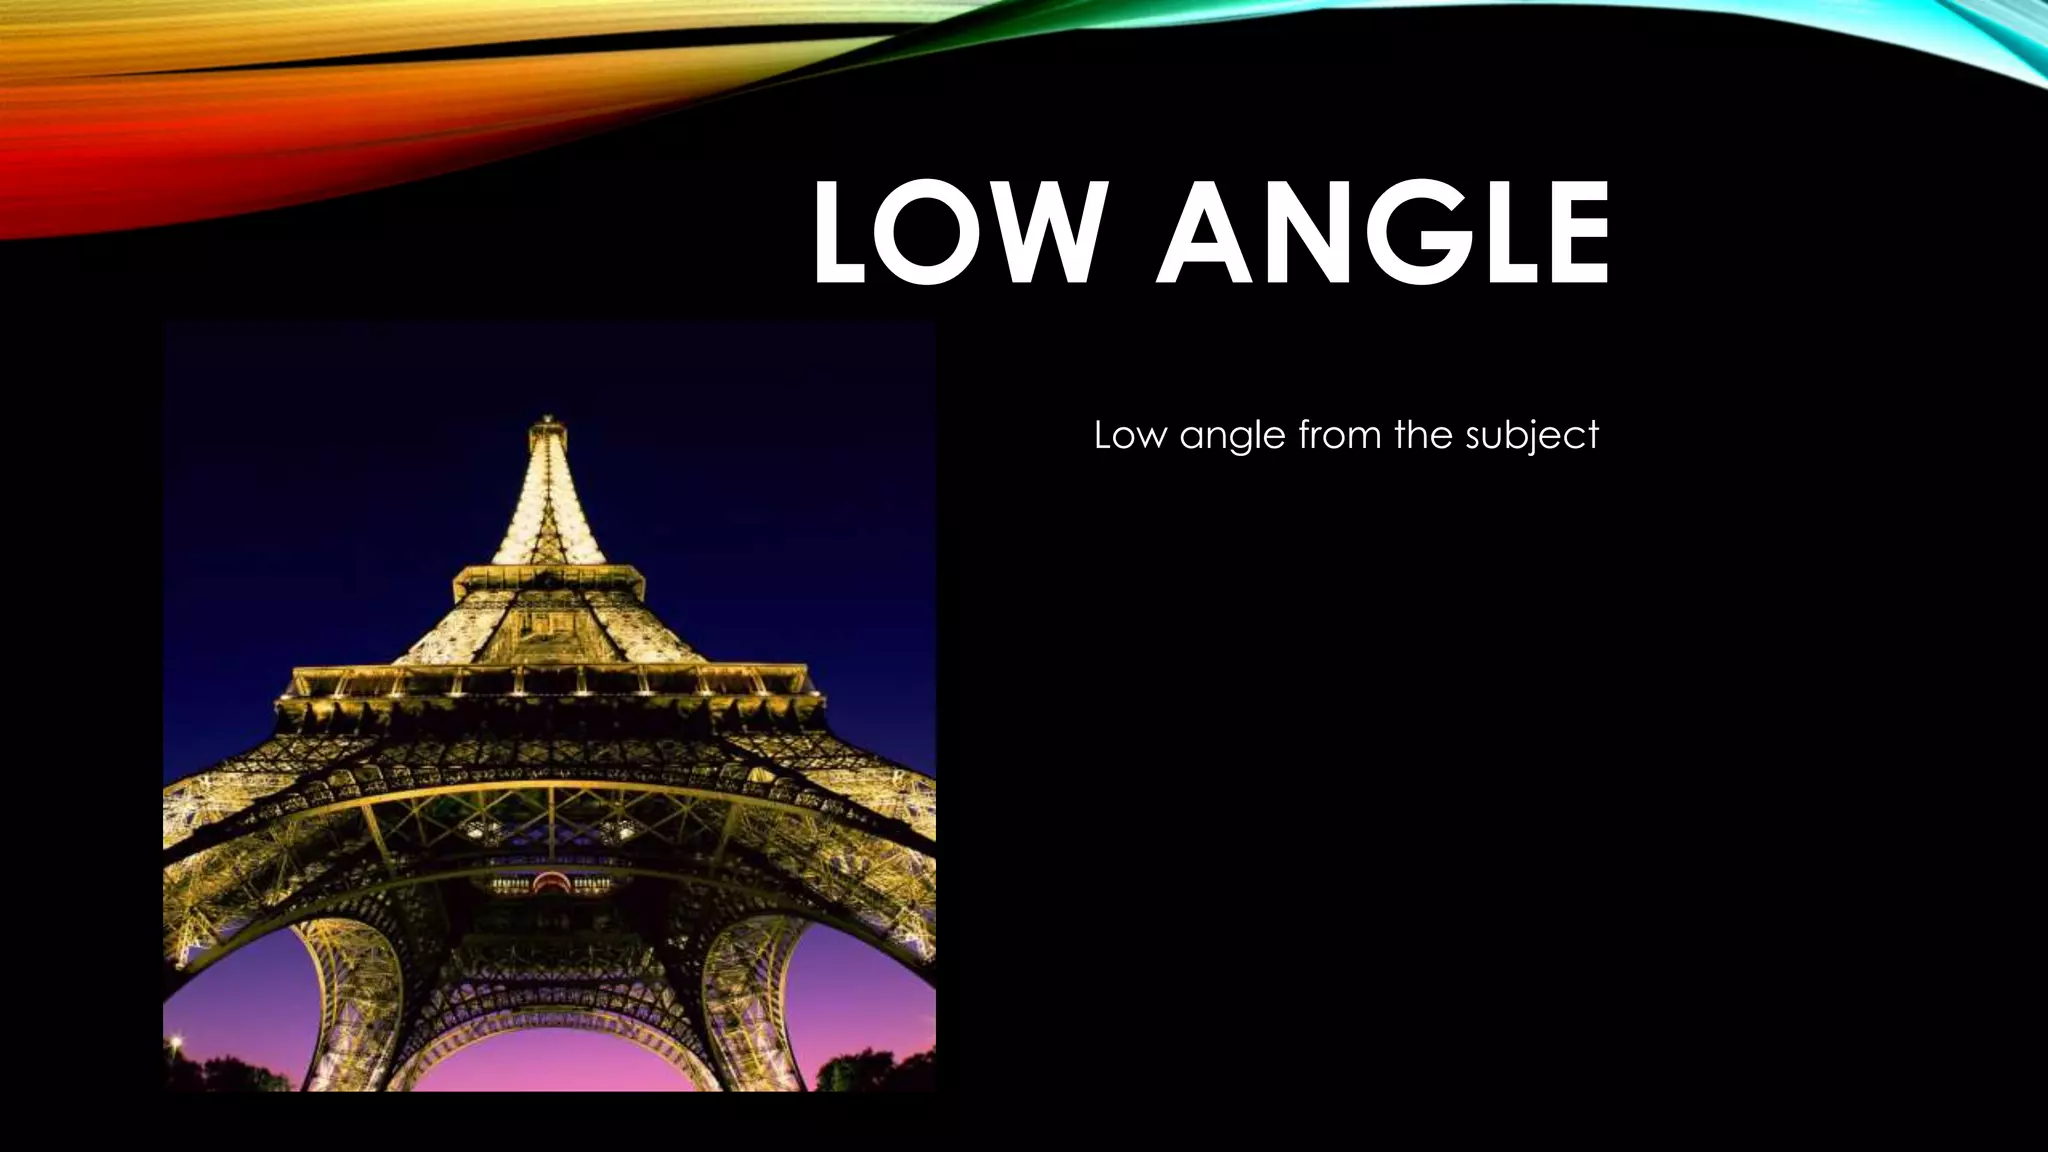
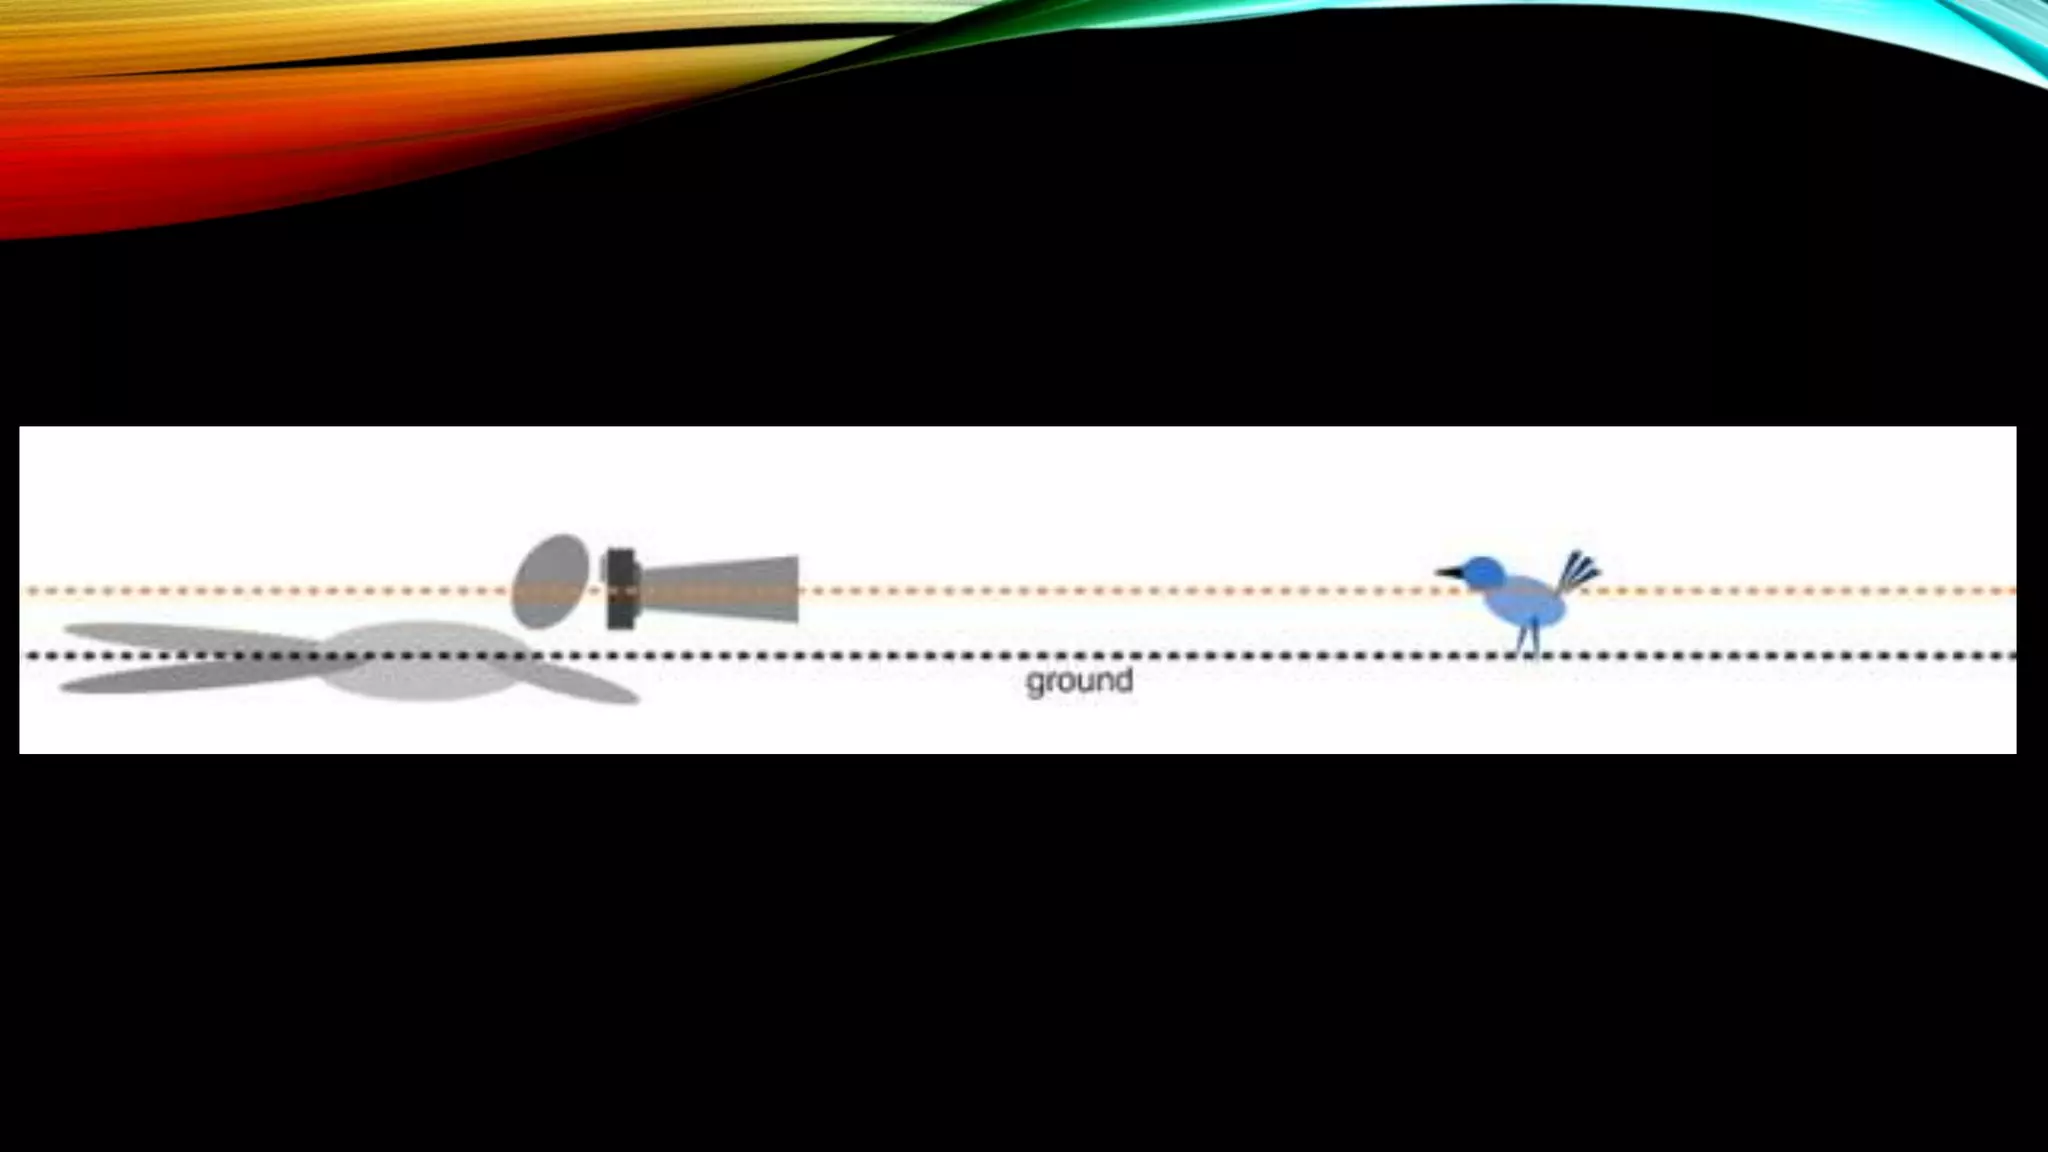
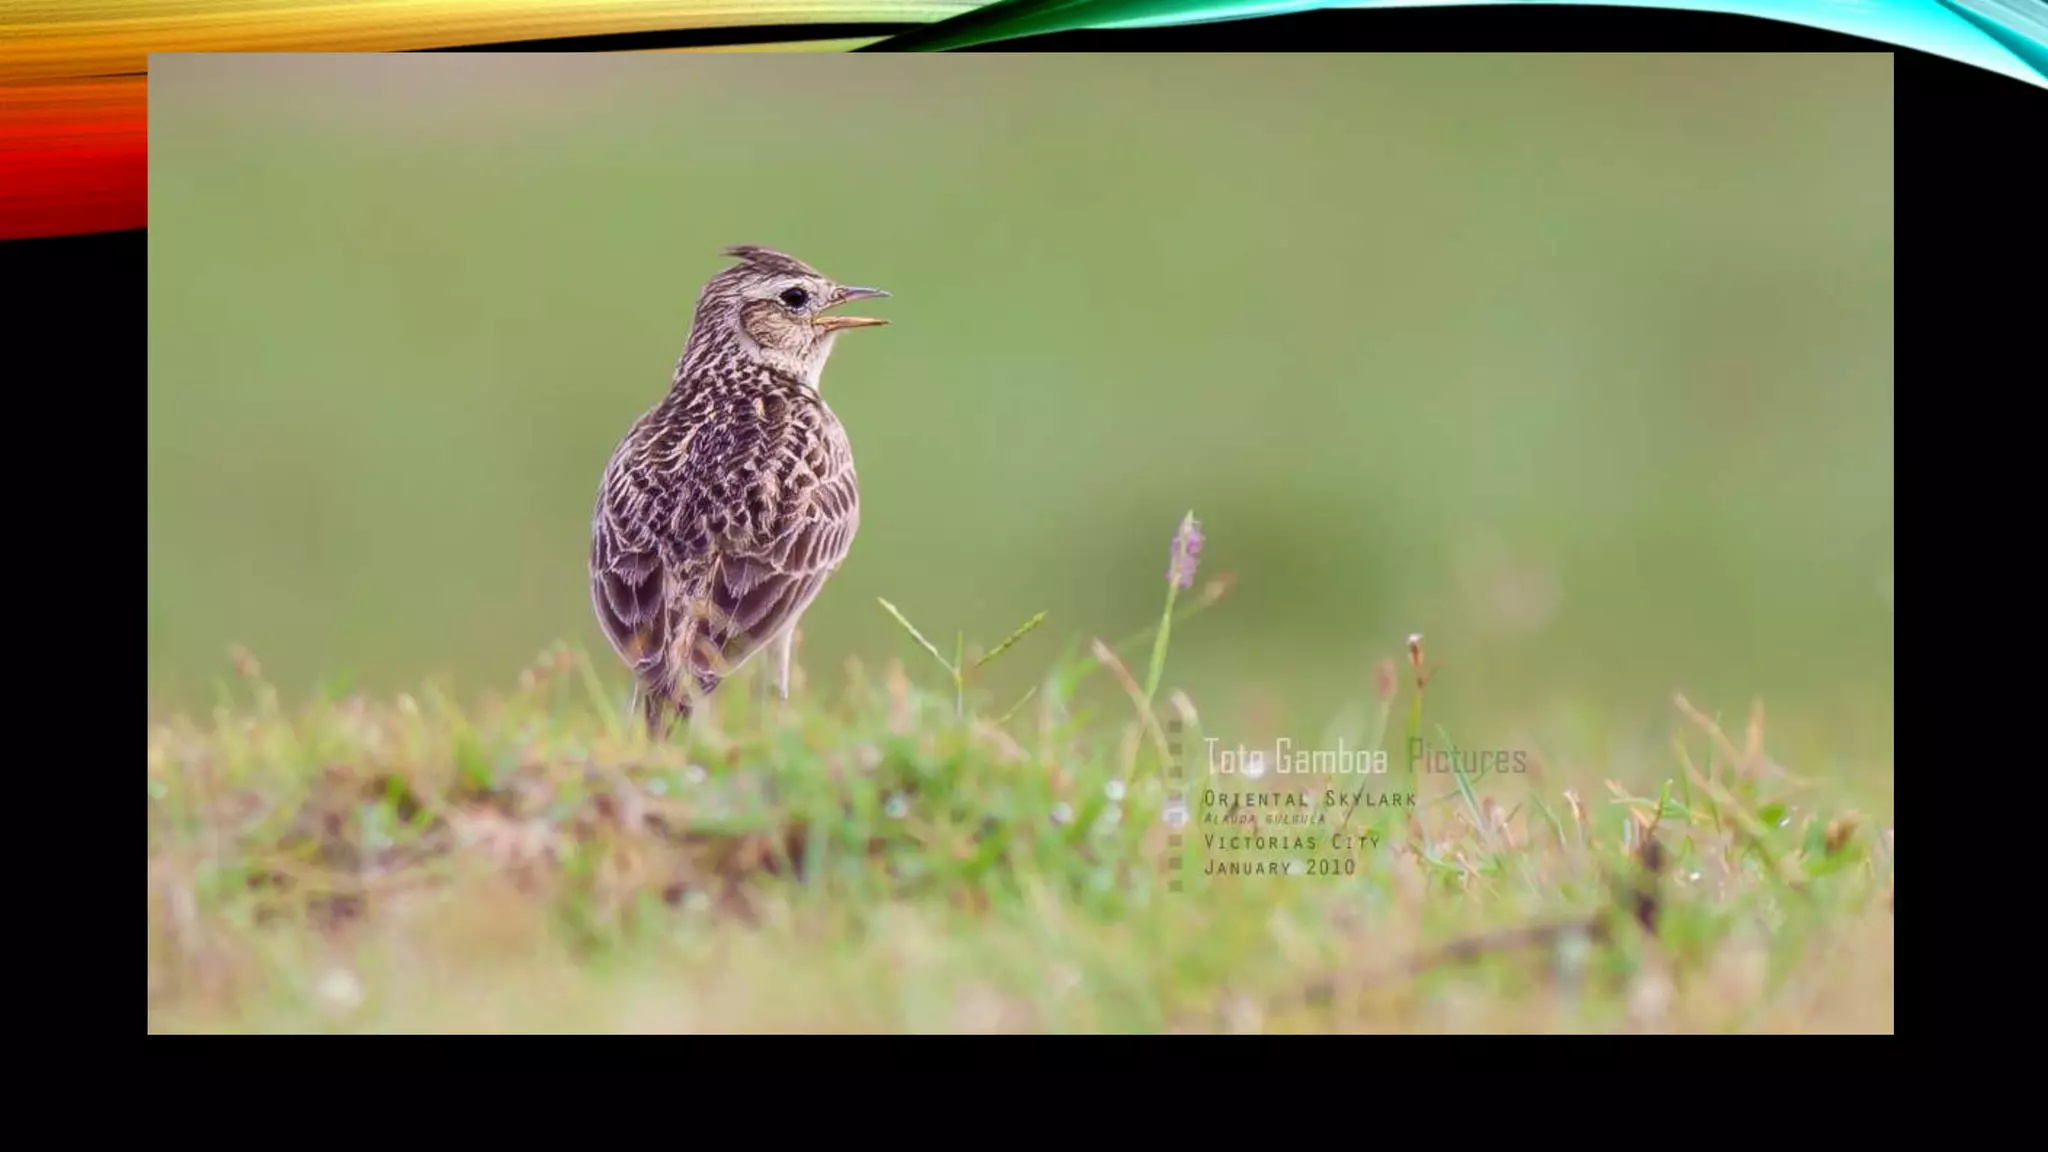
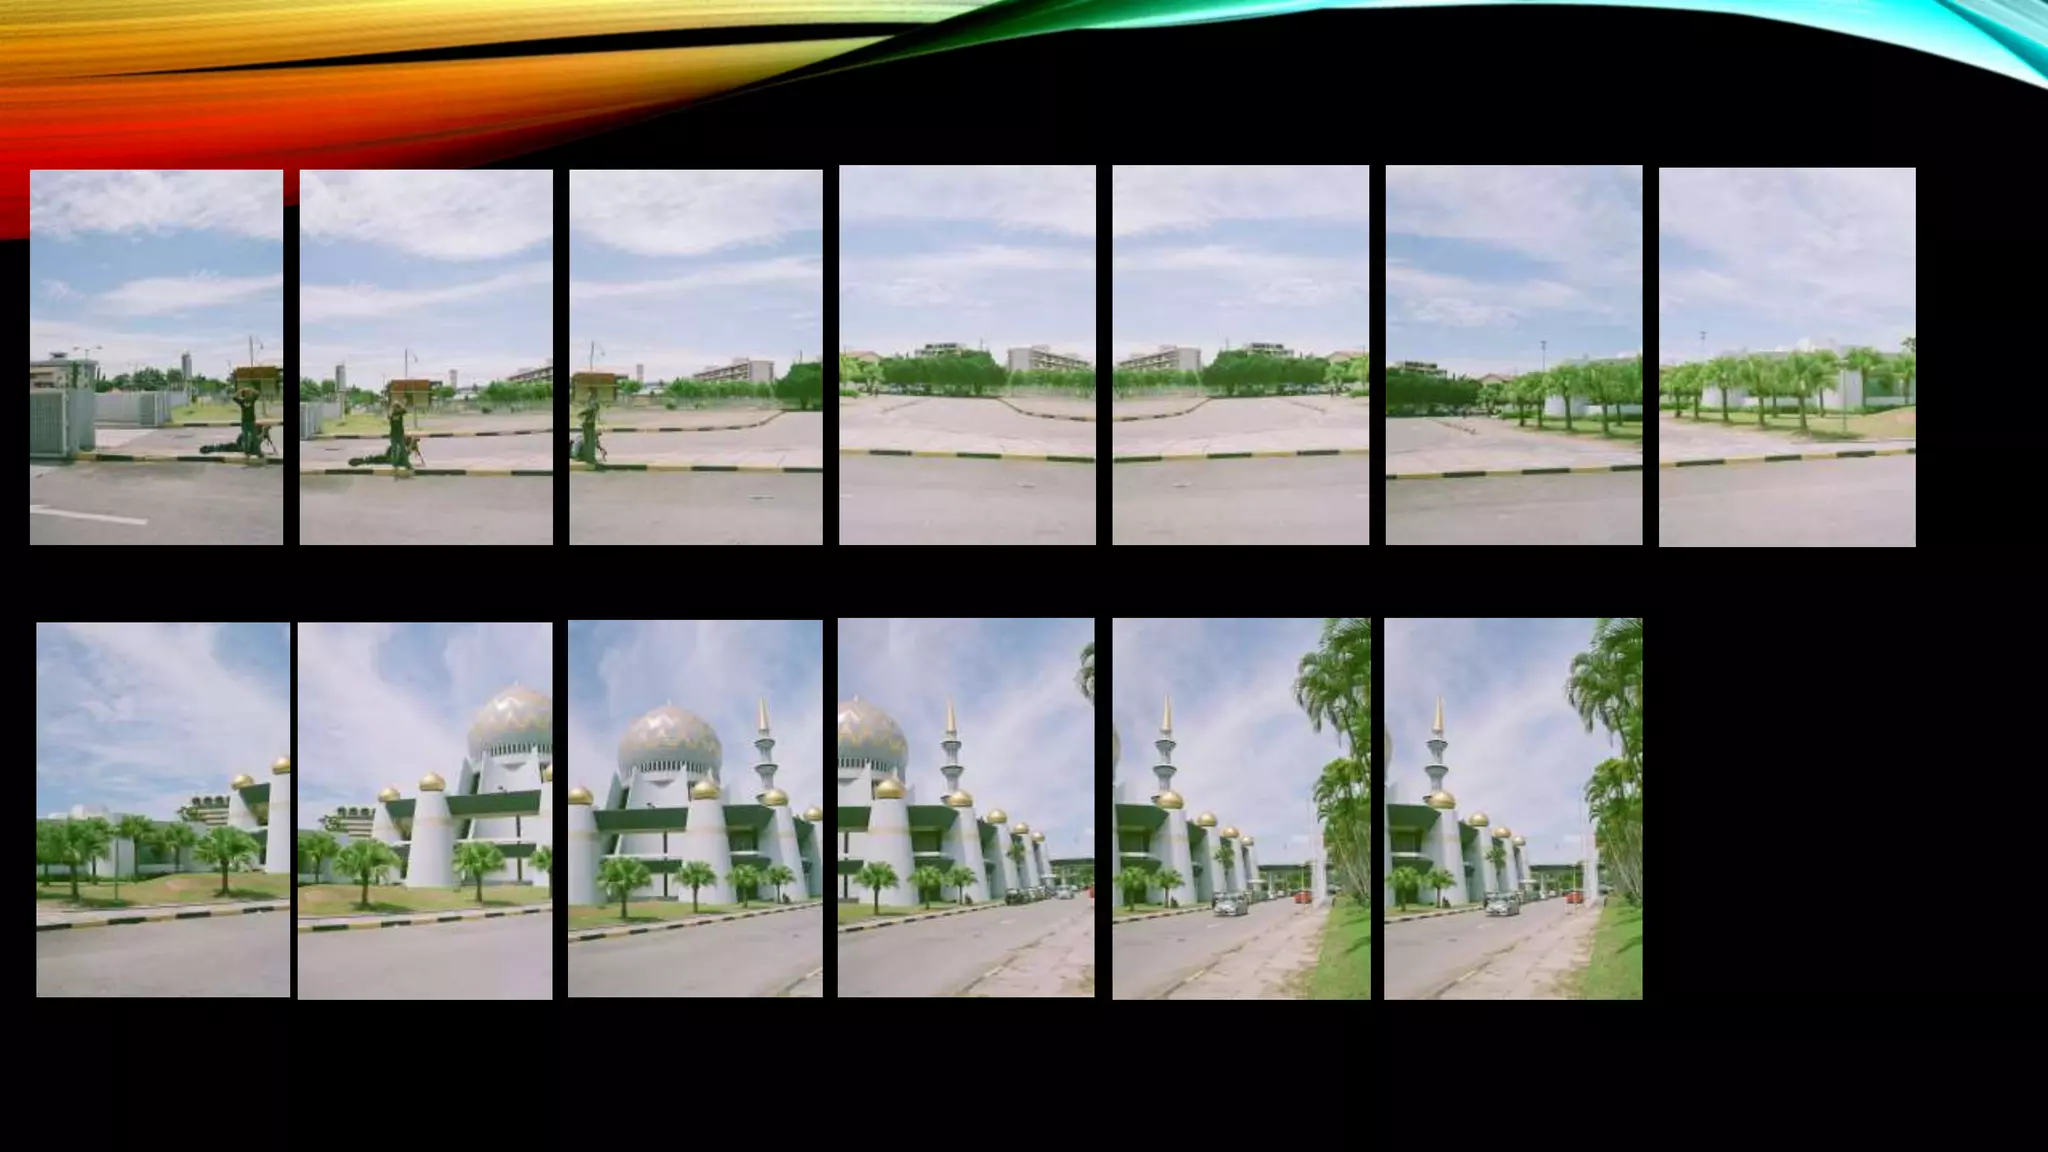
IMAGE COMPOSITION 
Yahaya Lawal
DEFINITION OF COMPOSITION 
Composition has been defined as a laying of comparative 
objects and elements in an artwork ( www.photographylife.com). 
DEFINITION OF COMPOSITION IN PHOTOGRAPHY 
This can be described as placing essentials or features within a 
photograph in a way that fits the central idea or target of your 
work 
(www.digitalcameraworld.com). 
GOOD COMPOSTION 
Good composition has been defined as the careful selection and arrangement 
of the photo’s subject matter within a frame (Busch: 2009)
EXAMPLE OF A GOOD COMPOSITION
It is a fact that best pictures are not by accident, they are calculated and 
crafted. The following will guide us on how to prepare and apply good 
composition in our photography. They are only guidelines your intelligence will 
tell you when to break the rules. 
• VISUALISING A CONCEPT FOR YOUR PICTURE 
Photo talks. You should decide what your picture will say and also determine 
your audience. Is your photo communicating emotions: happiness, sorrow, 
mourning, sympathy, pains or a pathetic situation.
PHOTO TALKS
It is significant to remember where the image will be used. If it is for display you 
need to have tight composition for adequate sharpness and should be framed 
And enlarged. If it is on the web page, you need to move back a little, you can crop it later. 
Another essential factor is for who is the photo: family, friends, colleagues, etc 
SELECTING A SUBJECT AND A CENTRE OF INTEREST 
You should not leave your viewers in limbo or confused on what is your soul 
intention or focal point. Every picture must have one strong Mecca. Do not 
include everything, rather narrow down your subject matter by eliminating all the 
unwanted object, cropping or excusing them to leave. Choose one main subject 
and allow the other interesting secondary subject to appear.
SIMPLICTY / CENTER OF INTEREST 
CHOOSE ONE MAIN CENTER OF INTEREST 
Some of the prominent compositional techniques to have centre of interest are 
as follow: 
Most prominent should be your center of interest : you may think that Sister Hafsat 
should be pictured but if she stands in front of a latest car in town, she can hardly be 
noticed.
SINGLE CENTER OF INTEREST 
Center of interest should be the brightest object or should not be conquered by 
a brighter object. Dazzling background and reflections should not distract 
viewers from your core subject.
SUBJECT SHOULD NOT ALWAYS BE IN THE MIDDLE 
Avoid placing your center of interest always at the at the center of the picture 
do not use the literal meaning of the word center every time
USING SECONDARY SUBJECT 
Presenting multiple center of interest is confusing. If a picture has many 
important subjects just include secondary objects that enrich the photo. 
Secondary objects can be identified through: brightness, location, and sharpness 
( by editing).
One of the essential basics of composition is appropriate arrangement of subjects within 
a frame. It matters seriously: where subjects are facing and where they are placed. 
The most important arrangement is selection of the subject’s distance. 
Choosing Subject Distance: Distance selection should not be permanent, it should be 
reviewed according to the situation demands. The following are ways to select subject 
distance: 
 Use wide –angle lens or move back to create the feeling of space or depth. 
 Your subject should not be appear too small. 
For pictures that stress a person, group or object move as close as possible. 
 Fill in the frame entirely. 
ARRANGING YOUR SUBJECTS
Optimizing Background: Unwanted background is somehow indispensible 
unless if the picture is in the night or somehow. Background can be an 
advantage or disadvantage to you. The following points can help in managing 
Your background. 
Make sure your background is not flamboyant, brightly colored or occupied. 
 Plain background suits portraits. 
 Natural settings such as trees, skies, mountains, waterfalls, etc can make an 
attractive compositional background. 
FRAMING & THE RULE OF THIRDS 
The best position to be assigned to an important subject is usually at one of the 
points located one third of the way from top or bottom and sides of the frame. 
Burch (2009) defined rule of thirds as a process of breaking up your picture 
horizontally and vertically into thirds.
PLACING IMPORTANT OBJECT AT IMAGINARY JUNCTION POINTS 
To stay away from placing your subject at the middle, you can 
stage it at off-center position with the support of imaginary rule of 
thirds. We can do this by: 
 Splitting the frame into thirds horizontally and vertically. 
 Place your center of interest at of the four intersections of the imaginary lines. 
 Do not position your object at the edge of your picture.
RULE OF THIRD
WHEN TO BREAK THE RULE OF THIRDS 
The rule of thirds is just a guide, one can break it rationally. We can neglect the 
rule if: 
 The main object is big enough to occupy one of the imaginary intersection points. 
 Placing the image at the centre will help in demonstrating a concept. 
 If illustrating symmetry. 
BREAKING THE RULE
LEADING LINE AND CURVES 
Your viewers will like to see the subjects arranged interestingly. Lines and 
curves within your image can direct your eyes toward your focal point. Line and 
curves can be in a form of walls, fence, building, roads, falls etc
Putting every subject of interest on one side of the picture leaving little or nothing to look at on the other 
side is making the composition of the photo to be unbalanced. Balancing an image requires that all the 
object that occupy one side should be counterbalanced by other objects on the other side. This is not 
akin to multiple centers of interest. Object can be balanced in two ways: 
 Symmetrical balance: this is where objects of the same size and weight can be placed on both sides. 
 Asymmetrical balance; Here the objects of different sizes and weights are stationed on both the opposing 
sides. 
BALANCING AN IMAGE
BALANCING IMAGE
FRAMING AN IMAGE 
Usually, printed pictures are put in physical frames for some reasons. Border 
delineates the shape of the picture and help to center attention on the image 
Within the frame. We can apply the basic notion on framing to create an 
attractive border within our picture by utilizing the following guidelines: 
 Search for clear framing shapes where you can place your composition, example; doo-ways, windows, 
spaces between building, etc 
 Change position to edge the shot so that the forefront object create a border around your image. 
 Situate your frame in the foreground 
 Use your frame to breed a sense of depth.
FRAMING IMAGE
DEPTH
• As conclusion there a few basic composition which are; 
• Photo Talk 
• Simplicity 
• Rule Of third 
• Breaking the rule 
• Balancing 
• Line 
• Framing 
• Depth
Busch, D.D (2009). Digital Photography, Wiley Publishing, Inc. Canada. 
REFERENCES
THEME AND MOODS 
Mohd Emran Ngadiman 
MP111370
What makes these 
images effective?
CREATING MOOD 
• Overall feel of a picture 
• Created by 
• Perspective 
• Color 
• Focus (isolation and distance) 
• Weather and light 
• Sunrise/sunset 
• Misty, rainy days 
• Sun vs. overcast
CHARACTERISTICS OF A GOOD PHOTO 
• Shape 
• Line 
• Pattern 
• Texture 
• Size and space
SHAPE 
• Tends to be noticed first, before texture and pattern 
• Easiest and most recognizable composition tool 
• Shape helps create a mood/character for the picture 
• Search for the unconventional or surprise shape in 
objects
CREATING SHAPE 
• Common— 
• use backlighting to create a silhouette 
• Uncommon— 
• side lighting with simple background 
• underexpose to focus on shape vs. color or texture
LINE 
• Lines create 
• Shape 
• Pattern 
• Depth 
• Perspective 
• Line leads the eye 
• Focal point/subject 
• Diagonals 
• S-curves
LINE CREATES PERSPECTIVE 
• Lines into the horizon show depth and perspective for the viewer 
• Vanishing point 
• Point at which lines converge and vanish in to the horizon 
• Place off-center 
• Close-ups decrease perspective while wide-angles can exaggerate it
PATTERN 
• Orderly combination of shape, line, or color 
• Pattern can help echo the character of a photo 
• Catching attention 
• Random patterns 
• Slight variation in a pattern 
• Pattern in common places
TEXTURE 
• Adds realism (sense of touch) to a photo 
• Sharp (hard) light highlights texture 
• Especially important for close-up and b/w shots 
• Side lighting highlights texture 
• Most portraits use front lighting to decrease texture on skin
USING LIGHT FOR DEPTH 
• Sometimes hard light is inappropriate for illustrating shape and depth 
• Soft side lighting can give a sense of shape and depth without high contrast 
• Portraits 
• Still life 
• When shape/depth is more important that texture
SIZE AND SPACE 
• 2D pictures distort depth, relative size, and distances 
• Include reference item 
• Include parts of the fore- or background 
• Use a frame 
• Be creative—maybe you want to distort
GIVING PERSPECTIVE 
• Linear—Lines which converge into the distance 
• Diminishing size—objects further away are smaller 
• Aerial perspective—atmosphere creates haze, which lightens objects farther 
away
CUT OFFS 
• Avoiding cutting out parts or wholes of people or main subjects 
• Avoiding cutting out the path of a moving object
Give the object 
somewhere to go
SHOOTING TECHNIQUE 
Ahmad Fathur Rahman bin Hasmiy 
MPP141070
HIGH ANGLE 
High angle from the subject
LOW ANGLE 
Low angle from the subject
EYE LEVEL/NORMAL ANGLE 
Eye level from the subject
PANNING 
• A moving object become static but the background still moving
PANORAMA
SILHOUTE 
• Picture that the background is brighter than the subject and make the 
subject black but people well know what is the subject
ZOOM IN ZOOM OUT 
• We use the bulb setting or slow shutter speed and we zoom our lens
ZOOM OUT
ZOOM IN
CREATIVE LIGHTING SYSTEM 
• We use the flash as a slave them we put out of the camera body
REFLECTION 
• Take the reflection of the object
There is only you and your camera. 
The limitations in your photography are in yourself 
-Ernst Haas
THANK YOU 

Group 4 shooting technique

  • 1.
  • 2.
    DEFINITION OF COMPOSITION Composition has been defined as a laying of comparative objects and elements in an artwork ( www.photographylife.com). DEFINITION OF COMPOSITION IN PHOTOGRAPHY This can be described as placing essentials or features within a photograph in a way that fits the central idea or target of your work (www.digitalcameraworld.com). GOOD COMPOSTION Good composition has been defined as the careful selection and arrangement of the photo’s subject matter within a frame (Busch: 2009)
  • 3.
    EXAMPLE OF AGOOD COMPOSITION
  • 4.
    It is afact that best pictures are not by accident, they are calculated and crafted. The following will guide us on how to prepare and apply good composition in our photography. They are only guidelines your intelligence will tell you when to break the rules. • VISUALISING A CONCEPT FOR YOUR PICTURE Photo talks. You should decide what your picture will say and also determine your audience. Is your photo communicating emotions: happiness, sorrow, mourning, sympathy, pains or a pathetic situation.
  • 5.
  • 6.
    It is significantto remember where the image will be used. If it is for display you need to have tight composition for adequate sharpness and should be framed And enlarged. If it is on the web page, you need to move back a little, you can crop it later. Another essential factor is for who is the photo: family, friends, colleagues, etc SELECTING A SUBJECT AND A CENTRE OF INTEREST You should not leave your viewers in limbo or confused on what is your soul intention or focal point. Every picture must have one strong Mecca. Do not include everything, rather narrow down your subject matter by eliminating all the unwanted object, cropping or excusing them to leave. Choose one main subject and allow the other interesting secondary subject to appear.
  • 7.
    SIMPLICTY / CENTEROF INTEREST CHOOSE ONE MAIN CENTER OF INTEREST Some of the prominent compositional techniques to have centre of interest are as follow: Most prominent should be your center of interest : you may think that Sister Hafsat should be pictured but if she stands in front of a latest car in town, she can hardly be noticed.
  • 11.
    SINGLE CENTER OFINTEREST Center of interest should be the brightest object or should not be conquered by a brighter object. Dazzling background and reflections should not distract viewers from your core subject.
  • 12.
    SUBJECT SHOULD NOTALWAYS BE IN THE MIDDLE Avoid placing your center of interest always at the at the center of the picture do not use the literal meaning of the word center every time
  • 13.
    USING SECONDARY SUBJECT Presenting multiple center of interest is confusing. If a picture has many important subjects just include secondary objects that enrich the photo. Secondary objects can be identified through: brightness, location, and sharpness ( by editing).
  • 14.
    One of theessential basics of composition is appropriate arrangement of subjects within a frame. It matters seriously: where subjects are facing and where they are placed. The most important arrangement is selection of the subject’s distance. Choosing Subject Distance: Distance selection should not be permanent, it should be reviewed according to the situation demands. The following are ways to select subject distance:  Use wide –angle lens or move back to create the feeling of space or depth.  Your subject should not be appear too small. For pictures that stress a person, group or object move as close as possible.  Fill in the frame entirely. ARRANGING YOUR SUBJECTS
  • 15.
    Optimizing Background: Unwantedbackground is somehow indispensible unless if the picture is in the night or somehow. Background can be an advantage or disadvantage to you. The following points can help in managing Your background. Make sure your background is not flamboyant, brightly colored or occupied.  Plain background suits portraits.  Natural settings such as trees, skies, mountains, waterfalls, etc can make an attractive compositional background. FRAMING & THE RULE OF THIRDS The best position to be assigned to an important subject is usually at one of the points located one third of the way from top or bottom and sides of the frame. Burch (2009) defined rule of thirds as a process of breaking up your picture horizontally and vertically into thirds.
  • 16.
    PLACING IMPORTANT OBJECTAT IMAGINARY JUNCTION POINTS To stay away from placing your subject at the middle, you can stage it at off-center position with the support of imaginary rule of thirds. We can do this by:  Splitting the frame into thirds horizontally and vertically.  Place your center of interest at of the four intersections of the imaginary lines.  Do not position your object at the edge of your picture.
  • 17.
  • 18.
    WHEN TO BREAKTHE RULE OF THIRDS The rule of thirds is just a guide, one can break it rationally. We can neglect the rule if:  The main object is big enough to occupy one of the imaginary intersection points.  Placing the image at the centre will help in demonstrating a concept.  If illustrating symmetry. BREAKING THE RULE
  • 19.
    LEADING LINE ANDCURVES Your viewers will like to see the subjects arranged interestingly. Lines and curves within your image can direct your eyes toward your focal point. Line and curves can be in a form of walls, fence, building, roads, falls etc
  • 20.
    Putting every subjectof interest on one side of the picture leaving little or nothing to look at on the other side is making the composition of the photo to be unbalanced. Balancing an image requires that all the object that occupy one side should be counterbalanced by other objects on the other side. This is not akin to multiple centers of interest. Object can be balanced in two ways:  Symmetrical balance: this is where objects of the same size and weight can be placed on both sides.  Asymmetrical balance; Here the objects of different sizes and weights are stationed on both the opposing sides. BALANCING AN IMAGE
  • 21.
  • 22.
    FRAMING AN IMAGE Usually, printed pictures are put in physical frames for some reasons. Border delineates the shape of the picture and help to center attention on the image Within the frame. We can apply the basic notion on framing to create an attractive border within our picture by utilizing the following guidelines:  Search for clear framing shapes where you can place your composition, example; doo-ways, windows, spaces between building, etc  Change position to edge the shot so that the forefront object create a border around your image.  Situate your frame in the foreground  Use your frame to breed a sense of depth.
  • 23.
  • 25.
  • 27.
    • As conclusionthere a few basic composition which are; • Photo Talk • Simplicity • Rule Of third • Breaking the rule • Balancing • Line • Framing • Depth
  • 28.
    Busch, D.D (2009).Digital Photography, Wiley Publishing, Inc. Canada. REFERENCES
  • 29.
    THEME AND MOODS Mohd Emran Ngadiman MP111370
  • 30.
    What makes these images effective?
  • 31.
    CREATING MOOD •Overall feel of a picture • Created by • Perspective • Color • Focus (isolation and distance) • Weather and light • Sunrise/sunset • Misty, rainy days • Sun vs. overcast
  • 32.
    CHARACTERISTICS OF AGOOD PHOTO • Shape • Line • Pattern • Texture • Size and space
  • 33.
    SHAPE • Tendsto be noticed first, before texture and pattern • Easiest and most recognizable composition tool • Shape helps create a mood/character for the picture • Search for the unconventional or surprise shape in objects
  • 34.
    CREATING SHAPE •Common— • use backlighting to create a silhouette • Uncommon— • side lighting with simple background • underexpose to focus on shape vs. color or texture
  • 36.
    LINE • Linescreate • Shape • Pattern • Depth • Perspective • Line leads the eye • Focal point/subject • Diagonals • S-curves
  • 37.
    LINE CREATES PERSPECTIVE • Lines into the horizon show depth and perspective for the viewer • Vanishing point • Point at which lines converge and vanish in to the horizon • Place off-center • Close-ups decrease perspective while wide-angles can exaggerate it
  • 44.
    PATTERN • Orderlycombination of shape, line, or color • Pattern can help echo the character of a photo • Catching attention • Random patterns • Slight variation in a pattern • Pattern in common places
  • 47.
    TEXTURE • Addsrealism (sense of touch) to a photo • Sharp (hard) light highlights texture • Especially important for close-up and b/w shots • Side lighting highlights texture • Most portraits use front lighting to decrease texture on skin
  • 49.
    USING LIGHT FORDEPTH • Sometimes hard light is inappropriate for illustrating shape and depth • Soft side lighting can give a sense of shape and depth without high contrast • Portraits • Still life • When shape/depth is more important that texture
  • 51.
    SIZE AND SPACE • 2D pictures distort depth, relative size, and distances • Include reference item • Include parts of the fore- or background • Use a frame • Be creative—maybe you want to distort
  • 52.
    GIVING PERSPECTIVE •Linear—Lines which converge into the distance • Diminishing size—objects further away are smaller • Aerial perspective—atmosphere creates haze, which lightens objects farther away
  • 53.
    CUT OFFS •Avoiding cutting out parts or wholes of people or main subjects • Avoiding cutting out the path of a moving object
  • 55.
    Give the object somewhere to go
  • 57.
    SHOOTING TECHNIQUE AhmadFathur Rahman bin Hasmiy MPP141070
  • 58.
    HIGH ANGLE Highangle from the subject
  • 61.
    LOW ANGLE Lowangle from the subject
  • 63.
    EYE LEVEL/NORMAL ANGLE Eye level from the subject
  • 66.
    PANNING • Amoving object become static but the background still moving
  • 69.
  • 71.
    SILHOUTE • Picturethat the background is brighter than the subject and make the subject black but people well know what is the subject
  • 74.
    ZOOM IN ZOOMOUT • We use the bulb setting or slow shutter speed and we zoom our lens
  • 76.
  • 77.
  • 78.
    CREATIVE LIGHTING SYSTEM • We use the flash as a slave them we put out of the camera body
  • 82.
    REFLECTION • Takethe reflection of the object
  • 85.
    There is onlyyou and your camera. The limitations in your photography are in yourself -Ernst Haas
  • 86.