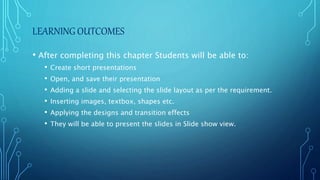
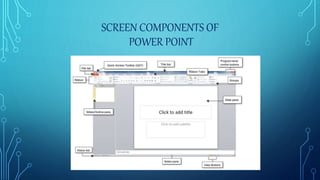
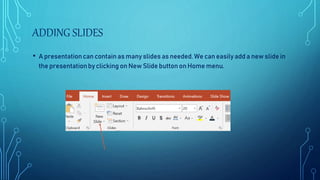
2. INTRODUCTION
•A Presentation is a collection of data and
information that is to be delivered to the
audience. It can be made specific depending
upon the audience.
•A presentation is the collection of electronic
slides that can have text, images, charts,
graphics, sound or video.
3. LEARNING OUTCOMES
• After completing this chapter Students will be able to:
• Create short presentations
• Open, and save their presentation
• Adding a slide and selecting the slide layout as per the requirement.
• Inserting images, textbox, shapes etc.
• Applying the designs and transition effects
• They will be able to present the slides in Slide show view.
5. FIRST SLIDE
• The first slide of the presentationis the Title Slide which shows the title of the
presentation.
6. ADDING SLIDES
• A presentationcan contain as many slides as needed. We can easily add a new slide in
the presentationby clicking on New Slide button on Home menu.
7. SLIDE LAYOUT
• There are options
to choose the
layout of the slide
depending upon
the contents such
as Title slide,
comparison Layout,
Blank etc.
8. SLIDE VIEWS
• Presentation can be viewed in various ways.
• In View tab we can choose the appropriate view for our
presentation such as Normal, Slide Sorter, Notes page, Outline
view and Slide Show view.
• Slide Show view shows the presentation in a full screen mode.
9. INSERTING OBJECTS
• A table can be inserted
in the slide by clicking
on the table option in
Insert menu. A sub
menu is prompted to
specify the number of
rows and columns in
the table.
10. INSERTING PICTURE/AUDIO/VIDEO
• A presentation can be made more effective by adding pictures, audio and videos.
• To insert a picture go to Insert menu and click on Picture button. If you click on the arrow
on the picture button, it gives the option to choose from the device or from the online
pictures.
11. APPLYING THE THEME
• We can apply various themes to the presentation to make it look more interesting
and effective.
• Themes can be applied to a particular slide or the whole presentation.
• To apply theme- click on Design tab-> Click on to chose more designs.
• By default the theme is applied on all the slide unless you specify it to apply on one
slide.
12. SLIDE BACKGROUND
• We can formatthe backgroundof the slides.
• Click the Design Tab to formatthe background.
• Backgroundeffects can be set as solid, gradient,transparentor
Pattern fill.
• The backgroundeffects can be applied to one or a few or all the slides.
13. SLIDE TRANSITION
• Slide transitions are the animation-like effects that happen when you move
from one slide to the next during the slide show. It brings life to the
presentation.
• To add transition effects- Select the slide to which the effect has to be applied -
> Go Transition tab-> Select a transition to see the preview->Select Effect
option to choose the direction and nature of transition.
14. ANIMATION EFFECTS
• Animation effects can be added to text, pictures, shapes, and objects in the
presentation.
• Select the object or text to animate, Select Animations tab and schoose the
effect.
• We can manage the animation effects by choosing the option on Click or by
setting the time.
15. SLIDE SHOW
• The presentation can be viewed in the Slide show view to present it to the audience. The
slide show can be managed by setting the option as Mouse click or by setting the timer
for each slide.
• To manage the slide show click on Slide Show tab-> Choose the Set Up Slide Show.
• F5 Key is the short cut key to play the slideshow.