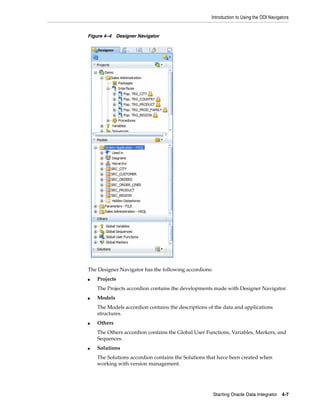
- Oracle Data Integrator is a tool for integrating data between heterogeneous systems and applications. It has components for modeling data, designing interfaces, executing integration processes, and monitoring results.
- The core components include repositories to store metadata, a design studio to create interfaces and mappings, and run-time agents that execute integration processes.
- This guide will help users get started with Oracle Data Integrator by walking through installing the software, exploring an example ETL project, and learning how to design and run integrations.


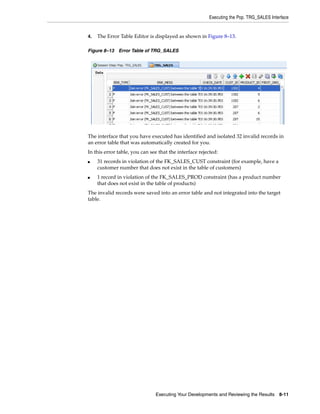
![Starting Oracle Data Integrator Studio
Caution: Do not shut down the databases by using the [CTRL-C]
keyboard shortcut, or by closing their execution windows. This may
leave the source, target, and repository databases in an unstable state.
Always use the stopdemo scripts.
4.2 Starting Oracle Data Integrator Studio
This section describes how to start Oracle Data Integrator Studio.
Note: Before starting ODI Studio, the demonstration environment
must be started as described in Section 4.1, "Starting the
Demonstration Environment".
4.2.1 Starting ODI Studio
In the demonstration environment, the connection to the demonstration repository is
already defined. To perform the tasks of this getting started guide, you only need to
login as SUPERVISOR to start Oracle Data Integrator Studio.
To connect to the demonstration repository and launch ODI Studio:
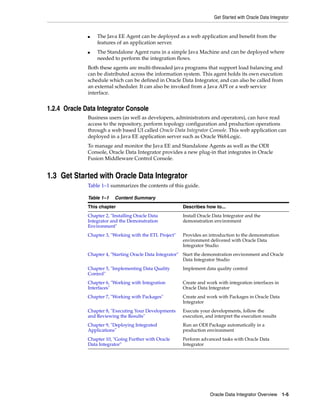
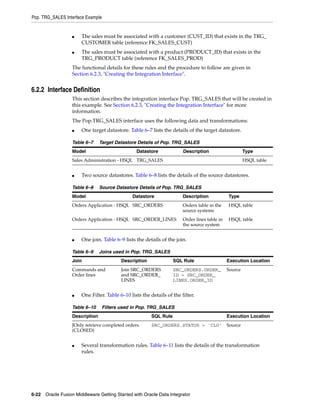
1. Start ODI Studio:
■ On UNIX operating systems:
ODI_HOME/oracledi/client directory/odi.sh
■ On Windows operating systems:
ODI_HOMEoraclediclientodi.exe
Note: On Windows, you can launch ODI Studio from the Start
menu:
On the Start menu, select All Programs > Oracle > Oracle Data
Integrator > ODI Studio.
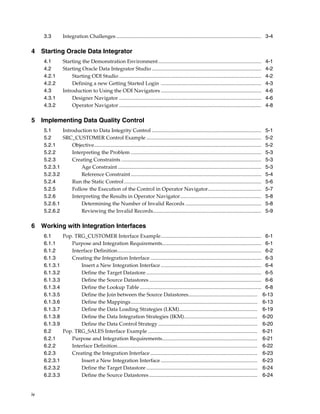
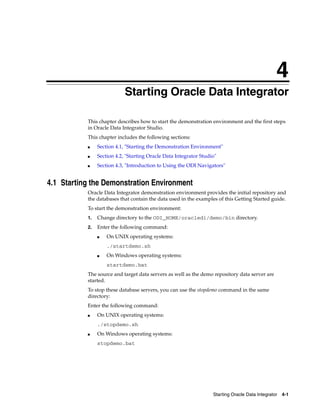
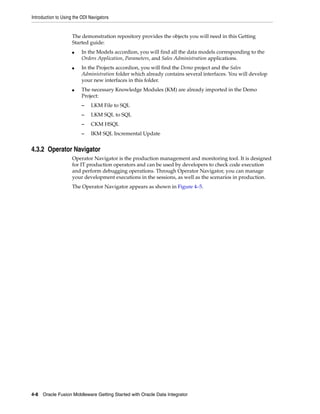
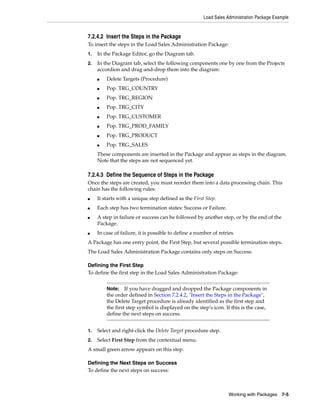
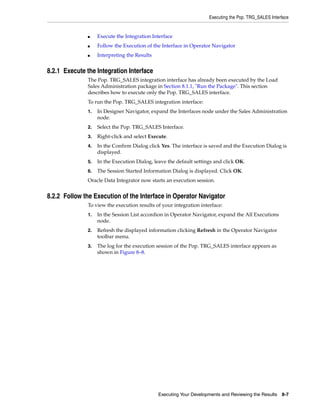
2. In Designer Navigator, click Connect To Repository...
The Oracle Data Integrator Login Dialog is displayed
3. Select Getting Started - ETL Project from the Login Name dropdown menu.
Note: If this Login Name does not exist, go to Section 4.2.2, "Defining
a new Getting Started Login".
4. In the User field, enter SUPERVISOR. Note that the username is case sensitive.
5. In the Password field, enter SUNOPSIS. Note that the password is case sensitive
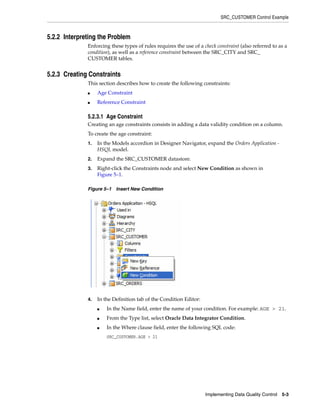
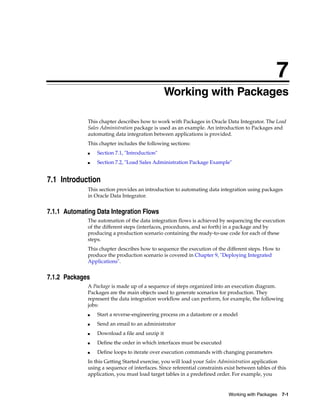
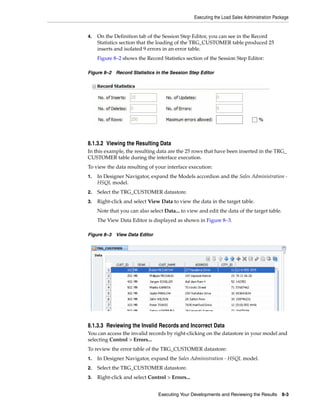
6. The Oracle Data Login Dialog should look as shown in Figure 4–1.
4-2 Oracle Fusion Middleware Getting Started with Oracle Data Integrator](https://image.slidesharecdn.com/gettingstartedwithodi-111104154033-phpapp01/85/Getting-started-with-odi-28-320.jpg)

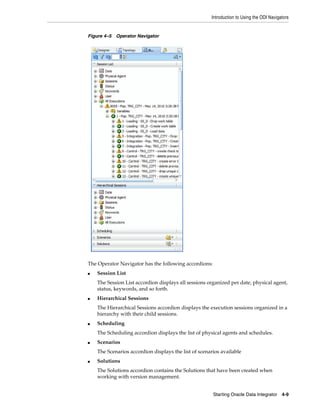

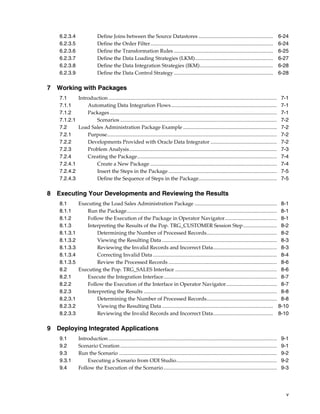
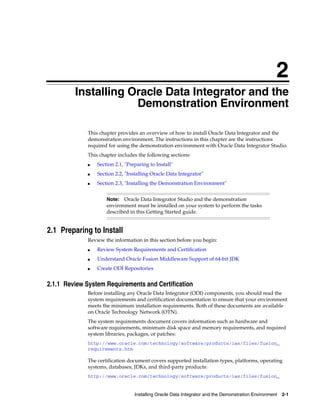
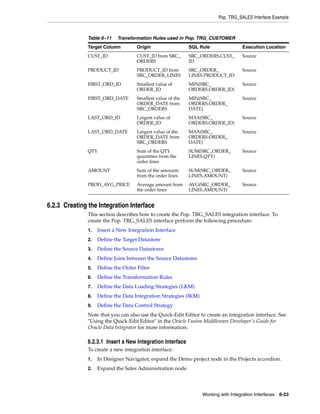
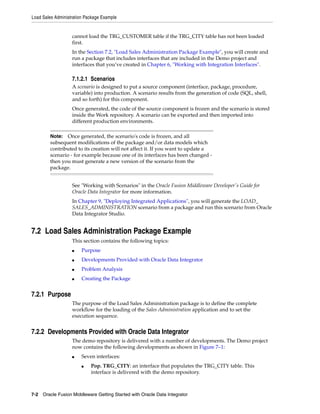
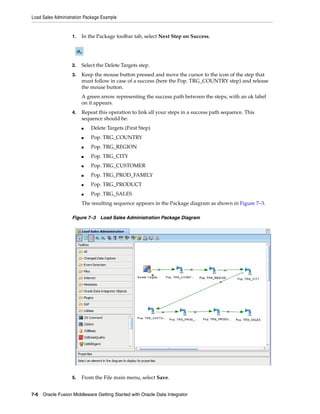
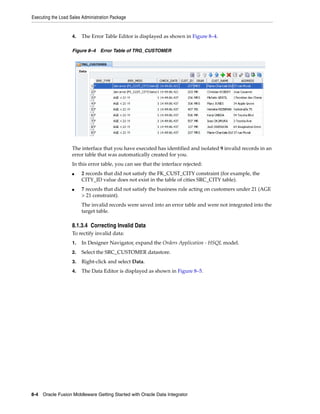
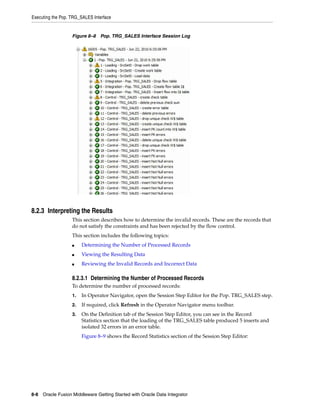
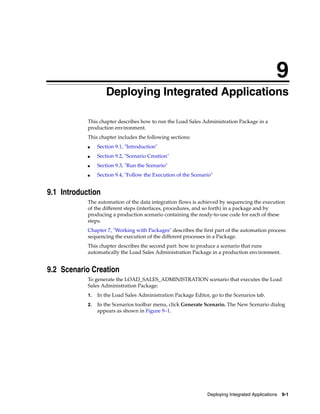
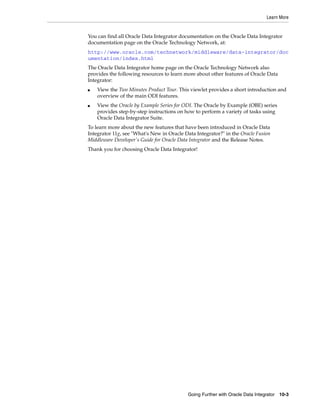
![SRC_CUSTOMER Control Example
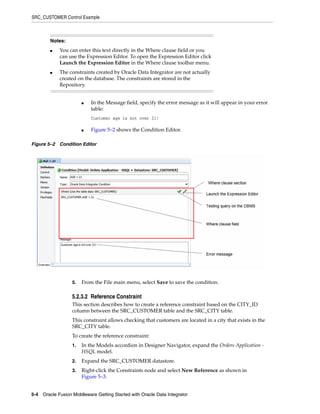
Figure 5–5 Columns tab of the Reference Editor
A new row is inserted in the columns table.
7. In this step you define the matching columns:
■ Click on the row that appears. This will bring up a drop-down list containing
all of the columns in the appropriate table.
■ From the Columns (Foreign Table) list, select CITY_ID.
■ From the Columns (Primary Table) list, select CITY_ID.
Figure 5–6 shows the Columns tab of the Reference Editor with the selected
matching columns.
Figure 5–6 Columns tab of the Reference Editor with matching columns
Note that in this example the Foreign Table is SRC_CUSTOMER and the Primary
Table is SRC_CITY. Note also that it is not required for foreign keys that the
column names of the Foreign Table and the Primary Table match. It just happens
that they do in this example.
8. Select File > Save to save this reference.
Tip: You can alternately use the [CTRL - S] shortcut to save the
current Editor.
5.2.4 Run the Static Control
Running the static control verifies the constraints defined on a datastore. You can now
verify the data in the SRC_CUSTOMER datastore against the constraints defined in
Section 5.2.3, "Creating Constraints".
To run the static control:
1. In the Models accordion in Designer Navigator, right-click the SRC_CUSTOMER
datastore.
2. Select Control > Check.
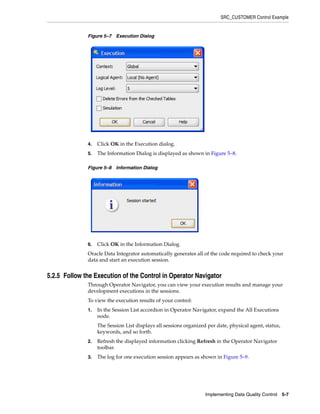
3. The Execution dialog is displayed as shown in Figure 5–7.
5-6 Oracle Fusion Middleware Getting Started with Oracle Data Integrator](https://image.slidesharecdn.com/gettingstartedwithodi-111104154033-phpapp01/85/Getting-started-with-odi-42-320.jpg)


![Getting Started with Apache Spark: Big Data Made Simple [Free Meetup]](https://cdn.slidesharecdn.com/ss_thumbnails/apachesparkgettingstarted-260203175547-8361bcc3-thumbnail.jpg?width=640&height=640&fit=bounds)


