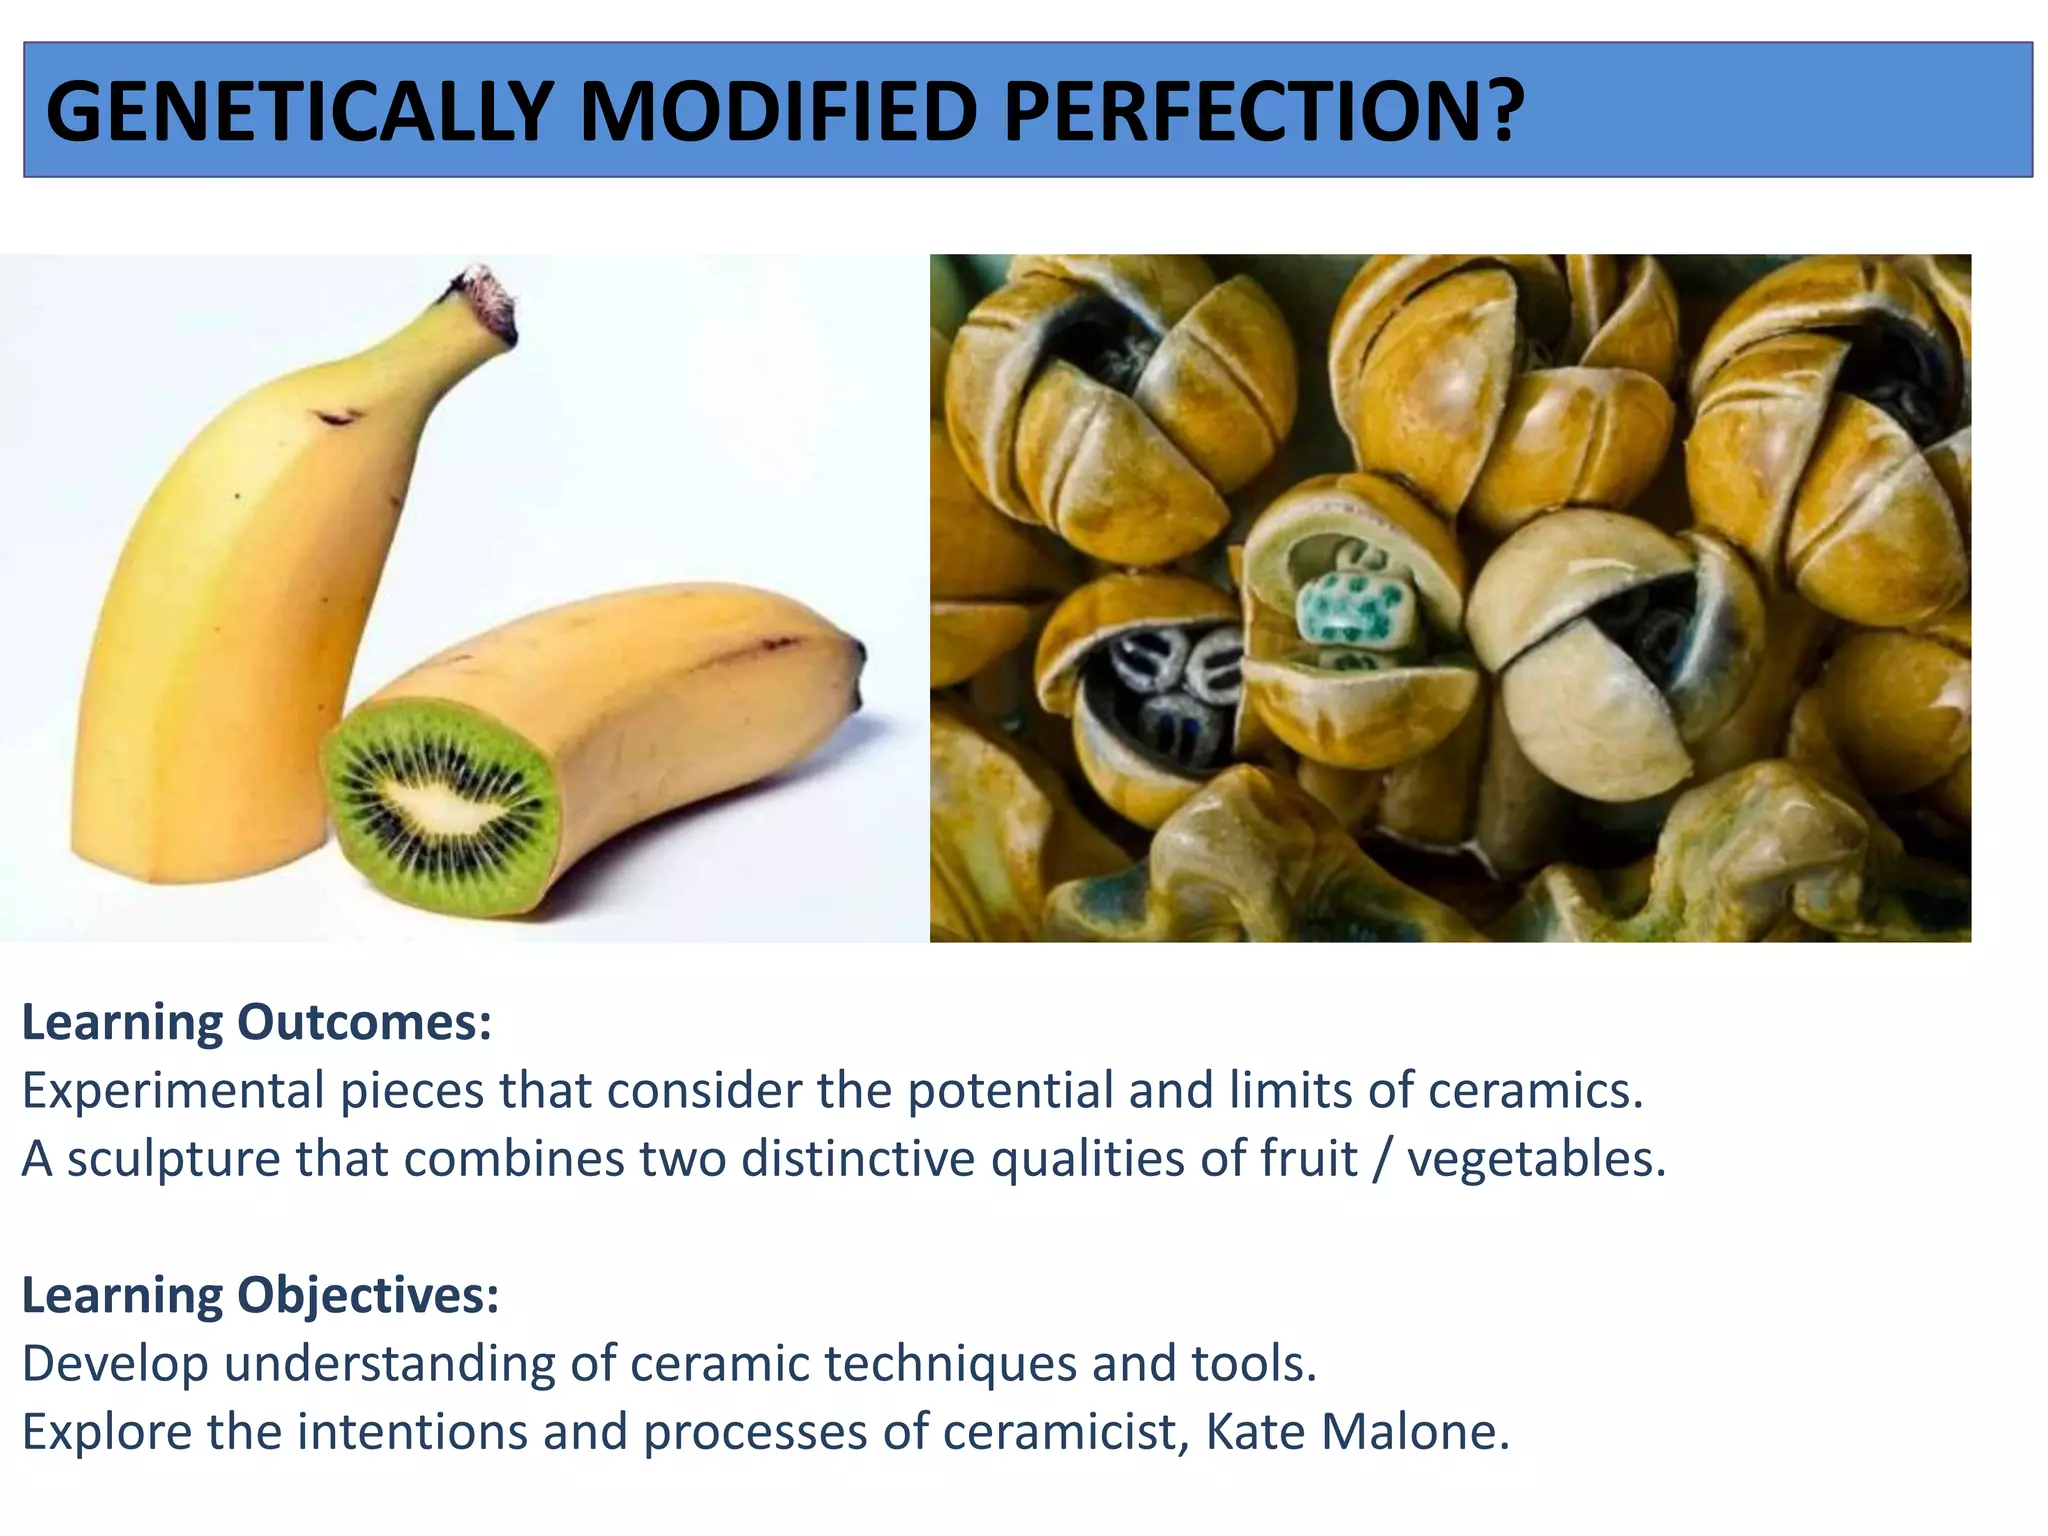
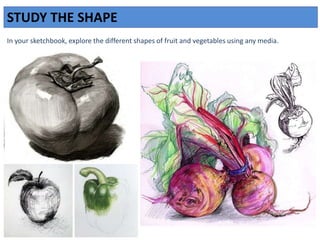
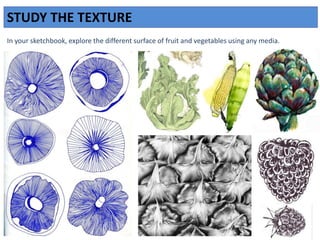
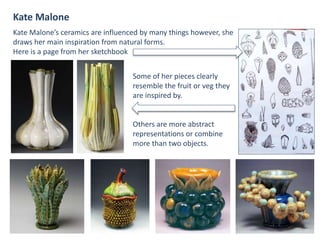
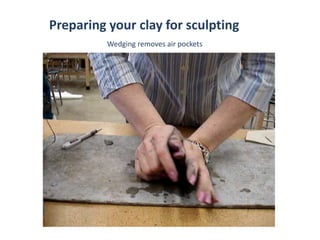
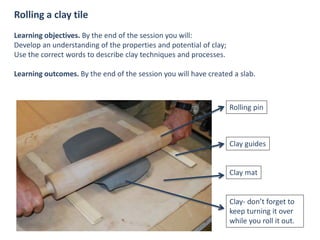
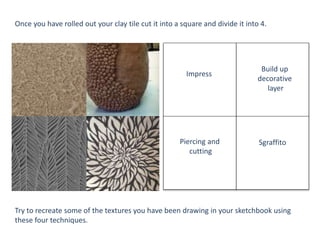
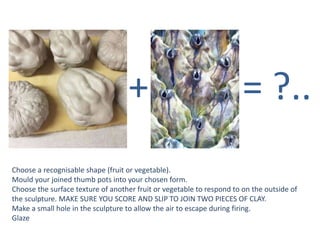
Learning Outcomes:
Experimental pieces that consider the potential and limits of ceramics.
A sculpture that combines two distinctive qualities of fruit / vegetables.
Learning Objectives:
Develop understanding of ceramic techniques and tools.
Explore the intentions and processes of ceramicist, Kate Malone.
GENETICALLY MODIFIED PERFECTION?
STUDY THE SHAPE
In your sketchbook, explore the different shapes of fruit and vegetables using any media.
STUDY THE TEXTURE
In your sketchbook, explore the different surface of fruit and vegetables using any media.
Kate Malone
Kate Malone’s ceramics are influenced by many things however, she
draws her main inspiration from natural forms.
Here is a page from her sketchbook
Some of her pieces clearly
resemble the fruit or veg they
are inspired by.
Others are more abstract
representations or combine
more than two objects.
Preparing your clay for sculpting
Wedging removes air pockets
Rolling a clay tile
Learning objectives. By the end of the session you will:
Develop an understanding of the properties and potential of clay;
Use the correct words to describe clay techniques and processes.
Learning outcomes. By the end of the session you will have created a slab.
Rolling pin
Clay guides
Clay mat
Clay- don’t forget to
keep turning it over
while you roll it out.
Impress
Build up
decorative
layer
SgraffitoPiercing and
cutting
Once you have rolled out your clay tile cut it into a square and divide it into 4.
Try to recreate some of the textures you have been drawing in your sketchbook using
these four techniques.
1. Form two, equal sized balls of clay.
2. Hold ball in left hand and push right thumb into the middle of the ball leaving about 1/4" -
1/2" thickness at the bottom.
3. Slowly and evenly pinch the clay, starting at the bottom rotating the ball, moving toward the
top edge. Leave about 1/4" thickness at edge.
4. Once both pinch pots have been created, score both edges with a tool.
5. Apply slip heavily to one pot.
6. Join pots. They might not fit exactly, this is fine. Slide the back of the thumb from one pot
over seam onto the other.
7. Once the seam is completely sealed, air is trapped like a balloon and the object can be
altered to create desired shape by gently rolling and pressing.
SCULPTURE STARTING POINT
+ = ?..
Choose a recognisable shape (fruit or vegetable).
Mould your joined thumb pots into your chosen form.
Choose the surface texture of another fruit or vegetable to respond to on the outside of
the sculpture. MAKE SURE YOU SCORE AND SLIP TO JOIN TWO PIECES OF CLAY.
Make a small hole in the sculpture to allow the air to escape during firing.
Glaze

Genetically modified perfection

  • 1.
    Learning Outcomes: Experimental piecesthat consider the potential and limits of ceramics. A sculpture that combines two distinctive qualities of fruit / vegetables. Learning Objectives: Develop understanding of ceramic techniques and tools. Explore the intentions and processes of ceramicist, Kate Malone. GENETICALLY MODIFIED PERFECTION?
  • 2.
    STUDY THE SHAPE Inyour sketchbook, explore the different shapes of fruit and vegetables using any media.
  • 3.
    STUDY THE TEXTURE Inyour sketchbook, explore the different surface of fruit and vegetables using any media.
  • 4.
    Kate Malone Kate Malone’sceramics are influenced by many things however, she draws her main inspiration from natural forms. Here is a page from her sketchbook Some of her pieces clearly resemble the fruit or veg they are inspired by. Others are more abstract representations or combine more than two objects.
  • 5.
    Preparing your clayfor sculpting Wedging removes air pockets
  • 6.
    Rolling a claytile Learning objectives. By the end of the session you will: Develop an understanding of the properties and potential of clay; Use the correct words to describe clay techniques and processes. Learning outcomes. By the end of the session you will have created a slab. Rolling pin Clay guides Clay mat Clay- don’t forget to keep turning it over while you roll it out.
  • 7.
    Impress Build up decorative layer SgraffitoPiercing and cutting Onceyou have rolled out your clay tile cut it into a square and divide it into 4. Try to recreate some of the textures you have been drawing in your sketchbook using these four techniques.
  • 8.
    1. Form two,equal sized balls of clay. 2. Hold ball in left hand and push right thumb into the middle of the ball leaving about 1/4" - 1/2" thickness at the bottom. 3. Slowly and evenly pinch the clay, starting at the bottom rotating the ball, moving toward the top edge. Leave about 1/4" thickness at edge. 4. Once both pinch pots have been created, score both edges with a tool. 5. Apply slip heavily to one pot. 6. Join pots. They might not fit exactly, this is fine. Slide the back of the thumb from one pot over seam onto the other. 7. Once the seam is completely sealed, air is trapped like a balloon and the object can be altered to create desired shape by gently rolling and pressing. SCULPTURE STARTING POINT
  • 9.
    + = ?.. Choosea recognisable shape (fruit or vegetable). Mould your joined thumb pots into your chosen form. Choose the surface texture of another fruit or vegetable to respond to on the outside of the sculpture. MAKE SURE YOU SCORE AND SLIP TO JOIN TWO PIECES OF CLAY. Make a small hole in the sculpture to allow the air to escape during firing. Glaze