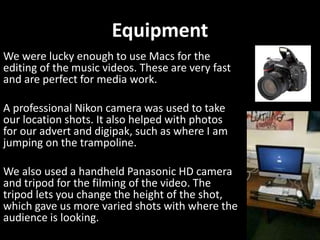
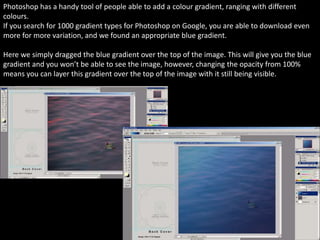
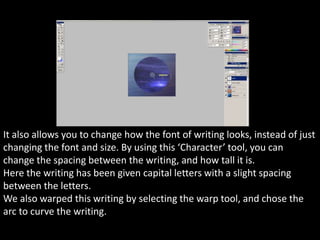
Evaluation 4
How did you use new media
technologies in the construction
and research, planning and
evaluation stages?
Equipment
We were lucky enough to use Macs for the
editing of the music videos. These are very fast
and are perfect for media work.
A professional Nikon camera was used to take
our location shots. It also helped with photos
for our advert and digipak, such as where I am
jumping on the trampoline.
We also used a handheld Panasonic HD camera
and tripod for the filming of the video. The
tripod lets you change the height of the shot,
which gave us more varied shots with where the
audience is looking.
This helped us throughout our entire production of the print
tasks. It enables you to upload pictures and edit these
however you can think. You can change the colour by playing
with the hue and saturation, you can duplicate the image,
crop it, reverse it, add a layer over the top, add edits onto it
and lots more.
Photoshop has a handy tool of people able to add a colour gradient, ranging with different
colours.
If you search for 1000 gradient types for Photoshop on Google, you are able to download even
more for more variation, and we found an appropriate blue gradient.
Here we simply dragged the blue gradient over the top of the image. This will give you the blue
gradient and you won’t be able to see the image, however, changing the opacity from 100%
means you can layer this gradient over the top of the image with it still being visible.
It also allows you to change how the font of writing looks, instead of just
changing the font and size. By using this ‘Character’ tool, you can
change the spacing between the writing, and how tall it is.
Here the writing has been given capital letters with a slight spacing
between the letters.
We also warped this writing by selecting the warp tool, and chose the
arc to curve the writing.
Here you can see where we managed to use
Photoshop with letting the hair look more
natural, and like it is falling through the water.
You can find different psd. tools online and open these it
Photoshop and edit as you wish. We found these hair
samples, and by changing the colour through selecting
iImage-Adjustments-Hue/Saturation, we got the colour to
match the girls hair. We then went to Edit-Transform-Warp,
and this allows you to move around the hair in any direction.
Using the hue/saturation tool again we selected the
layer of the girl and changed the colour of her to a
more blue tone, which fits in with the water look.
We also found some bubble psd. tools online which
you can download as a brush, and then change the
size of this and use. Here is where we played around
with this to see how it looks.
This was another necessity to give our music video the
look it now has.
It has a range of different effects you can use and
different ways you can change a video clip.
We added different clips and could split the clips by
selecting ‘command-B’. This lets you vary the different
lengths.
We also changed the speed of some clips, by choosing
Modify-custom speed, and then changed this varying
from 50-90% depending on how slow we wanted it to be.
One effect we regularly used was adding a
filter effect to the clip. We did this for the
flashback and singing clips, to add a different
look to the video and for the audience to
distinguish a difference in these shots.
This shows the effect ‘Dream’, which you
can select on the right and simply drag over
the clip to achieve this look.
You can also match
the colour on final
cut pro of a different
clip to create the
same look. We did
this when the
weather was slightly
different on different
days of filming. By
selecting a clip and
choosing ‘Match
colour’, and then
selecting the clip you
wish for it to look
like, this changes the
colour slightly to help
the footage flow
better.
Blogger has been the base of my
coursework, helping me to upload any
files and store them in this one place
to see everything. By using Scribd and
Slideshare, they have allowed me to
upload my Word and Powerpoint
documents to share onto my blog.
Survey Monkey has also
been very useful in
collecting information and
audience research, and this
has been uploaded to my
blog. The only problem with
Survey Monkey is that it is
anonymous, which gives the
audience the freedom to
type anything, which might
not be relevant to our
research.
Prezi also allows you to create
different presentations, which I was
able to use for the treatment and
different tasks.
Alchemy is a very creative program which we
were able to download and play around with to
create our record logo with.
What makes alchemy so unique is that no design
will be the same as someone else, as it gives you
the freedom to explore many different colours,
shapes, tools, lines and thicknesses.
Social media sites have also helped with relevant research to
help with the coursework. You can find different pages, see how
many people like these or have viewed these, and also find out
additional information from a large group of people.
Instagram has also allowed me to share my work for anyone to
like and comment which is helpful to see how people react to
these.
YouTube also allowed us to upload our video for anyone to
watch. With the same link we can go back to our video, and see
how many views it has had, as well as any likes/dislikes and
comments.

Evaluation 4

  • 1.
    Evaluation 4 How didyou use new media technologies in the construction and research, planning and evaluation stages?
  • 3.
    Equipment We were luckyenough to use Macs for the editing of the music videos. These are very fast and are perfect for media work. A professional Nikon camera was used to take our location shots. It also helped with photos for our advert and digipak, such as where I am jumping on the trampoline. We also used a handheld Panasonic HD camera and tripod for the filming of the video. The tripod lets you change the height of the shot, which gave us more varied shots with where the audience is looking.
  • 4.
    This helped usthroughout our entire production of the print tasks. It enables you to upload pictures and edit these however you can think. You can change the colour by playing with the hue and saturation, you can duplicate the image, crop it, reverse it, add a layer over the top, add edits onto it and lots more.
  • 5.
    Photoshop has ahandy tool of people able to add a colour gradient, ranging with different colours. If you search for 1000 gradient types for Photoshop on Google, you are able to download even more for more variation, and we found an appropriate blue gradient. Here we simply dragged the blue gradient over the top of the image. This will give you the blue gradient and you won’t be able to see the image, however, changing the opacity from 100% means you can layer this gradient over the top of the image with it still being visible.
  • 6.
    It also allowsyou to change how the font of writing looks, instead of just changing the font and size. By using this ‘Character’ tool, you can change the spacing between the writing, and how tall it is. Here the writing has been given capital letters with a slight spacing between the letters. We also warped this writing by selecting the warp tool, and chose the arc to curve the writing.
  • 7.
    Here you cansee where we managed to use Photoshop with letting the hair look more natural, and like it is falling through the water. You can find different psd. tools online and open these it Photoshop and edit as you wish. We found these hair samples, and by changing the colour through selecting iImage-Adjustments-Hue/Saturation, we got the colour to match the girls hair. We then went to Edit-Transform-Warp, and this allows you to move around the hair in any direction. Using the hue/saturation tool again we selected the layer of the girl and changed the colour of her to a more blue tone, which fits in with the water look. We also found some bubble psd. tools online which you can download as a brush, and then change the size of this and use. Here is where we played around with this to see how it looks.
  • 8.
    This was anothernecessity to give our music video the look it now has. It has a range of different effects you can use and different ways you can change a video clip. We added different clips and could split the clips by selecting ‘command-B’. This lets you vary the different lengths. We also changed the speed of some clips, by choosing Modify-custom speed, and then changed this varying from 50-90% depending on how slow we wanted it to be.
  • 9.
    One effect weregularly used was adding a filter effect to the clip. We did this for the flashback and singing clips, to add a different look to the video and for the audience to distinguish a difference in these shots. This shows the effect ‘Dream’, which you can select on the right and simply drag over the clip to achieve this look. You can also match the colour on final cut pro of a different clip to create the same look. We did this when the weather was slightly different on different days of filming. By selecting a clip and choosing ‘Match colour’, and then selecting the clip you wish for it to look like, this changes the colour slightly to help the footage flow better.
  • 10.
    Blogger has beenthe base of my coursework, helping me to upload any files and store them in this one place to see everything. By using Scribd and Slideshare, they have allowed me to upload my Word and Powerpoint documents to share onto my blog. Survey Monkey has also been very useful in collecting information and audience research, and this has been uploaded to my blog. The only problem with Survey Monkey is that it is anonymous, which gives the audience the freedom to type anything, which might not be relevant to our research. Prezi also allows you to create different presentations, which I was able to use for the treatment and different tasks.
  • 11.
    Alchemy is avery creative program which we were able to download and play around with to create our record logo with. What makes alchemy so unique is that no design will be the same as someone else, as it gives you the freedom to explore many different colours, shapes, tools, lines and thicknesses.
  • 12.
    Social media siteshave also helped with relevant research to help with the coursework. You can find different pages, see how many people like these or have viewed these, and also find out additional information from a large group of people. Instagram has also allowed me to share my work for anyone to like and comment which is helpful to see how people react to these. YouTube also allowed us to upload our video for anyone to watch. With the same link we can go back to our video, and see how many views it has had, as well as any likes/dislikes and comments.