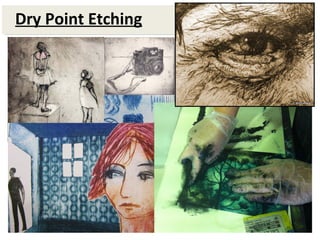
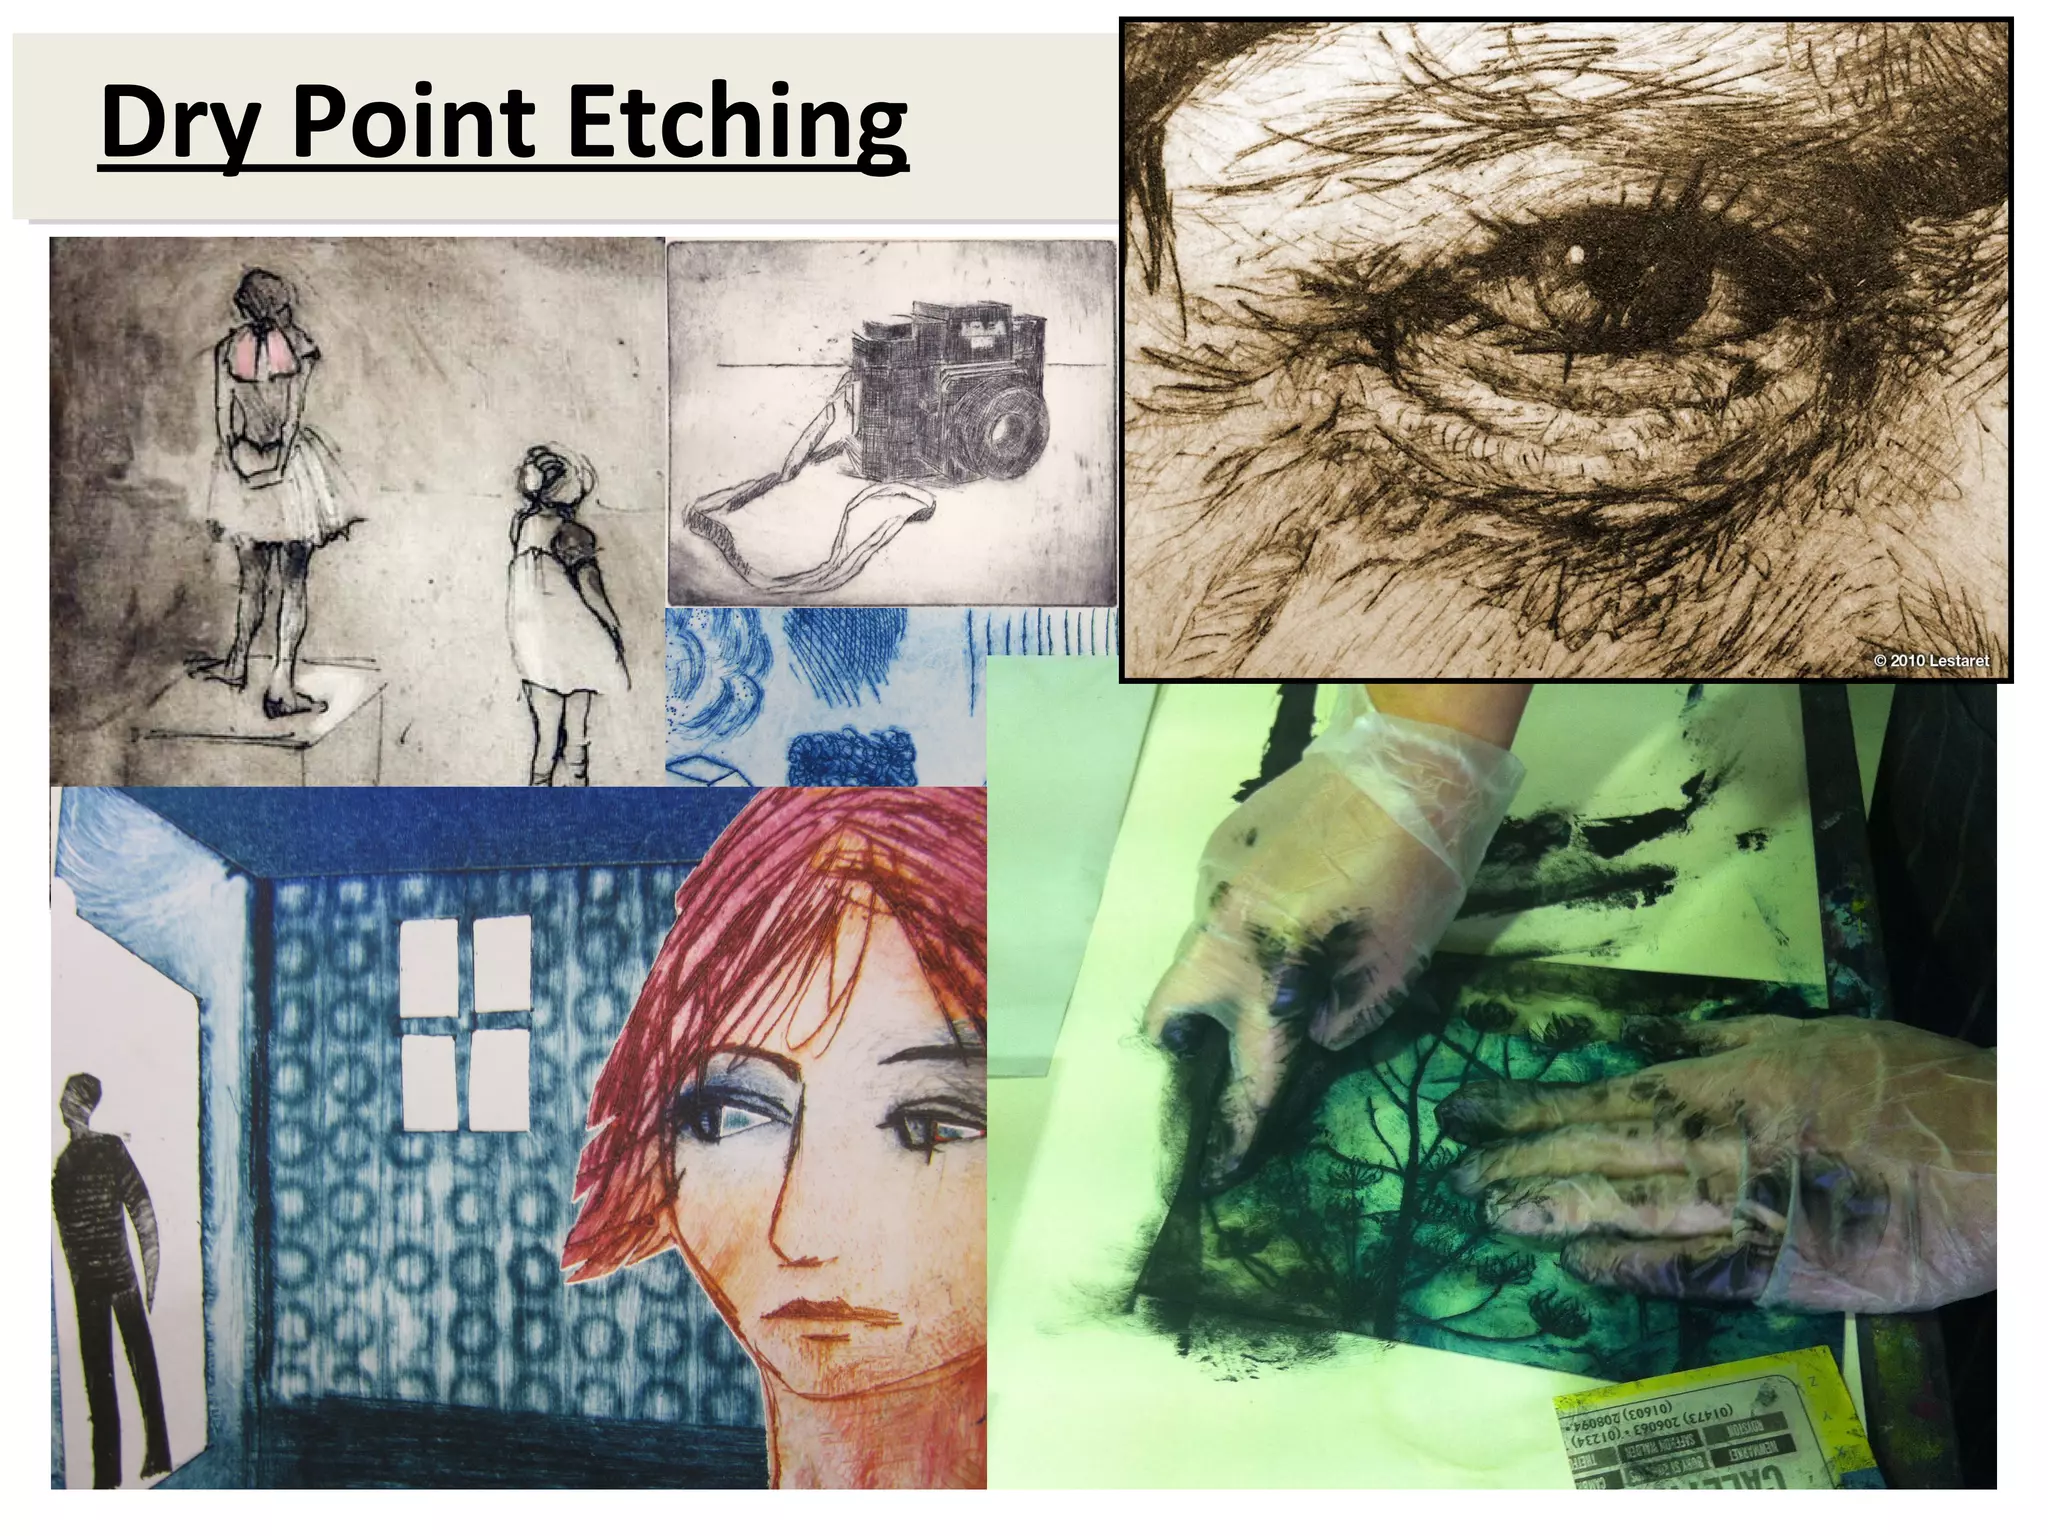
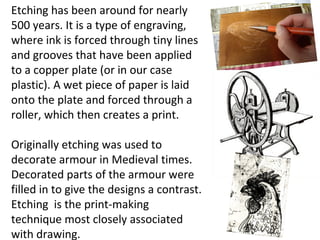
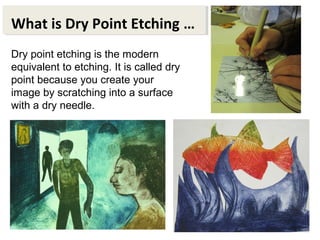
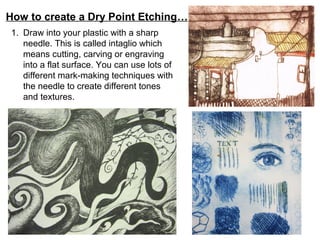
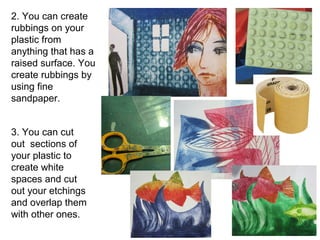
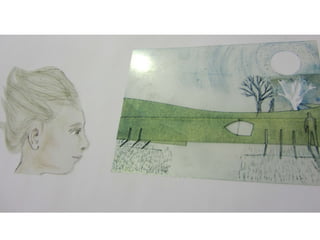
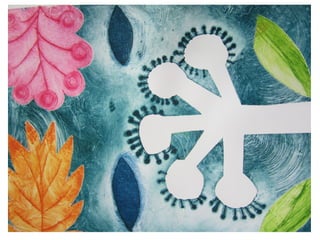
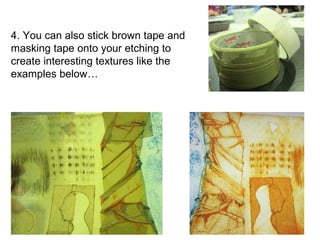
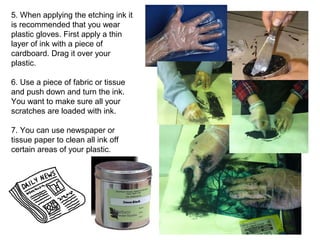
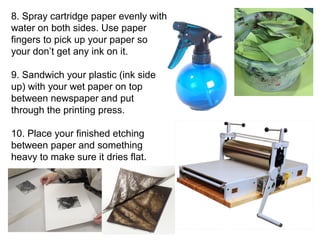
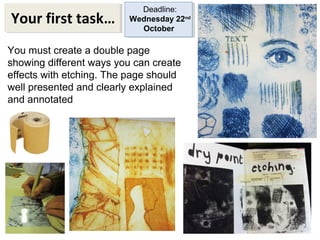
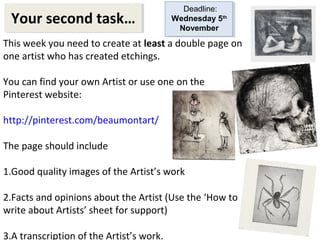
Dry Point Etching
Etching has been around for nearly 
500 years. It is a type of engraving, 
where ink is forced through tiny lines 
and grooves that have been applied 
to a copper plate (or in our case 
plastic). A wet piece of paper is laid 
onto the plate and forced through a 
roller, which then creates a print. 
Originally etching was used to 
decorate armour in Medieval times. 
Decorated parts of the armour were 
filled in to give the designs a contrast. 
Etching is the print-making 
technique most closely associated 
with drawing.
What is Dry Point Etching … 
Dry point etching is the modern 
equivalent to etching. It is called dry 
point because you create your 
image by scratching into a surface 
with a dry needle.
How to create a Dry Point Etching… 
1. Draw into your plastic with a sharp 
needle. This is called intaglio which 
means cutting, carving or engraving 
into a flat surface. You can use lots of 
different mark-making techniques with 
the needle to create different tones 
and textures.
2. You can create 
rubbings on your 
plastic from 
anything that has a 
raised surface. You 
create rubbings by 
using fine 
sandpaper. 
3. You can cut 
out sections of 
your plastic to 
create white 
spaces and cut 
out your etchings 
and overlap them 
with other ones.
4. You can also stick brown tape and 
masking tape onto your etching to 
create interesting textures like the 
examples below…
5. When applying the etching ink it 
is recommended that you wear 
plastic gloves. First apply a thin 
layer of ink with a piece of 
cardboard. Drag it over your 
plastic. 
6. Use a piece of fabric or tissue 
and push down and turn the ink. 
You want to make sure all your 
scratches are loaded with ink. 
7. You can use newspaper or 
tissue paper to clean all ink off 
certain areas of your plastic.
8. Spray cartridge paper evenly with 
water on both sides. Use paper 
fingers to pick up your paper so 
your don’t get any ink on it. 
9. Sandwich your plastic (ink side 
up) with your wet paper on top 
between newspaper and put 
through the printing press. 
10. Place your finished etching 
between paper and something 
heavy to make sure it dries flat.
Your first task… 
Deadline: 
Wednesday 22nd 
October 
You must create a double page 
showing different ways you can create 
effects with etching. The page should 
well presented and clearly explained 
and annotated
Your second task… Deadline: 
This week you need to create at least a double page on 
one artist who has created etchings. 
You can find your own Artist or use one on the 
Pinterest website: 
http://pinterest.com/beaumontart/ 
The page should include 
1.Good quality images of the Artist’s work 
2.Facts and opinions about the Artist (Use the ‘How to 
write about Artists’ sheet for support) 
3.A transcription of the Artist’s work. 
Wednesday 5th 
November

Etching

  • 1.
  • 2.
    Etching has beenaround for nearly 500 years. It is a type of engraving, where ink is forced through tiny lines and grooves that have been applied to a copper plate (or in our case plastic). A wet piece of paper is laid onto the plate and forced through a roller, which then creates a print. Originally etching was used to decorate armour in Medieval times. Decorated parts of the armour were filled in to give the designs a contrast. Etching is the print-making technique most closely associated with drawing.
  • 3.
    What is DryPoint Etching … Dry point etching is the modern equivalent to etching. It is called dry point because you create your image by scratching into a surface with a dry needle.
  • 4.
    How to createa Dry Point Etching… 1. Draw into your plastic with a sharp needle. This is called intaglio which means cutting, carving or engraving into a flat surface. You can use lots of different mark-making techniques with the needle to create different tones and textures.
  • 5.
    2. You cancreate rubbings on your plastic from anything that has a raised surface. You create rubbings by using fine sandpaper. 3. You can cut out sections of your plastic to create white spaces and cut out your etchings and overlap them with other ones.
  • 8.
    4. You canalso stick brown tape and masking tape onto your etching to create interesting textures like the examples below…
  • 9.
    5. When applyingthe etching ink it is recommended that you wear plastic gloves. First apply a thin layer of ink with a piece of cardboard. Drag it over your plastic. 6. Use a piece of fabric or tissue and push down and turn the ink. You want to make sure all your scratches are loaded with ink. 7. You can use newspaper or tissue paper to clean all ink off certain areas of your plastic.
  • 10.
    8. Spray cartridgepaper evenly with water on both sides. Use paper fingers to pick up your paper so your don’t get any ink on it. 9. Sandwich your plastic (ink side up) with your wet paper on top between newspaper and put through the printing press. 10. Place your finished etching between paper and something heavy to make sure it dries flat.
  • 11.
    Your first task… Deadline: Wednesday 22nd October You must create a double page showing different ways you can create effects with etching. The page should well presented and clearly explained and annotated
  • 12.
    Your second task…Deadline: This week you need to create at least a double page on one artist who has created etchings. You can find your own Artist or use one on the Pinterest website: http://pinterest.com/beaumontart/ The page should include 1.Good quality images of the Artist’s work 2.Facts and opinions about the Artist (Use the ‘How to write about Artists’ sheet for support) 3.A transcription of the Artist’s work. Wednesday 5th November