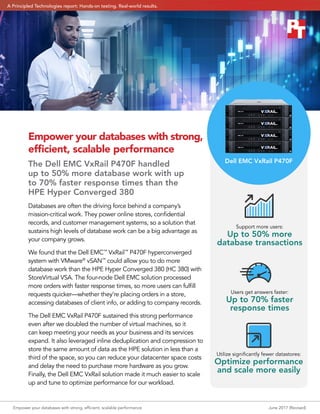
Empower your databases with strong, efficient, scalable performance

Databases power your business, so the performance of the hardware behind your databases is crucial. In our datacenter, the Dell EMC VxRail P470F with VMware vSAN handled more orders per minute, delivered higher IOPS, responded more quickly, and utilized resources more efficiently than the HPE Hyper Converged 380 with HPE StoreVirtual VSA. Plus, scaling up and tuning performance for our specific workload was considerably easier with the Dell EMC VxRail solution than the HPE solution. These differences translate to real-world benefits. With the Dell EMC VxRail solution, you can achieve shorter wait times for customers and staff, which could increase sales and innovation at your company; reduce work for your IT staff, so they can spend more time on other critical tasks; and save space, potentially helping you delay capital expenditures. To find out more about the Dell EMC VxRail P470F, visit DellEMC.com/VxRail.

Recommended
Recommended
More Related Content
What's hot
What's hot (18)
Similar to Empower your databases with strong, efficient, scalable performance
Similar to Empower your databases with strong, efficient, scalable performance (20)
More from Principled Technologies
More from Principled Technologies (20)
Recently uploaded
Recently uploaded (20)
Empower your databases with strong, efficient, scalable performance
- 1. Empower your databases with strong, efficient, scalable performance June 2017 (Revised) Support more users: Up to 50% more database transactions Users get answers faster: Up to 70% faster response times Utilize significantly fewer datastores: Optimize performance and scale more easily Empower your databases with strong, efficient, scalable performance The Dell EMC VxRail P470F handled up to 50% more database work with up to 70% faster response times than the HPE Hyper Converged 380 Databases are often the driving force behind a company’s mission-critical work. They power online stores, confidential records, and customer management systems, so a solution that sustains high levels of database work can be a big advantage as your company grows. We found that the Dell EMC™ VxRail™ P470F hyperconverged system with VMware® vSAN™ could allow you to do more database work than the HPE Hyper Converged 380 (HC 380) with StoreVirtual VSA. The four-node Dell EMC solution processed more orders with faster response times, so more users can fulfill requests quicker—whether they’re placing orders in a store, accessing databases of client info, or adding to company records. The Dell EMC VxRail P470F sustained this strong performance even after we doubled the number of virtual machines, so it can keep meeting your needs as your business and its services expand. It also leveraged inline deduplication and compression to store the same amount of data as the HPE solution in less than a third of the space, so you can reduce your datacenter space costs and delay the need to purchase more hardware as you grow. Finally, the Dell EMC VxRail solution made it much easier to scale up and tune to optimize performance for our workload. Dell EMC VxRail P470F A Principled Technologies report: Hands-on testing. Real-world results.
- 2. Empower your databases with strong, efficient, scalable performance June 2017 (Revised) | 2 Handle more orders with ease If your company relies on databases, you want them to be able to support a large number of simultaneous users. When we tested the two solutions with 0ms think time, the Dell EMC VxRail solution handled 26 percent more orders per minute (OPM) and delivered 19 percent more input/output operations per second (IOPS) than the HPE solution. After we upped the think time to 50ms to simulate a more realistic scenario, the Dell EMC VxRail solution maintained an advantage, delivering 4 percent more OPM and 5 percent more IOPS. (To learn more about think time, see “Think time and why it matters”.) Together, these results show that the Dell EMC VxRail solution can process more database work than the HPE solution in the same amount of time. Depending on your business, you may have staff members relying on databases of constantly changing client information. Or perhaps you’ve got thousands of customers attempting to research and purchase your products. No matter what you use your databases for, when your hardware can handle more hits to your databases, it almost certainly means smoother business operations. Think time and why it matters If DS2 simulates customers shopping in an online store, think time is the amount of time between operations taken by multiple users accessing the store at the same time. We set this metric each time we run a test. A think time of 0 ms gives us the maximum OPM a solution can deliver, making it a useful metric if you want to measure a solution’s highest possible performance. A 0ms think time is virtually impossible in the real world, however, because it is rare to have a long period of time in which one action always follows the previous action instantaneously. For this reason, we also tested with a think time of 50 ms, simulating a more realistic scenario. Though results from this test yielded lower total numbers of OPM and IOPS, they are a more realistic representation of how each solution might perform in the real world. Our test tool: DVD Store 2 To create a real-world database workload, we used DVD Store Version 2.1 (DS2). DS2 models an online store where customers log in, search for products, and make purchases. It reports these actions by showing how many orders per minute the system can handle, which in turn shows you what kind of performance you could expect for your customers. DS2 also performs other actions, such as adding new customers, to exercise the wide range of database functions you might need. To learn more about DS2, see http:// en.community.dell.com/techcenter/extras/w/ wiki/dvd-store. To download DS2, see https:// github.com/dvdstore. The Dell EMC VxRail P470F delivered more orders per minute in every test Orders per minute (OPM) 0 200,000 400,000 600,000 800,000 1,000,000 Dell EMC VxRail P470F HPE HC 380 800,045 631,817 447,194 428,005 50ms think time0ms think time
- 3. Empower your databases with strong, efficient, scalable performance June 2017 (Revised) | 3 Fast response times for your staff and customers For the users accessing your databases, fast response times are key. Customers are likely to leave your site if the pages they’re seeking won’t load, which can directly translate to lost revenue. Slow response times affect your internal operations, too. Want a recipe for a frustrated, unproductive employee? Try forcing them to wait every time they update the database they use throughout each day. The Dell EMC VxRail solution offered up to 69 percent faster response times than the HPE solution (see chart above). In both the 0ms and 50ms think time test scenarios, the Dell EMC VxRail P470F achieved comparable or lower read and write latencies. Users expect an immediate response from their databases—and technology in general—and those fractions of seconds can pile up to make a big difference in user experience and productivity. Defining hyperconverged systems Both of the solutions we tested in this study are hyperconverged systems, which combine servers, storage, and networking into a single hardware stack controlled by software. These space- efficient platforms can break down traditional silos and reduce administrative burden, allowing fewer technical staff members to perform everyday management tasks, which makes them ideal for regional offices or remote locations. Because the entire system is modular and software-controlled, it should require minimal work to scale out by adding more hardware nodes. Latency (ms) (smaller is better) 20 15 10 5 0 Read 3.06 Read 1.74 Read 1.57 Read 4.41 Write 5.57 Write 4.70 Write 11.29 Write 18.29 Dell EMC VxRail P470F HPE HC 380 0ms think time 50ms think time
- 4. Empower your databases with strong, efficient, scalable performance June 2017 (Revised) | 4 Double your workload and maintain strong performance As your business grows and adds new products and services, you may need your database hardware to handle more work while continuing to offer a great experience for customers. Ideally, you want your solution to scale performance linearly; if your solution can handle only a little more work after you increase its workload, it’s a bad sign for the solution’s ability to handle your company’s work moving forward. To see how the solutions dealt with an expanded workload, we doubled the VM count from 18 to 36 VMs on both solutions, keeping think time at 50 ms to simulate a more real-world experience. Both solutions were able to do more work, but the performance of the Dell EMC VxRail P470F jumped dramatically, reaching close to linear scaling, while that of the HPE solution rose a comparatively small amount. The Dell EMC VxRail solution’s advantage was most pronounced in this scenario. It handled 50 percent more orders and 22 percent more IOPS than the HPE solution. This proves that even as you increase the load on the Dell EMC VxRail, it can continue making quick work of your database requests. It also maintained its advantage in response times, offering up to 70 percent faster response times than the HPE solution. Though latencies were higher than they were in our tests with 18 VMs, both read and write latencies consistently remained under 10 ms for the Dell EMC VxRail solution. The HPE solution’s response times, on the other hand, were over 10 ms for both read and write, with write latencies reaching over 30 ms. If you’re trying to give your users a smooth, positive shopping and working experience, slow response times get in the way. Dell EMC VxRail P470F HPE HC 380 Latency (ms) (smaller is better) 0 10 5 20 25 30 35 15 Read 3.74 Read 12.24 Write 9.01 Write 30.26 Dell EMC VxRail P470F HPE HC 380 Orders per minute (OPM) 0 200,000 400,000 600,000 800,000 1,000,000 806,038 536,814
- 5. Empower your databases with strong, efficient, scalable performance June 2017 (Revised) | 5 Tune to optimize performance and scale your environment more easily When you set up a new solution in your datacenter, tuning and optimizing for your specific workload needs is essential. Our experience tuning the Dell EMC VxRail solution was straightforward. We checked a box to enable inline deduplication and compression, and while creating a VM, we created a storage policy to apply to each VM’s virtual disks. With only these tuning steps, the Dell EMC VxRail solution delivered consistently strong performance in terms of OPM, IOPS, and latency. We had a similarly positive experience scaling up from 18 to 36 VMs with the Dell EMC VxRail P470F. We simply cloned out 18 more VMs without encountering any problems. The HPE solution, in contrast, was extremely challenging to optimize and scale. HPE best practices recommend creating more LUNs if you encounter performance issues—and initially, we did find unusual performance problems, such as high queue and kernel latencies in esxtop. Therefore, in order to tune it for ideal performance, we needed to create a LUN for each data and log VMDK in the HPE StoreVirtual management console, rescan the cluster’s storage in VMware vCenter® for new devices, and create a datastore from each newly discovered device. All in all, we had to create 86 datastores for the HPE solution, while with the VxRail P470F, we could simply rely on the single datastore pre-configured with the solution. (Note that the exact number of necessary datastores for the HPE solution may vary depending on your workload and performance needs.) Only after all these steps did we achieve the best performance we could coax from the HPE solution—which was still lower than that of the Dell EMC VxRail solution on every metric we tested. Similarly, when scaling up to 36 VMs, we had to go back and repeat the same process of creating LUNs for each data and log VMDK. Due to the increased number of VMs, we immediately ran out of available iSCSI connections in VMware vCenter, so we had to find another solution. After reconfiguring the solution by placing all the OS VMDKs into one LUN’s datastore and all of the TempDB VMDKs into another LUN’s datastore, we freed up the necessary iSCSI connections. All of this work required valuable time and effort, which we didn’t have to expend with the Dell EMC VxRail solution. Many users trust the products they purchase to function well right out of the box. If they need to run through a long, tedious series of steps to achieve good performance or scale up their workloads, the extra work costs the company time and money.
- 6. Empower your databases with strong, efficient, scalable performance June 2017 (Revised) | 6 Utilize resources more effectively Datacenter space is limited and costly, so your business directly benefits from more efficient hardware. The more work your hardware can do and the more data it can store in the space it is allocated, the less you spend on datacenter space and cooling—and the longer you can wait before needing to purchase new hardware and expand your datacenter. Both solutions we tested were composed of four 2U nodes, taking up a total of 8U of rack space. The Dell EMC VxRail solution, however, consistently offered an inline compression/deduplication ratio of over 2x, meaning that it could store the same amount of data in less than half the space of the HPE solution. When we scaled up to 36 VMs, this ratio reached 3.48x, consolidating the data into less than a third of the space the HPE solution required. Meanwhile, the HPE solution did not offer compression or deduplication features at all. By compressing data and removing duplicate data, the Dell EMC VxRail solution leaves room in your storage for more data as your business grows, allowing you to delay the acquisition of more costly storage arrays. HPE HC 380 Dell EMC VxRail P470F 01000100 01100101 01100100 01110101 01110000 01101100 01101001 01100011 01100001 01110100 01101001 01101111 01101110 00100000 01110010 01100001 01110100 01101001 01101111 01110011 00100000 01110011 01101000 01101111 01110111 00100000 01101000 01101111 01110111 00100000 01101101 01110101 01100011 01101000 00100000 01110011 01110000 01100001 01100011 01100101 00100000 01100001 01101110 00100000 01100001 01110010 01110010 01100001 01111001 00100000 01110011 01100001 01110110 01100101 01110011 00100000 01100010 01111001 00100000 01100101 01101100 01101001 01101101 01101001 01101110 01100001 01110100 01101001 01101110 01100111 00100000 01110010 01100101 01100100 01110101 01101110 01100100 01100001 01101110 01110100 00100000 01100100 01100001 01110100 01100001 00001010 01000100 01100101 01100100 01110101 01000100 01100101 01100100 01110101 01110000 01101100 01101001 01100011 01100001 01110100 01101001 01101111 01101110 00100000 01110010 01100001 01110100 01101001 01101111 01110011 00100000 01110011 01101000 01101111 01110111 00100000 01101000 01101111 01110111 00100000 01101101 01110101 01100011 01101000 00100000 01110011 01110000 01100001 01100011 01100101 00100000 01100001 01101110 00100000 01100001 01110010 01110010 01100001 01111001 00100000 01110011 01100001 01110110 01100101 01110011 00100000 01100010 01111001 00100000 01100101 01101100 01101001 01101101 01101001 01101110 01100001 01110100 01101001 01101110 01100111 00100000 01110010 01100101 01100100 01110101 01101110 01100100 01100001 01101110 01110100 00100000 01100100 01100001 01110100 01100001 00001010 01000100 01100101 01100100 01110101 Actual storage used thanks to deduplication and compression Total storage used according to VMware vSphere The fast, flexible Dell EMC VxRail P470F The Dell EMC VxRail P470F is a single-node, 2U appliance built on Dell EMC PowerEdge™ server technology. When you order your Dell EMC VxRail system, you can choose the specific configuration that fits your needs. The solution we tested utilized four nodes, but as your business needs change, you can link up to 64 nodes. VMware technologies control the entire stack, enabling straightforward management and resource allocation. According to Dell EMC, the VxRail appliance family “are the only hyper-converged infrastructure appliances jointly engineered with VMware.”1 For more information on the Dell EMC VxRail P470F, visit DellEMC.com/VxRail.
- 7. Empower your databases with strong, efficient, scalable performance June 2017 (Revised) | 7 Boost efficiency and give more customers a great experience, today and tomorrow Databases power your business, so the performance of the hardware behind your databases is crucial. In our datacenter, the Dell EMC VxRail P470F with VMware vSAN handled more orders per minute, delivered higher IOPS, responded more quickly, and utilized resources more efficiently than the HPE Hyper Converged 380 with HPE StoreVirtual VSA. Plus, scaling up and tuning performance for our specific workload was considerably easier with the Dell EMC VxRail solution than the HPE solution. These differences translate to real-world benefits. With the Dell EMC VxRail solution, you can achieve shorter wait times for customers and staff, which could increase sales and innovation at your company; reduce work for your IT staff, so they can spend more time on other critical tasks; and save space, potentially helping you delay capital expenditures. To find out more about the Dell EMC VxRail P470F, visit DellEMC.com/VxRail. 1 “Dell Delivers Industry’s Broadest Hyper-converged Infrastructure Portfolio for Flexible, Scalable and Streamlined IT”, accessed June 7, 2017, http://www.dell.com/learn/us/en/uscorp1/press-releas- es/2016-04-05-dell-delivers-industrys-broadest-hci-portfolio
- 8. Empower your databases with strong, efficient, scalable performance June 2017 (Revised) | 8 On March 17, 2017, we finalized the hardware and software configurations we tested. Updates for current and recently released hardware and software appear often, so unavoidably these configurations may not represent the latest versions available when this report appears. We concluded hands-on testing on May 15, 2017. Appendix A: Test configuration and benchmark About our Microsoft SQL Server database configuration For the first part of our testing, we set up a mixed workload environment with 18 virtual machines and three different database sizes; six small (25GB) databases, six medium (100GB) databases, and six large (250GB) databases. We created six new small database VMs, installed Microsoft SQL Server® 2016 on the VMs, and configured the VMs with 12 GB of RAM and four vCPUs. Each VM had a 40GB virtual disk, on which we installed Windows Server® 2016 and the database software, and a 10GB virtual disk for TempDB and TempLog files. We then added a 55GB VMDK to each VM to hold the database data files, and a 25GB VMDK to store the database log files. Then, we created six new medium database VMs, installed Microsoft SQL Server 2016 on the VMs, and configured the VMs with 50 GB of RAM and six vCPUs. Each VM had a 40GB virtual disk, on which we installed Windows Server 2016 and the database software, and a 10GB virtual disk for TempDB and TempLog files. We then added a 185GB VMDK to each VM to hold the database data files, and a 40GB VMDK to store the database log files. Then, we created six new large database VMs, installed Microsoft SQL Server 2016 on the VMs, and configured the VMs with 128 GB of RAM and eight vCPUs. Each VM had a 40GB virtual disk, on which we installed Windows Server 2016 and the database software, and a 10GB virtual disk for TempDB and TempLog files. We then added two 220GB VMDKs to each VM to hold the database data files, and one 95GB VMDK to store the database log files. Finally, we used DS2’s data-generation tool to create the initial database schemas. We used database size parameters of 25GB, 100GB, and 250GB in DS2’s workload generator to create approximately 25 GB, 100 GB, and 250 GB of data. We then imported those databases into Microsoft SQL Server VMs to create the indexes. For details, including the DS2 configuration files, see Appendix B. For the scale-up portion of the testing, we doubled the VM count to 36: 12 small 25GB databases, 12 medium 100GB databases, and 12 large 250GB databases. We followed the same procedures to create and configure these virtual machines. The small 25GB database each VMs had 12GB RAM, four vCPUs, a 55GB VMDK to hold the database data files, and a 25GB VMDK to store the database log files. The medium 100GB database VMs each had 50GB RAM, six vCPUs, a 185GB VMDK to hold the database data files, and a 40GB VMDK to store the database log files. The large 250GB database VMs each had 128GB RAM, eight vCPUs, a 220GB VMDK to hold the database data files, and a 95GB VMDK to store the database log files. About Microsoft SQL Server 2016 According to Microsoft, “SQL Server 2016 is the biggest leap forward in Microsoft data platform history. Gain real time insights across your transactional and analytical data with a scalable database platform that has everything built in, from unparalleled in-memory performance, new security innovations and high availability, to advanced analytics that make mission-critical applications intelligent.” Learn more about Microsoft SQL Server 2016 at https://www.microsoft.com/en-us/server-cloud/products/sql-server/.
- 9. Empower your databases with strong, efficient, scalable performance June 2017 (Revised) | 9 Appendix B: System configuration information Server configuration information Dell EMC VxRail P470F (four-node cluster) HPE Hyper Converged 380 (four-node cluster) BIOS name and version Dell EMC VxRail P470F 2.2.5 HP ProLiant System BIOS P89 v2.22 Operating system name and version/build number VMware ESXi™, 6.0.0, 5050593 VMware ESXi, 6.0.0, 3620759 Date of last OS updates/patches applied 03/13/2017 03/15/2017 Power management policy Performance Custom Processor Number of processors 2 2 Vendor and model Intel® Xeon® E5-2699 v4 Intel Xeon E5-2699 v4 Core count (per processor) 22 22 Core frequency (GHz) 2.20 2.20 Stepping 1 1 Memory module(s) Total memory in system (GB) 1536 1536 Number of memory modules 24 24 Vendor and model Hynix HMAA8GL7MMR4N-UH Micron® MTA72ASS8G72LZ-2G3A1PI Size (GB) 64 64 Type PC4-2400T PC4-2400T Speed (MHz) 2,400 2,400 Speed running in the server (MHz) 2,133 2,400 Storage controller Vendor and model Dell HBA330 Mini Smart Array P440ar Controller Cache size (GB) 0 4000 Firmware version 09.17.20.07 4.02 Driver version 10.00.03.00-1OEM.600.0.0.2768847 6.0.0.118-1OEM Local storage (caching tier) Number of drives 3 N/A Drive vendor and model Dell HUSMM1680ASS204 N/A Drive size (GB) 800GB N/A Drive information (speed, interface, type) 12 Gb/s, SAS, SSD N/A Local storage (storage tier) Number of drives 5 8 Drive vendor and model Dell HUSMR1619ASS204 Intel SSD DC S3610 Drive size (GB) 1.92 1.6 Drive information (speed, interface, type) 12 Gb/s, SAS, SSD 6 Gb/s, SATA, SSD
- 10. Empower your databases with strong, efficient, scalable performance June 2017 (Revised) | 10 Server configuration information Dell EMC VxRail P470F (four-node cluster) HPE Hyper Converged 380 (four-node cluster) Network adapter Vendor and model Intel Ethernet 10G X520/I350 HP Ethernet 10Gb 560FLR-SFP+ Number and type of ports 2 x 10 Gb, 2 x 1 Gb 2 x 10 Gb Driver version 17.5.10 1.1200.0 Cooling fans Number of cooling fans 6 6 Power supplies Vendor and model Dell L1100E-S1 HP HSTNS-PL41 Number of power supplies 2 2 Wattage of each (W) 1100 800
- 11. Empower your databases with strong, efficient, scalable performance June 2017 (Revised) | 11 Appendix C: How we tested In our labs, we tested a mixed OLTP workload on the Dell EMC VxRail P470F with VMware VSAN versus the HPE HC380 with HPE StoreVirtual VSA in two different phases. For phase 1, we tested 18 VMs at 0ms think time to stress the storage on each solution. In phase 2, we introduced a small amount of think time to simulate a more real-world situation. We tested our original 18 VMs at 50ms think time and then scaled up the VM count to 36, again testing at 50ms think time. Once our networking checklist was complete, engineers from both Dell EMC and HPE came out to finish the installations. Both hyper- converged systems come with VMware vSphere 6, vCenter 6, and the storage solutions mentioned above pre-installed. We did not make any modifications to the hardware or server OS after the engineers completed the initial setup configuration. After the engineers completed the setup, we created six small SQL Server database VMs, six medium SQL Server database VMs, and six large SQL Server database VMs on each cluster for our testing environment. We ran the DS2 benchmark against the SQL Server VMs and measured OPM, latency, and IOPs for each solution. It is important to note that we originally configured the HC 380 storage to match the VxRail as closely as possible. The VxRail uses VMware VSAN storage, and it is presented to each host in the cluster as one large datastore automatically after the Dell EMC engineer completed the setup. When we configured the HC 380 to match by creating one LUN and datastore, we saw significant KAVG and QAVG latencies in esxtop. To alleviate this latency issue, we created a LUN in HPE StoreVirtual VSA CMC and a corresponding datastore for each VMDK we would need for all 18 VMs. This took significantly more time and steps. When we doubled the VM count to 36 for phase 2, the scale up portion, we ran into the vSphere 6 limit for the maximum number of iSCSI initiator paths (1024). To work around this issue, we consolidated the OS and TempDB LUNs and datastores into two LUNs and datastores large enough to hold all of the OS and TempDB VMDKs. We put each VM’s OS and TempDB VMDK in their respective datastores, and created a new LUN and datastore for each remaining Data and Log VMDK. In our final configuration, we have 12 small SQL Server database VMs, 12 medium SQL Server database VMs, and 12 large SQL Server database VMs. We again ran the DS2 benchmark against the SQL Server VMs and measured OPM, latency, and IOPs for each solution. We used the following steps to configure our environment. Creating the HPE HC 380 StoreVirtual LUNs 1. Log into the vCenter VM with the StoreVirtual CMC. 2. Launch the StoreVirtual CMC program. 3. Log into the storage cluster. 4. In the navigation pane on the left, right-click the storage cluster, and select New Volume. 5. On the basic tab, fill in the Volume Name, Description, and Reported Size fields. 6. Click Assign and Unassign Servers. 7. Select the checkbox next to the server(s) you wish to select, and click OK. 8. Click the Advanced tab. 9. Verify the Data Protection Level is set to Network RAID-10 (2-Way Mirror). 10. Verify the Provisioning is set to Full. 11. Click OK. 12. Repeat steps 4 through 11 for every datastore that you will created. Creating the HPE HC 380 datastores 1. Log into the HC 380 vCenter. 2. Click Hosts and Clusters. 3. In the navigation pane on the left, click the first host in the cluster. 4. Navigate to ManageàStorageàStorage Devices. 5. Rescan the storage to see the newly created LUNs. 6. Repeat steps 3 through 5 for the remaining hosts in the cluster. 7. In the navigation pane on the left, click the cluster. 8. Navigate to Related ObjectsàDatastores. 9. Click the Create New Datastore icon to create a new datastore. 10. On the location tab, click Next. 11. On the Type tab, select VMFS and click Next. 12. On the Name and device selection tab, enter a datastore name. 13. Select a host from the drop-down menu to view the available storage devices. 14. Select the device that corresponds with the correct LUN created by matching the iSCSI initiator and device name.
- 12. Empower your databases with strong, efficient, scalable performance June 2017 (Revised) | 12 15. Click Next. 16. On the Partition Configuration tab, select Use all available partitions. 17. Click Next. 18. Click Finish. Creating the small VMs on the HPE HC 380 We created one small gold image VM for SQL Server using the following steps. 1. In VMware vCenter, navigate to Virtual Machines. 2. To create a new VM, click the icon. 3. Leave Create a new virtual machine selected, and click Next. 4. Enter a name for the virtual machine, and click Next. 5. Place the VM on the cluster, and click Next. 6. Select the desired datastore for the 40GB OS VMDK, and click Next. 7. Select the guest OS as Microsoft Windows Server 2016 (64-bit), and click Next. 8. In the Customize Hardware section, use the following settings: a. Set the vCPU count to 4. b. Set the Memory to 12GB, and check the Reserve all guest memory box. c. Add 1 x 10GB VMDK for TempDB & TempLogs, 1 x 55GB VMDK for data, 1 x 25GB VMDK for log. Set all VMDKs to thick provision eager zeroed. d. Create two additional SCSI controllers, and assign the data VMDK to one and the log VMDK to the other. e. Attach a Windows Server 2016 ISO to the CD/DVD drive. 9. Click Next. 10. Click Finish. Creating the medium VMs on the HPE HC 380 We created one medium gold image VM for SQL Server using the following steps. 1. In VMware vCenter, navigate to Virtual Machines. 2. To create a new VM, click the icon. 3. Leave Create a new virtual machine selected, and click Next. 4. Enter a name for the virtual machine, and click Next. 5. Place the VM on the cluster, and click Next. 6. Select the desired datastore for the 40GB OS VMDK, and click Next. 7. Select the guest OS as Microsoft Windows Server 2016 (64-bit), and click Next. 8. In the Customize Hardware section, use the following settings: a. Set the vCPU count to 6. b. Set the Memory to 50GB, and check the Reserve all guest memory box. c. Add 1 x 10GB VMDK for TempDB & TempLogs, 1 x 185GB VMDK for data, 1 x 40GB VMDK for log. Set all VMDKs to thick provision eager zeroed. d. Create two additional SCSI controllers, and assign the data VMDK to one and the log VMDK to the other. e. Attach a Windows Server 2016 ISO to the CD/DVD drive. 9. Click Next. 10. Click Finish.
- 13. Empower your databases with strong, efficient, scalable performance June 2017 (Revised) | 13 Creating the large VMs on the HPE HC 380 We created one large gold image VM for SQL Server using the following steps. 1. In VMware vCenter, navigate to Virtual Machines. 2. To create a new VM, click the icon. 3. Leave Create a new virtual machine selected, and click Next. 4. Enter a name for the virtual machine, and click Next. 5. Place the VM on the cluster, and click Next. 6. Select the desired datastore for the 40GB OS VMDK, and click Next. 7. Select the guest OS as Microsoft Windows Server 2016 (64-bit), and click Next. 8. In the Customize Hardware section, use the following settings: a. Set the vCPU count to 8. b. Set the Memory to 128GB, and check the Reserve all guest memory box. c. Add 1 x 10GB VMDK for TempDB & TempLogs, 2 x 220GB VMDK for data, 1 x 95GB VMDK for log. Set all VMDKs to thick provision eager zeroed. d. Create three additional SCSI controllers, and assign each data VMDK to one and the log VMDK to the third. e. Attach a Windows Server 2016 ISO to the CD/DVD drive. 9. Click Next. 10. Click Finish. Creating the VM storage policy for the Dell EMC VxRail P470F 1. Click the home drop-down menu, and select Policies and Profiles. 2. Select VM Storage Policies. 3. Click the icon to Create a new VM storage policy. 4. Enter a name, and click Next. 5. Click Next. 6. On the Rule-Set 1 tab, from the Rules based on data services drop-down menu, select VSAN. 7. Click the <Add rule> drop-down menu, and select Number of failures to tolerate. 8. Set the Number of failures to tolerate to 1. 9. Click the <Add rule> drop-down menu, and select Fault tolerance method. 10. Set the Fault tolerance method to RAID-1 (Mirroring) – Performance. 11. Click Next. 12. Click Next. 13. Click Finish. Creating the small VMs on the Dell EMC VxRail P470F We created one small gold image VM for SQL Server using the following steps. 1. In VMware vCenter, navigate to Virtual Machines. 2. To create a new VM, click the icon. 3. Leave Create a new virtual machine selected, and click Next. 4. Enter a name for the virtual machine, and click Next. 5. Place the VM on the cluster, and click Next. 6. Select the desired datastore for the 40GB OS VMDK, and click Next. 7. Select the guest OS as Microsoft Windows Server 2016 (64-bit), and click Next. 8. In the Customize Hardware section, use the following settings: a. Set the vCPU count to 4. b. Set the Memory to 12GB, and check the Reserve all guest memory box. c. Add 1 x 10GB VMDK for TempDB & TempLogs, 1 x 55GB VMDK for data, 1 x 25GB VMDK for log. Set all VMDKs to the VM storage policy previously created. d. Create two additional SCSI controllers, and assign the data VMDK to one and the log VMDK to the other. e. Attach a Windows Server 2016 ISO to the CD/DVD drive. 9. Click Next. 10. Click Finish.
- 14. Empower your databases with strong, efficient, scalable performance June 2017 (Revised) | 14 Creating the medium VMs on the Dell EMC VxRail P470F We created one medium gold image VM for SQL Server using the following steps. 1. In VMware vCenter, navigate to Virtual Machines. 2. To create a new VM, click the icon. 3. Leave Create a new virtual machine selected, and click Next. 4. Enter a name for the virtual machine, and click Next. 5. Place the VM on the cluster, and click Next. 6. Select the desired datastore for the 40GB OS VMDK, and click Next. 7. Select the guest OS as Microsoft Windows Server 2016 (64-bit), and click Next. 8. In the Customize Hardware section, use the following settings: a. Set the vCPU count to 6. b. Set the Memory to 50GB, and check the Reserve all guest memory box. c. Add 1 x 10GB VMDK for TempDB & TempLogs, 1 x 185GB VMDK for data, 1 x 40GB VMDK for log. Set all VMDKs to the VM storage policy previously created. d. Create two additional SCSI controllers, and assign the data VMDK to one and the log VMDK to the other. e. Attach a Windows Server 2016 ISO to the CD/DVD drive. 9. Click Next. 10. Click Finish. Creating the large VMs on the Dell EMC VxRail P470F We created one large gold image VM for SQL Server using the following steps. 1. In VMware vCenter, navigate to Virtual Machines. 2. To create a new VM, click the icon. 3. Leave Create a new virtual machine selected, and click Next. 4. Enter a name for the virtual machine, and click Next. 5. Place the VM on the cluster, and click Next. 6. Select the desired datastore for the 40GB OS VMDK, and click Next. 7. Select the guest OS as Microsoft Windows Server 2016 (64-bit), and click Next. 8. In the Customize Hardware section, use the following settings: a. Set the vCPU count to 8. b. Set the Memory to 128GB, and check the Reserve all guest memory box. c. Add 1 x 10GB VMDK for TempDB & TempLogs, 2 x 220GB VMDK for data, 1 x 95GB VMDK for log. Set all VMDKs to the VM storage policy previously created. d. Create three additional SCSI controllers, and assign each data VMDK to one and the log VMDK to the third. e. Attach a Windows Server 2016 ISO to the CD/DVD drive. 9. Click Next. 10. Click Finish. Installing Windows Server 2016 onto the VMs 1. Attach the Windows Server 2016 ISO to the virtual machine. 2. Open the VM console and start the VM. 3. When prompted to boot from DVD, press any key. 4. When the installation screen appears, leave language, time/currency format, and input method as default, and click Next. 5. Click Install now. 6. When the installation prompts you, enter the product key. 7. Select Windows Server 2016 Datacenter Edition (Server with a GUI), and click Next. 8. Check I accept the license terms, and click Next. 9. Click Custom: Install Windows only (advanced). 10. Select Drive 0 Unallocated Space, and click Next. This starts Windows automatically, and Windows will restart automatically after completing. 11. When the Settings page appears, fill in the Password and Reenter Password fields with the same password. 12. Log in with the password you set up previously.
- 15. Empower your databases with strong, efficient, scalable performance June 2017 (Revised) | 15 Installing SQL Server 2016 1. Attach the installation media ISO for SQL Server 2016 to the VM. 2. Click Run SETUP.EXE. If Autoplay does not begin the installation, navigate to the SQL Server 2016 DVD, and double-click it. 3. In the left pane, click Installation. 4. Click New SQL Server stand-alone installation or add features to an existing installation. 5. Click the checkbox to accept the license terms, and click Next. 6. Click Use Microsoft Update to check for updates, and click Next. 7. To install the setup support files, click Install. 8. If there are no failures displayed, click Next. 9. At the Setup Role screen, choose SQL Server Feature Installation, and click Next. 10. At the Feature Selection screen, select Database Engine Services, Full-Text and Semantic Extractions for Search, Client Tools Connectivity, Client Tools Backwards Compatibility, Management Tools – Basic, and Management Tools – Complete. 11. Click Next. 12. At the Instance configuration screen, leave the default selection of default instance, and click Next. 13. At the Database Engine Configuration screen, select the authentication method you prefer. For our testing purposes, we selected Mixed Mode. 14. Enter and confirm a password for the system administrator account. 15. Click Add Current user. This may take several seconds. 16. Click Next. 17. At the Error and usage reporting screen, click Next. 18. At the Installation Configuration Rules screen, check that there are no failures or relevant warnings, and click Next. 19. At the Ready to Install screen, click Install. 20. Close the installation window. Enabling Lock pages in memory 1. Inside the VM, click Start, type gpedit.msc, and press Enter. 2. In the Local Group Policy Editor, expand Computer ConfigurationàWindows SettingsàSecurity SettingsàLocal Policies. 3. Select User Rights Assignment, and in the right pane, scroll down to Lock pages in memory. 4. Right-click Lock pages in memory, and click Properties. 5. Click Add User or Group, and add your SQL user account. 6. Click OK. Configuring DVD Store 2 Data generation overview We generated the data using the Install.pl script included with DVD Store version 2.1, providing the parameters for our 25GB, 100GB, and 250GB, database sizes and the Microsoft SQL Server 2016 platform. We ran the Install.pl script on a utility system running Linux® . The Install. pl script also generated the database schema. After processing the data generation, we transferred the data files and schema creation files to a Windows-based system running SQL Server 2016. We built the databases in SQL Server 2016, and then performed a full backup. We used that backup file to restore the server between test runs. The only modification we made to the schema creation scripts were the specified file sizes for our database. We explicitly set the file sizes higher than necessary to ensure that no file-growth activity would affect the outputs of the test. Besides this file size modification, the database schema was created and loaded according to the DVD Store documentation. Specifically, we followed the steps below: 1. Generate the data and create the database and file structure using database creation scripts in the DS2 download. Make size modifications specific to your databases and the appropriate changes to drive letters. 2. Transfer the files from the Linux data generation system to a Windows system running SQL Server. 3. Create database tables, stored procedures, and objects using the provided DVD Store scripts. 4. Set the database recovery model to bulk-logged to prevent excess logging. 5. Load the data we generated into the database. For data loading, use the import wizard in SQL Server Management Studio. Where necessary, retain options from the original scripts, such as Enable Identity Insert. 6. Create indices, full-text catalogs, primary keys, and foreign keys using the database-creation scripts. 7. Update statistics on each table according to database-creation scripts, which sample 18 percent of the table data.
- 16. Empower your databases with strong, efficient, scalable performance June 2017 (Revised) | 16 8. On the SQL Server instance, create a ds2user SQL Server login using the following Transact-SQL (T-SQL) script: USE [master] GO CREATE LOGIN [ds2user] WITH PASSWORD=N’’, DEFAULT_DATABASE=[master], DEFAULT_LANGUAGE=[us_english], CHECK_EXPIRATION=OFF, CHECK_POLICY=OFF GO 9. Set the database recovery model back to full. 10. Create the necessary full text index using SQL Server Management Studio. 11. Create a database user and mapped this user to the SQL Server login. 12. Set the compatibility level to 2014. 13. Perform a full backup of the database, which lets you restore the databases to a pristine state relatively quickly between tests. The table below shows our initial file size modifications for the three database sizes. Logical name Filegroup Initial size (MB) Small database Initial size (MB) Medium database Initial size (MB) Large database Database files primary PRIMARY 8 8 8 cust1 DS_CUST_FG 5,144 20,504 50,776 cust2 DS_CUST_FG 5,144 20,504 50,776 cust3 DS_CUST_FG 5,144 20,504 50,776 cust4 DS_CUST_FG 5,144 20,504 50,776 ind1 DS_IND_FG 5,120 15,360 35,840 ind2 DS_IND_FG 5,120 15,360 35,840 ind3 DS_IND_FG 5,120 15,360 35,840 ind4 DS_IND_FG 5,120 15,360 35,840 ds_misc DS_MISC_FG 300 200 392 orders1 DS_ORDERS 3,072 10,028 25,004 orders2 DS_ORDERS 3,072 10,028 25,004 orders3 DS_ORDERS 3,072 10,028 25,004 orders4 DS_ORDERS 3,072 10,028 25,004 Log files ds_log Not applicable 20,480 36,008 90,152
- 17. Empower your databases with strong, efficient, scalable performance June 2017 (Revised) | 17 Configuring the database workload client For our testing, we used a virtual client for the Microsoft SQL Server client. To create this client, we installed Windows Server 2012 R2, assigned a static IP address. Running the DVD Store tests We created a series of batch files, SQL scripts, and shell scripts to automate the complete test cycle. DVD Store outputs an orders-per-minute metric, which is a running average calculated through the test. In this report, we report the last OPM reported by each client/target pair. Each complete test cycle consisted of the following general steps: 1. Clean up prior outputs from the target system and the client driver system. 2. Drop the database from the target. 3. Restore the database on the target. 4. Reboot the target. 5. Wait for a ping response from the server under test and the client system. 6. Let the test server idle for 10 minutes. 7. Start the DVD Store driver on the client. We used the following DVD Store parameters for testing: ds2sqlserverdriver.exe --target=<target_IP> --ramp_rate=10 --run_time=60 --n_threads=32 --db_ size=<25/100/250>GB --think_time=0 --detailed_view=Y --warmup_time=30 --report_rate=1 --csv_output=<drive path> We ran this test three times and took the median run from each solution.
- 18. Empower your databases with strong, efficient, scalable performance June 2017 (Revised) | 18 Appendix D: Pre-installation checklist switch configuration ! Version 9.5(0.1) ! Last configuration change at Mon Apr 3 17:37:57 2017 by admin ! Startup-config last updated at Fri Apr 21 09:19:03 2017 by admin ! boot system stack-unit 0 primary system: A: boot system stack-unit 0 secondary system: B: boot system stack-unit 0 default system: A: boot system gateway 0.0.0.0 ! redundancy auto-synchronize full ! hardware watchdog ! hostname S4810-A ! username admin password 7 297a4f435cb9010182895c1658f993e7 privilege 15 ! stack-unit 0 provision S4810 ! stack-unit 0 stack-group 11 ! interface TenGigabitEthernet 0/0 no ip address mtu 12000 portmode hybrid switchport no shutdown ! interface TenGigabitEthernet 0/1 no ip address mtu 12000 portmode hybrid switchport spanning-tree rstp edge-port no shutdown ! interface TenGigabitEthernet 0/2 no ip address mtu 12000 portmode hybrid switchport spanning-tree rstp edge-port no shutdown ! interface TenGigabitEthernet 0/3 no ip address mtu 12000 portmode hybrid switchport spanning-tree rstp edge-port no shutdown ! interface TenGigabitEthernet 0/4 no ip address mtu 12000 portmode hybrid switchport spanning-tree rstp edge-port no shutdown ! interface TenGigabitEthernet 0/5 no ip address mtu 12000 portmode hybrid
- 19. Empower your databases with strong, efficient, scalable performance June 2017 (Revised) | 19 switchport spanning-tree rstp edge-port no shutdown ! interface TenGigabitEthernet 0/6 no ip address mtu 12000 portmode hybrid switchport spanning-tree rstp edge-port no shutdown ! interface TenGigabitEthernet 0/7 no ip address mtu 12000 portmode hybrid switchport spanning-tree rstp edge-port no shutdown ! interface TenGigabitEthernet 0/8 no ip address mtu 12000 portmode hybrid switchport spanning-tree rstp edge-port no shutdown ! interface TenGigabitEthernet 0/9 no ip address mtu 12000 portmode hybrid switchport spanning-tree rstp edge-port no shutdown ! interface TenGigabitEthernet 0/10 no ip address mtu 12000 portmode hybrid switchport spanning-tree rstp edge-port no shutdown ! interface TenGigabitEthernet 0/11 no ip address mtu 12000 portmode hybrid switchport spanning-tree rstp edge-port no shutdown ! interface TenGigabitEthernet 0/12 no ip address mtu 12000 portmode hybrid switchport spanning-tree rstp edge-port no shutdown ! interface TenGigabitEthernet 0/13 no ip address mtu 12000 portmode hybrid switchport spanning-tree rstp edge-port no shutdown
- 20. Empower your databases with strong, efficient, scalable performance June 2017 (Revised) | 20 ! interface TenGigabitEthernet 0/14 no ip address mtu 12000 portmode hybrid switchport spanning-tree rstp edge-port no shutdown ! interface TenGigabitEthernet 0/15 no ip address mtu 12000 portmode hybrid switchport spanning-tree rstp edge-port no shutdown ! interface TenGigabitEthernet 0/16 no ip address mtu 12000 portmode hybrid switchport spanning-tree rstp edge-port no shutdown ! interface TenGigabitEthernet 0/17 no ip address mtu 12000 portmode hybrid switchport spanning-tree rstp edge-port no shutdown ! interface TenGigabitEthernet 0/18 no ip address mtu 12000 portmode hybrid switchport spanning-tree rstp edge-port no shutdown ! interface TenGigabitEthernet 0/19 no ip address mtu 12000 portmode hybrid switchport spanning-tree rstp edge-port no shutdown ! interface TenGigabitEthernet 0/20 no ip address mtu 12000 portmode hybrid switchport spanning-tree rstp edge-port no shutdown ! interface TenGigabitEthernet 0/21 no ip address mtu 12000 portmode hybrid switchport spanning-tree rstp edge-port no shutdown ! interface TenGigabitEthernet 0/22 no ip address
- 21. Empower your databases with strong, efficient, scalable performance June 2017 (Revised) | 21 mtu 12000 portmode hybrid switchport spanning-tree rstp edge-port no shutdown ! interface TenGigabitEthernet 0/23 no ip address mtu 12000 portmode hybrid switchport spanning-tree rstp edge-port no shutdown ! interface TenGigabitEthernet 0/24 no ip address mtu 12000 portmode hybrid switchport spanning-tree rstp edge-port no shutdown ! interface TenGigabitEthernet 0/25 no ip address mtu 12000 portmode hybrid switchport spanning-tree rstp edge-port no shutdown ! interface TenGigabitEthernet 0/26 no ip address mtu 12000 portmode hybrid switchport spanning-tree rstp edge-port no shutdown ! interface TenGigabitEthernet 0/27 no ip address mtu 12000 portmode hybrid switchport spanning-tree rstp edge-port no shutdown ! interface TenGigabitEthernet 0/28 no ip address mtu 12000 portmode hybrid switchport spanning-tree rstp edge-port no shutdown ! interface TenGigabitEthernet 0/29 no ip address mtu 12000 portmode hybrid switchport spanning-tree rstp edge-port no shutdown ! interface TenGigabitEthernet 0/30 no ip address mtu 12000 portmode hybrid switchport spanning-tree rstp edge-port
- 22. Empower your databases with strong, efficient, scalable performance June 2017 (Revised) | 22 no shutdown ! interface TenGigabitEthernet 0/31 no ip address mtu 12000 portmode hybrid switchport spanning-tree rstp edge-port no shutdown ! interface TenGigabitEthernet 0/32 no ip address mtu 12000 portmode hybrid switchport spanning-tree rstp edge-port no shutdown ! interface TenGigabitEthernet 0/33 no ip address mtu 12000 portmode hybrid switchport spanning-tree rstp edge-port no shutdown ! interface TenGigabitEthernet 0/34 no ip address mtu 12000 portmode hybrid switchport spanning-tree rstp edge-port no shutdown ! interface TenGigabitEthernet 0/35 no ip address mtu 12000 portmode hybrid switchport spanning-tree rstp edge-port no shutdown ! interface TenGigabitEthernet 0/36 no ip address mtu 12000 portmode hybrid switchport spanning-tree rstp edge-port no shutdown ! interface TenGigabitEthernet 0/37 no ip address mtu 12000 portmode hybrid switchport spanning-tree rstp edge-port no shutdown ! interface TenGigabitEthernet 0/38 no ip address mtu 12000 portmode hybrid switchport spanning-tree rstp edge-port no shutdown ! interface TenGigabitEthernet 0/39
- 23. Empower your databases with strong, efficient, scalable performance June 2017 (Revised) | 23 no ip address mtu 12000 portmode hybrid switchport spanning-tree rstp edge-port no shutdown ! interface TenGigabitEthernet 0/40 no ip address mtu 12000 portmode hybrid switchport spanning-tree rstp edge-port no shutdown ! interface TenGigabitEthernet 0/41 no ip address mtu 12000 portmode hybrid switchport spanning-tree rstp edge-port no shutdown ! interface TenGigabitEthernet 0/42 no ip address mtu 12000 portmode hybrid switchport spanning-tree rstp edge-port no shutdown ! interface TenGigabitEthernet 0/43 no ip address mtu 12000 portmode hybrid switchport spanning-tree rstp edge-port no shutdown ! interface fortyGigE 0/48 description ISL to Switch2 no ip address mtu 12000 ! port-channel-protocol LACP port-channel 100 mode active no shutdown ! interface fortyGigE 0/52 no ip address mtu 12000 shutdown ! interface fortyGigE 0/56 description ISL to Switch2 no ip address mtu 12000 ! port-channel-protocol LACP port-channel 100 mode active no shutdown ! interface fortyGigE 0/60 no ip address mtu 12000 shutdown !
- 24. Empower your databases with strong, efficient, scalable performance June 2017 (Revised) | 24 interface ManagementEthernet 0/0 no ip address shutdown ! interface ManagementEthernet 1/0 no shutdown ! interface ManagementEthernet 2/0 no shutdown ! interface ManagementEthernet 3/0 no shutdown ! interface ManagementEthernet 4/0 no shutdown ! interface ManagementEthernet 5/0 no shutdown ! interface ManagementEthernet 6/0 no shutdown ! interface ManagementEthernet 7/0 no shutdown ! interface ManagementEthernet 8/0 no shutdown ! interface ManagementEthernet 9/0 no shutdown ! interface ManagementEthernet 10/0 no shutdown ! interface ManagementEthernet 11/0 no shutdown ! interface Port-channel 100 description ISL to Switch2 no ip address portmode hybrid switchport no shutdown ! interface Vlan 1 !untagged Port-channel 100 ! interface Vlan 10 ip address 10.200.0.6/16 untagged TenGigabitEthernet 0/0-43 no shutdown ! interface Vlan 20 no ip address tagged TenGigabitEthernet 0/1-43 tagged Port-channel 100 shutdown ! interface Vlan 30 no ip address tagged TenGigabitEthernet 0/1-43 tagged Port-channel 100 shutdown ! interface Vlan 40 no ip address tagged TenGigabitEthernet 0/1-43
- 25. Empower your databases with strong, efficient, scalable performance June 2017 (Revised) | 25 Principled Technologies is a registered trademark of Principled Technologies, Inc. All other product names are the trademarks of their respective owners. DISCLAIMER OF WARRANTIES; LIMITATION OF LIABILITY: Principled Technologies, Inc. has made reasonable efforts to ensure the accuracy and validity of its testing, however, Principled Technologies, Inc. specifically disclaims any warranty, expressed or implied, relating to the test results and analysis, their accuracy, completeness or quality, including any implied warranty of fitness for any particular purpose. All persons or entities relying on the results of any testing do so at their own risk, and agree that Principled Technologies, Inc., its employees and its subcontractors shall have no liability whatsoever from any claim of loss or damage on account of any alleged error or defect in any testing procedure or result. In no event shall Principled Technologies, Inc. be liable for indirect, special, incidental, or consequential damages in connection with its testing, even if advised of the possibility of such damages. In no event shall Principled Technologies, Inc.’s liability, including for direct damages, exceed the amounts paid in connection with Principled Technologies, Inc.’s testing. Customer’s sole and exclusive remedies are as set forth herein. This project was commissioned by Dell EMC. Principled Technologies® Facts matter.®Principled Technologies® Facts matter.® tagged Port-channel 100 shutdown ! ip route 0.0.0.0/0 10.200.0.1 ! ip ssh server enable ! ip igmp snooping enable ! protocol lldp ! line console 0 line vty 0 line vty 1 line vty 2 line vty 3 line vty 4 line vty 5 line vty 6 line vty 7 line vty 8 line vty 9 ! reload-type normal-reload ! end