Download as PDF, PPTX

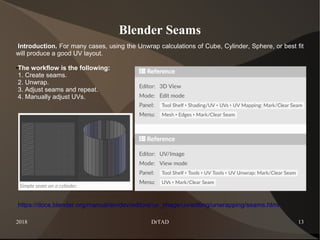


The document is a tutorial on using the Blender software for 3D design, specifically focusing on UV unwrapping techniques. It describes various methods for unwrapping 3D objects, including smart UV project, cylindrical, and spherical mappings, as well as the workflow for preparing UV layouts. Additionally, it discusses the concept of UV mapping and provides practical examples and references to further resources.