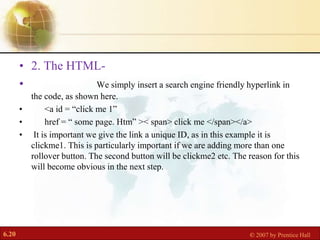
More Related Content
Similar to Dhtml ppt (2) (20)
More from Rai Saheb Bhanwar Singh College Nasrullaganj
More from Rai Saheb Bhanwar Singh College Nasrullaganj (20)
Dhtml ppt (2)
- 2. 6.2 © 2007 by Prentice Hall
.Presentation preparation.
Guided to-
Mr. Sanjay Shinde Sir
- 3. 6.3 © 2007 by Prentice Hall
• Presented by-
• Abhishek meena
• B.sc. 6th sem.(computer science)
• Web Development
- 4. 6.4 © 2007 by Prentice Hall
Topic
•
• DHTML (Dynamic HyperText
Markup Language)
- 5. 6.5 © 2007 by Prentice Hall
• Context-
• 1. DHTML Definition
• 2. Need of HTML
• 3. Various components of DHTML
• 4. Overview of DHTML
• 5. Advantage / Disadvantage of DHTML
• 6. CSS (Cascading Style Sheets)
• 7. DOM( Document Object Model)
• 8. DOM evolution
• 9. HTML & Scripting access
• 10. Rollover buttons
- 6. 6.6 © 2007 by Prentice Hall
• DHTML Definition-
• DHTML is stands for Dynamic HyperText
Markup Language. It is a combination of HTML with CSS and Scripting
language. DHTML is not language. It is a term that is used to describe the
technologies used to make web pages dynamic and interactive.
• According to the World Wide Web Consortium -“Dynamic HTML
is a term used by some vendors to describe the combination of HTML,
style sheets and scripts that allows documents to be animated”.
•
- 7. 6.7 © 2007 by Prentice Hall
Need of DHTML
• DHTML is the combination of several built-in browser features in fourth
generation browsers that enable a web page to be more dynamic. DHTML
is not a scripting language (like JavaScript), but merely a browser feature
or enhancement that gives our browser the ability to be dynamic. What we
really want to learn is not DHTML itself, but rather, the syntax needed to
use DHTML.
•
- 8. 6.8 © 2007 by Prentice Hall
Various components of DHTML
The term DHTML is implies that there is a single magic characteristic that
turns plain HTML into a DHTML page. Actually. DHTML is a
combination of several different browser features that work together to
make web pages more dynamic and interactive.
components into our page to make it dynamic. DHTML components are-
1. HTML
2. CSS(Cascading Style Sheets)
3. DOM(Document Object Model)
4. JavaScript
- 9. 6.9 © 2007 by Prentice Hall
• Overview of DHTML- DHTML stands for Dynamic hypertext
markup language, and it is the most widely used language to write web
pages.
• . Hypertext refers to the way in which web pages (DHTML Document) are
linked together. Thus the link available on a web page are called hypertext.
• . As its name suggests, HTML is a Markup Language which means you
use HTML to simply” Markup “ a text document with tags that tell a web
browsers how to structure it to display.
- 10. 6.10 © 2007 by Prentice Hall
• Advantage of DHTML-
• 1. Quicker Downloads
• 2. No plug-ins required
• 3. Utility
• Disadvantage of DHTML –
• 1. Costly Editing Tools
• 2. Long and complex Coding
• 3. Browsers Support Problem
- 11. 6.11 © 2007 by Prentice Hall
• Cascading Style Sheets-
• . Css brings powerful layout and design capabilities to DHTML .
• . Css provides an efficient way to define universal style.
• . Separation the structure of document form content allows greater
manageability and makes changing the style easier.
• The style sheet start and end with <STYLE>….<STYLE> Tags.
Between those tags we specified all the style attributes.
<STYLE>…..<STYLE> Tags are written within the
<HEAD>…..<HEAD> Tags.
• For Example-
• <STYLE Type= “text/CSS”>
• Tag {attribute: value; attribute: value;}
• </STYLE>
- 12. 6.12 © 2007 by Prentice Hall
• Css evolution-
• . Css was first developed in 1997, as a way for Web developers to define
the look and feel of their Web pages.
• . It was indented to allow develseparate content form design so that HTML
could perform more of the function that it was originally based on- the
markup of content, without worry about the design and layout.
- 13. 6.13 © 2007 by Prentice Hall
• DOM (Document Object Model)-
• . DOM is platform- and language-neutral interface that allow programs and
scripts to dynamically access and manipulate the content, structure and
style of document.
• . DOM chooses OMG IDL to provide language- independent specification
of the DOM interfaces and provide language bindings for Java and
ECMAScript.
• TYPES-
• 1.Legacy DOM
• 2. Intermediate DOM
- 14. 6.14 © 2007 by Prentice Hall
• DOM evolution-
• .Level 0 (Netscape Navigator 3.0 and MS IE 3.0)
• . Level1 ( Oct. 1998)
• Contains functionality for document navigation and manipulation of the
content and structure of DHTML and XML documents.
• . Level 2 (Nov. 2000)
• . Level 3 ( Draft, under development)
- 15. 6.15 © 2007 by Prentice Hall
• HTML & Scripting access-
• . HTML is a markup language. A markup language is a set of markup tags
which used to describe the content of a document. A basic HTML
document contain various HTML tag and plain text. These HTML
documents are also called web page.
• .Scripting access the document demonstrates how to script across the
“embed” element to an embedded SVG documents and it’s scripts in a
cross – browser way. View the document’s (heavily commented ) source to
see how.
- 16. 6.16 © 2007 by Prentice Hall
• HTML Script-
• Nested HTML Element-
• HTML elements can be nested (elements can contain elements)
• All HTML document consist of nested HTML elements .
• This example contains 4 HTML elements:
• Example-
• <!Doctype html>
• <html>
• <body>
• <h1> My First Heading </h1>
• <p> My First Paragraph</P>
• </body>
• </html>
- 17. 6.17 © 2007 by Prentice Hall
.Rollover Button.
• What is rollover button?
• A rollover button provides an eye-pleasing option to your site as an
alternative to a standard hyperlink. When a user hovers their mouse over
the button image it magically changes – a great part trick to impress all
your friends.
• There are a variety of methods for doing this but
we’ are going to show you the cleanest, most browser-friendly option. A
small caveat, however: while this method generally works fine on modern
computers (from the last five years or so), you may find it a little hit-and-
miss on anything older, so be cartious.
- 18. 6.18 © 2007 by Prentice Hall
• There are three aspects to this process:
• 1. Creating the image
• 2. Adding the HTML to the page
• 3. Adding some new style to the CSS file
- 19. 6.19 © 2007 by Prentice Hall
• 1. Creating the image-
• What you need to do is create a single image
that includes your button in its normal state as well as its rollover state, the
final image will be exactly twice the height of the button size.
• For example, if you button
size is 100 pixels wide and 20 pixels high, then the image you are creating
will be 100 pixels wide and 40 pixels high.
- 20. 6.20 © 2007 by Prentice Hall
• 2. The HTML-
• We simply insert a search engine friendly hyperlink in
the code, as shown here.
• <a id = “click me 1”
• href = “ some page. Htm” >< span> click me </span></a>
• It is important we give the link a unique ID, as in this example it is
clickme1. This is particularly important if we are adding more than one
rollover button. The second button will be clickme2 etc. The reason for this
will become obvious in the next step.
- 21. 6.21 © 2007 by Prentice Hall
• 3. Adding the CSS –
• This is where a little bit of CSS magic comes in
to play and transforms our ordinary looking hyperlink into a super
impressive rollover button.
• Add the CSS code shown here to your CSS style file, replacing clickme1
with the ID you have used as well as updating the image file name. If the
image is not stored in the same folder as your CSS file then add the full
URL.
- 22. 6.22 © 2007 by Prentice Hall
• # clickme1
• {
• display: block;
• Width: 100PX;
• height: 20PX;
• Background : URL (“ click me. gif”)
• No- repeat0 0;
• }
• # clickme1 : hover
• {
• Background – position : 0 _ 20px;
• }
• # clickme1 span
• {
• Display : none ;
• }
•
- 23. 6.23 © 2007 by Prentice Hall
• You should also change the “width” and “height” so that its same width
and height as your button.
• Remember that you’ve made your
original image twice as high as your actual button. So your “height”
number should be half the height of your image.
• Lastly, look at the part the refers to
• background – position : 0-20PX;
•
• Substitute – 20 with the number you just used for” height”, with a minus in
front of it. So if the total height of your button is actually 60 pixels and not
40 as we’ve used in our example, then change it to what’s shown here.
- 24. 6.24 © 2007 by Prentice Hall
• background – position : 0-30PX;
• Save the changes to your CSS file.
• That’s it – you are done.