
Recommended
More Related Content
What's hot
What's hot (8)
Viewers also liked
Viewers also liked (20)
Similar to DEFORESTATION
Similar to DEFORESTATION (20)
Recently uploaded
Recently uploaded (20)
DEFORESTATION
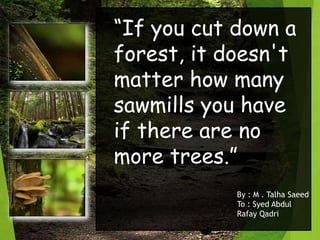
- 1. “If you cut down a forest, it doesn't matter how many sawmills you have if there are no more trees.” By : M . Talha Saeed To : Syed Abdul Rafay Qadri
- 2. • Deforestation is the “action or process of clearing of forests” (Merrium Webster). • Deforestation occurs due to various reasons. Agriculture, urban development, cattle ranching, subsistence farming, logging, and natural disasters such as forest fires, are some of these reasons. • Forests cover about 30-31% of our planet, but 46- 58 thousands of square miles are lost each year to deforestation. To put in perspective that equates to about 36 football fields per minute.
- 3. • Loss of species • Soil Erosion • Humans • Animals • Also affects some cycles: • The water cycle • The oxygen cycle • The carbon cycle
- 4. 0 1 2 3 4 5 6 0 50 100 150 200 Are you satisfied with your government steps to prevent Deforestation ?
- 5. 0 20 40 60 80 100 120 140 no no answer yes no comments Life without forest comments of people
- 6. Satisfactory rate 0 20 40 60 80 100 120 140 160 180 Satisfication Rate of Deforestaion In Current Situation Yes No Series1
- 7. 0 60 30 30 20 26 0 10 20 30 40 50 60 70 Satisfication Rate of Deforestation Over Population Urbanization Agriculture Activity Minning Other Common Effect Of Deforestation
- 8. Reaching the goal of zero net deforestation can be done by: Getting both private and public sectors involved. Including producer, consumer, financiers and local stakeholders in places threatened by deforestation. Reducing emissions from deforestation and forest degradation by getting countries to sign an agreement, in exchange for incentives (as done in the ‘REDD’s program’) Implementing land-use policies, to keep track of who’s using the land Protection and sustainable management of forests Promoting responsible consumption and production of forest-related goods and agricultural commodities. (i.e. reuse, reduce and recycle)
Editor's Notes
- The Forest (Intermediate) To reproduce the background effects on this slide, do the following: On the Design tab, in the bottom right corner of the Background group, click the arrow to launch the Format Background dialog box. In the Format Background dialog box, click Fill in the left pane, under Fill in the right pane select Picture or Texture Fill. Then under Insert From click File. In the left pane of the Insert Picture dialog box, click the drive or library that contains the picture. In the right pane of the dialog box, click the picture (Forest Path) that you want and then click Insert. Close the Format Background dialog box. To reproduce the video effects on this slide, do the following: On the Home tab, in the Slides group, click Layout, and then click Blank. On the Insert tab, in the Media group, click Video, and then click Video from File. In the left pane of the Insert Video dialog box, click the drive or library that contains the video. In the right pane of the dialog box, click the first video that you want and then click Insert. Under Video Tools, on the Format tab in the Size group, click the arrow at the bottom right corner to launch the Format Video dialog box. Select Size in the left pane. Under Scale in the right pane, clear the Lock aspect ratio box, then under Size and Rotate in the right pane, set Height to 1.77” and Width to 2.36”. Also in the Format Video dialog box, select Position in the left pane. Under Position in the right pane, do the following: In the Horizontal box, enter 0.3” From Top Left Corner. In the Vertical box, enter 0.75” From Top Left Corner. Also in the Format Video dialog box, select Border Color in the left pane, and then in the Border Color pane select Solid Line. Click the arrow to the right of Color and under Theme Colors select White, Background 1 (first row, first option). Also in the Format Video dialog box, select Border Style in the left pane, under Border Style in the right pane, in the Width box, enter 0.75”. Also in the Format Video dialog box, select Shadow in the left pane, under Shadow in the right pane do the following: Click the arrow to the right of Color, and under Theme Colors select Black, Text 1 (first row, second option). In the Transparency box, enter 0%. In the Size box, enter 100%. In the Blur box, enter 16 pt. In the Angle box, enter 45 degrees. In the Distance box, enter 6 pt. Close the Format Video dialog box. On the Insert tab, in the Media group, click Video, and then click Video from File. In the left pane of the Insert Video dialog box, click the drive or library that contains the video. In the right pane of the dialog box, click the second video that you want and then click Insert. Under Video Tools, on the Format tab in the Size group, click the arrow at the bottom right corner to launch the Format Video dialog box. Select Size in the left pane. Under Scale in the right pane, clear the Lock aspect ratio box, then under Size and Rotate in the right pane, set Height to 1.77” and Width to 2.36”. Also in the Format Video dialog box, select Position in the left pane, and then in the Position pane, do the following: In the Horizontal box, enter 0.3” From Top Left Corner. In the Vertical box, enter 2.87” From Top Left Corner. Also in the Format Video dialog box, select Border Color in the left pane, and then in the Border Color pane select Solid Line. Click the arrow to the right of Color and under Theme Colors select White, Background 1 (first row, first option). Also in the Format Video dialog box, select Border Style in the left pane. Under Border Style in the right pane, set Width to 0.75”. Also in the Format Video dialog box, select Shadow in the left pane. In the right pane, under Shadow, do the following: Click the arrow to the right of Color and under Theme Colors select Black, Text 1 (first row, second option). In the Transparency box, enter 0%. In the Size box, enter 100%. In the Blur box, enter 16 pt. In the Angle box, enter 45 degrees. In the Distance box, enter 6 pt. Close the Format Video dialog box. On the Insert tab, in the Media group, click Video, and then click Video from File. In the left pane of the Insert Video dialog box, click the drive or library that contains the video. In the right pane of the dialog box, click the third video that you want and then click Insert. Under Video Tools, on the Format tab in the Size group, click the arrow at the bottom right corner to launch the Format Video dialog box. Select Size in the left pane. Under Scale in the right pane, clear the Lock aspect ratio box, then under Size and Rotate in the right pane, set Height to 1.77” and Width to 2.36”. Also in the Format Video dialog box, select Position in the left pane. Under Position in the right pane, do the following: In the Horizontal box, enter 0.3” From Top Left Corner. In the Vertical box, enter 4.99” From Top Left Corner. Also in the Format Video dialog box, select Border Color in the left pane, and then in the Border Color pane, select Solid Line. Click the arrow to the right of Color and under Theme Colors select White, Background 1 (first row, first option). Also in the Format Video dialog box, select Border Style in the left pane. In the right pane, under Border Style, set Width to 0.75”. Also in the Format Video dialog box, select Shadow in the left pane. Under Shadow the right pane, do the following: Click the arrow to the right of Color, and under Theme Colors select Black, Text 1 (first row, second option). In the Transparency box, enter 0%. In the Size box, enter 100%. In the Blur box, enter 16 pt. In the Angle box, enter 45 degrees. In the Distance box, enter 6 pt. Close the Format Video dialog box. Press and hold CTRL and select all three videos. On the Animations tab, in the Timing group, click the arrow to the right of Start and select With Previous. To reproduce the text on this slide, do the following: On the Insert tab, in the Illustrations group, click the arrow under Shapes, and then under Rectangles, select Rectangle (first row, first option). On the slide, drag to draw a rectangle. Under Drawing Tools, on the Format tab, in the Size group, click the arrow at the bottom right corner to launch the Format Shape dialog box. Select Size in the left pane. In the right pane, under Size, do the following: In the Height box, enter 6.96”. In the Width box, enter 6.72”. Also in the Format Shape dialog box, select Position in the left pane, under Position in the right pane do the following: In the Horizontal box, enter 3” From Top Left Corner. In the Vertical box, enter 0.27” From Top Left Corner. Also in the Format Shape dialog box, select Fill in the left pane, under Fill in the right pane, select Solid fill and then do the following: Click the arrow to the right of Color. Under Theme Colors, select White, Background 1 (first row, first option). In the Transparency box, enter 20%. Also in the Format Shape dialog box, select Line Color in the left pane. Under Line Color in the right pane, select Solid line and then do the following: Click the arrow to the right of Color. Under Theme Colors, select White, Background 1 (first row, first option). Also in the Format Shape dialog box, select Line Style in the left pane. Under Line Style in the right pane, set Width to 1.5 pt. Close Format Shape dialog box. On the Insert tab, in the Text group, click Text Box, and then on the slide drag to draw your text box. Type text in the text box, and then select the text. On the Home tab, in the Font group, select Brush Script Std from the Font list, and then select 54 pt from the Font Size list. With the text box selected, under Drawing Tools, on the Format tab, in the Size group, click the arrow at the bottom right corner to launch the Format Shape dialog box. Select Size in the left pane, under Size and Rotate in the right pane, set Height to 5.55” and Width to 6.04”. Select Position in the left pane, and under Position on the right pane, set Horizontal to 3.46” and Vertical to 0.97”. On the Insert tab, in the Text group, click Text Box, and then on the slide drag to draw your text box. Type “~ Susan George” in the text box. On the Home tab, in the Font group, select Calibri from the Font list, and then select 18 pt from the Font Size list. In the Format Shape dialog box select Size in the left pane. Under Size and Rotate in the right pane, set Height to 0.4” and Width to 2.5”. Select Position in the left pane, and under Position on the right pane, set Horizontal to 6.86” and Vertical to 6.42”. Close the Format Shape dialog box.
- Logging- To cut trees from lumber. This lumber is used for a variety of reasons. e.g: paper, furniture, firewood (Merrium Webster) Subsistence farming- Growing crops or raising livestock to meet daily needs (NASA)