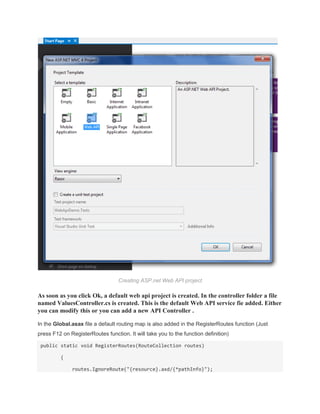
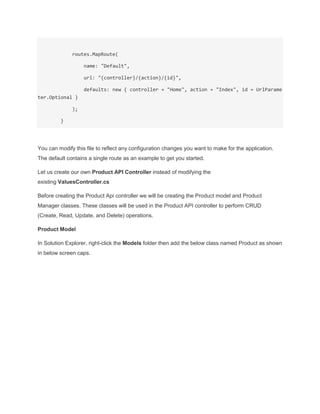
Download to read offline
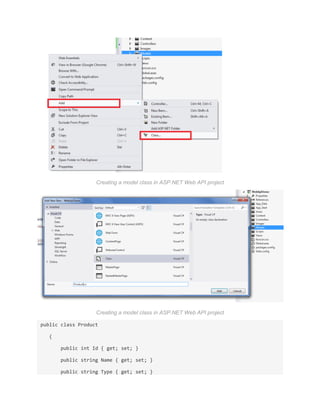
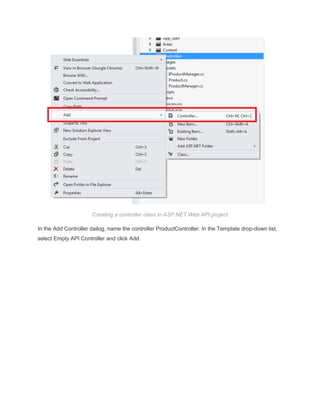
![Adding a model class in ASP.NET Web API project
Add the following code in the ProductController.cs class
public class ProductController : ApiController
{
static readonly IProductManager prodManager = new ProductManager();
//Get All Products
[HttpGet]
public List<Product> GetAllProducts()
{
return prodManager.GetAll();
}
//Get Product by id
[HttpGet]](https://image.slidesharecdn.com/creatingwebapiandconsumingpart1-160610085818/85/Creating-web-api-and-consuming-part-1-9-320.jpg)
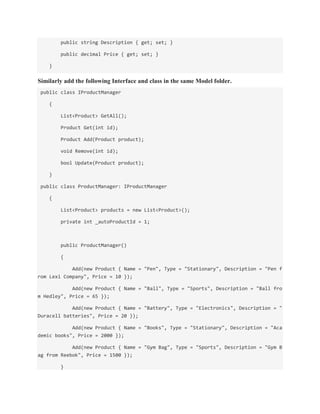
![public Product GetProductById(int id)
{
var product = prodManager.Get(id);
if (product == null)
{
throw new HttpResponseException(HttpStatusCode.OK);
}
return product;
}
//Add Product
[HttpPost]
public Product AddProduct(Product product)
{
product = prodManager.Add(product);
return product;
}
//Update Product
[HttpPut]
public void UpdateProduct(Product product)
{
if (!prodManager.Update(product))
{
throw new HttpResponseException(HttpStatusCode.NotFound);
}
}
//Delete Product
[HttpDelete]
public void DeleteProduct(int id)
{](https://image.slidesharecdn.com/creatingwebapiandconsumingpart1-160610085818/85/Creating-web-api-and-consuming-part-1-10-320.jpg)
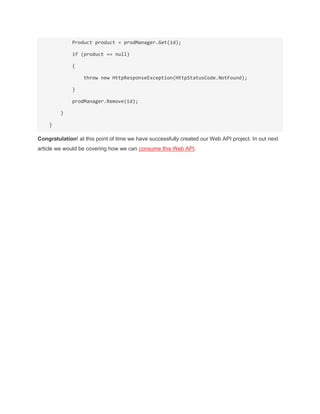

The document describes creating an ASP.NET Web API project to perform CRUD operations on products. It includes creating a Product model and ProductManager class to manage products. A ProductController is added to handle GET, POST, PUT, and DELETE requests for products by calling methods on the ProductManager. The Web API project is configured to use routing and the default ValuesController is removed. This establishes the backend API portion, with the next part covering consuming the API through a client.