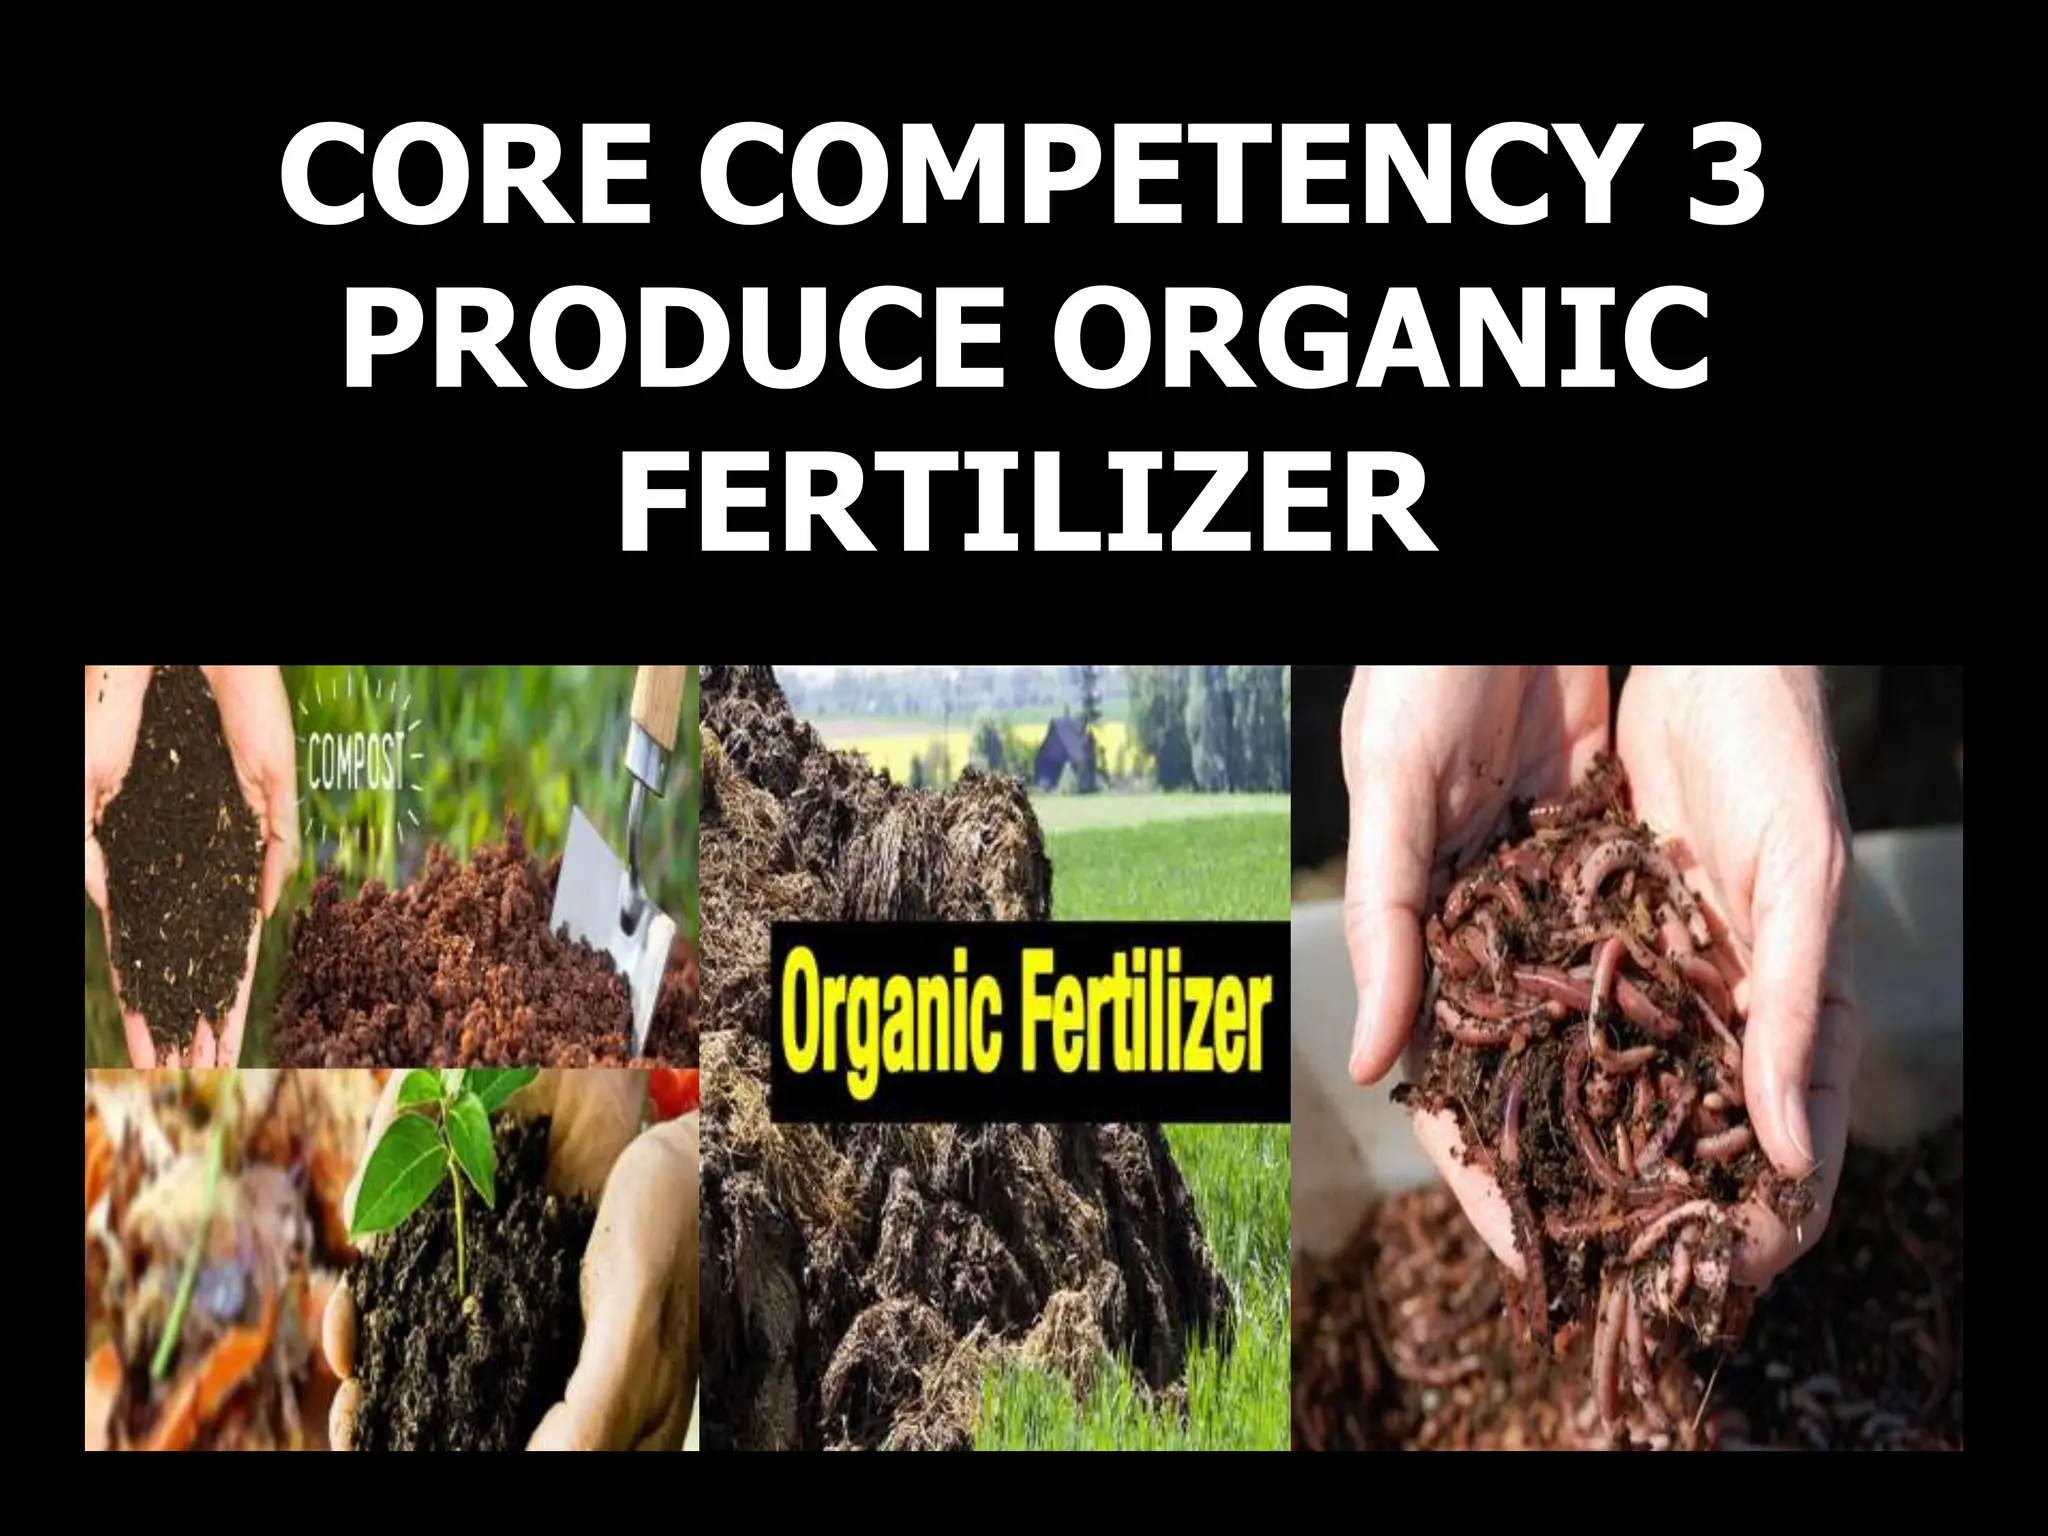
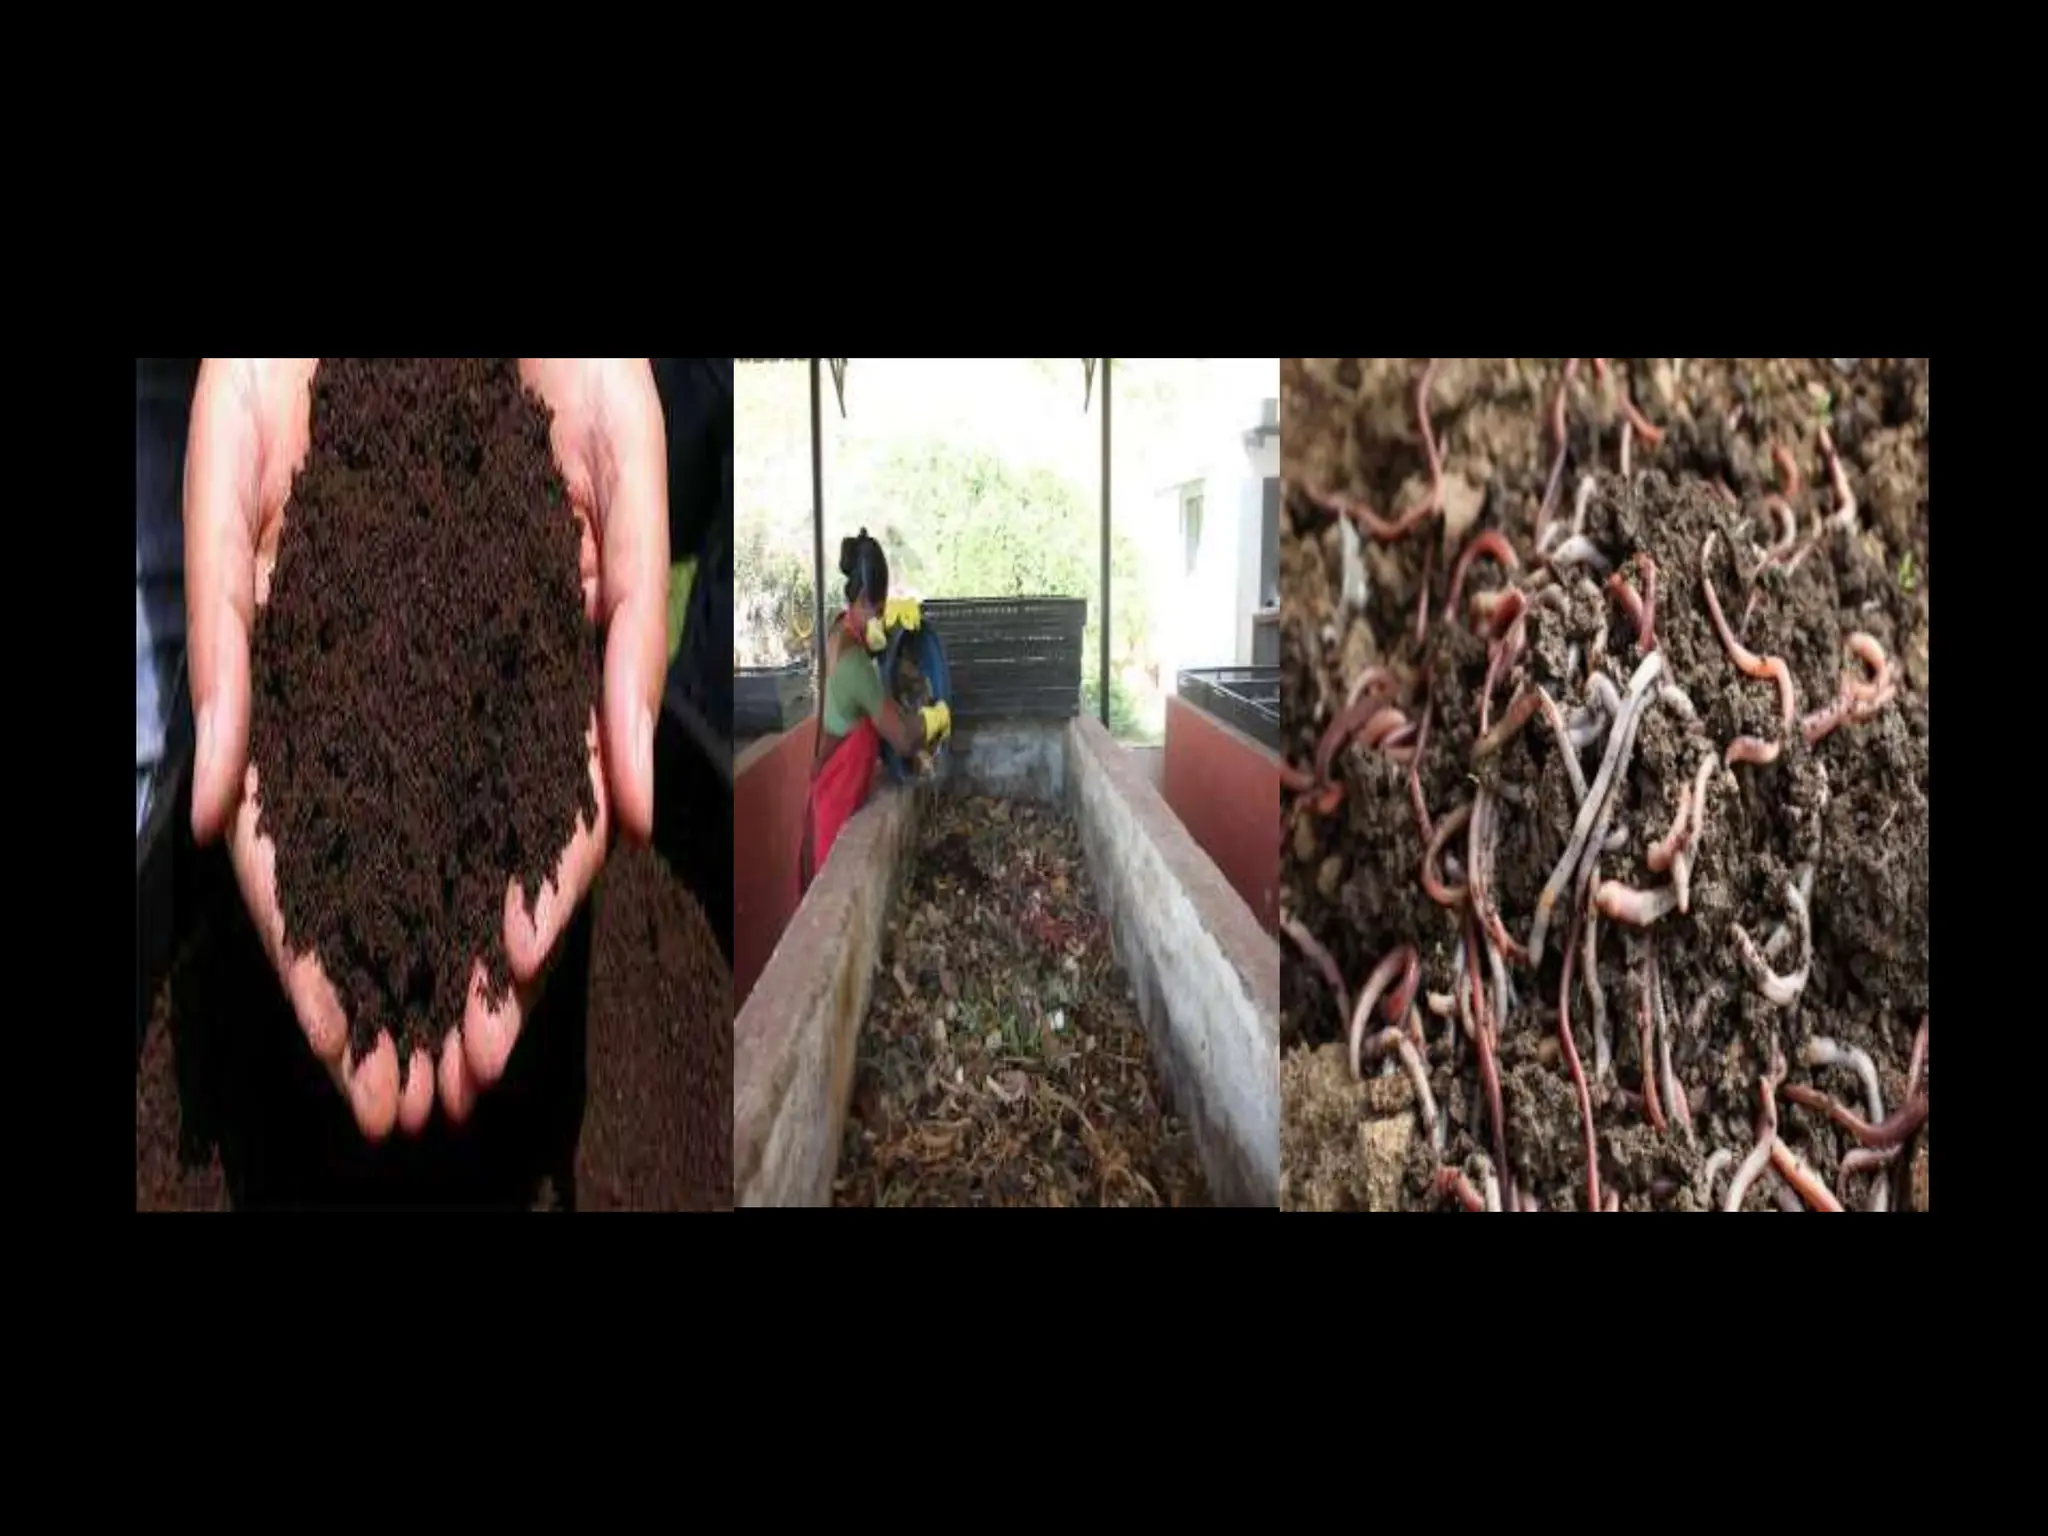
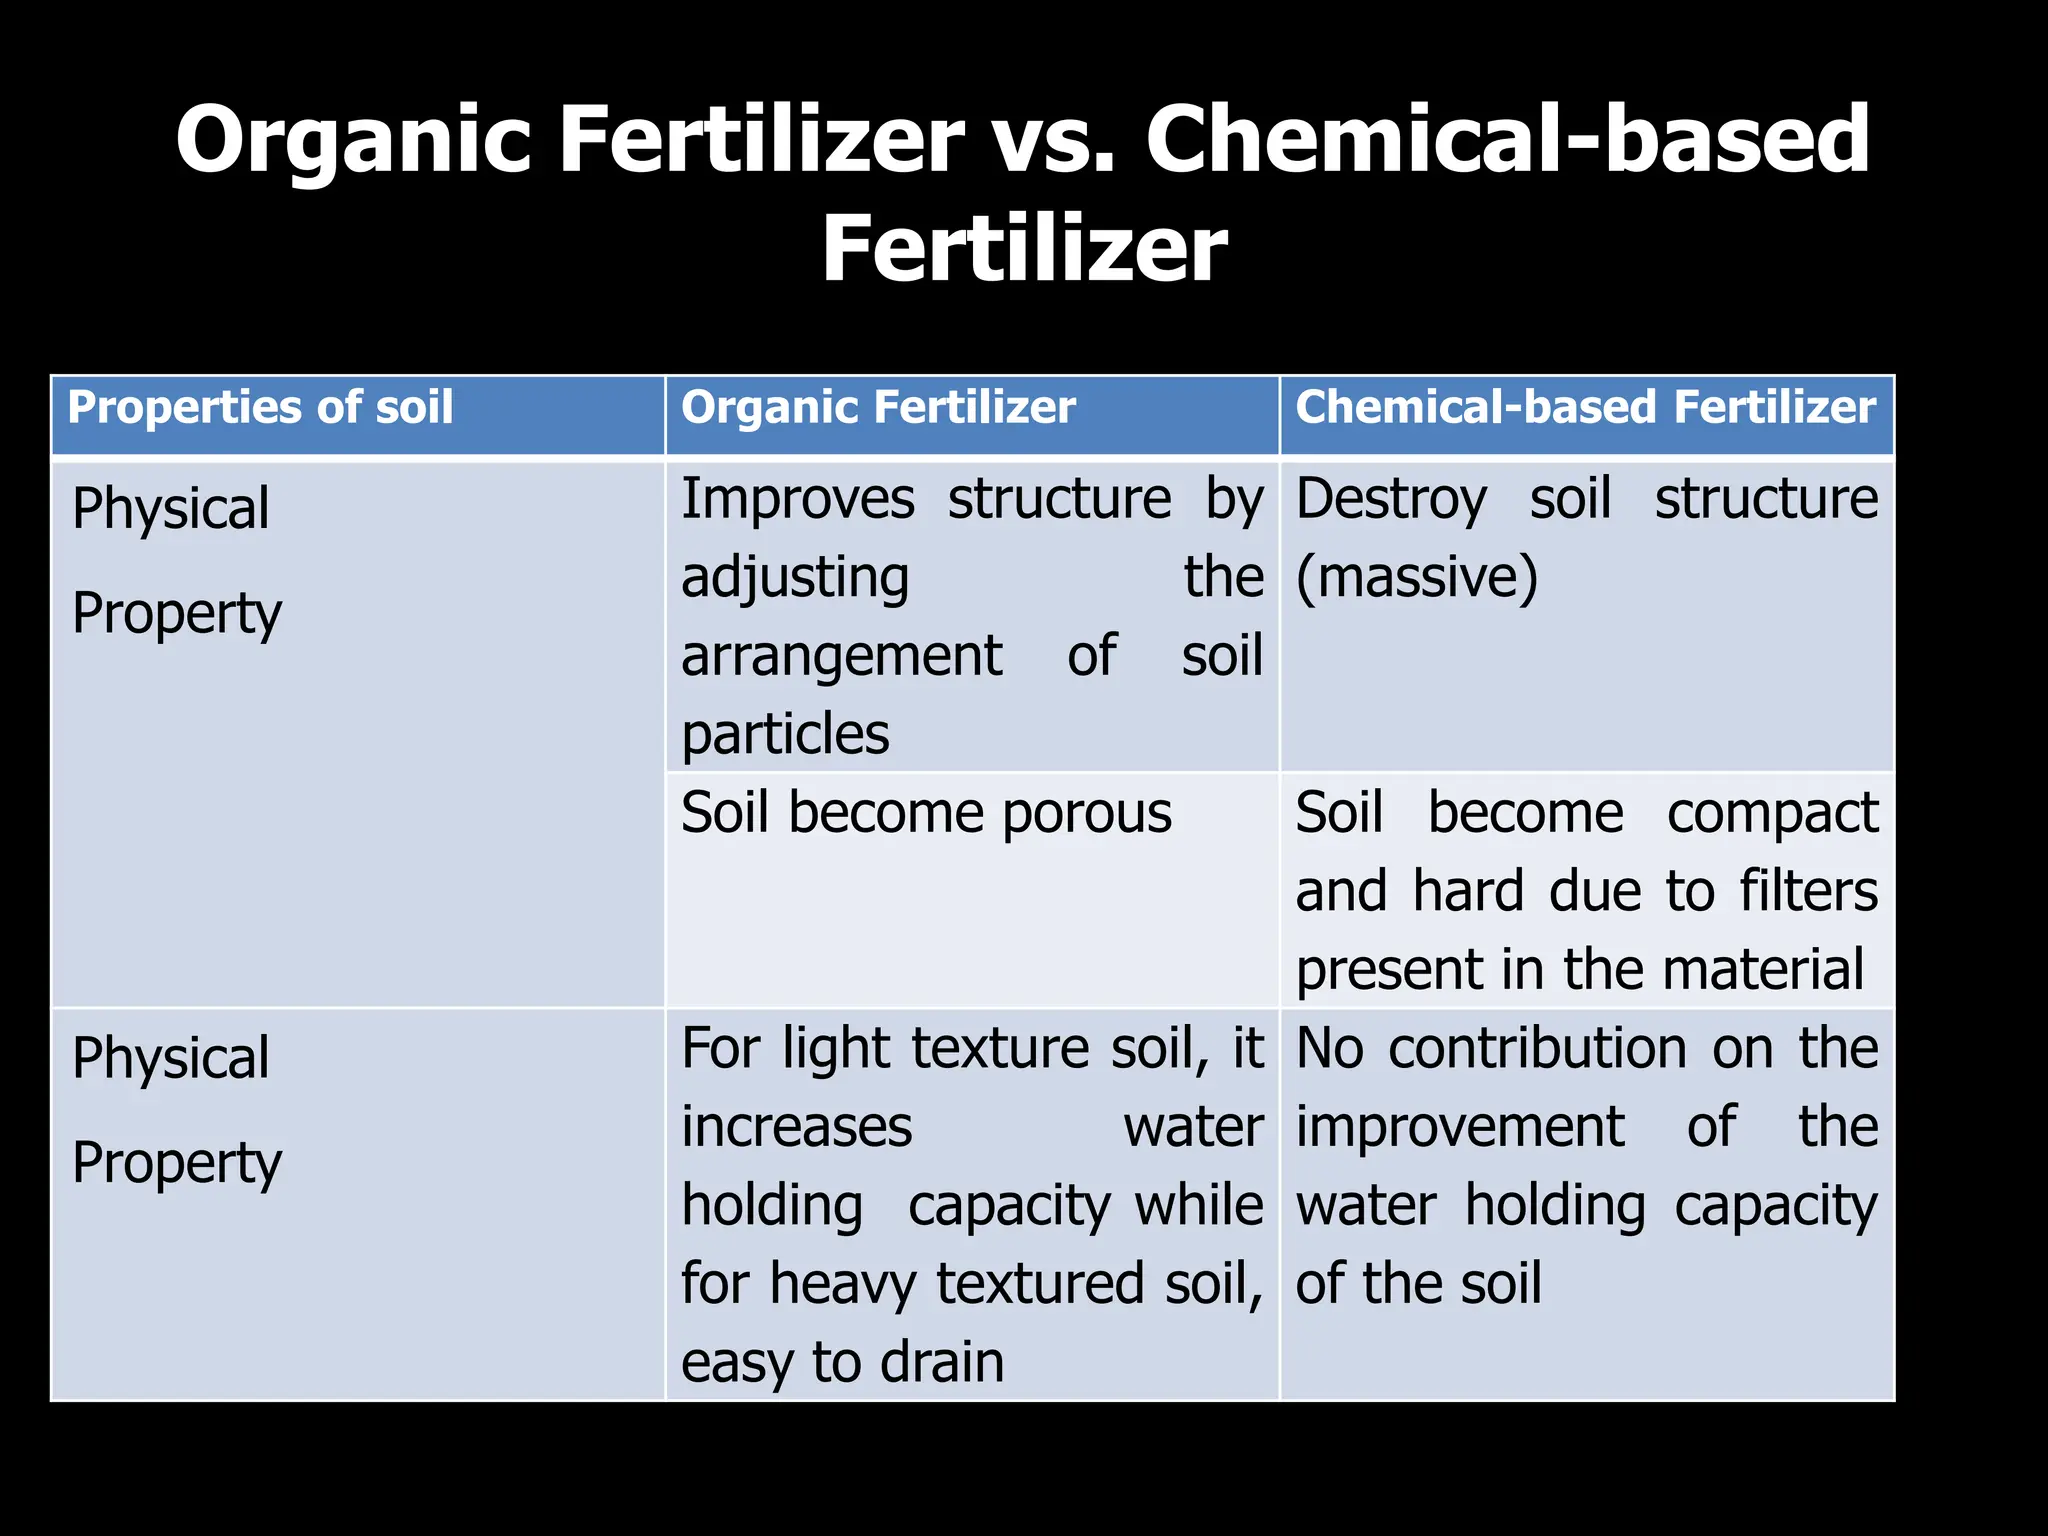
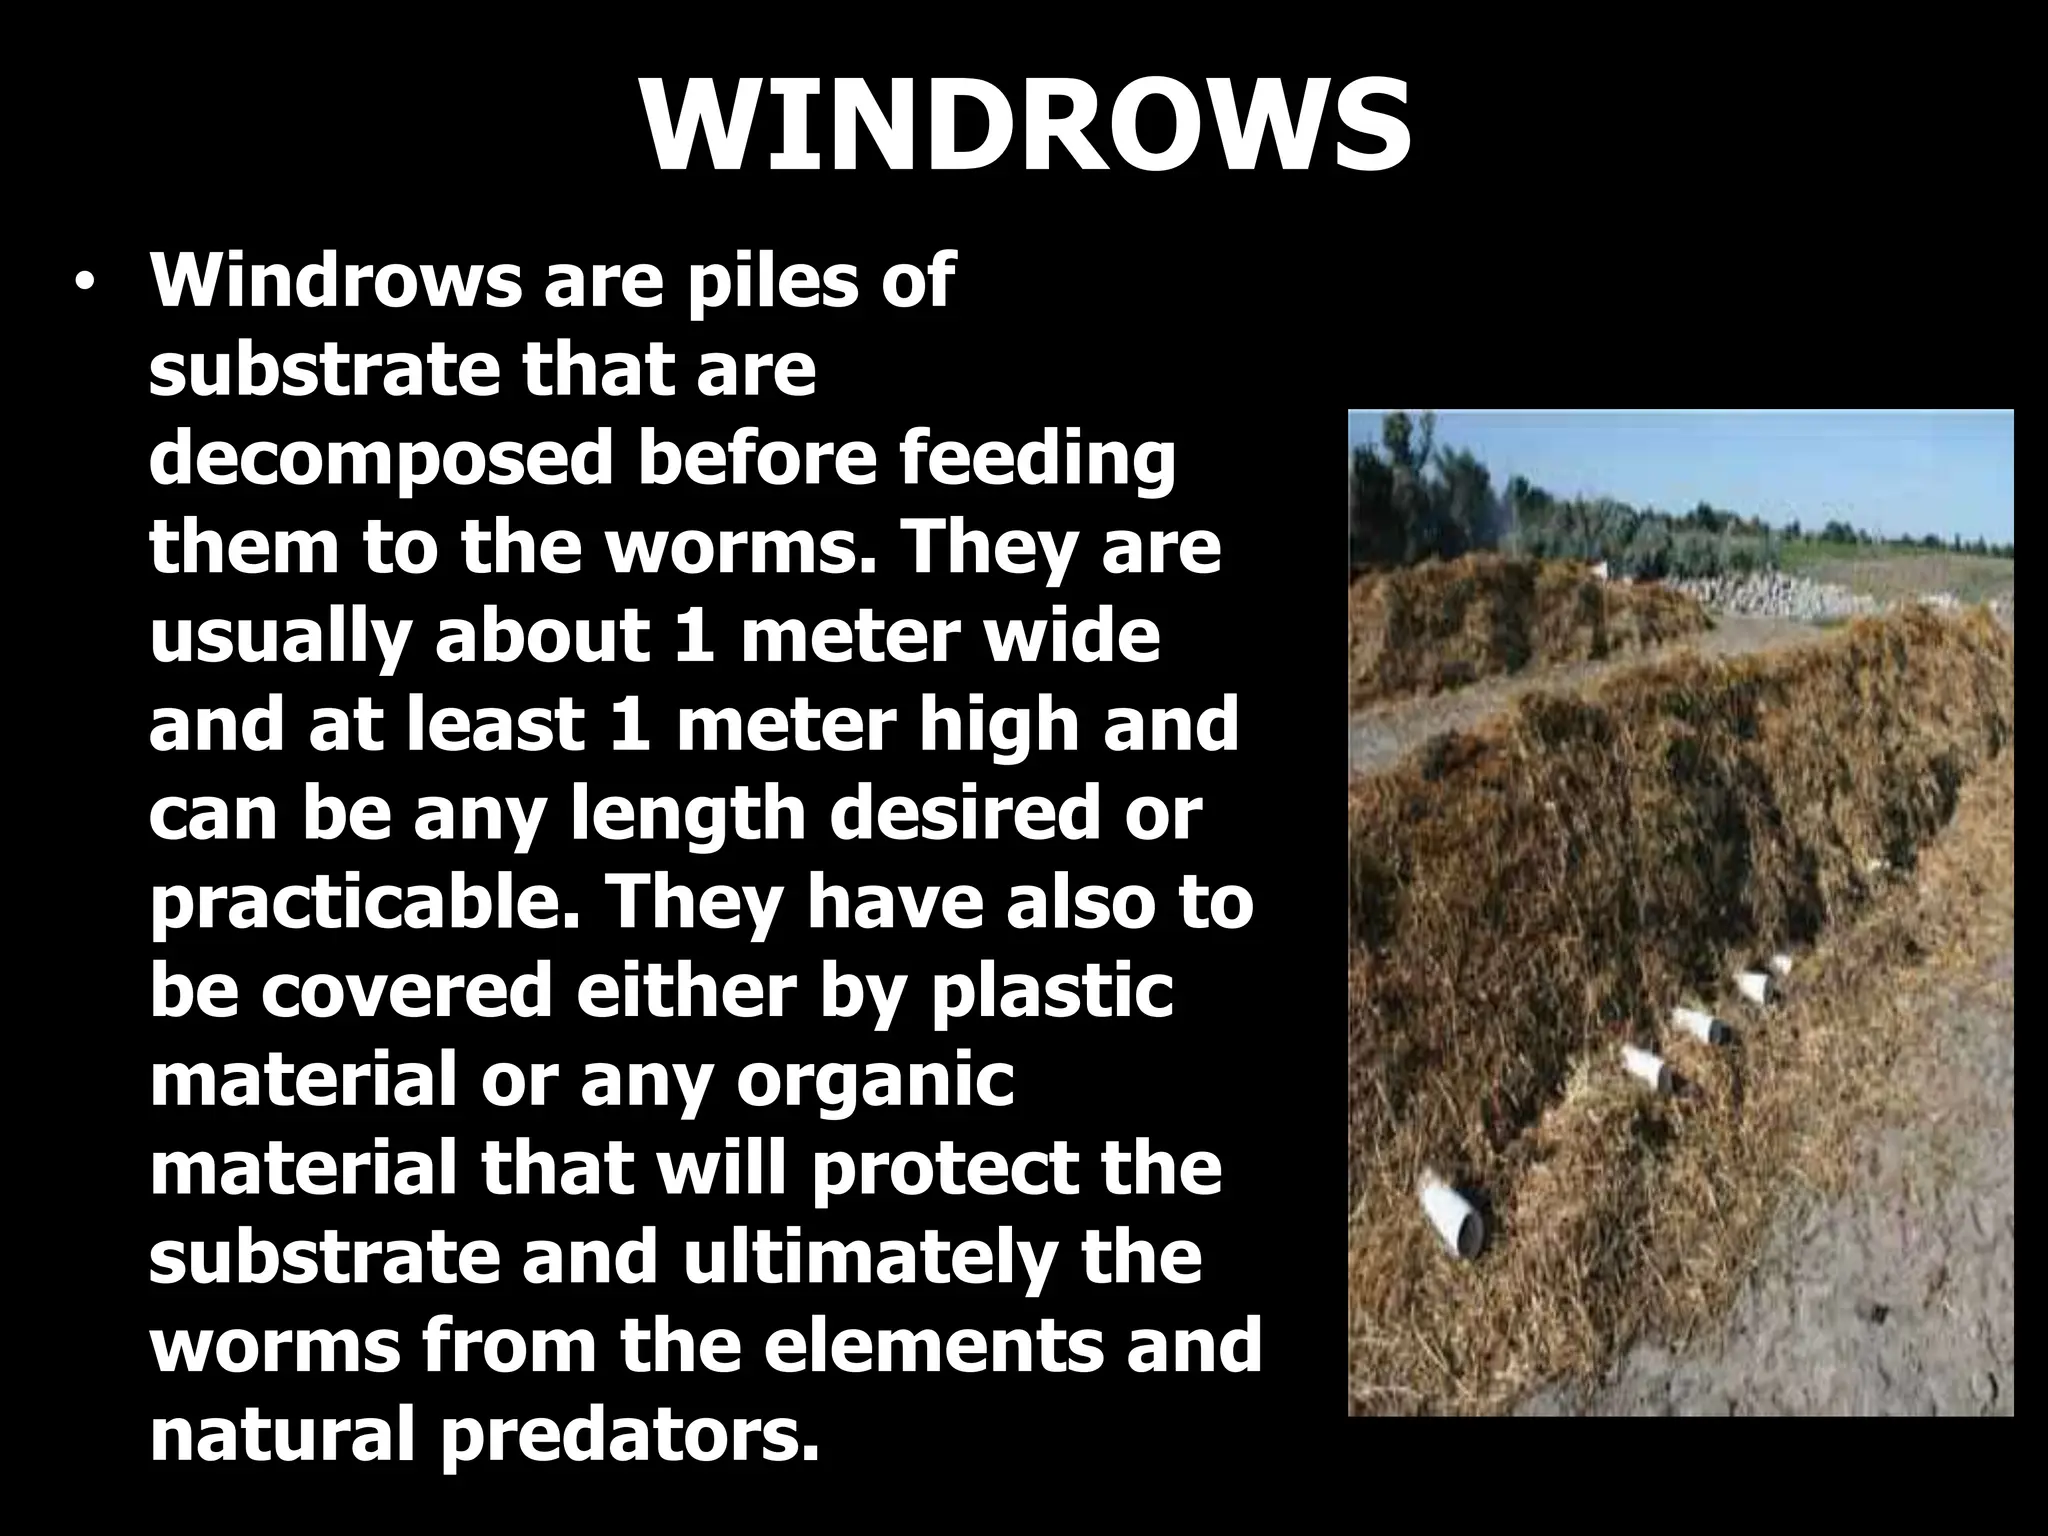
CORE COMPETENCY 3
PRODUCE ORGANIC
FERTILIZER
WHAT IS ORGANIC FERTILIZER?
• Fertilizers become
organic when the
material is free of
chemical substances,
there is presence of high
organic matter content
and the raw materials
used are indigenous in
the locality.
To preserve the potency of
organic fertilizer the following
must be observed;
-store in dry, dark and cool
place
-packaging material should be
lined with plastic bag
-for foliar, when aging add
molasses to prolong shelf-life
WHAT IS CHEMICAL
FERTILIZER?
• This is a substance that
supplies one or more nutrient
elements, which are produced
through chemical processes.
They usually contain high
amount of nutrients and
dissolve in water.
Organic Fertilizer vs. Chemical-based
Fertilizer
Properties of soil Organic Fertilizer Chemical-based Fertilizer
Physical
Property
Improves structure by
adjusting the
arrangement of soil
particles
Destroy soil structure
(massive)
Soil become porous Soil become compact
and hard due to filters
present in the material
Physical
Property
For light texture soil, it
increases water
holding capacity while
for heavy textured soil,
easy to drain
No contribution on the
improvement of the
water holding capacity
of the soil
Chemical
Property
Provides both
macro and
micronutrients
Contains 1-4
elements and
mostly
macronutrients
only
Improve soil PH Contributes to the
acidity of the
soil
Lowers toxicity
level of
micronutrients
Increases
population density
of beneficial
microorganism
Kills most of
beneficial
microorganisms in
the soil
Biological
Property
Promotes
biodiversity
VERMICOMPOSTING
• It is the scientific method of
making compost by using
eathworms. They are
commonly found living in soil,
feeding on biomass and
excreting in a digestive form. .
If the desired product is
fertilizer, the process is called
vermicomposting.
VERMICULTURE
• It is the fast production of
earthworms.
• The person who manage
vermiculture is called
vermiculturist.
APPROPRIATE COMPOSTING
METHOD
• Earthworms can be classified as
real earthworms or compost
worm. The earthworms are those
which burrow deeply and are
almost near impossible to culture
in captivity. They eat the soil.
They do not eat compost. They
are responsible for mixing the
different layers of the soil.
• So, when you see that the soil in your
flowerpots are in mounds and are
disappearing, that is the action of the
real earthworm. Their poop is in
mounds or maidens. The other kind,
the compost worms are those that
live on the upper surface of the earth
and they eat the compost, not the
earth. Their poop are granular but
finer and are not in mounds. They
can be cultured and thus can be put
to good use to produce vermicast.
• In a nutshell, we go into
vermicomposting to produce
fertilizer. To do this, we have to
formulate our substrate so that we
get the desire carbon to nitrogen (C:
N) ratio of 70:30. We get the carbon
from more than two (2) parts grass
or banana bracts and the nitrogen
from 1 part animal manure or plant
source.. Plant sources may be
kakawate, ipil-ipil, azolla, peanut,
kudzu, baing ilg, rensoni, flamingia,
mongo, etc
• To increase our worm population
fast, we use animal manure, banana
bracts, ipil-ipil, kakawate on ratio
mentioned above. This is
vermiculture. Either procedure
produces both fertilizer and the
worm biomass however,the
formulation of the substrate has to
be adjusted accordingly. Also, in
most cases, the C: N ratio from
vermiculture is higher and thus may
just be soil amendment albeit very
good organic source.
Dry your vermicompost in the
shade only. Exposing organic
fertilizer to the sun will cause it
to lose its nitrogen content.
Vermicompost can be stored at
30% humidity in plastic bags.
Store in a cool place away from
direct sunlight.
CHARACTERISTICS OF COMPOSTING WORM
• It is a true hermaphrodite. It has
both the male and the female organs
but the most species cannot
impregnate itself. It needs a partner
to become pregnant.
• When two worms come together,
they both get pregnant.
• It is perfectly evolved so that if you
put several species together in a
wormbin, they do not cross breed.
AFRICAN NIGHT CRAWLER
EGGS
AFRICAN NIGHT CRAWLER
• It originated in West Africa. Due to their
voracious appetites and ability to quickly
reproduce African Night Crawlers are
quickly gaining popularity with
vermicomposters.
• The African night crawlers when sexually
mature breed every week and the
resultant cocoon/egg/capsule can
produce from 2-10 worms. It was
observed that in six months, 1,000
sexually mature worms could produce
30,000 on the low side. On the high side,
it can go up to 120,000
• One worm divided by 2 equals 1. Only
the part where the vital organs are
found will regenerate. The other half
will die.
• Worms are hardworking, unpaid, silent
and efficient workers. They do not
demand pay increase nor to form
unions. There is no learning curve for
them because they work as soon as
they are born. All they ask for are good
working, living and eating conditions.
They eat their weight per day.
FEEDS OF ANC
• Fruit waste- non citrus (apples, grapes,
bananas, plums, peaches, and pumpkins)
• Vegetable waste (carrots, lettuce, beans,
peas, limited amounts of potatoes, leafy
vegetables)
• Egg shells- in moderation and best when
crushed up a bit
• Tree Leaves- yes in moderation stick to
common species, avoid exotic tree leaves
• Aged Animal Manure- yes its best to stick
with horse manure in the beginning.
NOT TO FEED ANC
• Citrus fruit
• Meat products
• Dairy waste
• Cooking oil or grease
• Human waste
• Pet waste
CHARACTERISTICS OF
VERMICOMPOST
• Physical
Physically, the gross appearance of the vermicast is
granular. It has been observed that the bigger
worms produce bigger granules. In the intestines
f the worms, the nutrients are ground and mixed.
The worm excretes mucus which coats and binds
all these elements together.
This granular character will allow the plants to
extract the elements they need. It is believed
that the vermicast can stay for along as five
years in the soil. It also will not leach out
because of its granular nature. Plants respond
fast to applications of vermicast and within a few
days, new shoots are observed and the leaves
turn green.
Chemical
• The PH of vermicast is almost neutral
and as such, it also acts to buffer the
PH of the soil to neutral.
• Vermicast can be used directly on the
plants at any point because it does
not burn the plant. Compost
produced traditionally cannot be
used directly but has to be aged
properly. Vermicast is ready for use
as soon as soon as it is produced. It
is virtually impossible to overdose
with vermicast.
SELECTING SITE
• Worms are livestock and
should be cared for in order
that they may be put to best
use. As such, select a site
that would be well above
the flood level, shaded, airy
and where water and raw
materials are easily
available. The temperature
should be about 26 degrees
Celsius.
• Worms are living creatures which
need to be cared for and protected.
They do not have skin and die
when exposed to direct sunlight.
The worm beds/containers should
be shaded where it is airy. Water
and raw materials are necessary
and it follows that the project, to
be successful should also include
cost. If the water and the raw
materials will have to be brought
in at considerable expense, the
cost of production would increase
impact on the viability of the
project.
CHARACTERISTICS OF GOOD
COMPOSTTING SITE
• Good drainage system
• Availability of water supply
• Proximity to the source of raw
materials
• Accessibility of the composting site
• Area of minimum contamination
• Area with minimal sunlight
Wormbins/Wormbeds
• May be made of any material available
whether iron bars with plastic lining,
old plastic basins, bamboo slats or
hollow blocks. The advantage of
wormbins/wormbeds is that they are
movable and can be transferred at will.
Care however should be taken that
they are properly protected from direct
sunlight, too much water and natural
predators. The substrate is placed in
the wormbeds where the worms feed
on them.
WORMBINS/WORMBEDS
WINDROWS
• Windrows are piles of
substrate that are
decomposed before feeding
them to the worms. They are
usually about 1 meter wide
and at least 1 meter high and
can be any length desired or
practicable. They have also to
be covered either by plastic
material or any organic
material that will protect the
substrate and ultimately the
worms from the elements and
natural predators.
HOUSING STRUCTURE
• Housing structures are
the best options but are
also the most expensive
so will be considered
when finances permit.
However, if there are
abandoned structures
within the site, these can
be used as well for the
purpose.
BED PREPARATIONS
BED PREPARATIONS
Prepare the bed by selecting the site that
is shaded, free from predators and near
to the water source. Arrange the hollow
blocks making a bed of 1m x 3m and
put bamboo stakes to strengthen the
bed. Use sacks and nylon net could be
used as matting. Other materials that
may be needed in the stocking of the
bed are:
• Water and water sprinklers
• Plastic sheets to cover the bed
GATHERING RAW MATERIALS
Source and quality
• In sourcing raw materials, care should be taken
that one is sure of the quality of raw materials.
If using animal manure, be sure that he
animals were not dewormed as this would also
deworm your project. On the other hand, the
plant source should also be free of harmful
insecticides, fungicides and herbicides which
may also decimate your worm population.
• The worms eat all organic waste and procedure
vermicast. However, the quality of the
vermicast and the speed of production are
dependent on several factors.
Carbon to Nitrogen Ratio (C:N)
The desire C:N ratio is 70:30. To achieve
this, more than two (2) parts of carbon
source with 1 part of nitrogen source. In
the rural setting, one may have the
luxury of choosing and formulating the
raw materials for the substrate in which
case, the resultant vermicast is of
fertilizer quality. At a higher ratio, the
carbon and nitrogen will be locked and
not easily available to the plants. A low
ratio will not able to hold the nitrogen
well and it will volatilize easily.
Size of the materials
• The smaller the materials being
composted, the faster the process. While
shredding is not absolutely necessary, it
is a vital factor in speeding up the
process. After gathering the raw
materials, mix well and shared. Wet the
mixtures so it feels like a damp sponge.
DECOMPOSTION PROCESS
Anaerobic Decomposition
• Place the substrate in containers as
airtight as possible or cover it with
plastic sheet. This is the anaerobic
process which is to hasten the
decomposition. This is composting
without air, hence the name. This stage
may last from 1 week depending upon
the quantity being processed and the
size of the particles. The substrate is
ready of white mushrooms
Aerobic Decomposition
When the substrate has cooled down, place the
substrate in appropriate containers or remove
the plastic sheet in the bed. This next phase is
called the aerobic stage or composting
When the substrate has cooled down, place the
substrate in appropriate containers or remove
the plastic sheet in the bed. This next phase is
called the aerobic stage or composting with air.
Stocking Earthworms
Anaerobic Decomposition
• Place the substrate in containers as
airtight as possible or cover it with
plastic sheet. This is the anaerobic
process which is to hasten the
decomposition. This is composting
without air, hence the name. This stage
may last from 1 week depending upon
the quantity being processed and the
size of the particles. The substrate is
ready of white mushrooms.
Stocking Earthworms
• The rate of producing vermicast is
dependent on the stocking density vis-
à-vis the amount of substrate. We have
observed that the worms can eat faster
if the substrate at this stage appears to
be ideal. It has been observed that 100
kilos of substrate can be consumed
within 30 days by 1 kilo of worms.
Monitoring Compost
• Maintain a humidity of 80%. Protect
the worms from natural predators.
Birds, chickens, frogs, mice, snakes and
even pigs love to eat worms. While ants
do not eat worms, they can kill yout
population if left unattended. Shade the
worms form direct sunlight. Worms
have no skin and compacted. The
constant watering of the beds will
compact the substrate. Loosen the beds
very gently when needed taking care
not to disturb the worms too much.
• Practical Tip for Humidity: Test
by squeezing a fistful of
substrate. Five to seven drops of
water indicate about 80%
humidity. Care should be taken
that the substrate is taken from
the lower portion of the bed
because the upper portion might
already by dry but the lower
portion is still wet.
HARVESTING COMPOST
HARVESTING COMPOST
• The earthworms are well mannered
and polite. They do not like to live with
their poo. They eat the substrate and
deposit their casting on the top. In
about 6-8 weeks, the substrate that
was formerly identifiable as grass and
leaves becomes transformed into
granular earthly material. The decision
to harvest depends on one`s needs.
Practical Tip: Compost is ready to
use when it is dark brown,
crumbly and has an earthly smell.
OPTIONS:
a. Pick the worms by hand and transfer
them to a new worm bed. The
vermicompost may be allowed
to dry in the shade for a few days and
then sifted if a finer compost is desired.
b. In the shade, pile the vermicompost in
such a manner that it looks like a
pyramid. After a day, you can harvest
the top part easily because the worms
have gone to the bottom of the pile.
When you reach the bottom of the pile,
you can extract the worms manually.
c. Move the contents of the whole bed
to one side. Fill the empty half with
new substrate. Allow the wroms to
move freely to the new food. Harvest
the casting left by the worms.
d. Fill an onion bag with fresh food and
bury it in the middle of the bed. After
a week or so, the bag will be filled
with worms which you can empty to a
new wormed. This facilitates the
gathering of most worms.
e. If you are not ready to harvest your
vermicompost which is fully eaten by the
worms, place a net on top of the bed and
place a 5 cm layer of fresh substrate on
top. You can delay harvesting for about a
week (depending on the volume of
worms in the bed) because the worms
will transfer to the new food. At the same
time, when you are ready to harvest, you
can first remove the net with the food
and you will see that worms have mostly
transferred here.
• If you are in a hurry and need
the castings, scrape the top of
the bed of the castings
deposited there. You run the
danger though of losing the
eggs which may be there and
have not yet hatched.
VERMITEA
VERMITEA MAKING
• The one that will result in the highest
amount of beneficial microbes is
actively aerated compost tea, which
means that you add your vermicompost
(in a linen or fine mesh bag) to a
bucket of water with an air pump
installed. Then, let the air pump
continuously aerate the
water/vermicompost for at least 24
hours. This is a fantastic method, and
many gardeners highly recommend it.
• There is another way to make
compost tea. This method simply
requires you to steep vermicompost
in a container of water overnight.
• One way to do this is to simply add
about 1/4 cup of vermicompost or
vermicastings to a gallon of water,
then strain the vermicompost by
pouring the mixture through a fine
sieve or filter.
• An even easier way to steep
some vermicompost tea is to put
1/4 cup of vermicompost into a
paper coffee filter and tie it
closed tightly with cotton twine.
Then, simply add this to a one-
gallon watering can or bucket,
fill the can with water, and let it
sit overnight. When you're ready
to use it, simply toss the bag into
the compost pile.
• To get some of the benefits of
aeration, you can try stirring the
mixture every once in a while,
but it's not the end of the world
if you don't do so. Letting it
steep overnight provides you
with a light brown vermicompost
tea that you can then
immediately use on any plant,
indoors or out.
When to Feed Plants With
Vermicompost Tea
• During the active growing season, feed
houseplants weekly to every 10 days with
this tea, and feed veggies and herbs in
your outdoor garden at least once a week
with it. You really can't overdo it. You can
also put this tea into a spray bottle or
hose-end sprayer and give your plants a
nice foliar feed with it. Some gardeners
swear that issues such as powdery
mildew are reduced if you use
vermicompost tea in this way.
Processing Organic Foliar Fertilizer
1. Prepare a 60-liter capacity container with
aeration facility.
2. Put 50 liters of clean water in the container.
3. Aerate the water in 30 minutes.
4. Put 3 kg. Of vermicast inside the tea bag and
place inside the container.
5. Pour 500 ml of molasses in the aerated
container.
6. Add IMO (50 ml) after 30 minutes then cover.
7. Harvest after 24 hours of continuous aeration
and use the prepared foliar fertilizer within 24
hours.
RECORDKEEPING
To effectively monitor the production of
organic fertilizer, the following
information must be recorded:
-manufacturing
-expiry date
-quantity
-moisture content
-nutritional composition
CORE COMPETENCY 3 PRODUCE ORGANIC FERTILIZER.pptx

CORE COMPETENCY 3 PRODUCE ORGANIC FERTILIZER.pptx

  • 1.
    CORE COMPETENCY 3 PRODUCEORGANIC FERTILIZER
  • 2.
    WHAT IS ORGANICFERTILIZER? • Fertilizers become organic when the material is free of chemical substances, there is presence of high organic matter content and the raw materials used are indigenous in the locality.
  • 4.
    To preserve thepotency of organic fertilizer the following must be observed; -store in dry, dark and cool place -packaging material should be lined with plastic bag -for foliar, when aging add molasses to prolong shelf-life
  • 5.
    WHAT IS CHEMICAL FERTILIZER? •This is a substance that supplies one or more nutrient elements, which are produced through chemical processes. They usually contain high amount of nutrients and dissolve in water.
  • 7.
    Organic Fertilizer vs.Chemical-based Fertilizer Properties of soil Organic Fertilizer Chemical-based Fertilizer Physical Property Improves structure by adjusting the arrangement of soil particles Destroy soil structure (massive) Soil become porous Soil become compact and hard due to filters present in the material Physical Property For light texture soil, it increases water holding capacity while for heavy textured soil, easy to drain No contribution on the improvement of the water holding capacity of the soil
  • 8.
    Chemical Property Provides both macro and micronutrients Contains1-4 elements and mostly macronutrients only Improve soil PH Contributes to the acidity of the soil Lowers toxicity level of micronutrients Increases population density of beneficial microorganism Kills most of beneficial microorganisms in the soil Biological Property Promotes biodiversity
  • 9.
    VERMICOMPOSTING • It isthe scientific method of making compost by using eathworms. They are commonly found living in soil, feeding on biomass and excreting in a digestive form. . If the desired product is fertilizer, the process is called vermicomposting.
  • 11.
    VERMICULTURE • It isthe fast production of earthworms. • The person who manage vermiculture is called vermiculturist.
  • 12.
    APPROPRIATE COMPOSTING METHOD • Earthwormscan be classified as real earthworms or compost worm. The earthworms are those which burrow deeply and are almost near impossible to culture in captivity. They eat the soil. They do not eat compost. They are responsible for mixing the different layers of the soil.
  • 13.
    • So, whenyou see that the soil in your flowerpots are in mounds and are disappearing, that is the action of the real earthworm. Their poop is in mounds or maidens. The other kind, the compost worms are those that live on the upper surface of the earth and they eat the compost, not the earth. Their poop are granular but finer and are not in mounds. They can be cultured and thus can be put to good use to produce vermicast.
  • 14.
    • In anutshell, we go into vermicomposting to produce fertilizer. To do this, we have to formulate our substrate so that we get the desire carbon to nitrogen (C: N) ratio of 70:30. We get the carbon from more than two (2) parts grass or banana bracts and the nitrogen from 1 part animal manure or plant source.. Plant sources may be kakawate, ipil-ipil, azolla, peanut, kudzu, baing ilg, rensoni, flamingia, mongo, etc
  • 15.
    • To increaseour worm population fast, we use animal manure, banana bracts, ipil-ipil, kakawate on ratio mentioned above. This is vermiculture. Either procedure produces both fertilizer and the worm biomass however,the formulation of the substrate has to be adjusted accordingly. Also, in most cases, the C: N ratio from vermiculture is higher and thus may just be soil amendment albeit very good organic source.
  • 16.
    Dry your vermicompostin the shade only. Exposing organic fertilizer to the sun will cause it to lose its nitrogen content. Vermicompost can be stored at 30% humidity in plastic bags. Store in a cool place away from direct sunlight.
  • 17.
    CHARACTERISTICS OF COMPOSTINGWORM • It is a true hermaphrodite. It has both the male and the female organs but the most species cannot impregnate itself. It needs a partner to become pregnant. • When two worms come together, they both get pregnant. • It is perfectly evolved so that if you put several species together in a wormbin, they do not cross breed.
  • 18.
  • 19.
  • 20.
    AFRICAN NIGHT CRAWLER •It originated in West Africa. Due to their voracious appetites and ability to quickly reproduce African Night Crawlers are quickly gaining popularity with vermicomposters. • The African night crawlers when sexually mature breed every week and the resultant cocoon/egg/capsule can produce from 2-10 worms. It was observed that in six months, 1,000 sexually mature worms could produce 30,000 on the low side. On the high side, it can go up to 120,000
  • 21.
    • One wormdivided by 2 equals 1. Only the part where the vital organs are found will regenerate. The other half will die. • Worms are hardworking, unpaid, silent and efficient workers. They do not demand pay increase nor to form unions. There is no learning curve for them because they work as soon as they are born. All they ask for are good working, living and eating conditions. They eat their weight per day.
  • 22.
    FEEDS OF ANC •Fruit waste- non citrus (apples, grapes, bananas, plums, peaches, and pumpkins) • Vegetable waste (carrots, lettuce, beans, peas, limited amounts of potatoes, leafy vegetables) • Egg shells- in moderation and best when crushed up a bit • Tree Leaves- yes in moderation stick to common species, avoid exotic tree leaves • Aged Animal Manure- yes its best to stick with horse manure in the beginning.
  • 23.
    NOT TO FEEDANC • Citrus fruit • Meat products • Dairy waste • Cooking oil or grease • Human waste • Pet waste
  • 24.
    CHARACTERISTICS OF VERMICOMPOST • Physical Physically,the gross appearance of the vermicast is granular. It has been observed that the bigger worms produce bigger granules. In the intestines f the worms, the nutrients are ground and mixed. The worm excretes mucus which coats and binds all these elements together. This granular character will allow the plants to extract the elements they need. It is believed that the vermicast can stay for along as five years in the soil. It also will not leach out because of its granular nature. Plants respond fast to applications of vermicast and within a few days, new shoots are observed and the leaves turn green.
  • 25.
    Chemical • The PHof vermicast is almost neutral and as such, it also acts to buffer the PH of the soil to neutral. • Vermicast can be used directly on the plants at any point because it does not burn the plant. Compost produced traditionally cannot be used directly but has to be aged properly. Vermicast is ready for use as soon as soon as it is produced. It is virtually impossible to overdose with vermicast.
  • 26.
    SELECTING SITE • Wormsare livestock and should be cared for in order that they may be put to best use. As such, select a site that would be well above the flood level, shaded, airy and where water and raw materials are easily available. The temperature should be about 26 degrees Celsius.
  • 27.
    • Worms areliving creatures which need to be cared for and protected. They do not have skin and die when exposed to direct sunlight. The worm beds/containers should be shaded where it is airy. Water and raw materials are necessary and it follows that the project, to be successful should also include cost. If the water and the raw materials will have to be brought in at considerable expense, the cost of production would increase impact on the viability of the project.
  • 28.
    CHARACTERISTICS OF GOOD COMPOSTTINGSITE • Good drainage system • Availability of water supply • Proximity to the source of raw materials • Accessibility of the composting site • Area of minimum contamination • Area with minimal sunlight
  • 29.
    Wormbins/Wormbeds • May bemade of any material available whether iron bars with plastic lining, old plastic basins, bamboo slats or hollow blocks. The advantage of wormbins/wormbeds is that they are movable and can be transferred at will. Care however should be taken that they are properly protected from direct sunlight, too much water and natural predators. The substrate is placed in the wormbeds where the worms feed on them.
  • 30.
  • 31.
    WINDROWS • Windrows arepiles of substrate that are decomposed before feeding them to the worms. They are usually about 1 meter wide and at least 1 meter high and can be any length desired or practicable. They have also to be covered either by plastic material or any organic material that will protect the substrate and ultimately the worms from the elements and natural predators.
  • 32.
    HOUSING STRUCTURE • Housingstructures are the best options but are also the most expensive so will be considered when finances permit. However, if there are abandoned structures within the site, these can be used as well for the purpose.
  • 33.
  • 34.
    BED PREPARATIONS Prepare thebed by selecting the site that is shaded, free from predators and near to the water source. Arrange the hollow blocks making a bed of 1m x 3m and put bamboo stakes to strengthen the bed. Use sacks and nylon net could be used as matting. Other materials that may be needed in the stocking of the bed are: • Water and water sprinklers • Plastic sheets to cover the bed
  • 35.
  • 36.
    Source and quality •In sourcing raw materials, care should be taken that one is sure of the quality of raw materials. If using animal manure, be sure that he animals were not dewormed as this would also deworm your project. On the other hand, the plant source should also be free of harmful insecticides, fungicides and herbicides which may also decimate your worm population. • The worms eat all organic waste and procedure vermicast. However, the quality of the vermicast and the speed of production are dependent on several factors.
  • 37.
    Carbon to NitrogenRatio (C:N) The desire C:N ratio is 70:30. To achieve this, more than two (2) parts of carbon source with 1 part of nitrogen source. In the rural setting, one may have the luxury of choosing and formulating the raw materials for the substrate in which case, the resultant vermicast is of fertilizer quality. At a higher ratio, the carbon and nitrogen will be locked and not easily available to the plants. A low ratio will not able to hold the nitrogen well and it will volatilize easily.
  • 38.
    Size of thematerials • The smaller the materials being composted, the faster the process. While shredding is not absolutely necessary, it is a vital factor in speeding up the process. After gathering the raw materials, mix well and shared. Wet the mixtures so it feels like a damp sponge.
  • 39.
    DECOMPOSTION PROCESS Anaerobic Decomposition •Place the substrate in containers as airtight as possible or cover it with plastic sheet. This is the anaerobic process which is to hasten the decomposition. This is composting without air, hence the name. This stage may last from 1 week depending upon the quantity being processed and the size of the particles. The substrate is ready of white mushrooms
  • 40.
    Aerobic Decomposition Aerobic Decomposition Whenthe substrate has cooled down, place the substrate in appropriate containers or remove the plastic sheet in the bed. This next phase is called the aerobic stage or composting When the substrate has cooled down, place the substrate in appropriate containers or remove the plastic sheet in the bed. This next phase is called the aerobic stage or composting with air. Stocking Earthworms
  • 41.
    Anaerobic Decomposition Anaerobic Decomposition •Place the substrate in containers as airtight as possible or cover it with plastic sheet. This is the anaerobic process which is to hasten the decomposition. This is composting without air, hence the name. This stage may last from 1 week depending upon the quantity being processed and the size of the particles. The substrate is ready of white mushrooms.
  • 42.
    Stocking Earthworms • Therate of producing vermicast is dependent on the stocking density vis- à-vis the amount of substrate. We have observed that the worms can eat faster if the substrate at this stage appears to be ideal. It has been observed that 100 kilos of substrate can be consumed within 30 days by 1 kilo of worms.
  • 43.
    Monitoring Compost • Maintaina humidity of 80%. Protect the worms from natural predators. Birds, chickens, frogs, mice, snakes and even pigs love to eat worms. While ants do not eat worms, they can kill yout population if left unattended. Shade the worms form direct sunlight. Worms have no skin and compacted. The constant watering of the beds will compact the substrate. Loosen the beds very gently when needed taking care not to disturb the worms too much.
  • 44.
    • Practical Tipfor Humidity: Test by squeezing a fistful of substrate. Five to seven drops of water indicate about 80% humidity. Care should be taken that the substrate is taken from the lower portion of the bed because the upper portion might already by dry but the lower portion is still wet.
  • 45.
  • 46.
    HARVESTING COMPOST • Theearthworms are well mannered and polite. They do not like to live with their poo. They eat the substrate and deposit their casting on the top. In about 6-8 weeks, the substrate that was formerly identifiable as grass and leaves becomes transformed into granular earthly material. The decision to harvest depends on one`s needs.
  • 47.
    Practical Tip: Compostis ready to use when it is dark brown, crumbly and has an earthly smell.
  • 48.
    OPTIONS: a. Pick theworms by hand and transfer them to a new worm bed. The vermicompost may be allowed to dry in the shade for a few days and then sifted if a finer compost is desired. b. In the shade, pile the vermicompost in such a manner that it looks like a pyramid. After a day, you can harvest the top part easily because the worms have gone to the bottom of the pile. When you reach the bottom of the pile, you can extract the worms manually.
  • 49.
    c. Move thecontents of the whole bed to one side. Fill the empty half with new substrate. Allow the wroms to move freely to the new food. Harvest the casting left by the worms. d. Fill an onion bag with fresh food and bury it in the middle of the bed. After a week or so, the bag will be filled with worms which you can empty to a new wormed. This facilitates the gathering of most worms.
  • 50.
    e. If youare not ready to harvest your vermicompost which is fully eaten by the worms, place a net on top of the bed and place a 5 cm layer of fresh substrate on top. You can delay harvesting for about a week (depending on the volume of worms in the bed) because the worms will transfer to the new food. At the same time, when you are ready to harvest, you can first remove the net with the food and you will see that worms have mostly transferred here.
  • 51.
    • If youare in a hurry and need the castings, scrape the top of the bed of the castings deposited there. You run the danger though of losing the eggs which may be there and have not yet hatched.
  • 52.
  • 53.
    VERMITEA MAKING • Theone that will result in the highest amount of beneficial microbes is actively aerated compost tea, which means that you add your vermicompost (in a linen or fine mesh bag) to a bucket of water with an air pump installed. Then, let the air pump continuously aerate the water/vermicompost for at least 24 hours. This is a fantastic method, and many gardeners highly recommend it.
  • 54.
    • There isanother way to make compost tea. This method simply requires you to steep vermicompost in a container of water overnight. • One way to do this is to simply add about 1/4 cup of vermicompost or vermicastings to a gallon of water, then strain the vermicompost by pouring the mixture through a fine sieve or filter.
  • 55.
    • An eveneasier way to steep some vermicompost tea is to put 1/4 cup of vermicompost into a paper coffee filter and tie it closed tightly with cotton twine. Then, simply add this to a one- gallon watering can or bucket, fill the can with water, and let it sit overnight. When you're ready to use it, simply toss the bag into the compost pile.
  • 56.
    • To getsome of the benefits of aeration, you can try stirring the mixture every once in a while, but it's not the end of the world if you don't do so. Letting it steep overnight provides you with a light brown vermicompost tea that you can then immediately use on any plant, indoors or out.
  • 57.
    When to FeedPlants With Vermicompost Tea • During the active growing season, feed houseplants weekly to every 10 days with this tea, and feed veggies and herbs in your outdoor garden at least once a week with it. You really can't overdo it. You can also put this tea into a spray bottle or hose-end sprayer and give your plants a nice foliar feed with it. Some gardeners swear that issues such as powdery mildew are reduced if you use vermicompost tea in this way.
  • 58.
    Processing Organic FoliarFertilizer 1. Prepare a 60-liter capacity container with aeration facility. 2. Put 50 liters of clean water in the container. 3. Aerate the water in 30 minutes. 4. Put 3 kg. Of vermicast inside the tea bag and place inside the container. 5. Pour 500 ml of molasses in the aerated container. 6. Add IMO (50 ml) after 30 minutes then cover. 7. Harvest after 24 hours of continuous aeration and use the prepared foliar fertilizer within 24 hours.
  • 59.
    RECORDKEEPING To effectively monitorthe production of organic fertilizer, the following information must be recorded: -manufacturing -expiry date -quantity -moisture content -nutritional composition