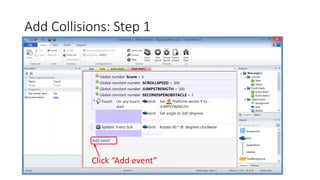
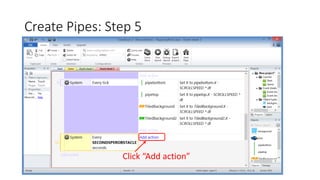
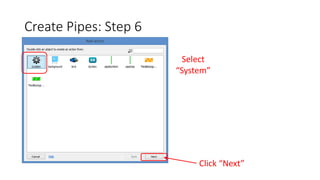
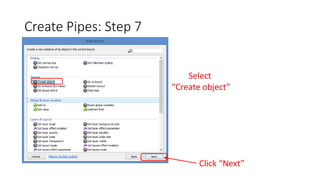
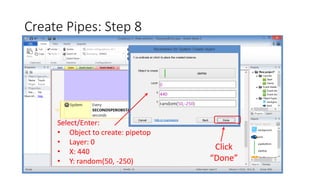
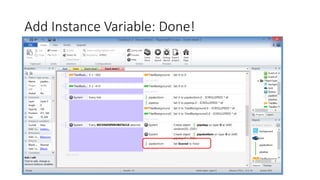
Downloaded 704 times


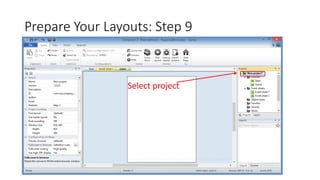
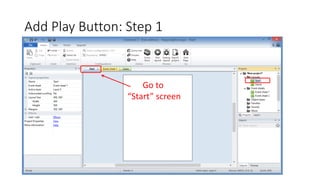


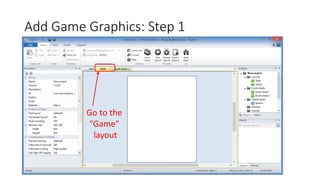

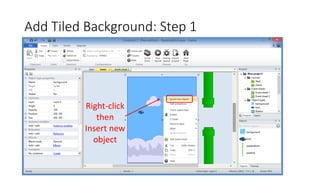
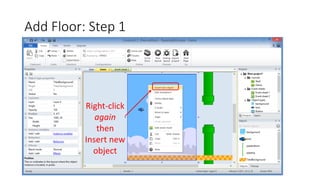


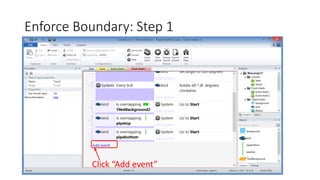
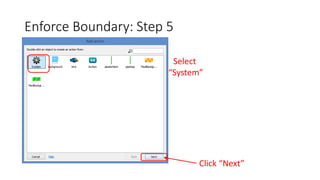
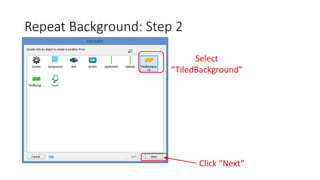
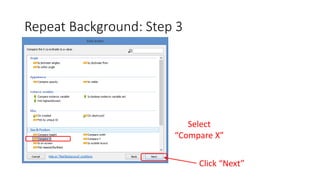
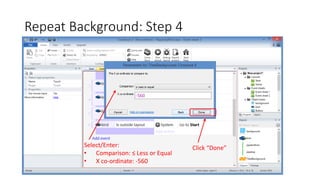
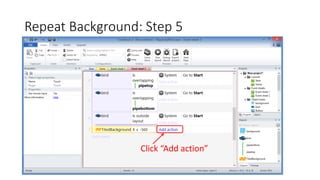
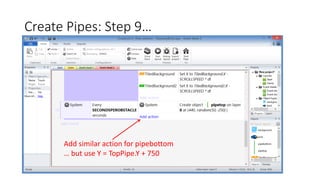
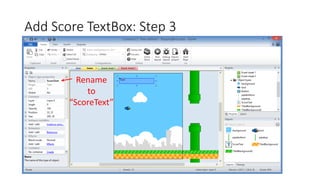
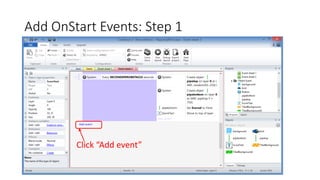
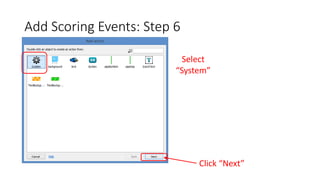
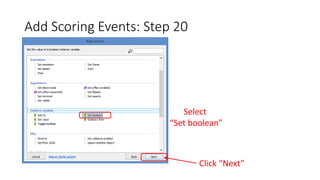
![Add Globals: Step 3
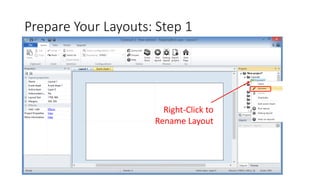
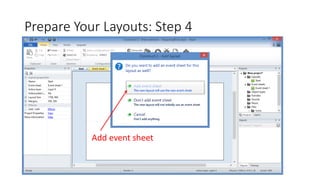
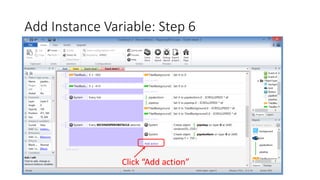
Add New Global Variable 3 times
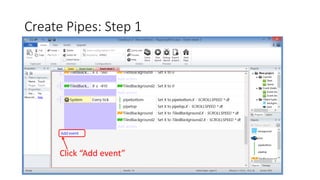
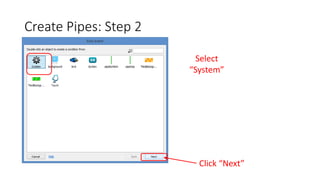
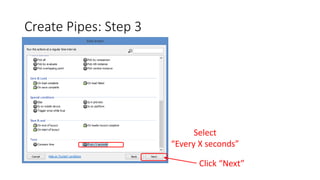
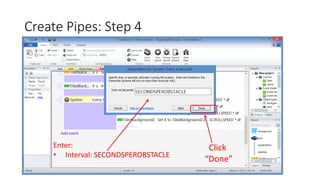
• Name: SECONDSPEROBSTACLE
• Type: Number
• Initial Value: 1
• Constant: [checked]
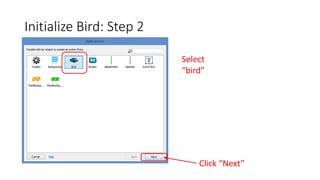
• Name: JUMPSTRENGTH
• Type: Number
• Initial Value: 500
• Constant: [checked]
• Name: SCROLLSPEED
• Type: Number
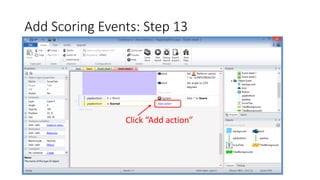
• Initial Value: 300
• Constant: [checked]](https://image.slidesharecdn.com/c2-flappingbird-all3-140717210054-phpapp01/85/Construct-2-Flapping-Bird-Step-by-Step-75-320.jpg)
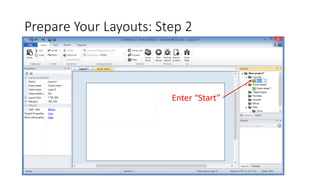
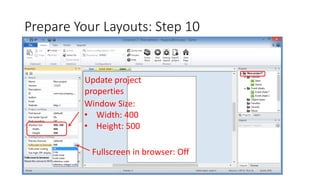
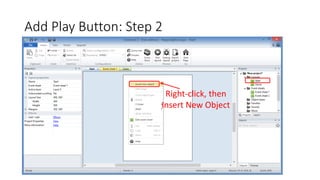
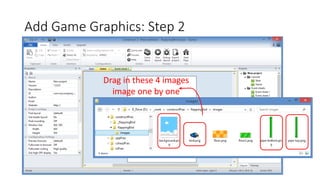
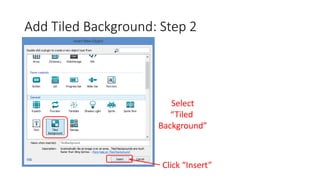
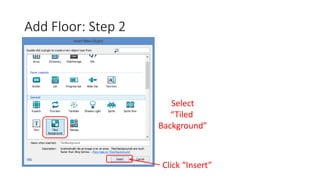
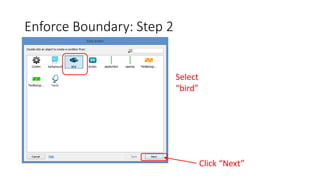
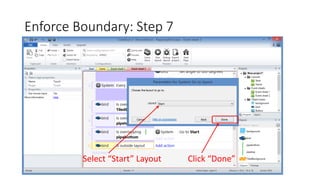
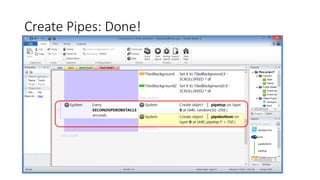
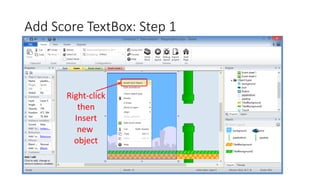
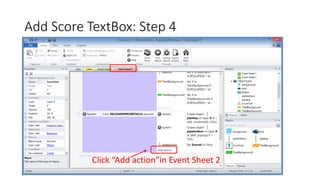
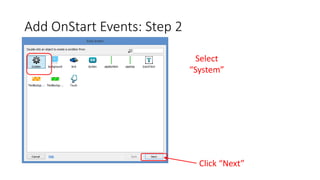
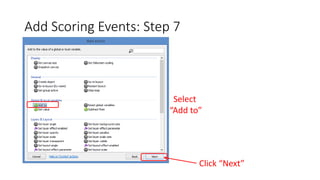
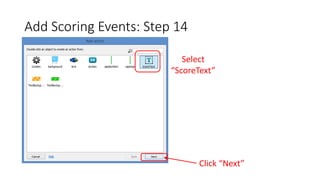
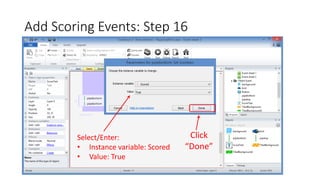
![Add Globals: Step 4
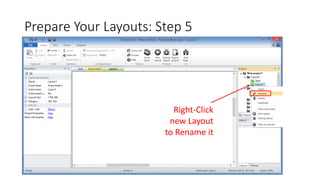
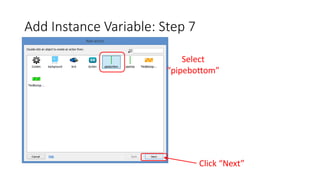
Also, add another global variable for Score
• Name: Score
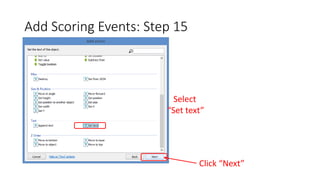
• Type: Number
• Initial Value: 0
• Constant: [NOT checked]](https://image.slidesharecdn.com/c2-flappingbird-all3-140717210054-phpapp01/85/Construct-2-Flapping-Bird-Step-by-Step-76-320.jpg)


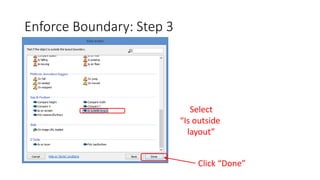

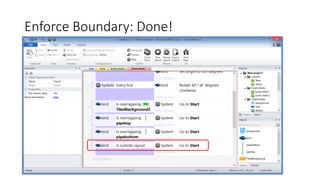

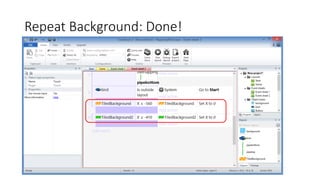


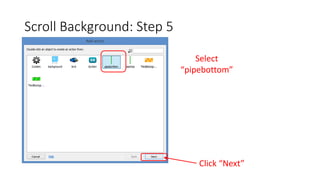
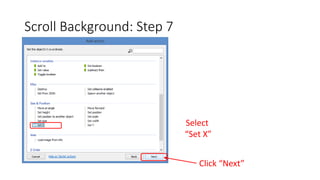
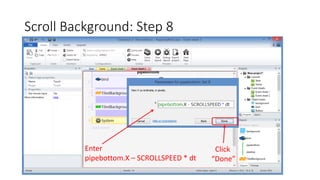
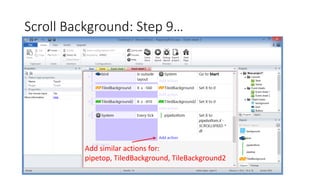
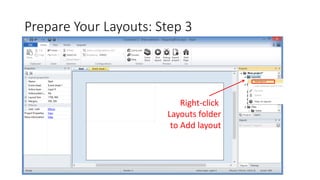
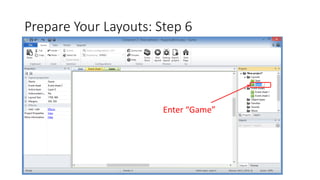
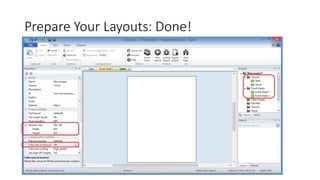
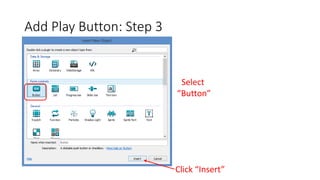
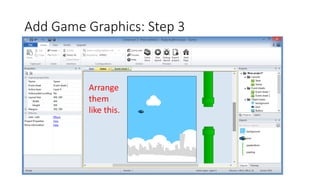
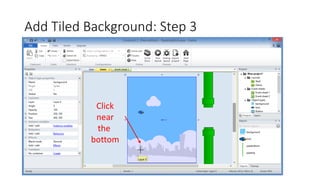
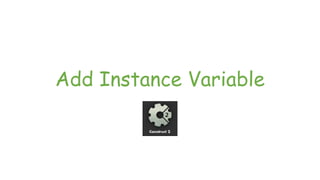
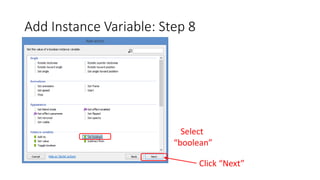
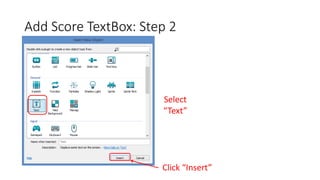
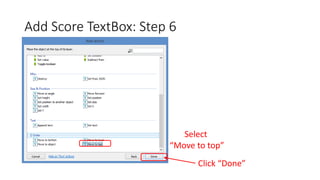
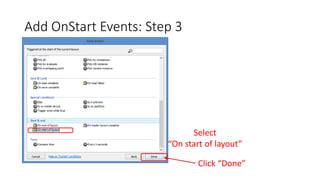
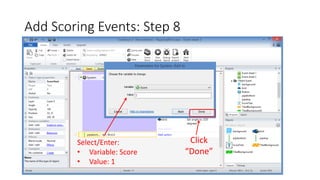
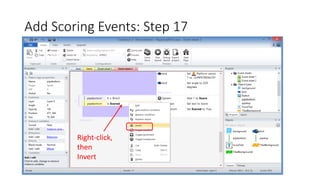
![Scroll Background: Done!
Hint: Set X to [object].X – SCROLLSPEED * dt](https://image.slidesharecdn.com/c2-flappingbird-all3-140717210054-phpapp01/85/Construct-2-Flapping-Bird-Step-by-Step-147-320.jpg)


The document provides a step-by-step tutorial for creating a Flappy Bird game using a specific game development software. It outlines processes such as setting up layouts, adding graphics, implementing gameplay mechanics, and managing game events and scoring. The tutorial aims to help beginners construct a functional game by following detailed instructions.