Laboratory Steps of
CompleteDenture
Designing the Polished Surface, Flasking, Packing, and
Processing
Assel Alrifaie
210801281
2.
Introduction
• Complete denturesare prostheses that replace the entire
dentition.
• Laboratory steps include:
• - Designing the polished surface
• - Flasking
• - Packing
• - Processing
3.
Designing the PolishedSurface
• Definition: The outer surface of the denture contacting lips,
cheeks, and tongue.
• Importance:
• - Provides stability and retention
• - Supports proper muscle balance
• - Aids in esthetics and hygiene
4.
Designing the PolishedSurface
- Principles
• - Maxillary: Convex surface, supports lips & cheeks
• - Mandibular: Proper tongue space, neutral zone
• - Proper contours prevent food accumulation
• - Must be smooth and easy to clean
5.
Flasking
• Definition: Investingthe waxed denture and cast in a flask
with dental stone to form a mold.
• Flask parts:
• - Cap (top)
• - Cope (middle)
• - Drag (bottom)
6.
Flasking - Steps(Part 1)
• 1. Soak master cast
• 2. Place cast in lower flask with dental stone
• 3. Apply separating medium
• 4. Position upper part of flask
7.
Flasking - Steps(Part 2)
• 5. Add second mix of stone over waxed denture
• 6. Fill flask completely with stone
• 7. Close flask and allow stone to set
8.
Devaxing
• • Flaskplaced in boiling water (4 min)
• • Open flask and remove softened wax
• • Residual wax cleaned with solvent
• • Apply separating medium to mold surface
9.
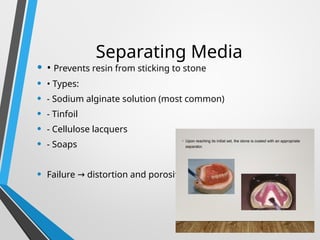
Separating Media
• •Prevents resin from sticking to stone
• • Types:
• - Sodium alginate solution (most common)
• - Tinfoil
• - Cellulose lacquers
• - Soaps
• Failure distortion and porosity
→
10.
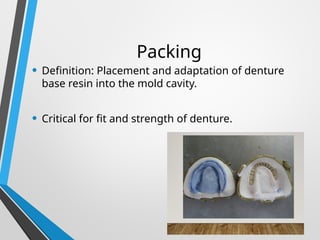
Packing
• Definition: Placementand adaptation of denture
base resin into the mold cavity.
• Critical for fit and strength of denture.
11.
Packing - Steps
•1. Mix polymer and monomer to dough stage
• 2. Roll into rope shape and place in mold
• 3. Trial closure under press
• 4. Remove excess resin (flash)
• 5. Final closure of flask
12.
Packing - Errors
•• Too much resin thick denture base, malposition
→
of teeth
• • Too little resin porosity and voids
→
Processing - LongCure
• • Water bath at 74°C for 8 hours
• • No terminal boil
• • Produces strong, accurate denture bases
15.
Processing - ShortCure
• • 74°C for 2 hours, then 100°C for 1 hour
• • Faster method
• • May increase porosity risk if rushed
16.
Processing - InjectionMolding
• • Resin injected into mold under pressure
• • Maintains vertical dimension of occlusion
• • More accurate adaptation
• • Example: Ivocap system
17.
Processing - Microwave
Technique
•• Uses special flask with resin and screws
• • 3 minutes microwave curing
• • Faster and energy efficient
• • Produces good results with less water absorption
18.
Deflasking - Step1
• • Bench cool flask for 30 minutes
• • Immerse in cool water for 15 minutes
19.
Deflasking - Step2
• • Carefully separate stone and retrieve denture
• • Avoid damaging the denture base or cast
20.
Finishing
• • Removeexcess resin and smooth rough surfaces
• • Polish polished surfaces for esthetics and hygiene
21.
Importance of EachStep
• • Designing polished surface stability &
→
retention
• • Flasking accurate mold
→
• • Packing proper fit and strength
→
• • Processing durability & biocompatibility
→
Clinical Relevance
• Laboratoryaccuracy ensures:
• - Good fit
• - Comfort for patient
• - Esthetics
• - Long-term durability
24.
Conclusion
• Complete denturesuccess depends on precise lab
procedures.
• Flasking, packing, and processing must be done carefully
to ensure a functional and esthetic denture.