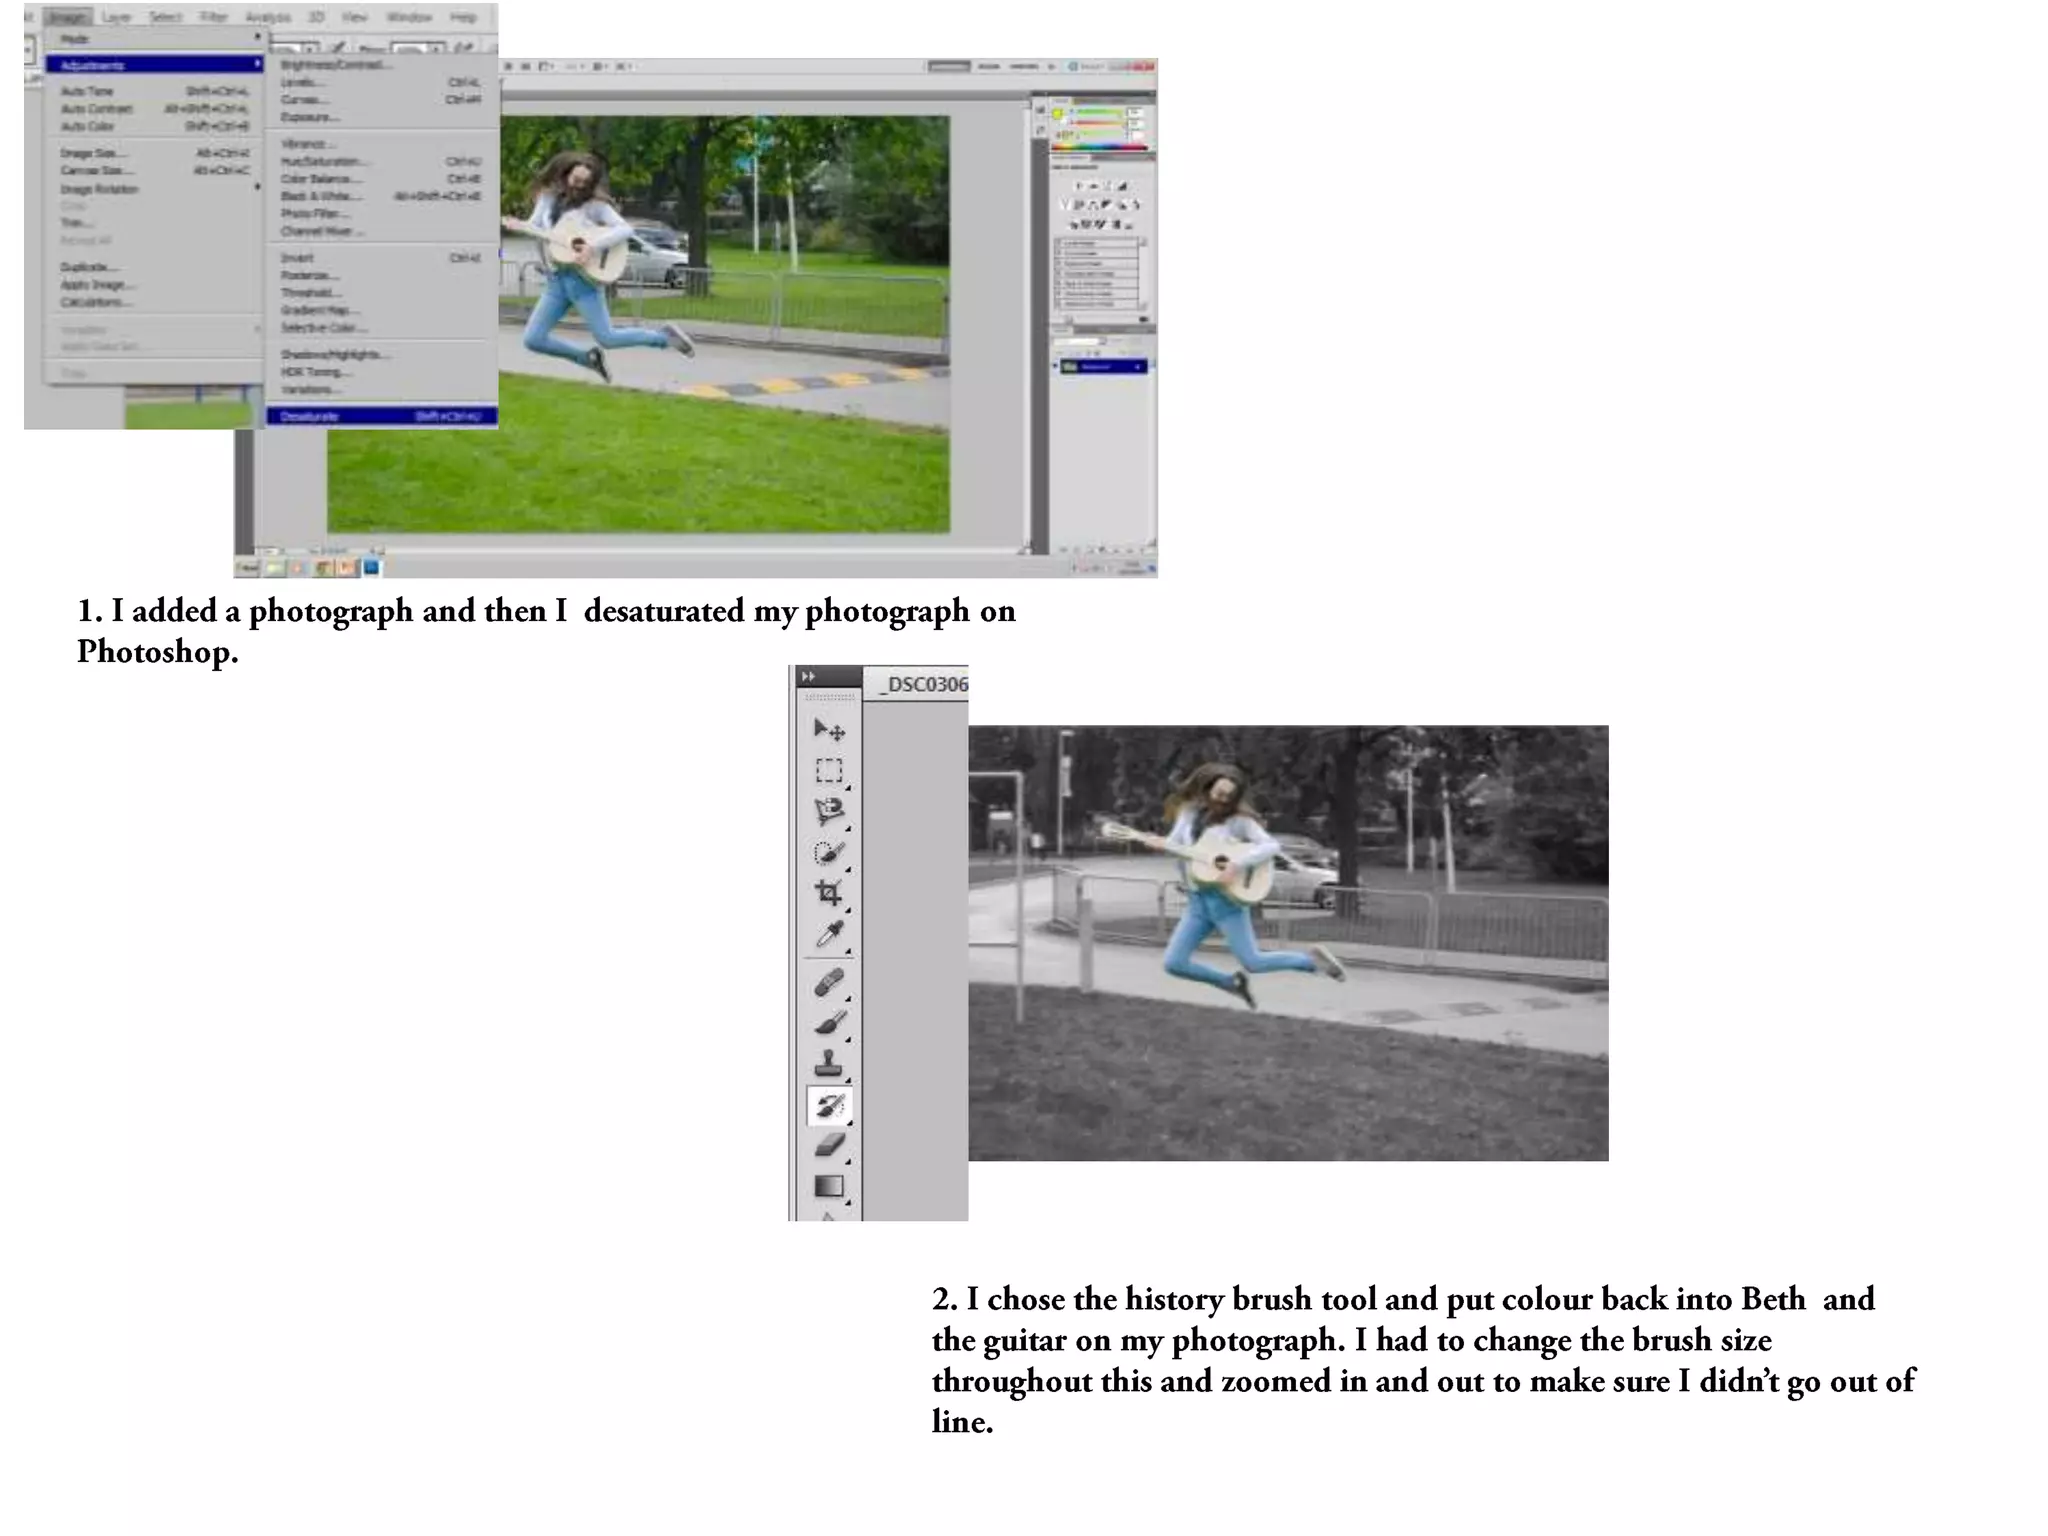
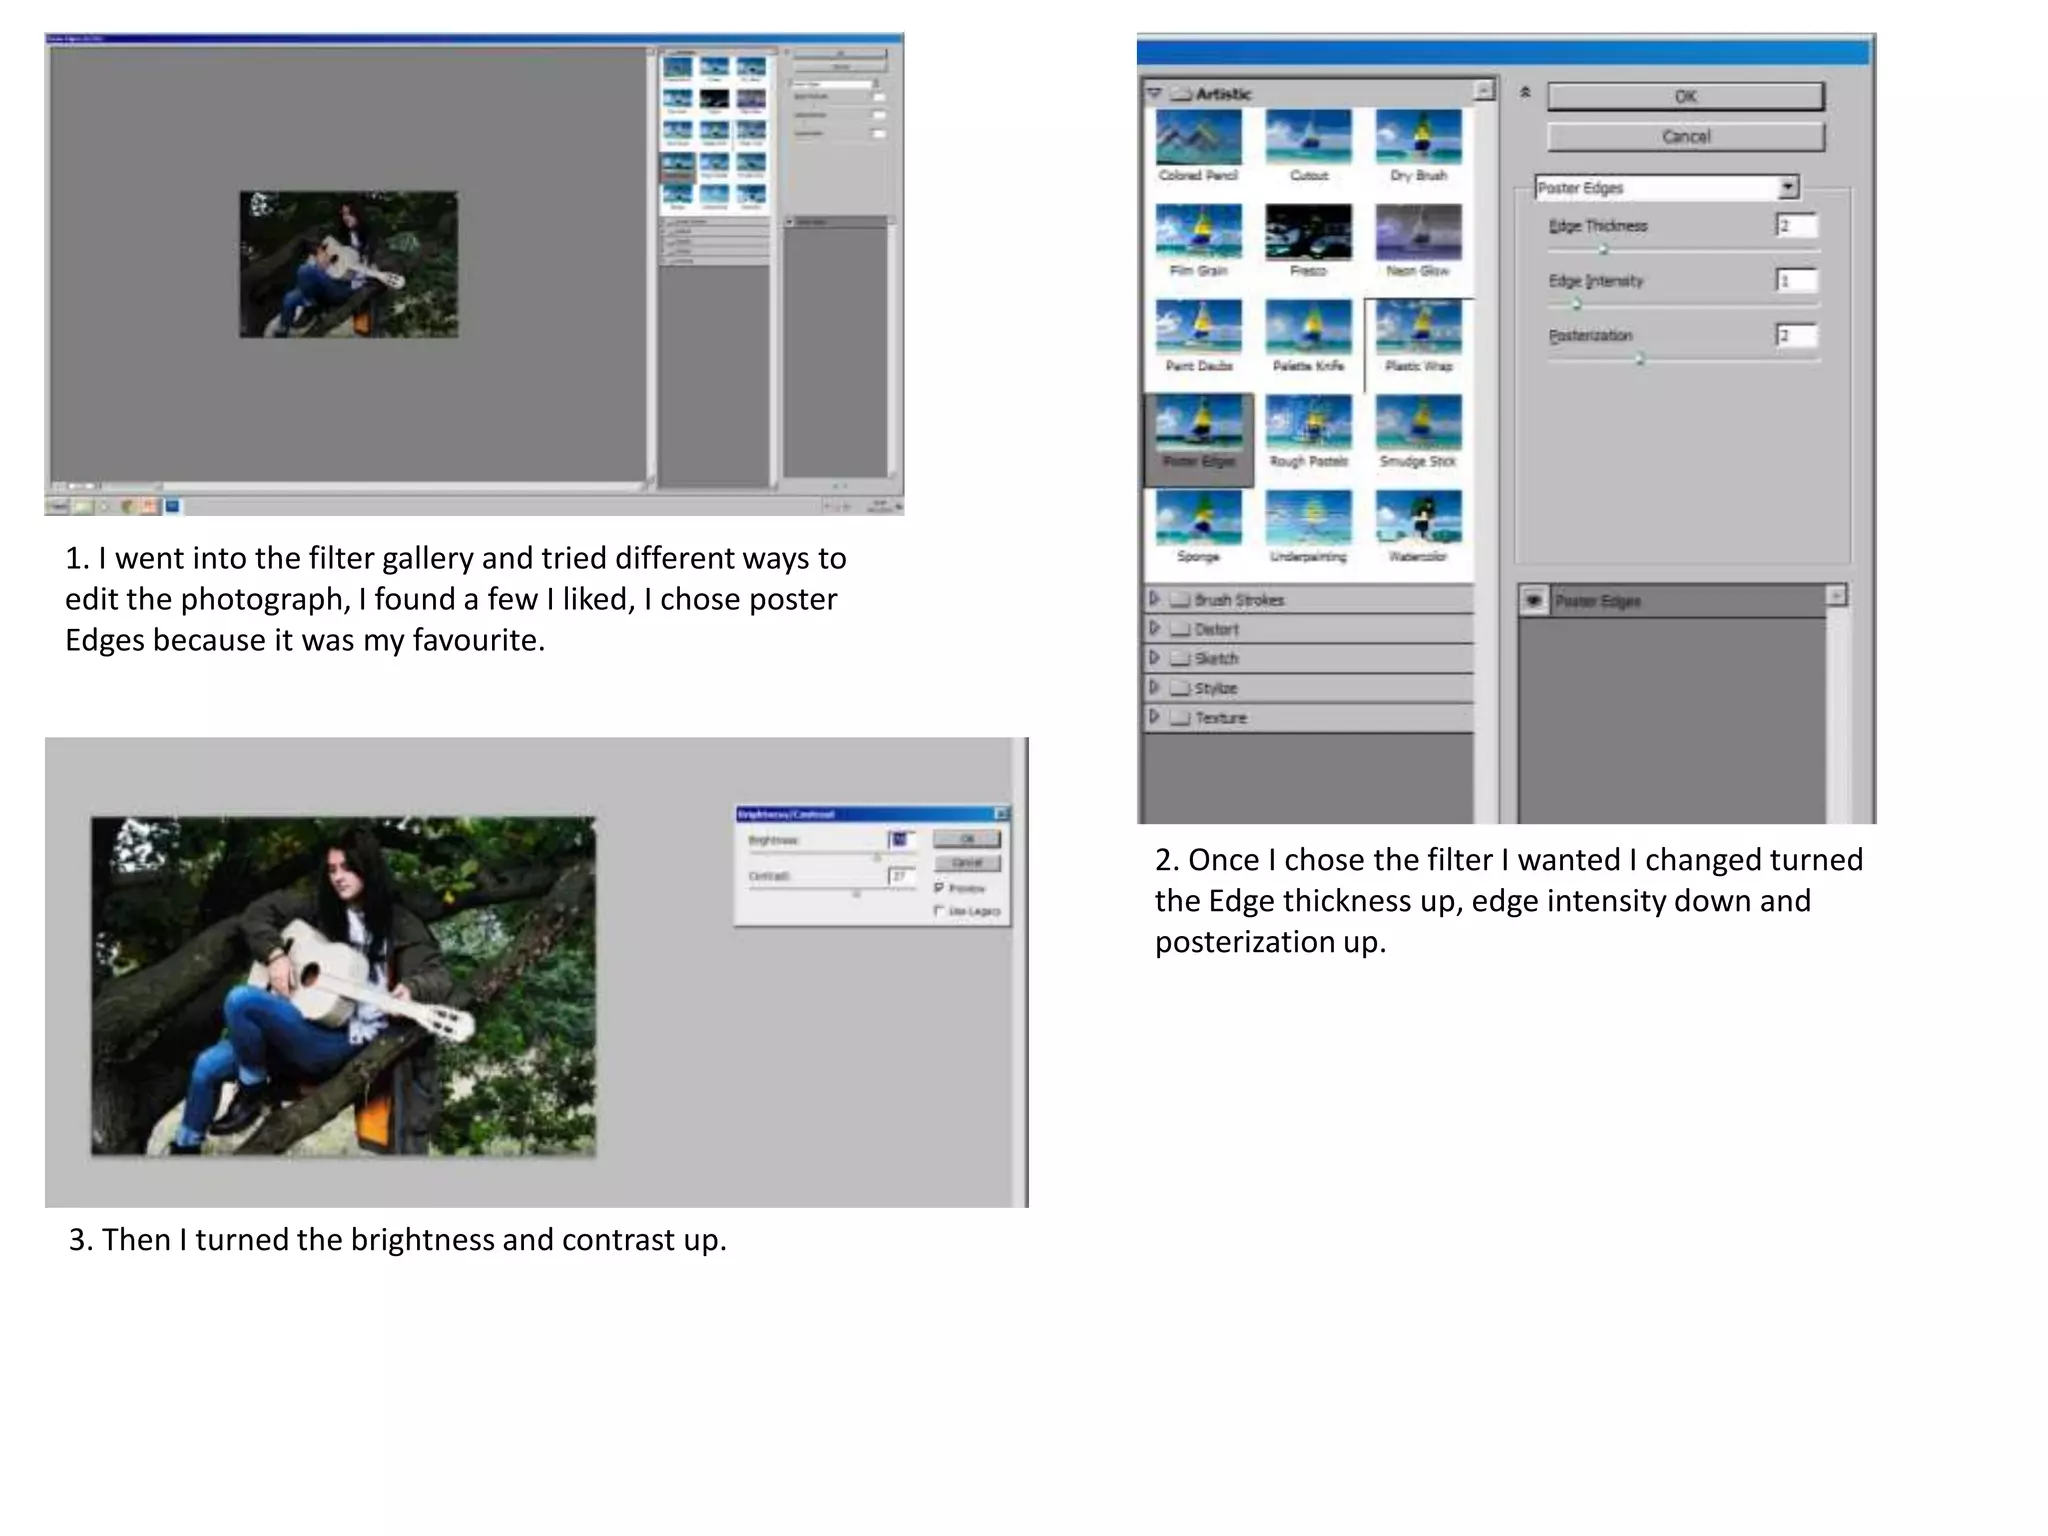
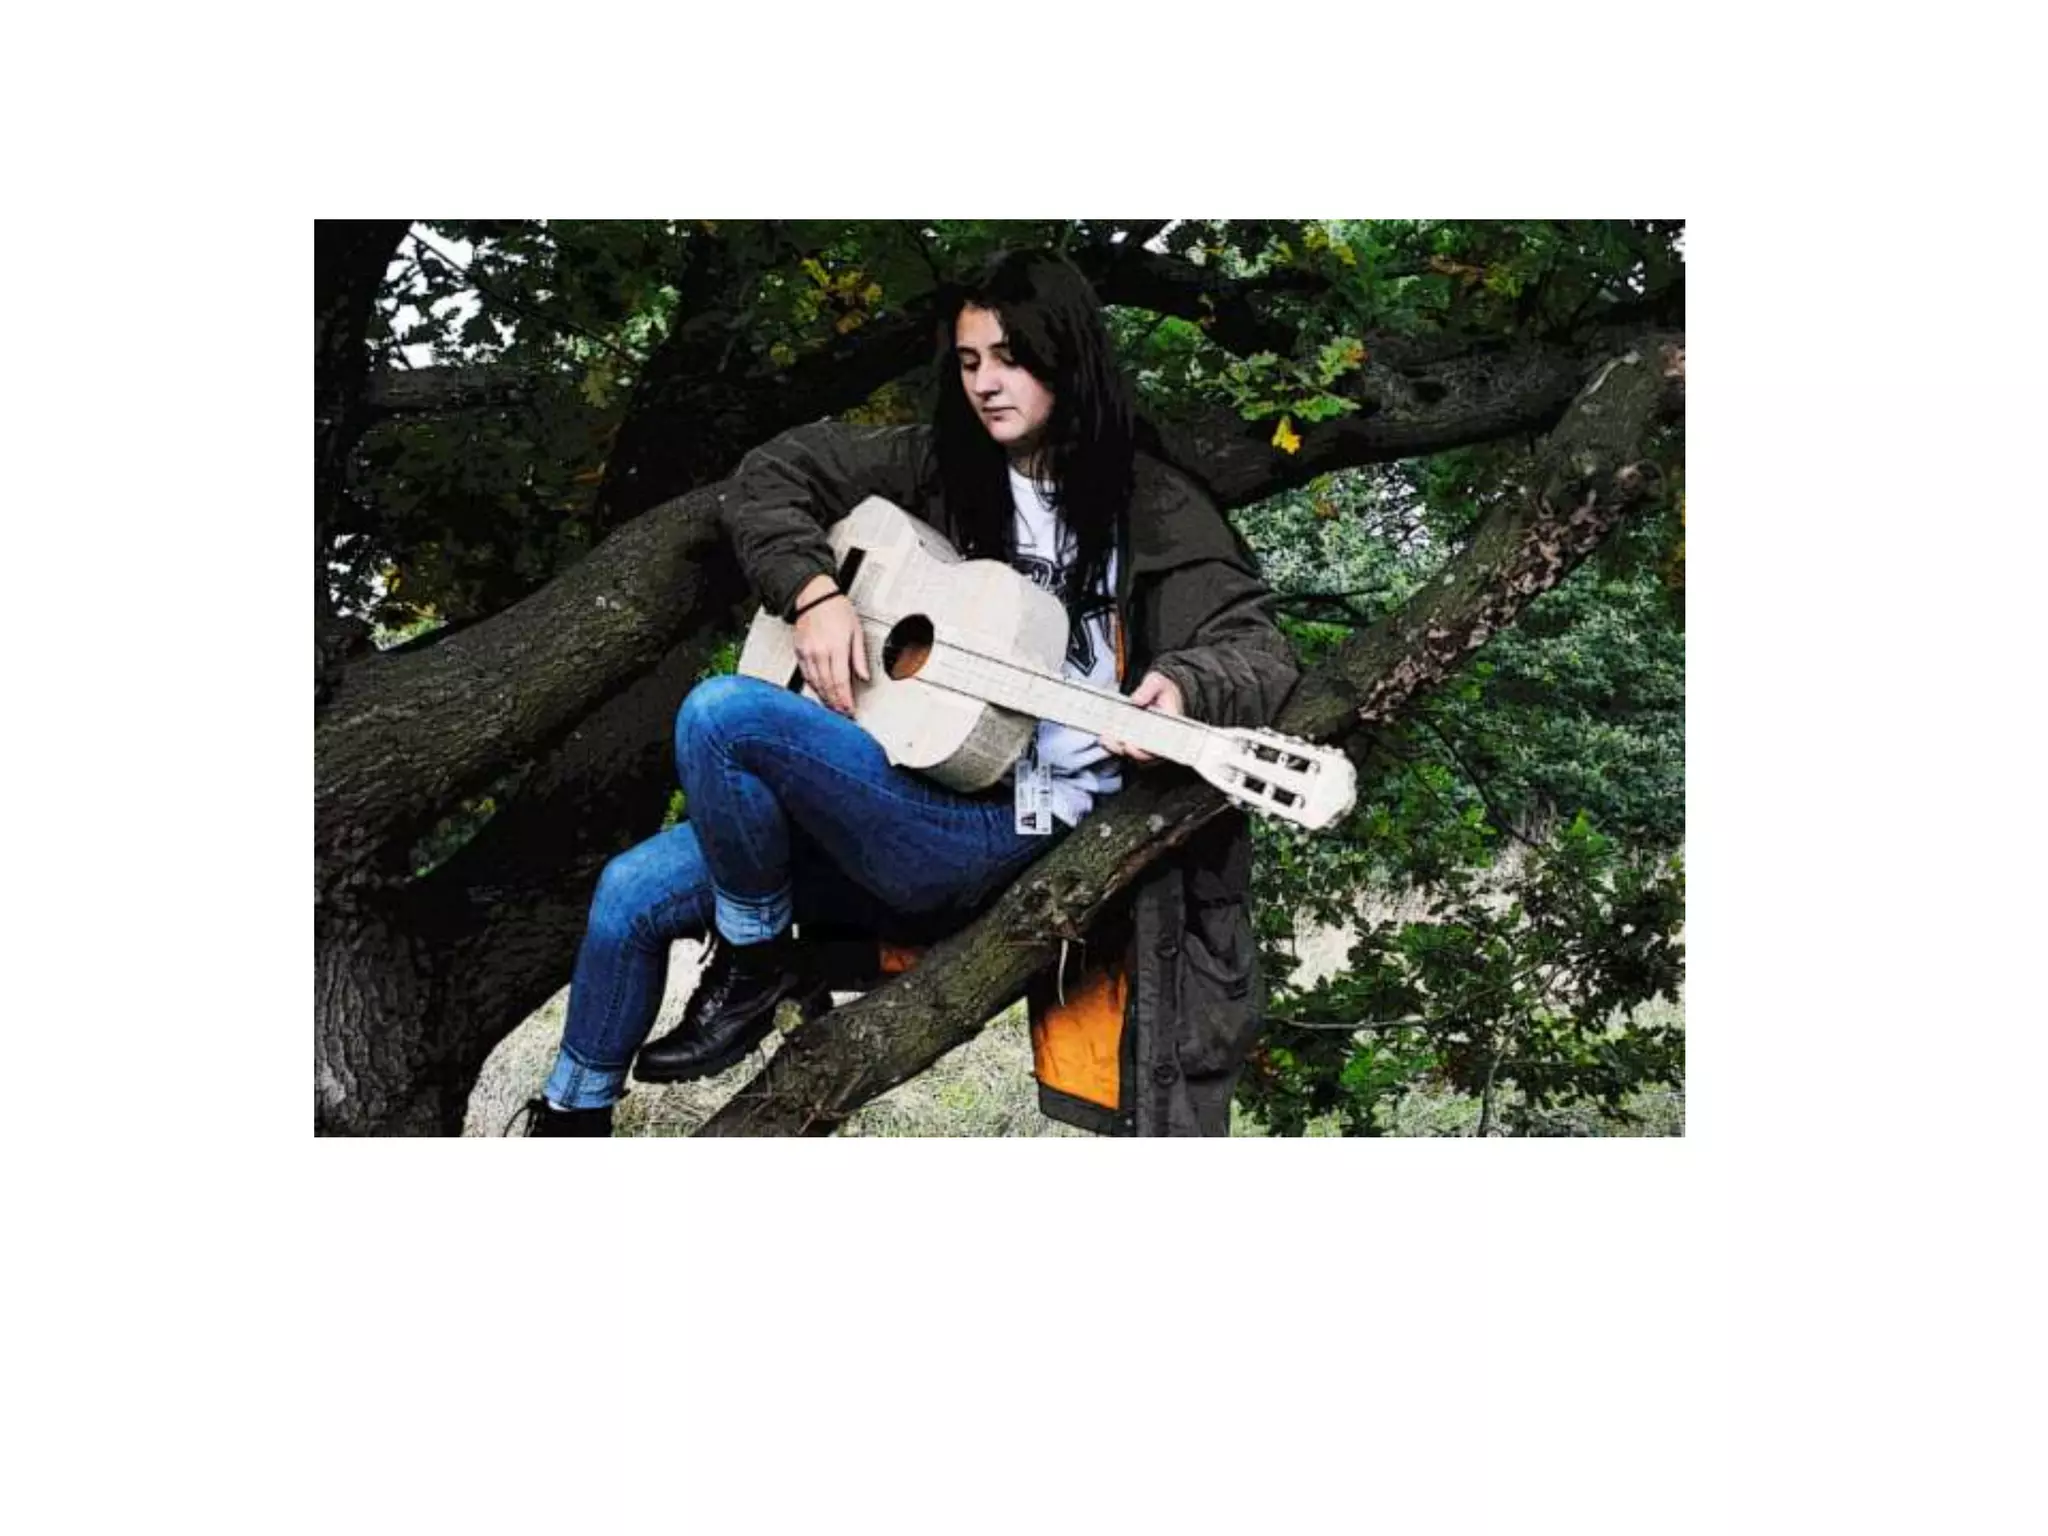
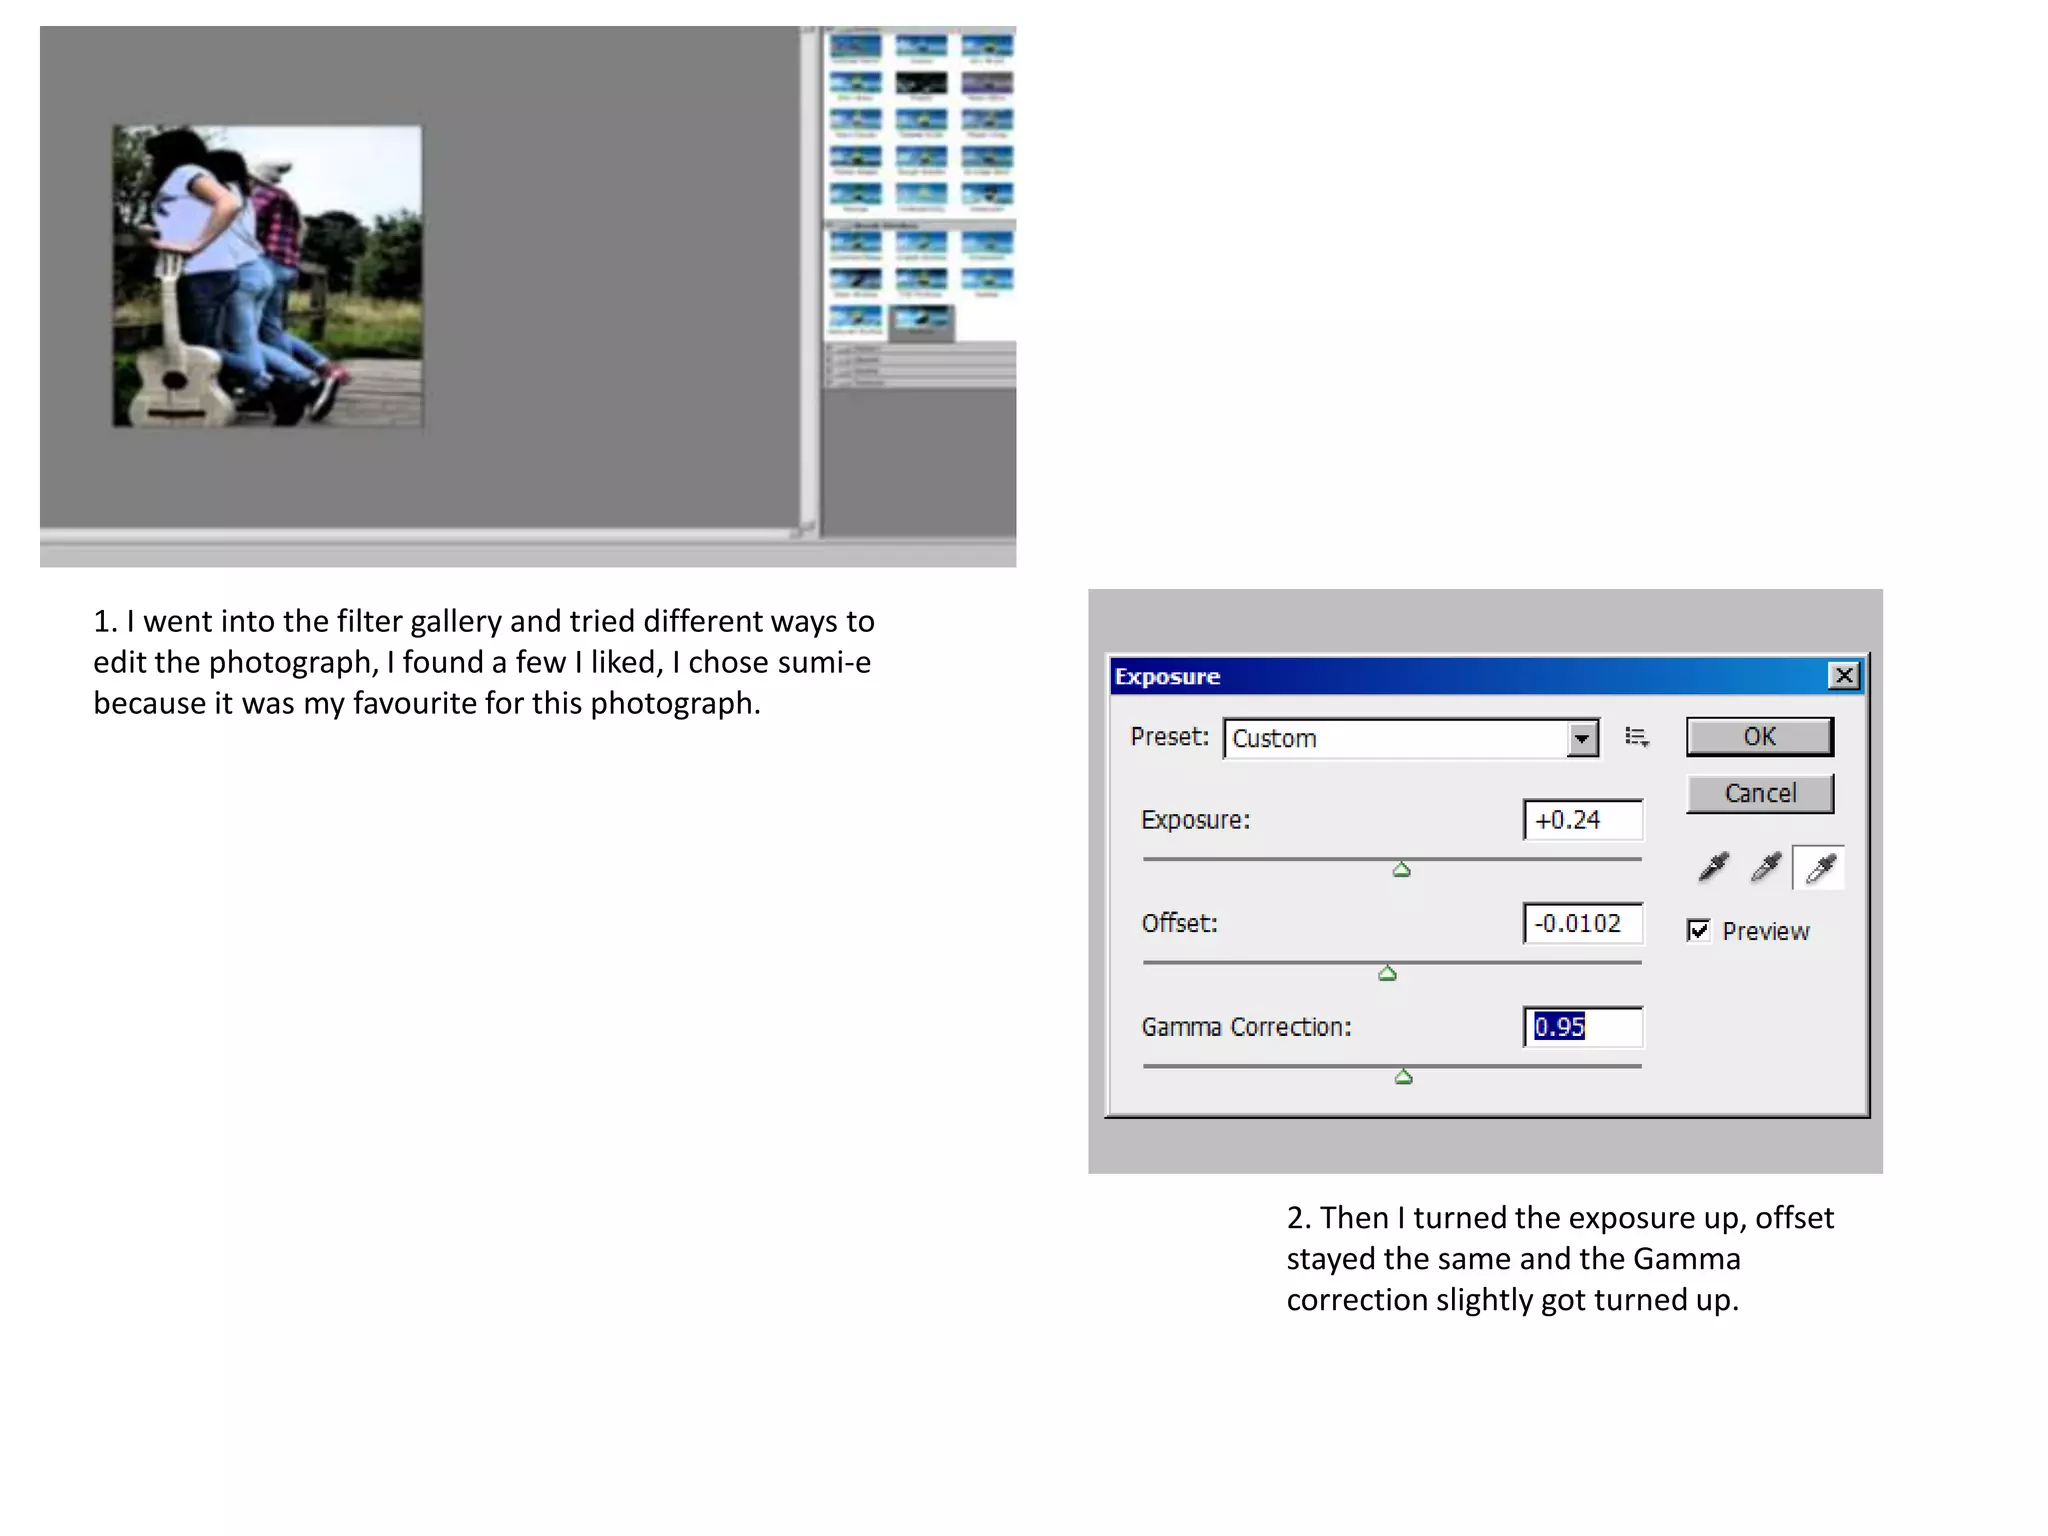
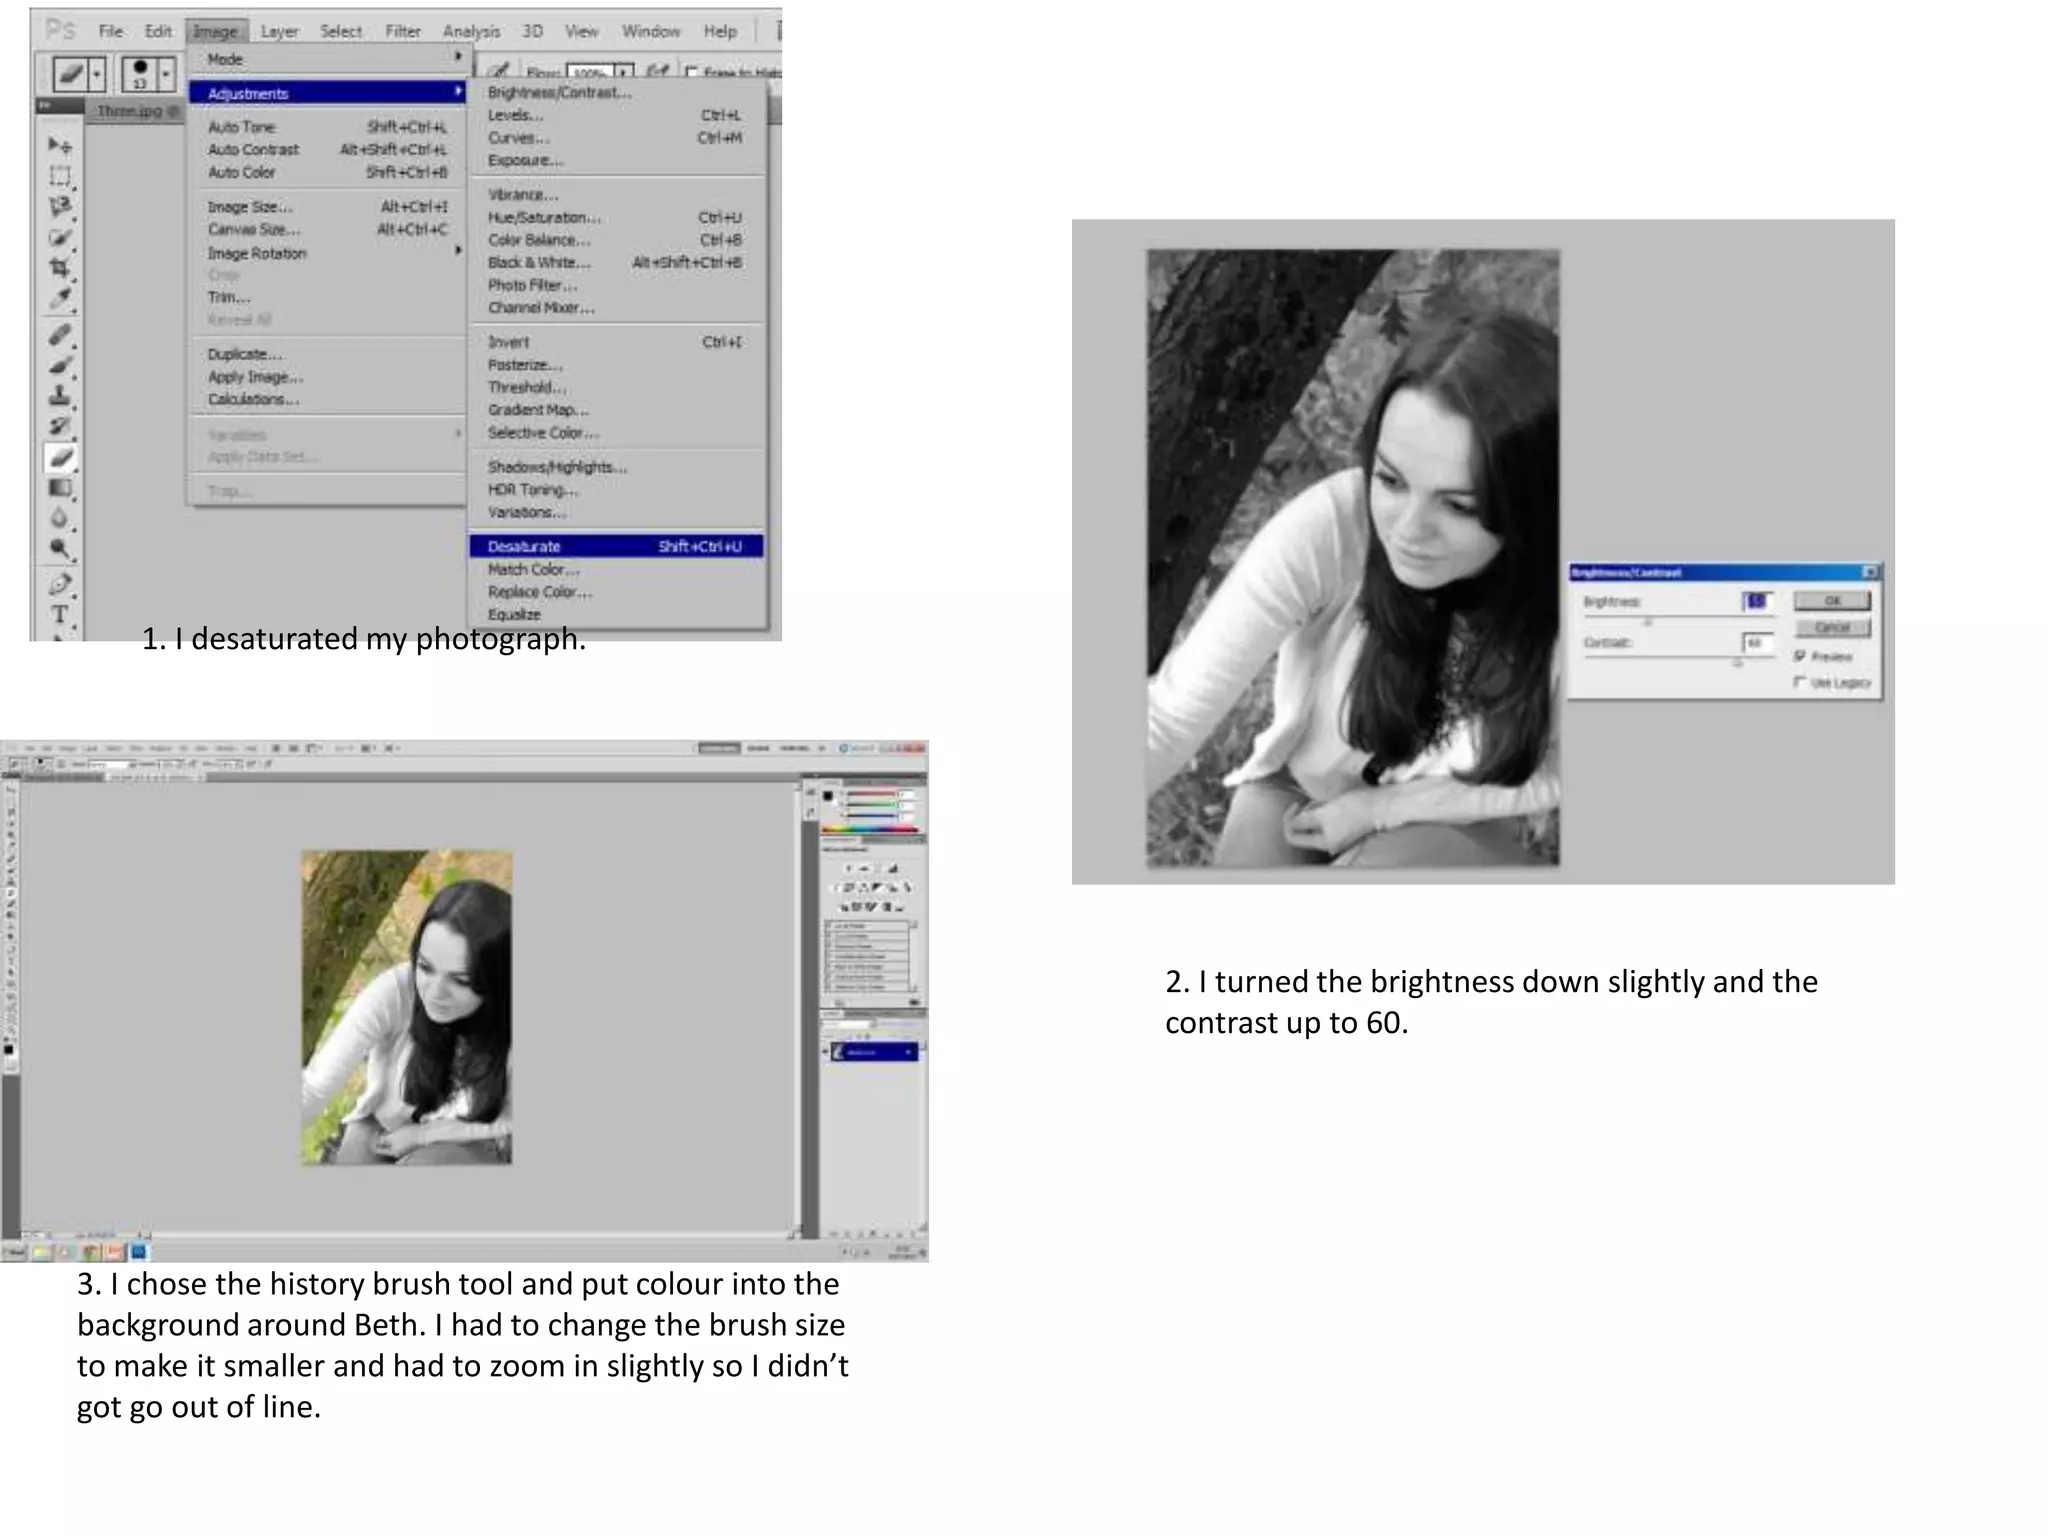
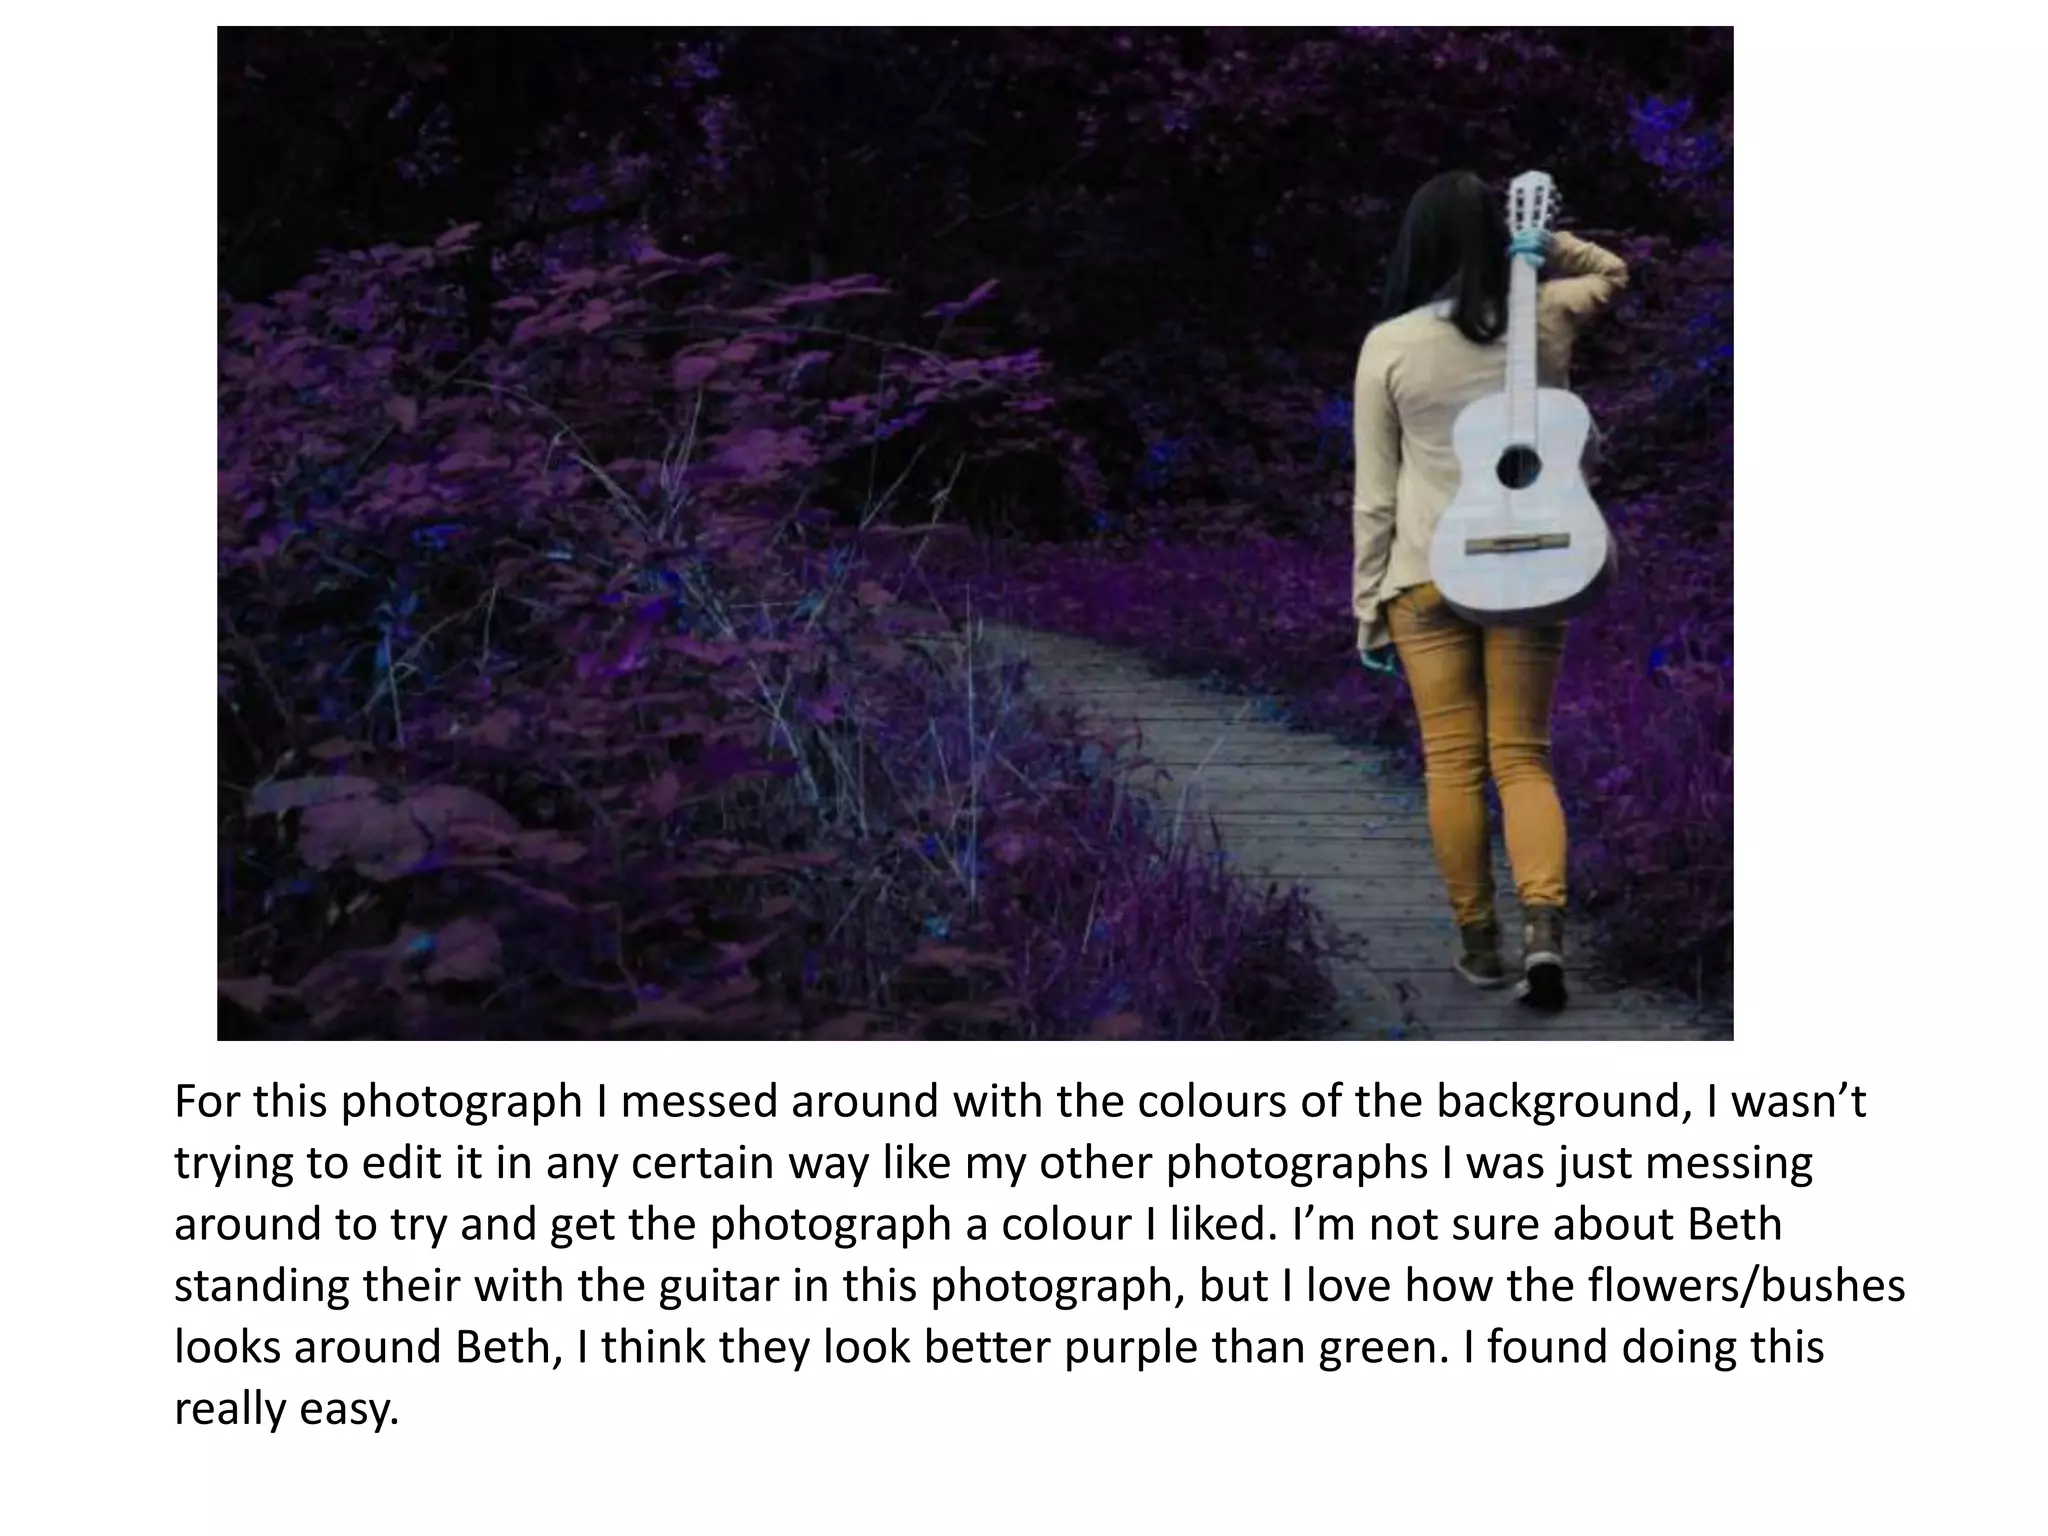
1. I went into the filter gallery and tried different ways to
edit the photograph, I found a few I liked, I chose poster
Edges because it was my favourite.

2. Once I chose the filter I wanted I changed turned
the Edge thickness up, edge intensity down and
posterization up.

3. Then I turned the brightness and contrast up.
1. I went into the filter gallery and tried different ways to
edit the photograph, I found a few I liked, I chose sumi-e
because it was my favourite for this photograph.

2. Then I turned the exposure up, offset
stayed the same and the Gamma
correction slightly got turned up.
1. I desaturated my photograph.

2. I turned the brightness down slightly and the
contrast up to 60.

3. I chose the history brush tool and put colour into the
background around Beth. I had to change the brush size
to make it smaller and had to zoom in slightly so I didn’t
got go out of line.
For this photograph I messed around with the colours of the background, I wasn’t
trying to edit it in any certain way like my other photographs I was just messing
around to try and get the photograph a colour I liked. I’m not sure about Beth
standing their with the guitar in this photograph, but I love how the flowers/bushes
looks around Beth, I think they look better purple than green. I found doing this
really easy.

College edits- slide1

  • 4.
    1. I wentinto the filter gallery and tried different ways to edit the photograph, I found a few I liked, I chose poster Edges because it was my favourite. 2. Once I chose the filter I wanted I changed turned the Edge thickness up, edge intensity down and posterization up. 3. Then I turned the brightness and contrast up.
  • 6.
    1. I wentinto the filter gallery and tried different ways to edit the photograph, I found a few I liked, I chose sumi-e because it was my favourite for this photograph. 2. Then I turned the exposure up, offset stayed the same and the Gamma correction slightly got turned up.
  • 8.
    1. I desaturatedmy photograph. 2. I turned the brightness down slightly and the contrast up to 60. 3. I chose the history brush tool and put colour into the background around Beth. I had to change the brush size to make it smaller and had to zoom in slightly so I didn’t got go out of line.
  • 10.
    For this photographI messed around with the colours of the background, I wasn’t trying to edit it in any certain way like my other photographs I was just messing around to try and get the photograph a colour I liked. I’m not sure about Beth standing their with the guitar in this photograph, but I love how the flowers/bushes looks around Beth, I think they look better purple than green. I found doing this really easy.