Download as DOCX, PPTX

![Fixing the theme
The solution is to add additional styling, it's possible to add some additional css
styling. Similar to how we added the JavaScript we can edit the 'screen.css' file
or create a new file.
As before the first option runs the risk that when you update Ghost you will lose
this styling. However, the second option requires browsers to load two file and is
slightly less performant, however this for me is still the best option.
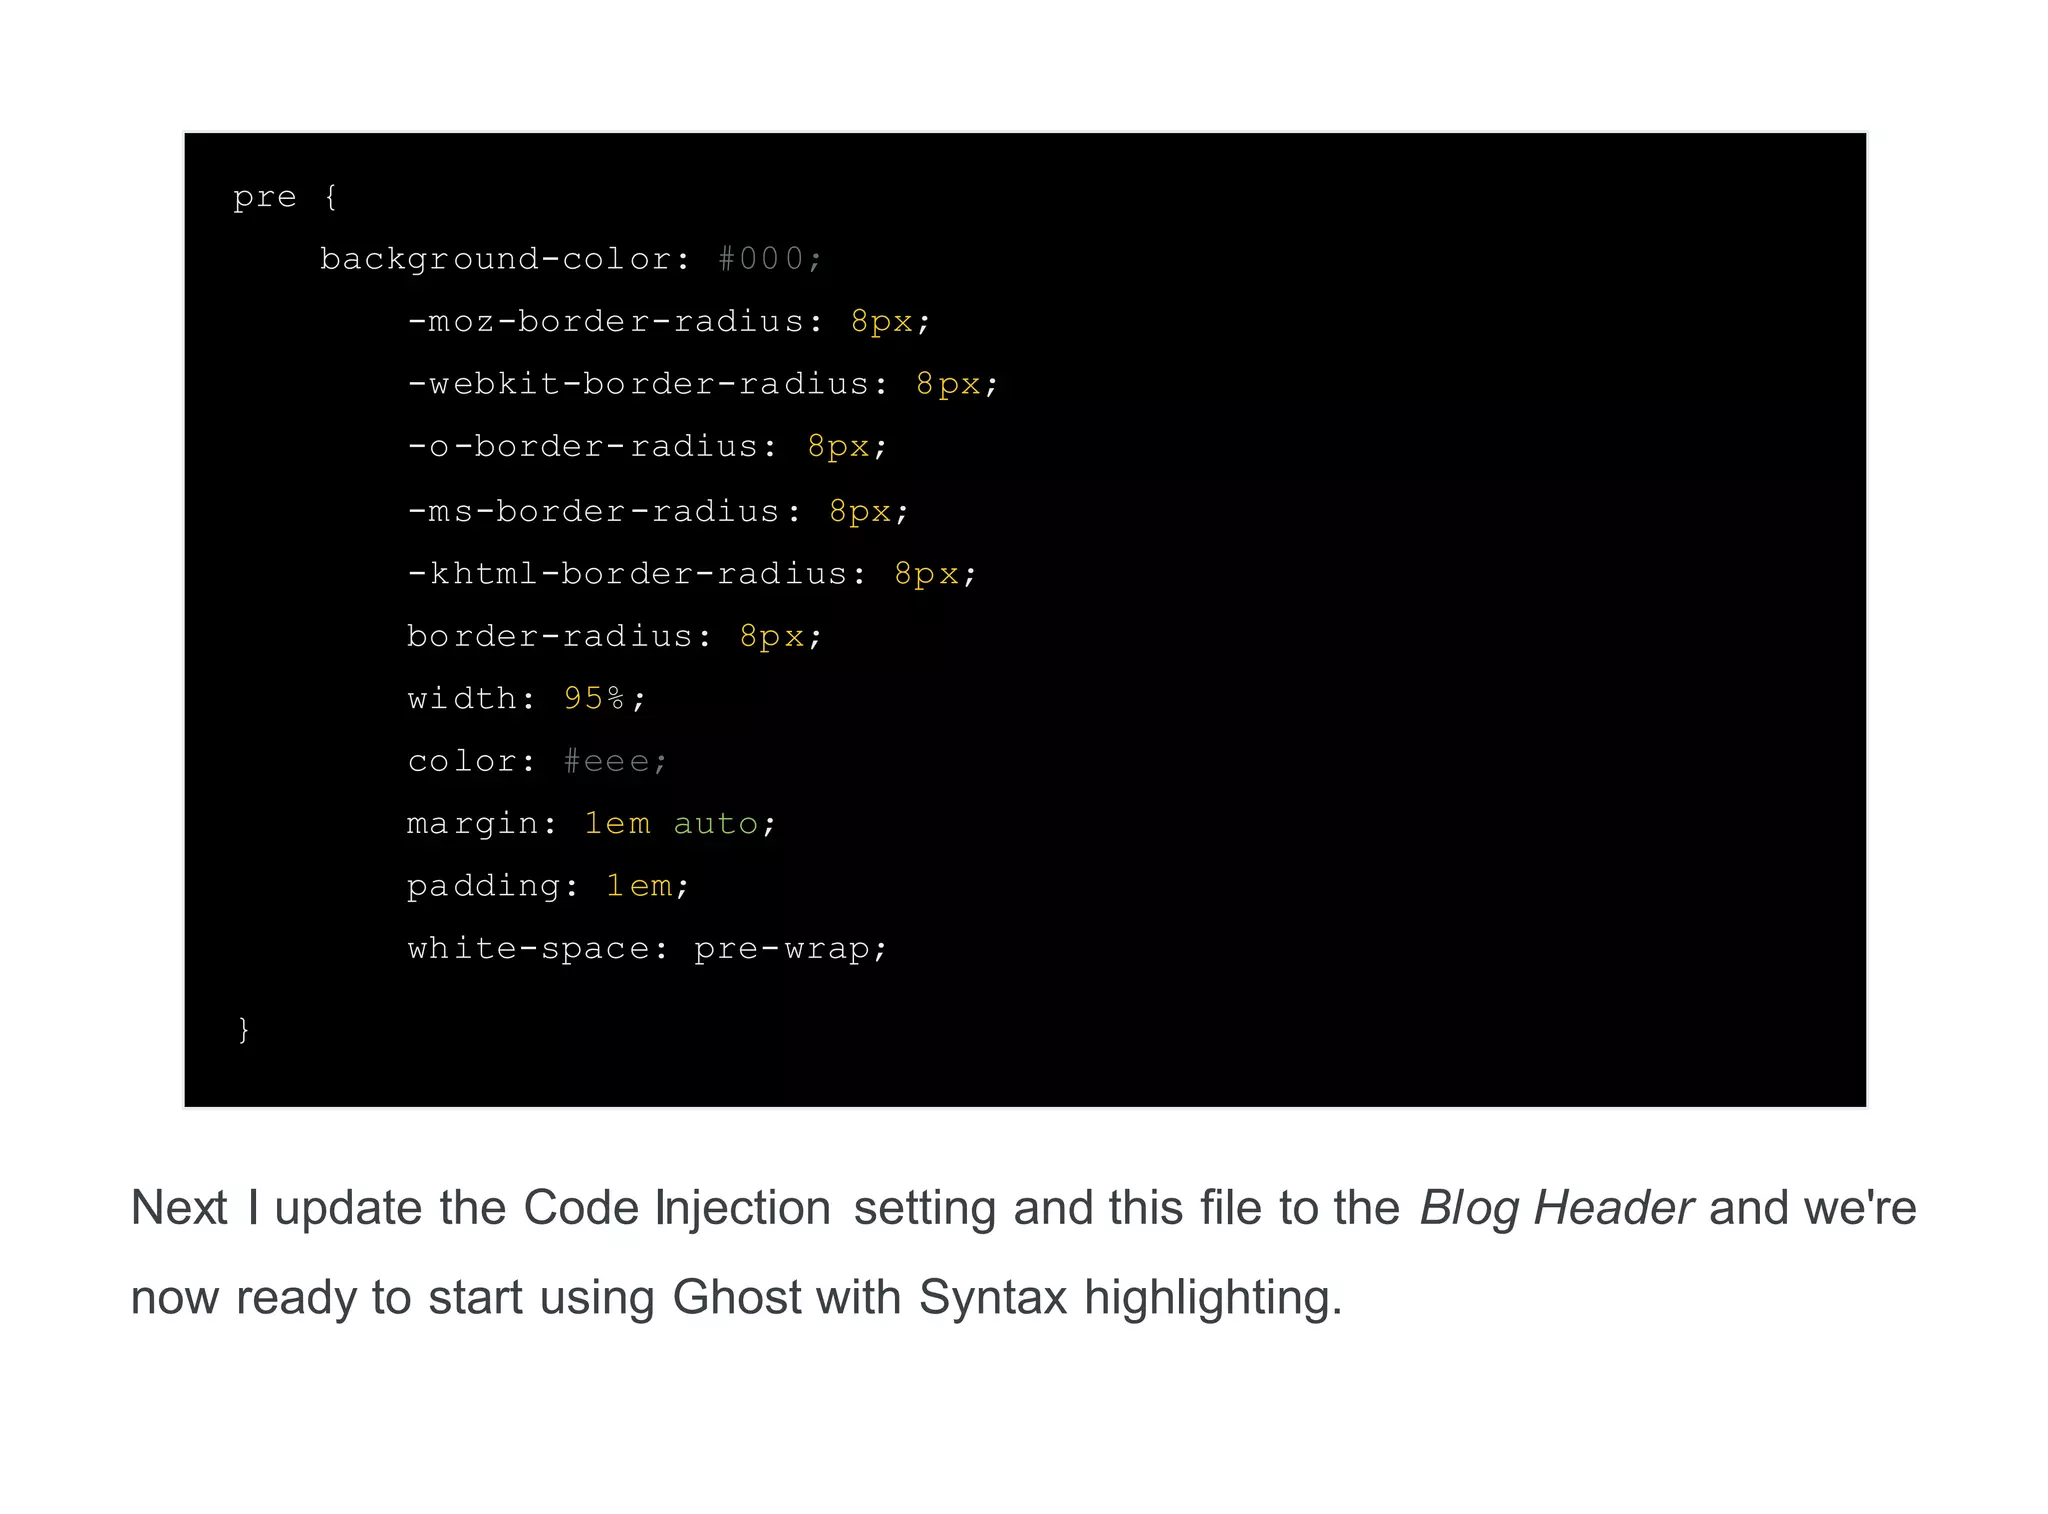
In Ghost css files live in the following folder /content/themes/[your
theme]/assets/css/ folder which is then mapped /assets/css/ for browsers to
access. In this folder I create a prettyprint.css text file and add this following
css.](https://image.slidesharecdn.com/codesyntaxhighlightinginghost-151027075451-lva1-app6891/75/Code-syntax-highlighting-in-ghost-6-2048.jpg)
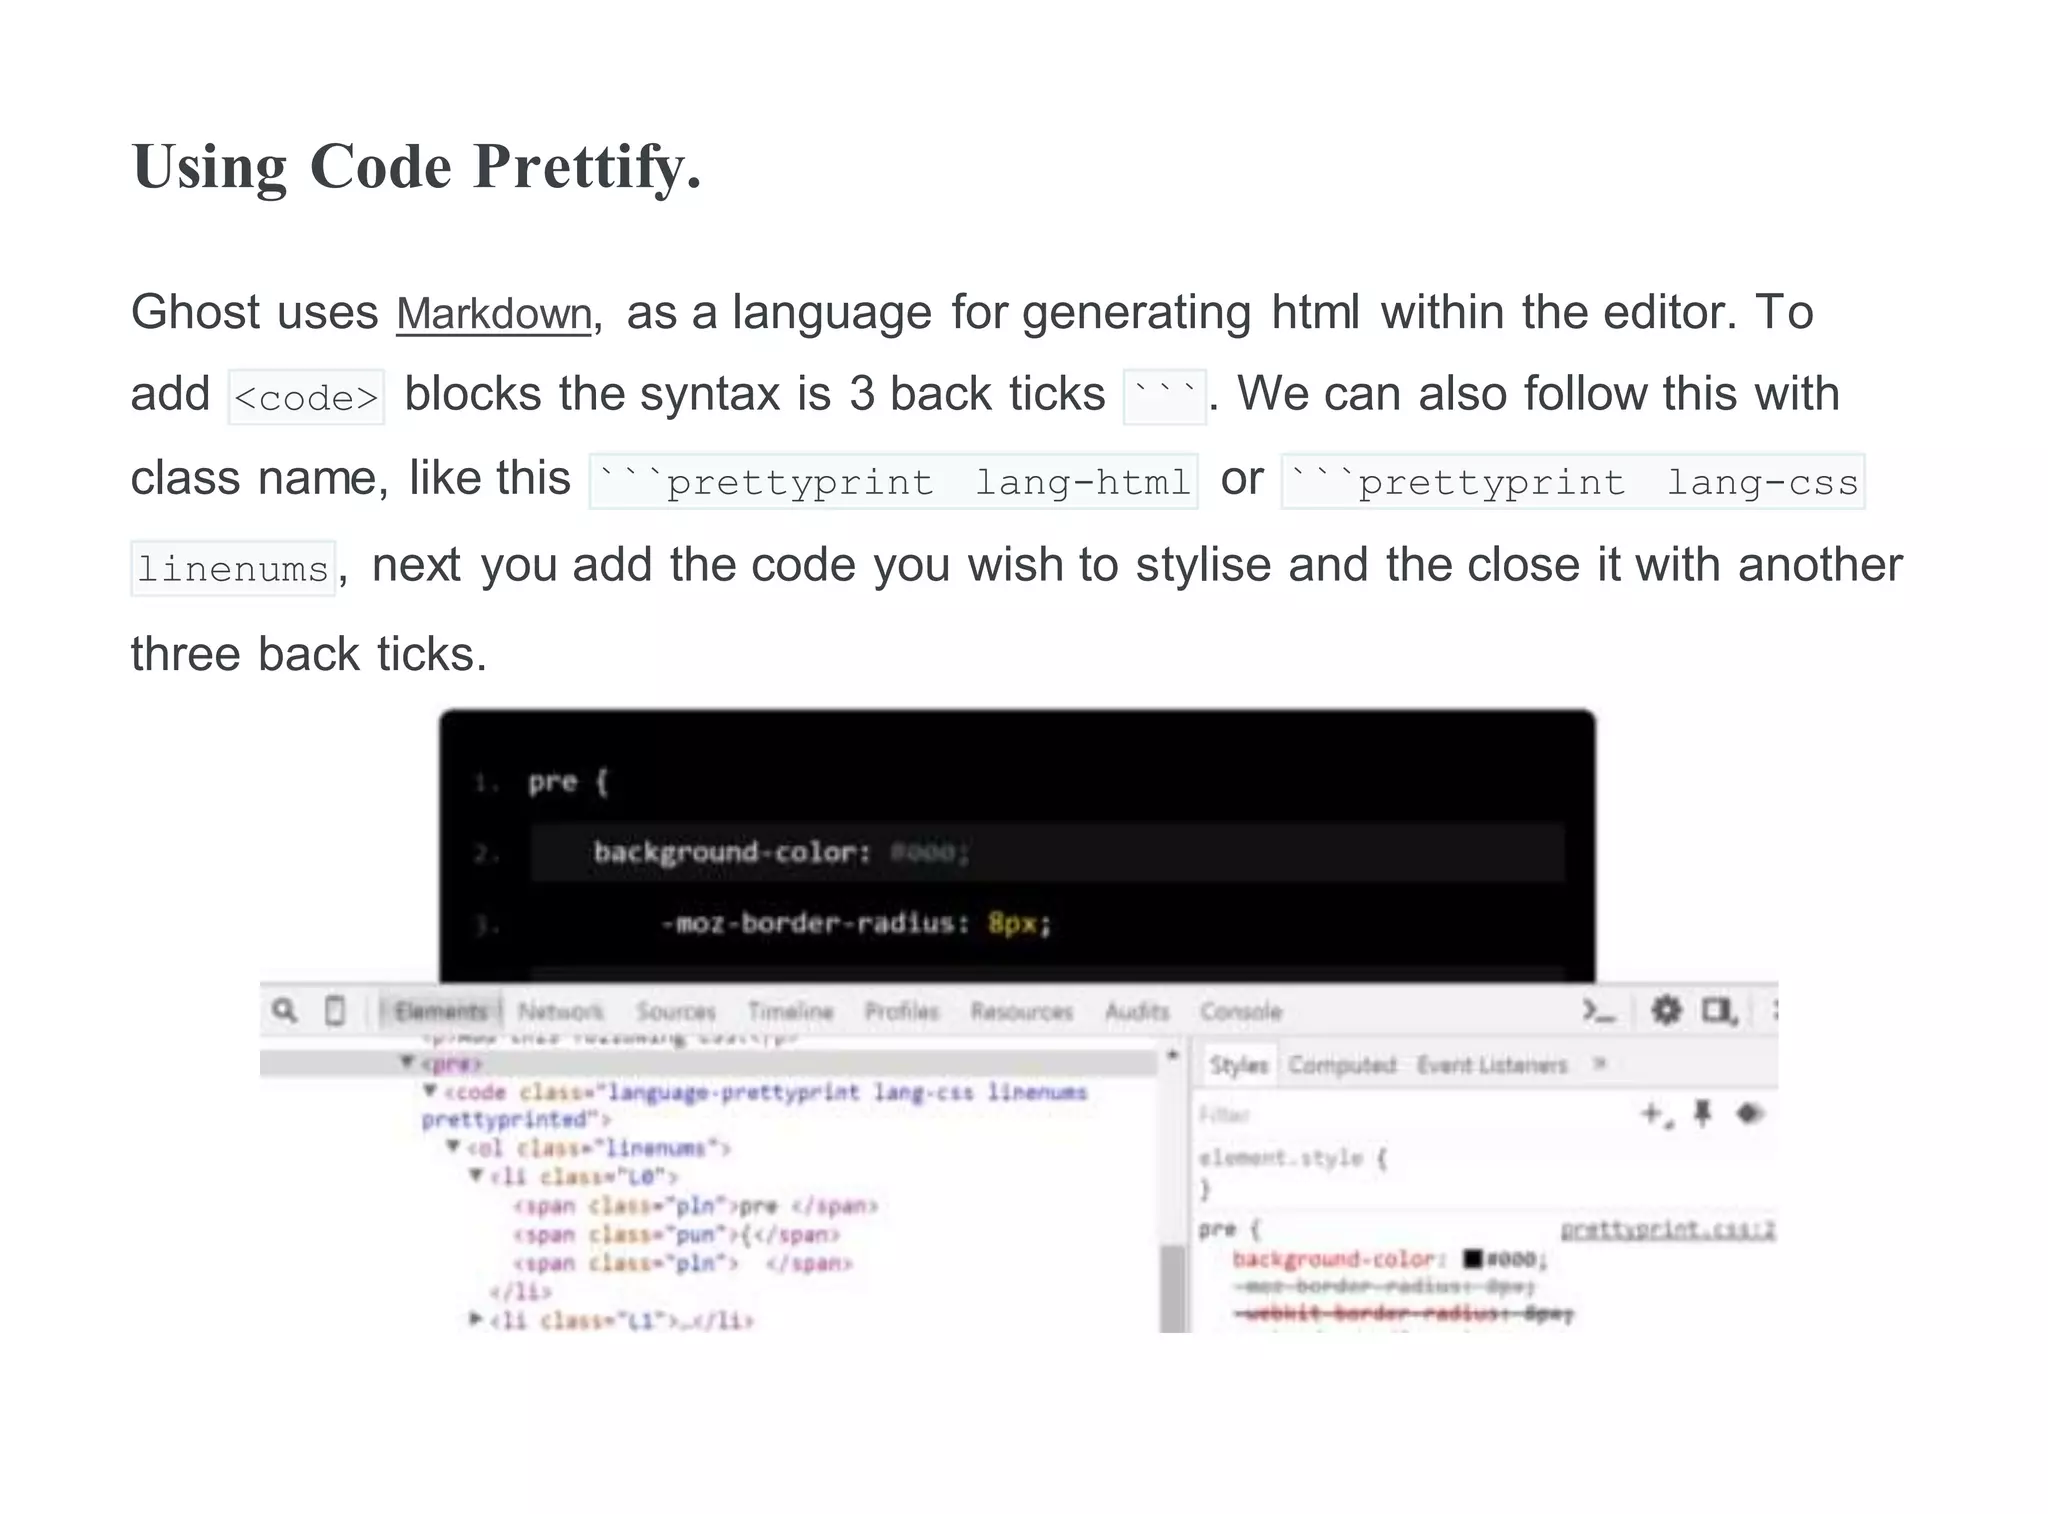

Code Prettify allows adding syntax highlighting to code blocks in Ghost blog posts. It works by adding JavaScript and CSS files. The JavaScript needs to be included on all pages via code injection. Additional CSS can be added to change the theme's styling of code blocks to have a colored background. The CSS file is added to the theme's folder and also via code injection. Markdown is then used to wrap code blocks in backticks with optional class names to trigger syntax highlighting.


![Vibe Coding vs. Spec-Driven Development [Free Meetup]](https://cdn.slidesharecdn.com/ss_thumbnails/vibecodingvsspecdrivendevelopment-251209105622-43f455e7-thumbnail.jpg?width=640&height=640&fit=bounds)


