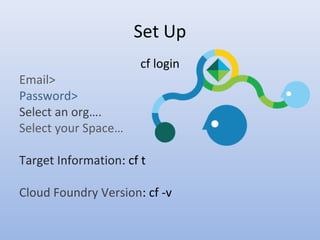
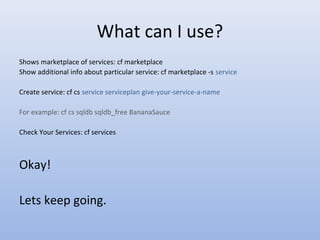
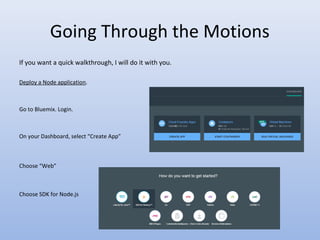
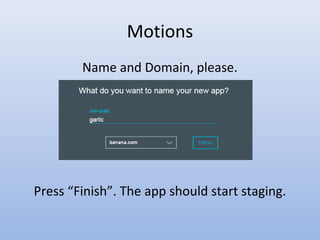
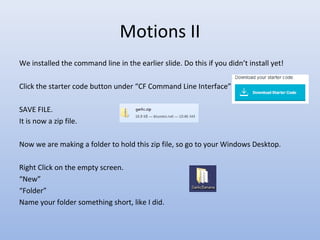
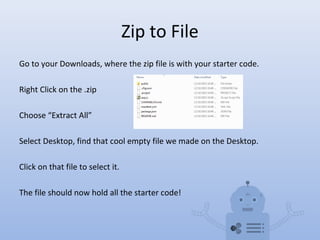
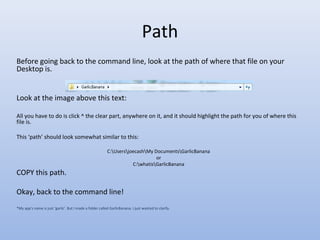
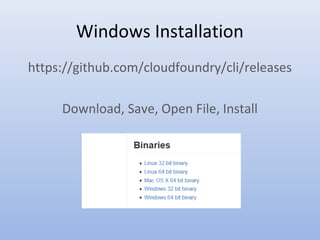
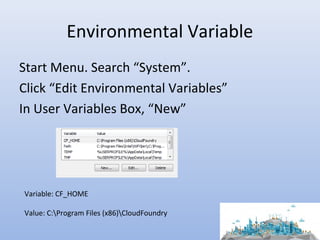
2. Windows Installation
First of all, let’s get the administrative terminal open on your Windows machine.
Go to your Desktop’s Start Menu
Type into the Search Engine “cmd”
Hold down SHIFT and CTRL.
Now, press ENTER!
Say “Yes” to the terminal.
7. What can I use?
Shows marketplace of services: cf marketplace
Show additional info about particular service: cf marketplace -s service
Create service: cf cs service serviceplan give-your-service-a-name
For example: cf cs sqldb sqldb_free BananaSauce
Check Your Services: cf services
Okay!
Lets keep going.
8. Custom Domains
Before going to development, you might want to customize the domain.
Go to your Bluemix Dashboard.
Upper right corner, click on
Under Organizations, click on
Choose “Domain”
Add a new domain!
9. Going Through the Motions
If you want a quick walkthrough, I will do it with you.
Deploy a Node application.
Go to Bluemix. Login.
On your Dashboard, select “Create App”
Choose “Web”
Choose SDK for Node.js
11. Motions II
We installed the command line in the earlier slide. Do this if you didn’t install yet!
Click the starter code button under “CF Command Line Interface”
SAVE FILE.
It is now a zip file.
Now we are making a folder to hold this zip file, so go to your Windows Desktop.
Right Click on the empty screen.
“New”
“Folder”
Name your folder something short, like I did.
12. Zip to File
Go to your Downloads, where the zip file is with your starter code.
Right Click on the .zip
Choose “Extract All”
Select Desktop, find that cool empty file we made on the Desktop.
Click on that file to select it.
The file should now hold all the starter code!
13. Path
Before going back to the command line, look at the path of where that file on your
Desktop is.
Look at the image above this text:
All you have to do is click ^ the clear part, anywhere on it, and it should highlight the path for you of where this
file is.
This ‘path’ should look somewhat similar to this:
C:UsersjoecashMy DocumentsGarlicBanana
or
C:whatisGarlicBanana
COPY this path.
Okay, back to the command line!
*My app’s name is just ‘garlic’. But I made a folder called GarlicBanana. I just wanted to clarify.
14. Path II
On your command line, you call the directory of that file where your starter code is.
So you will PASTE the path into your command line script.
Establish path: cd PASTE-PATH-HERE
Look at the directory: dir
Now, we will deploy the application.
15. Deploy
Now that you have everything set up, let’s deploy.
There are fancier commands, but if you do this, it should show you the capacity of the service:
In terminal: cf push
16. Go To Application
Your application should now be running.
Go back to your Bluemix, and click on ‘Route’
Copy and Paste it to your browser and go!
17. Useful Information
Bluemix Docs are updated regularly and contain great information that can be used
within your programming. This is documentation for this SDK for Node.js apps.
https://www.ng.bluemix.net/docs/#starters/nodejs/index.html#nodejs
You can customize the code given on Bluemix Docs based on which app you are working on.
Hope you enjoyed this tutorial, let me know if you have any questions! -Julia