Clinical technique for complex Amalgam Restoration
•
12 likes•3,682 views

Complex posterior restorations are indicated when tooth structure is missing due to cusp fracture, severe caries lesion development,

Recommended
More Related Content
What's hot
What's hot (20)
Similar to Clinical technique for complex Amalgam Restoration
Similar to Clinical technique for complex Amalgam Restoration (20)
More from Amir Rajaey
Recently uploaded
Recently uploaded (20)
Clinical technique for complex Amalgam Restoration
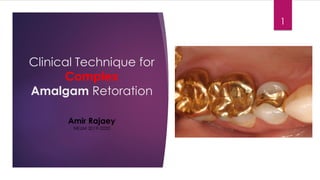
- 1. Clinical Technique for Complex Amalgam Retoration 1 Amir Rajaey NKUM 2019-2020
- 2. Indication 2 Complex posterior restorations tooth structure is missing due to cusp: Fracture severe caries lesion development replacement of existing restorative material is necessary. Complex amalgam preparations large amounts of tooth structure are missing one or more cusps need to be covered increased resistance and retention forms are needed Complex amalgams may be used as 1. definitive (final) restorations 2. foundations, 3. control restorations in teeth that have a questionable pulpal or periodontal Prognosis 4. control restorations in teeth with acute or severe caries lesions.
- 3. the factors must be considered 3 Resistance and Retention Forms Status and Prognosis of the Tooth Role of the Tooth in Overall Treatment Plan Occlusion and Economics Age and Health of Patient older and debilitated patients preferred over the more expensive and time consuming indirect restoration.
- 4. 4 Resistance and Retention Forms insufficient remaining tooth structure => inadequate conventional retention => the retention form enhanced => auxiliary features such as slots and pins (remaining vertical walls are inadequate). The type of retention • amount of tooth structure remaining • the tooth being restored As more tooth structure is lost, more auxiliary retention is required.
- 5. Status and Prognosis of the Tooth 5 control restoration: • require endodontic therapy • crown lengthening • uncertain periodontal prognosis control restoration helps 1. protect the pulp 2. anatomic contour consistent with gingival health 3. control caries risk 4. Resistance fracture. the status and prognosis determine: the size, number, and placement of retention features. Larger restorations generally require more retention.
- 6. Role of the Tooth in Overall Treatment Plan 6 • Abutment teeth for fixed prostheses may use a complex restoration as a foundation
- 7. Occlusion and Economics 7 When cost of indirect restorations is a major factor for the patient Indicated as interim restorations for vertical dimension, occlusal plane.
- 8. Contraindication 8 anatomic or functional considerations (or both) cannot be restored esthetic importance
- 9. Advantage 9 Conservation of Tooth Structure conservative than the preparation for an indirect restoration. Appointment Time completed in one appointment. Reduced Cost Resistance and Retention Forms cusp coverage increase the fracture resistance of weakened teeth compared with amalgam restorations without cusp coverage.
- 10. Disadvantage 10 Tooth Anatomy Proper contours and occlusal contacts and anatomy are sometimes difficult Resistance Form • difficult to develop compared to the preparation of a tooth for a cusp- covering onlay or a full crown. • does not protect the tooth from fracture as effectively as a full-coverage indirect restoration.
- 11. Tooth Preparation for Complex Amalgam Retoration 11
- 12. 12 Preparation for Cusp Coverage Complex Amalgams Extensive caries lesion with resultant loss of dentin necessary to support occlusally loaded areas of the tooth The facial or lingual extension exceeds two thirds the distance from a primary fissure toward the cusp tip is required for resistance form coverage reduces the risk of fracture
- 13. 13 resistance form creation Reduction during the initial tooth preparation because it improves access and visibility. (B,C) depth cuts, minimum of 2 mm for functional cusps and 1.5 mm for nonfunctional cusps. (orients the bur parallel to the cuspal incline) (F,G) If only one of two facial (or lingual) cusps is to be covered, the cusp reduction should extend slightly beyond the facial (or lingual) groove area to create a 90-degree cavosurface margin. this approach results in adequate thickness and edge strength of the amalgam Any sharp internal corners should be rounded to reduce stress concentration
- 14. 14Cusp reduction and coverage reduce the amount of vertical preparation wall height and increase the need for the use of secondary retention features
- 15. Mandibular First Premolar 15 The lingual cusp may need to be reduced if the lingual margin of the occlusal step extends more than two thirds the distance from the central fissure to the cuspal eminence. retention is severely diminished when the cusp is over reduced resulting in elimination of the lingual wall of the occlusal portion. Depth cuts of 1.5 mm
- 16. Maxillary First Molar 16 the lingual groove may be extended intentionally to increase the retention form (B and C). Secondary retention when the divergence of proximal walls limited primary retention.
- 17. Mandibular First Molar 17 Reducing the distal cusp is an alternative to extending the entire distofacial wall when the occlusal margin crosses the cuspal eminence. 2 mm reduction. Butt joint between the tooth structure and amalgam When possible, reducing distal cusp is more desirable than extending the distofacial proximal margin because this conserves tooth structure of the functional cusp, and the remaining portion of the cusp helps in applying the matrix for the development of proper distofacial embrasure form. Mesiodistally the plane of the reduced cusp should parallel the facial (or lingual) outline of the unreduced cusp and the cuspal incline emerging from the central groove faciolingually. B, Entire distal cusp included in preparation outline form.
- 18. Tooth Preparation for Slot-Retained 18 A slot is a horizontal retention groove in dentin. 2 to 4 mm loss of vertical coronal height (secondary retention). with a No. 330 bur 1 mm wide and 1 mm deep Placed in the line-angle areas of the tooth 2 to 4 mm in length 0.5 to 1 mm inside the DEJ one slot per missing axial line angle should be used may be continuous or segmented (depending on the amount of missing tooth structure and whether pin retention) internal walls be convergent
- 19. In addition to slot ….. 19 remaining vertical walls: • retention grooves • coves
- 20. 20
- 21. Tooth Preparation for Pin-Retained 21 parapulpal retention pin, pin-retained amalgam, pin-amalgam loss of 4 mm or more of vertical coronal height Resistance and retention forms are not able to be established with slots, grooves, or undercuts only. Pins placed into prepared pinholes or pin channels. pins decreases the tensile and horizontal strength of amalgam most frequently used type is the self-threading.
- 22. Pinhole preparation 22 diameter of pinhole is smaller than the diameter of the pin threads engage dentin as the pin is inserted, thus retaining the pin. elasticity of dentin permits insertion depth of the pinhole from 1.3 to 2 mm, depending on the diameter of the pin used, Recommended 2 mm Thread Mate System (TMS) most widely used 1. Versatility 2. wide range of pin sizes 3. color-coding system 4. greater retentiveness
- 23. Pin Placement Factors and Techniques 23 Pin Size color-coded drill Selecting appropriate- sized pin 1. the amount of dentin available to safely receive the pin and 2. the amount of retention desired.
- 24. 24 Number of Pins Pin Placement Factors and Techniques 1. the amount of missing tooth structure 2. the amount of dentin available to safely receive the pins 3. the amount of retention required 4. the size of the pins. one pin per missing axial line angle should be used excessive number of pins may fracture the tooth
- 25. Pin Placement Factors and Techniques 25 Pinhole Location 1. knowledge of normal pulp anatomy and external contours 2. a current radiograph of the tooth 3. a periodontal probe, 4. the patient’s age. placement where the greatest bulk of amalgam Occlusal clearance should be sufficient to provide 2 mm of amalgam over the pin. In the cervical third of molars and premolars. near the line angles of the tooth no closer than 0.5 to 1 mm to the DEJ no closer than 1 to 1.5 mm to the external surface of the tooth parallel to the adjacent external surface of the tooth
- 26. 26 minimum 0.5mm clearance around the circumference of the pin for adequate condensation of amalgam
- 27. 27 optimal interpin distance depends on the size of pin Fluted and furcal areas should be avoided
- 28. 28
- 29. Pinhole Preparation 29 1. A pilot hole (dimple) is placed in the horizontal dentin surface 2. the correct size twist drill (based on the pin size)
- 30. Pinhole Preparation 30 3. the twist drill is placed in the gingival crevice beside the location for the pinhole and positioned such that it lies flat against the external surface of the tooth 4. without changing the angulation obtained from the gingival crevice position, the handpiece is moved occlusally and the drill placed in the previously prepared pilot hole 5. the drill is then viewed from a 90-degree angle to the previous viewing position to ascertain that the drill also is angled correctly in this plane
- 31. Pinhole Preparation 31 6. with the drill tip in its proper position and with the handpiece rotating at very low speed (300–500 rpm), pressure is applied to the drill until the depth-limiting portion of the drill is reached 7. the pinhole is prepared in one or two movements without allowing the drill to stop rotating. While still rotating, the drill is immediately removed from the pinhole
- 32. 32