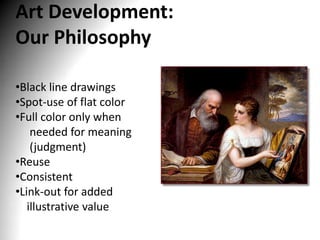
1. Art Development:
Our Philosophy
•Black line drawings
•Spot-use of flat color
•Full color only when
needed for meaning
(judgment)
•Reuse
•Consistent
•Link-out for added
illustrative value
2. Rendered Art Samples from Chapter 24:
The Digestive System
THE DIGESTIVE SYSTEM
This is an example of a figure that provides an overview.
Pertinent information is presented without getting
bogged down in detail and text is kept to a minimum.
Students can grasp the content quickly. Organs are
differentiated by color, using a simple silhouette that
creates a clean look, even though the illustration is full of
color. Such illustrations lend themselves to viewing on
screen.
Figure 24_01_01
The Digestion System
3. ACCESSORY ORGANS DIGESTION OF PROTEINS
The same figure used again to identify accessory The same illustration, a third time, adding information as
organs. student learns more about process of digestion.
Figure 24_10_01 Figure 24_11_04
Accessory Organs Digestion of Proteins
4. LAYERS OF THE GASTROINTESTINAL TRACT
Even when showing complex structures, we avoid
adding too much surface detail. Important elements
stand out, made distinct by color not by texture, making
the content visually accessible. Note the use of
transparency in the out layer.
Figure 24_01_02
Layers of the Gastrointestinal Tract
5. EXOCRINE AND ENDOCRINE PANCREAS GALLBLADDER
Combinations of colors and heavy black lines are applied to Shading provides shape without requiring complex
distinguish different structures and help visually organize a detailing. Effective but simple.
complex diagram. The black lines bring forward structures being
discussed but still the rendering is still simple in approach.
Figure 24_10_04
Gallbladder
Figure 24_10_03
Exocrine and Endocrine Pancreas
6. THE PERITONEUM
This illustration show use of simple black outlines with a spot, flat color to focus attention on
a single important feature, on a specific part of the anatomy. Students can still see the other
organs of the central body cavity, but the peritoneum stands out. Also note orienting diagram
that maps the cross section to the "geography" of the human body.
We made the deliberate
choice to dial back on
color so a critical detail
can stand out. Our
competitors color in all
the organs and even
add texture. In this
case, less is more.
Figure 24_01_03
The Peritoneum
7. THE PHARYNX
In this illustration, dramatic spot colors are
used to differentiate between different
cavities and regions that connect to the
pharynx. If we had attempted to be realistic
in coloring, the whole diagram would have
been pink and those different regions would
not have been so clearly demarcated.
With this image in mind, now look at the
next slide.
Figure 24_04_01
Pharynx
8. DEGLUTINATION
The same illustration used to show the esophagus and related structures is now used to show the muscle action
that moves a bolus from the mouth into the esophagus.
Figure 24_06_01
Deglutition
9. STRUCTURES OF THE MOUTH
In this illustration, no one structure is more important than
the other. A simple heavy line around the teeth serves as
anchor, an orienting device, to separate inside from out.
Color would be superfluous
Figure 24_03_01
Structures of the Mouth
10. THE TOOTH
This illustration uses a mix of styles to good effect. The outlines signal that the
point of interest is the tooth, not the surrounding bone.Simple color is used to
highlight the tooth’s inner structure, which is the main point of the
illustration. Traditional textbook art would put everything in color, which
dilutes the message and can confuses students with too much information.
Figure 24_03_04
Tooth
11. PERISTALSIS SEGMENTATION
A simple schematic shows the mechanism by which a Spot colors applied to a similar schematic show how
bolus is transported down to the stomach, moving in boluses consisting of different food materials get mixed in
one direction, as the esophagus pinches in. There is no the small intestine. The two-way movement of
real need for color. segmentation causes the boluses to combine. Here the
color is needed to show the progression.
Figure 24_02_01
Peristalsis Figure 24_08_03
Segmentation
12. LIPID ABSORPTION CARBON DIGESTION
This process diagram shows a physiological process This illustration uses a schematic approach, a flow chart
that uses an anatomical region as a backdrop. Clean that provides basic information in a straightforward way.
and simple, but instructive. The excessive color used in most textbooks for a flowchart
like this is visual noise and serves no pedagogical purpose.
Figure 24_11_02
Carbon Digestion
Figure 24_11_06
Lipid Absorption
13. MECHANICAL AND CHEMICAL DIGESTION DIGESTIVE SECRETIONS AND ABSORPTION OF WATER
A hybrid approach makes use of an illustrated flow The same anatomical illustration is reused to show a
chart, one in which anatomy is representational and different process. This provides continuity and
delineates the pathway for digestion. The illustration puts reinforces the idea that many processes occur at the
a process in context, doing more for understanding than same time in the same place.
simply reading a paragraph of text.
Figure 24_11_05
Figure 24_11_01 Digestive Secretions Absorption of Water
Mechanical and Chemical Digestion
14. Our Art Program:
Strategic Advantages Summarized
• Invest art render $ wisely
• Avoid unnecessary detail
• Black line art as base for multiple illustrations
• Help student focus on main point of the figure
• Clean, simple, and understandable
• Distinguish our project from the mainstream
• Head off plagiarism fishing expeditions
• Advertise (with pride) the OER-ness
Editor's Notes
Sometimes there is no need to make distinctions between structures.
Invest art render $ wiselyAvoid unnecessary detail, distracting visual noiseUse black line art as base for more than one illustrationHelp student focus on main point of the figureArt program is clean, simple, and understandableDistinguish our project from the mainstreamHead off all possible plagiarism investigationsAdvertise, with pride the OER-nature of our product