
Recommended
Recommended
More Related Content
Similar to Case studies.pptx
Similar to Case studies.pptx (20)
Recently uploaded
Recently uploaded (20)
Case studies.pptx
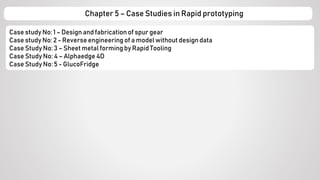
- 1. Case study No: 1 – Design and fabrication of spur gear Case study No: 2 - Reverse engineering of a model without designdata Case Study No: 3 – Sheet metal forming by Rapid Tooling Case Study No: 4 – Alphaedge 4D Case Study No: 5 - GlucoFridge Chapter 5 – Case Studies in Rapid prototyping
- 2. This is a case study on prototyping process of spur gear using FDM. It also describes step by step procedure for making the prototype. • Spur Gear has teeth parallel to the axis of rotation and is used to translate motion from one shaft to another • 3D CAD file was generated using Auto CAD • Slicing is done using Quick Slice software • FDM 1650 machine was used to fabricate the spur gear. • Material used is ABS plastic filament Fabrication process consist of four major steps: Case study No 1: Design and Prototypingof spur gear Step 1 CAD Process Step 2 Part Preparation Step 3 Setup and Bild Step 4 Post Processing
- 3. Step 1 CAD Process 1. A detailed CAD drawing of the part was created on Auto CAD 2. If there is more than one component to the model that is to be created, the unity function must be used. Stl file can only be created if the model is a solid object 3. Stl file is generated using export commands 4. File is now ready to be sliced Step 2 Part Preparation 1. Proper orientation of the model is the first step after opening the file. The optimum position for the gear is to lie flat on the ground. 2. The parts are sized in order to fill the build envelope. 3. After slicing the part will show various layer starting from the first layer in the bottom. 4. If the model turns red it means the model needs support structure. Software will analyse where support is needed. Once the support is created add a base to the part. 5. Next step is to create inroads for the part. This is the path the extrusion head will follow to create the part. After that save the part in .sml format. This file will allow the machine to read the information
- 4. Step 3 Setup and Build 1. The FDM machine was operating at an overall temperature of 680 C . The model extrusion head was operating at 2700 C and the support material head at 2650 C. 2. In the FDM machine navigate to the folder containing the model and choose the .sml file. 3. Machine will read the information and pause button will be flashing at this point. 4. A 10x 10 substrate was placed into the building chamber. Set the origin for the print head and click ‘start printing now’ Step 4 Post Processing 1. Support removal was accomplished with the use of simple hand tools 2. Sand paper was also used to completely remove the base material from the base The machine can produce over eight different parts with completely different geometry in less than 3 weeks. There are size and material limitations but the advantages definitely outweigh the disadvantages which are limited part size and rough surface finish
- 5. Case study No: 2 - Reverse engineering of a model without designdata Introduction • University of Magdeburg, Germany derived its name from Otto Von Guericke (OVG). • There was a need for a number of sculptures in several sizes for awards , souvenirs and so forth. • It was determined the necessary scaled master form is to be produced using RP • Sculpture of OVG has no design data. Hence an intelligent reverse engineering approach is needed. • In the absence of design data a 3D digitizing and surface reconstruction techniques are used. Methodology • The general strategy used to reconstruct the sculpture of OVG using reverse engineering, rp and investment casting is illustrated below: Physical Model Sculpture of OVG Contact digitalizing using CMM Creation of CAD model Rapid Prototyping Using FDM-1650 and SPI-MM Final product: Scaled model in plastic and bronze Investment casting Using Lost wax method
- 6. BronzeSculpture, LOM Model, Final RP resonstruction Methodology • The original sculpture was 650 mm high and made from bronze. • The size and weight exceeded the capacity of the local available optical 3D scanners. • Therefore, tactile digitizing on CMM with a probe was performed. • The data was captured in 500 radial profiles, creating about 800,000 single data points. • In this situation there are 2 possibilities for a valid volume representation: 1. Surface model 2. Facet model
- 7. • The shape was too complex for surface reconstruction. This would require high no. of surface patches. • Every patch has to be connected to the neighbours precisely. • The number, shape and the connections make a surface reconstruction impossible. • The second possibility was direct polygonization. In a time consuming polygonization process, a valid stl model was derived from the point cloud. • Many defects inside the point cloud made the polygonization very difficult. • The original count of 217,000 facets was too large to handle with the existing software. • A step wise reduction to 30,000 was reached. Challenges in reconstruction PrototypingProcess • LOM was used to make the first prototype. • The shape and quality was examined and corrections were made. • Sanders prototype Inc (SPI) Modelmaker 6B and FDM were used to make the model • The models made using wax and ABS respectively
- 8. • An investment casting method was used to make a bronze cast of OVG • The steps involved in this process is listed below: • Dissolve the support wax in an ultrasonic cleaner filled with pertrofirm solvent • Attach sprues to the wax model • Weigh the wax and calculate the amount of metal that would be needed for casting • Attach the wax model and sprues to a rubber bottom and secure this to a steel flask cylinder • Mix the powder investment and water together • Coat the wax with a solution to break the surface tension • Pour the liquid investment into the flask and vacuum this solution to remove the air bubbles. • Allow the investment to harden, thereby creating a ceramic shell in the green state. • Place the flask in a kiln and over 112 hr, raise the temperature to 13000 F • Melt the brass with oxyacetylene torch • When the metal is molten place the flask in a vacuum caster and turn on the vacuum. • With vacuum running, pour the metal into the flask while keeping a reduction flame on the metal. • Allow the metal to completely harden. Submerge the hot flask in water to break the shell • Cut the sprues off and place it in a vibrating polishing machine for 6hr Bronze Cast of OVG
- 9. Case Study No 3: Sheet Metal Forming by RT
- 10. SL was used in 3 different ways: 1. ACES part built as form block, 2. Quick Cast part with steel filled epoxy, LMC (Liquid Mould Compound), became a curing mould 3. Casting m Load: 350 ton, Thickness: 1mm, Material: 7075 aluminium. 30-50 SM parts were made. 2 hours Vs 96 hours SL mould as layup tool for composite filling. 4 hours Vs 60 hours Vista Technologies, tested this on punching press on galvanized MS. Stereolithography
- 11. ABS part built as a form block FDM 1650 machine, Loyola Marymount university. Same stl file used for the SL is used again Thickness: 1.27 mm Material: 6061-0 Al alloy sheet. Result: No visible degradation or wear is observed. Fused Deposition Modelling
- 12. Material: LGFO45 (organic fibers + inorganic particuate + acrylic binder) Layer adhesive 3 stage epoxy. R&D of Helisys wanted to check the forming suitability of the new composite. SM blank: 6061-0 Al alloy, Load: 10 tons 0.5 hours V 2 hours (2 hour post cure common for both ways) Result: No visible degradation or wear is observed. Laminated Object Manufacturing
- 13. • In footwear market the need of the customer is changing rapidly. • The highly competitive and growing nature of the market forces the footwear companies to release new model every year. • To react rapidly to the above said condition various departments of footwear industry started to incorporate the RP technology into their work flow • Prototyping using conventional method is both time consuming and expensive. • Major footwear brands such as Wolverine, Adidas, New balance have employed 3D printing for athletic shoe production line. • As the flexible colour printing capabilities offer a range of colour scheme exact mock of the shoes can be easily realised. • Also the reviewing of aesthetics, fit and design features can be assessed easily. Case Study No: 4 – Building Footwear prototype using Digital light synthesis Alphaedge 4D • German footwear manufacturer Adidas released first version of Alphaedge 4D. • The product was designed and produced in collaborated with California base 3D printing company called Carbon. • Carbon used its proprietary CLIP technology, a digital light synthesis process for the prototyping.
- 14. • Carbon Digital Light Synthesis technology uses light and oxygen permeable optics to craft a 3D object, and then a thermal baking step to achieve the desired properties. • The midsole was digitally engineered by gathering pressure plates and foot scan data from athletes. • This data is then feed into a 3D printer to create functionally responsive zones for cushioning, stability and controlled energy in the final product. • The provides the shoe with the ability to adjust to various ground surface. It feels entirely different on grass and on concrete. • The upper part of the shoe is made of thermoplastic polyurethane which makes it lightweight. • Shoes sole unit is usually created using injection moulding. Use of 3D printing technology greatly reduces the time and cost involved in the process • Adidas is adding to the 4D franchise with a new Reflective ALPHAEDGE 4D.
- 15. • The following case study, undertaken by product development students at Massey University, in Auckland, New Zealand, demonstrates how using these virtual and physical rapid prototyping technologies can help in bringing a new product to market faster. • The latest WHO estimate for the number of people with diabetes, worldwide, in 2000 is 177 million. This will increase to at least 300 million by 2025. • Overall, direct health care costs of diabetes range from 2.5% to 15% annual health care budgets Case Study No: 5 – GlucoFridge • Insulin is the major medication for diabetes patients. • Insulin should be kept at temperatures below 250C. Many countries have temperatures ranging from 200C to 400C, which rapidly spoils insulin. • These factors make it troublesome for diabetics to travel as they have a constant worry about whether there insulin is safe. • There are currently 3 commonly available cooling methods for insulin dependant patients as well as a number of derivative solutions. They are 1) ice packs 2) MEDIce (These are re-freezable ice packs filled with a nontoxic gel that last 30% longer than ice cubes) 3) Frio Wallets (A device used to keep insulin cool for 48 hours) Problem Statement
- 16. • The GlucoFridge is a portable, battery powered, pocket sized refrigerator. This `worlds smallest' refrigerator is designed for carrying insulin (or other medication), which needs to be kept at a low temperature • The GlucoFridge went through 3 major, and several minor, design reiterations, the first two of which identified the major technical problems to overcome, before arriving at the final production design. • The first 2 weeks of the project were spent producing a conceptual CAD design. • At the same time, a large range of Peltier devices (thermoelectric coolers) was ordered so that a series of tests could be undertaken. • From the initial CAD design, a thermal finite element analysis (FEA) was performed to calculate the size of the cold plate that would be required to keep two vials and the insulin compartment of 2 NovoPen III (a commonly used insulin injection device) at a temperature of approximately 100C. The portable Insulin refrigerator– GlucoFridge Design Process
- 17. • A rapid prototype of all the plastic components was printed on a Dimension 3D printer which produced ABS plastic parts . The time taken for the first set of parts was 54 hours. • The initial tests revealed an almost immediate problem in reaching the target temperature. • The system was not quite efficient enough to dissipate enough heat for the temperature differential created by the Peltier to allow the desired refrigerator temperature to be reached. • In this second batch of tests a second major problem soon became apparent: The design included an electronic temperature control circuit which, when the cold plate reached the lower end of the target temperature range of 580C, would cause the power to the Peltier to be switched off. • A solution was soon found to this problem: To build the entire cooling assembly into the inside of a vacuum flask type cooling container. • This major change forced a complete redesign, as the vacuum flask meant that the battery could no longer be on the rear of the unit. • This, in turn, meant that the size and shape of the Handycam type battery made it less than ideal for the product, so a new battery needed to be found. • Another prototype was made of the plastic and aluminium components. • The lead-time to get a sample of the vacuum flask made was about 3 weeks, so tests were initially carried out with an off-the-shelf vacuum flask of the same volume as that in the design. T • his second prototype proved to work, and was taken to potential users for comment. From these focus groups a few minor problems were identified. DesignProcess
- 18. • From this user feedback, the third major design iteration was entered. • The new design iteration therefore changed to a removable battery pack on the outside of the vacuum flask, which at the same time alleviated any risk of any heat produced by the batteries affecting the temperature of the insulin or creating condensation. • The new design iteration therefore changed to a removable battery pack on the outside of the vacuum flask, which at the same time alleviated any risk of any heat produced by the batteries affecting the temperature of the insulin or creating condensation • At this stage, less than three months after the start of the project, it was deemed that the product was at a level where it would both meet customer expectations and be manufacturable at a cost acceptable to the manufacturing company • The entire project, including all CAD files and data, as well as the physical working prototypes was then handed over to the medical product company for manufacturing and production DesignProcess
- 19. Case Study No: 3 - Sheet Metal Forming by Rapid Tooling • Forming tool made using SL (3D systems), FDM (Stratasys), LOM (Helisys Corp.) • Simple sheet metal blank Plastic Deformation Complex configuration. • Reduces the metal removal by taking the component to near net dimensions. • Hydraulic Press and Guerin Process (Rubber Pad Forming) • Rubber Pad Forming: Rubber presses the sheet around the form block. • Guerin, Verson – Wheelon, Hydro forming process. • Efficient. Can handle any thickness • Objective: Reducing the tooling cost