SlideShare a Scribd company logo
1 of 45
AUTO CAD 2004
(LAB COPY )


Muhammad Qasim Shinwari
Shinwari913@ymail.com
0333-9136689
www.aboutcivil.com
NWFP University of Engineering and Technology Peshawar.
www.aboutcivil.com                                          shinwari913@ymail.com


PREFACE
       AutoCAD stands for Automatically Computer Aided Drafting/Designing. It is
an electronic tool that enables you to make quick and accurate drawings with the use
of a computer. Unlike the traditional methods of making drawings on a drawing
board, with CAD you can sit back in an easy chair and create wonderful drawings just
by clicking the buttons of a keyboard. Moreover, drawings created with CAD have a
number of advantages over drawings created on a drawing board. CAD drawings are
neat, clean and highly presentable. Electronic drawings can be modified quite easily
and can be presented in a variety of formats.
                              I have tried my best to make a copy for AutoCAD 2004.
Approximately all basic commands are introduced in it.
       Special thanks to Sir Mubashir as he taught me AutoCAD in a very nice
manner.
                                                         Muhammad Qasim Shinwari
                                                                        26th Jan, 2007


                                           2
www.aboutcivil.com                                                                         shinwari913@ymail.com


Table of Contents
LECTURE 1 ................................................................................................................... 6
          Introduction:- ...................................................................................................... 6
   How to Start? ............................................................................................................. 6
          Introduction of Main Interface:- ......................................................................... 6
          Command Entry:-................................................................................................ 6
          My Assumptions in This Copy ........................................................................... 8
                Setting the Units:- ........................................................................................ 8
                Draw a Line:- ............................................................................................... 8
                Draw a Rectangle:- ...................................................................................... 9
                Saving Your Drawing:- ............................................................................... 9
                Exiting:- ..................................................................................................... 11
LECTURE 2 ................................................................................................................. 12
          Cursor List:- ...................................................................................................... 12
          Pop-Up-List:- .................................................................................................... 12
          How To Repeat A Command:- ......................................................................... 12
          Transparent Commands:- .................................................................................. 12
          Command Aliases:- ........................................................................................... 12
          Changing Command Alias:- ............................................................................. 12
          Text Window: - (F2) ......................................................................................... 13
          Cross Window and Box Window:- ................................................................... 13
          Options:- ........................................................................................................... 14
                Display Tag:- ............................................................................................. 14
                Open and Save Tag:- ................................................................................. 14
                System Tag:- .............................................................................................. 14
                User Preferences Tag:- .............................................................................. 14
                Drafting Tag:- ............................................................................................ 14
          Status Bar:-........................................................................................................ 16
                Snap Tag:-.................................................................................................. 16
                Grid Tag:- .................................................................................................. 16
                Ortho Tag:- ................................................................................................ 16
                Polar Tag:- ................................................................................................. 16
                OSnap Tag:-............................................................................................... 16
                OTRACK Tag:- ......................................................................................... 17


                                                               3
www.aboutcivil.com                                                                           shinwari913@ymail.com

                 LWT Tag:- ................................................................................................. 17
                 MODEL Tag:- ........................................................................................... 17
LECTURE 3 ................................................................................................................. 18
          Erase:- ............................................................................................................... 18
          Copy:- ............................................................................................................... 18
          Copy Multiple:- ................................................................................................. 18
          Construction Line:- ........................................................................................... 18
          Mirror:- ............................................................................................................. 20
          Zoom Real Time:- ............................................................................................. 20
                 All:-............................................................................................................ 20
                 Center:- ...................................................................................................... 20
                 Dynamic:- .................................................................................................. 20
                 Extents:- ..................................................................................................... 20
                 Previous:- ................................................................................................... 21
                 Scale:- ........................................................................................................ 21
                 Window:- ................................................................................................... 21
                 Real Time:- ................................................................................................ 21
          Multiline:- ......................................................................................................... 21
          Trim:- ................................................................................................................ 23
                 Projection:- ................................................................................................ 23
                 Edge:-......................................................................................................... 23
                 Undo:- ........................................................................................................ 23
          Chamfer:- .......................................................................................................... 23
                 Polyline:- ................................................................................................... 24
                 Distance:- ................................................................................................... 24
                 Angle:- ....................................................................................................... 24
                 Trim:- ......................................................................................................... 24
                 Method:- .................................................................................................... 24
                 Multiple:- ................................................................................................... 24
          Fillet:-................................................................................................................ 24
                 Radius:- ...................................................................................................... 26
                 Trim:- ......................................................................................................... 26
                 Multiple:- ................................................................................................... 26
LECTURE 4 ................................................................................................................. 27
          Text:- ................................................................................................................. 27
                 Single Line Text:- ...................................................................................... 27
                 Multiline Text:-.......................................................................................... 28


                                                                 4
www.aboutcivil.com                                                                          shinwari913@ymail.com

             Multiline Vs Single Line Text:- .................................................................... 28
          Quick Text:- ...................................................................................................... 28
          Region:-............................................................................................................. 28
          Ellipse:- ............................................................................................................. 28
LECTURE 5 ................................................................................................................. 29
          Using of commands:- ........................................................................................ 29
          Wall Footing:- ................................................................................................... 29
LECTURE 6 ................................................................................................................. 32
          Inverted Arch Foundation:-............................................................................... 32
          Layers:- ............................................................................................................. 32
                 Setting Up Layers:-.................................................................................... 32
                 Changing the layer of an object:- .............................................................. 34
                 Changing the different properties of an object:- ........................................ 34
                 Match Properties:- ..................................................................................... 35
          Coming Back to Inverted Arch Foundation:- ................................................... 35
LECTURE 7 ................................................................................................................. 41


                                                                5
www.aboutcivil.com                                          shinwari913@ymail.com

LECTURE 1
       Introduction:-
       AutoCAD stands for Automatically Computer Aided Designing/ Drafting. As
the name shows, this software is used for drafting purposes. Although it can be used
for many other useful purposes yet we will concentrate on drafting.


How to Start?
     There are many ways of starting Auto CAD. Some are given below;
   o Start> Programs> Auto Desk> Auto CAD 2004> Auto CAD 2004
   o Go to the drive where you have installed Auto CAD. By default Auto CAD is
     installed in c drive. Go to that drive and find Auto CAD 2004 folder. In this
     folder, double click on acad.exe file.

       Introduction of Main Interface:-
           Once AutoCAD is loaded, move the mouse around until you see a
crosshair cursor. You will see somewhat interface as shown in Fig1

Explanation:-
        Now let us explain some properties or features of Auto CAD 2004 (As shown
in above Figure);

   o The standard Windows drop-down menus.

   o The standard Windows toolbar below the menus, it includes: File-New, File-
     Open, File-Save, Print and "Find and Replace"(!!).

   o In addition to the standard toolbar there will be a number of AutoCAD
     specific toolbars: Object Properties, Draw and Modify (there may be
     others...?).

   o The graphics area or drawing area - that's the area where you draw - note the
     scroll bars and the axis label.

   o View Tabs - these 'tabs' give access to different view of the current drawing.
     The "model" tab should be selected at present.

   o The command area - this small window (by default) has space for three lines
     of text - this is where you type commands.

   o The status area, at the bottom of the AutoCAD window, this includes the
     current cursor position.

       Command Entry:-
Typically there are three ways of giving a command!


                                          6
www.aboutcivil.com           shinwari913@ymail.com


                     Fig-1


                                Fig-2


                      7
www.aboutcivil.com                                                shinwari913@ymail.com


      o Type the command using the keyboard - the command is displayed in the
        command area.

      o Select the command from a menu.

      o Select the command's icon from a toolbar.

        My Assumptions in This Copy
      o When I want you to type a command in the command area the AutoCAD
        command will be written like:
        Type QSAVE ↵

      o When I want you to select a command from a menu, it will look like:
        Select File> Save

      o When I want you to pick a command from a toolbar, I'll write:
        Select Save

      o Despite all of the above, I'll probably use a combination of the above like:
        Select File> Save (or type QSAVE)

      o When will want you to click the left mouse button, I’ll write:
        Clickϒ

           Setting the Units:-
           The first step in Auto CAD is to set the units. For this purpose:
           Type UN↵

You will observe a new dialog box will appear as shown in Fig2. In this dialog box, in
the Length Group Box, change type to Architectural and change Precision to 0′-
00″.
In the Angle Group box, change type to Decimal and Precision to 0.00. In the same
area, you will find clockwise check box: check it if you want to take clockwise angles
to be entered as positive.
Similarly, in the Drag-and-Drop scale Group Box, change scale drag-and-drop content
to inches.

Fig2

           Draw a Line:-
           First of all we will draw a line.

      o Type LINE (or simply l)↵. You will see some comments in the command line
        that is LINE Specify first point:


ϒ
    But the use of commands will be preferred by me.


                                                   8
www.aboutcivil.com                                         shinwari913@ymail.com

   o Press F8 to make the line straight. <Ortho on> will be written in the command
     line.

   o Select first point on screen. And you will be asked for more points; Specify
     next point or [Undo]:
                                                    Note that all the Figures I will draw in
   o Select second point on screen.                 white back ground. The back ground
                                                    can be changed. But it will come later.
   o Press Enter.

      You will see that a line will be drawn as shown in Fig3.

      Draw a Rectangle:-
      Now we will draw a rectangle.

   o Type Rectangle↵ (or select rectangle icon from the draw tool bar. The
                            rectangle icon is somewhat like)
   o Type                   50′, 50′↵

   o Type                     100’, 100’↵

   o You will see that there is no rectangle drawn but that’s not the cause.
     Rectangle is drawn but you are unable to see it. You have to zoom out your
     graphics area. For this purpose either;
   o Whorl your mouse wheel towards your self or if no wheel exists in your
     mouse then
   o Type z↵
   o Type a↵ zoom all the graphics area. Now you will be able to see the rectangle
     as shown in Fig4

      Saving Your Drawing:-
      There are different methods to save your drawing:

   o Select the Save icon from the standard toolbar.

   o Type qsave↵

   o Select File> Save.


                                         9
www.aboutcivil.com                                      shinwari913@ymail.com


               The drawing has not been saved before, so AutoCAD will display the SAVE
        AS dialog box, select the appropriate Drive and Directory.


   Fig-3


Fig-4


                                              10
www.aboutcivil.com                                       shinwari913@ymail.com


       Exiting:-
       There are many ways to exit:-

   o Press Ctrl+Q

   o Click on exit button of the control box of the main windows form.

   o Type quit↵

Select File> Exit.


                                       11
www
          w.aboutcivil.c
                       com                                           shin
                                                                        nwari913@y
                                                                                 ymail.com

        LEC
          CTURE 2
               In this lec
                         cture, we wil get inform
                                     ll         mation about different opt tions of Auto CAD
        2004 so that we may be able to change A
                         m                      Auto CAD 20 display e according to our
                                                              004          etc
        own requirement But before going forw
            r            ts.         e          ward, first let us define so termino
                                                              t            ome        ologies
        which will be use frequently in future.
            h            ed          y
                                                                                  Fig
                                                                                    g-5
               Cursor L
                      List:-
             The list displayed wh we right click on in th model wh none of the
                                   hen                        he         hile
           mand is activ
        comm           vated is calle as Cursor List. It is sh
                                    ed         r             hown in Fig5
                                                                        5
             At the top of the curso list, we ca see that R
                       p            or         an           Repeat will b written for the last
                                                                        be          r
           mand used. S we can us the last us comman from curso list.
        comm           So           se         sed          nd           or


               Pop-Up-
                     -List:-
               Unlike cu
                       ursor list, the list displaye when we right click o in the mo while
                                     e             ed                    on         odel
        any o of the co
            one        ommands is activated, is called Pop-U
                                      a                     Up-List. It is shown in F
                                                                         s          Fig6


               How To Repeat A Command
                                     d:-
               There are many ways to repeat a c
                                               command;
        Press Enter.
            s
Fig-6   In Cu
            ursor list, sel Repeat.
                          lect
        Press Spacebar.
            s
        Type Multiple ↵
            e


               Transpa
                     arent Com
                             mmands:-
               The comm
                      mands which can be used while othe commands are activate are
                                h           d          er       s            ed
        know as Transparent Comm
            wn                 mands.
        E.g. P Zoom etc
             Pan,     e


               Comman Aliases
                    nd      s:-
                 A comma alias is an abbreviati that you enter on the command li
                         and        a            ion                                 ine
        instea of enterin the entire command n
             ad         ng                      name.
        For example, you can enter c instead of c
            e            u                      circle to start the CIRCL command An alias
                                                              t         LE          d.
        is not the same as a keyboard shortcut, w
             t           s          d           which is a commbination of keystrokes, such as
                                                                         f
        CTRL for SAV
             L+S         VE.
        An al can be d
             lias       defined for an AutoCAD command, device driv command or
                                     ny          D                       ver         d,
        extern comman
             nal        nd.


               Changin Comma Alias:-
                     ng    and
               You can c
                       change exist
                                  ting aliases o add new ones by editin acad.pgp in
                                               or        o            ng
        Notep or any te editor that saves files in ASCII f
             pad       ext                     s         format. To op the PGP file, on
                                                                      pen      P
        the Tools
            T
www.aboutcivil.com                                              shinwari913@ymail.com

Menu, click Customize > Edit Custom Files >Program Parameters (acad.pgp). The
file can also contain comment lines preceded by a semicolon (;).
Note: - Before editing acad.pgp, first create a backup so that you can restore it later, if
necessary.
To define a command alias, add a line to the command alias section of the acad.pgp
file using the following syntax:

Abbreviation,*command
Where abbreviation is the command alias that you enter at the Command prompt and
command is the command being abbreviated. You must enter an asterisk (*) before
the command name to identify the line as a command alias definition.
If you can enter a command transparently, you can also enter its alias transparently.
When you enter the command alias, the full command name is displayed at the
Command prompt and the command is executed.
You can create command aliases that include the special hyphen (–) prefix, such as
those listed here, that access the command line version of certain commands.
BH, *-BHATCH
BD, *-BOUNDARY
Note: - You cannot use command aliases in command scripts. Using command aliases
in menu files is not recommended.

If you edit acad.pgp while AutoCAD is running, enter reinit in order to use the revised
file. Restarting AutoCAD automatically reloads the file.


       Text Window: - (F2)
      The text window shows the history of the commands used. It can be accessed
form View > Display > Text Window.


       Cross Window and Box Window:-
            You can select objects by specifying opposite corners to define a
rectangular area. After specifying the first corner point, you can
Drag your cursor from left to right to create an enclosing window (Box Window)
selection. Only objects that the rectangular window entirely encloses are selected.
Drag your cursor from right to left to create a crossing selection. Objects that the
rectangular window encloses or crosses are selected.

     When selecting objects with a window selection, usually the entire object must
be contained in the window selection box. However, if an object with a
noncontinuous (dashed) linetype is only partially visible in the viewport and all the
visible vectors of the linetype can be enclosed within the selection window, the entire
object is selected.


                                            13
www.aboutcivil.com                                             shinwari913@ymail.com


       Options:-
Type op↵
You will see a dialog box as shown in Fig 7.
You are observing different tags like Files, Display etc. Let us explain its use.

        Display Tag:-
        Click on display tag. You will see a number of options in it. For the time
being, we will deal with Window elements. In this Group Box, the first checkbox is of
Display scroll bars in drawing windows. If it is checked then you will have scroll bars
in your drawing wing, of course its existence is essential. So try to remain it checked.
The other checkbox is of Display screen menu. If you want to have an additional
menu which will have the entire draw and modify commands including undo and redo
options then check the Display screen menu checkbox. But I will advise you to keep it
unchecked as it will give us comparatively larger drawing area.
        After two checkboxes, we’ve two buttons. If you want to change the fonts of
Auto CAD then click on Fonts Button.
        The other button is of Colors. Click it and you will have a mini dialog box
which will have different options. You can change the color of text, back color of
model and layouts etc.

        Open and Save Tag:-
        In this tag, find File Safety Precautions Group Box. It is recommended to
check the Automatic Save so that Auto CAD will save your drawing automatically.
Below this is the text box labeled as Minutes between saves. Write, for instance, 3;
now your drawing will be automatically saved after every three minutes. Below this,
there is a button of Security options. You can use it to protect your drawing by giving
a certain password.

       System Tag:-
       If you are getting creating new drawing dialog box at start up as shown in
Fig8, you can make it disable to be displayed. This can be done by the startup drop
down menu in the General Options Group Box at the System tag.

       User Preferences Tag:-
       You can customize your right click. You can do it by clicking Right click
customization button in Windows standard behavior Group Box at the User
Preferences Tag.

       Drafting Tag:-
       Here you can change the Auto Snap marker color (while drawing lines, you
might have seen a square box showing you the midpoint or endpoint etc of a line. If
your Auto CAD is not displaying this, press F3. It will be also discussed in the
coming Status Bar settings)
       The Auto Snap marker color and its size as well as size of aperture can also be
changed at the same windows form.


                                           14
www
          w.aboutcivil.c
                       com   shinwari913@y
                                n        ymail.com


Fig-7


                                     Fig-9
                                         9
            Fig-8
            F
www.aboutcivil.com                                            shinwari913@ymail.com

       Status Bar:-
       You can see status bar in the Fig1. Now let us explain its uses and settings:-

       Snap Tag:-
       The first tag that lies at status bar is Snap. Actually when you move your
mouse while the cross hair is displayed in the model, Snap enables us to control the
cross hair movement. Right click on the Snap tag and click on Settings. You will
observe a new dialog box as shown in Fig9

        In this dialog box, you must be on Snap and Grid tag. The other two tags i.e.
Polar tracking and object snap will be discussed later. Change the values of Snap X
spacing and/or Snap Y spacing and click on OK. Now you will see that there will be
change in the movement of cross hair. For instance, if you have increased the spacing
then the cross hair will jump from one point to another.

        Grid Tag:-
The grid is a rectangular pattern of dots that extends over the area you specify as the
drawing limits. Using the grid is similar to placing a sheet of grid paper under a
drawing. The grid helps you align objects and visualize the distances between them.
The grid is not plotted. If you zoom in or out of your drawing, you may need to adjust
grid spacing to be more appropriate for the new magnification.

To display a grid and set grid spacing
From the Tools menu, choose Drafting Settings (or Type Dsettings)
In the Drafting Settings dialog box, Snap & Grid tab, select Grid On to display the
grid.
Under Snap Type and Style, make sure Grid Snap and Rectangular Snap are selected.
For grid X Spacing, enter the horizontal grid spacing in units.
To use the same value for vertical grid spacing, press ENTER. Otherwise, enter a new
value for grid Y Spacing.
Choose OK.
Although the grid dots do not necessarily correspond to the current snap interval, they
do reflect the current snap angle and isometric snap and grid settings.

        Ortho Tag:-
        If we want the movement of cross hair to be constrained in vertical or
horizontal direction, we use grid.
        To turn it on, either press F8 or click on Ortho tag. When ortho is ON, Polar
will be OFF.

        Polar Tag:-
        When we don’t want the movement of cross hair to be constrained in vertical
or horizontal direction, we use Polar.
        To turn it ON, Press F8. When polar is ON, Ortho will be OFF.

        OSnap Tag:-
        Object snaps constrain point specification to exact locations, such as a
midpoint or an intersection, on existing objects. Using object snaps is a quick way to
locate an exact position on an object without having to know the coordinate or draw
construction lines. For example, you can use an object snap to draw a line to the


                                          16
www.aboutcivil.com                                             shinwari913@ymail.com

center of a circle or to the midpoint of a Polyline segment. You can specify an object
snap whenever AutoCAD prompts for a point.
        To turn it ON, press F3
We can change its settings by Right Clicking on the OSnap Tag and click on settings.

        OTRACK Tag:-
        Auto Track helps you draw objects at specific angles or in specific
relationships to other objects. When you turn on Auto Track, temporary alignment
paths help you create objects at precise positions and angles. Auto Track includes two
tracking options: polar tracking and object snap tracking. You can toggle Auto Track
on and off with the Polar and Otrack buttons on the status bar. Object snap tracking
works in conjunction with object snaps. You must set an object snap before you can
track from an object's snap point.

       LWT Tag:-
       This is used to increase or decrease the line weight.

       MODEL Tag:-
       This is used to toggle between model and paper.


                                          17
www.aboutcivil.com                                             shinwari913@ymail.com

LECTURE 3
       Let us learn how to use the following commands:-

     Erase:-
     There many ways to erase an object.
   o Type E↵
   o Select the objects which you want to erase ↵

The easiest and fast way to delete an object is to select the object and then press
Delete button of your key board.

       Copy:-

   o Type co↵
   o Select the object(s) ↵
   o Select the base point. (By base point it is meant to select a point from which
     you want it to be copied.)
   o Either type distance ↵ or specify any point on screen.

       Copy Multiple:-
       If we want to copy an object more than once, the easiest way is;
   o   Type co↵
   o   Select object↵
   o   Type m↵
   o   Select base point as in above case.
   o   Click on required space to have multiple copies as shown in Fig10
   o   Press ↵ when you want to finish multiple copying.

       Construction Line:-
       This is used for multiple purposes like:-
   •   To draw horizontal, vertical or angular line.
   •   To draw offset (off set is used to draw the walls etc) and projections etc.
   •   To bisect an angle.
   •   To check a certain line for horizontal or vertical etc.

   o Type XL↵
   o Type H for horizontal or V for vertical line. We will see that a line of infinite
     length is drawn. Now we can use it for our required purposes like to check any
     line in our drawing etc.
   o If you want angular line, Type XL↵ and then press A for angle. And then you
     will be asked to enter angle. Type the angle value and press↵. Here we can
     also press R to use a line as a reference.


                                           18
www.aboutcivil.com        shinwari913@ymail.com


                                     Fig-10


                                    Fig-11


                                Fig-12


                     19
www.aboutcivil.com                                             shinwari913@ymail.com

   o If we want to bisect an angle, Type XL↵ then Type B↵ then select the angle
     vertex. After this, select the start point of the angle and then select end point
     and press ↵ as shown in Fig11.

To draw the offset, Type XL↵ then Type O↵. After this, either:-
Type the distance of offset and press ↵.Then select the line. Then move the cursor to
the side where you want offset and click the left mouse button.
OR type T↵. Now select the line. Then click at any point and you will have that much
offset.

        Mirror:-
        Mirroring creates a mirror image of objects. It is useful for creating
symmetrical objects because you can quickly draw half the object and then mirror it
instead of drawing the entire object.
You flip objects about an axis called a mirror line to create a mirror image. To specify
this temporary mirror line, you enter two points. You can choose whether to delete or
retain the original objects. Mirroring works in any plane parallel to the XY plane of
the current UCS.

   o Type mi↵
   o Select object↵
   o Then select first and second points of mirror line.
   o Press Y to delete the source object or N to avoid deleting source object and
     press enter.
   o Fig12

       Zoom Real Time:-
       You might have observed that some times when you draw an object; it can not
be seen fully. To make the object fully visible, we use zoom real time.

Type z↵

       Now a number of options are available which are briefly described below;
       All:-
       This is used to present the full drawing in the present viewport.

        Center:-
 This is used to show a window defined by a center point and a magnification value or
height. A lesser value for the height enlarges the magnification. A bigger value
reduces the magnification.

         Dynamic:-
 It is used to show the generated portion of the drawing with a view box. The view
box represents our viewport, which we can reduce in size or enlarge and move around
the drawing. Positioning and sizing the view box pans or zooms to fill the viewport
with the image inside the view box.

         Extents:-
 It is used to show the drawing extents and results in the largest possible display of all
the objects.


                                            20
www.aboutcivil.com                                            shinwari913@ymail.com


     Previous:-
Zooms to display the previous view. You can restore up to 10 previous views.

        Scale:-
 Zooms the display at a specified scale factor. Enter a value followed by x to specify
the scale relative to the current view. For example, entering .5x causes each object to
be displayed at half its current size on the screen. Enter a value followed by xp to
specify the scale relative to paper space units. For example, entering .5xp displays
model space at half the scale of paper space units. You can create a layout with each
viewport displaying objects at a different scale. Enter a value to specify the scale
relative to the limits of the drawing. (This option is rarely used.) For example,
entering 2 displays objects at twice the size they would appear if you were zoomed to
the limits of the drawing.

     Window:-
Zooms to display an area specified by two opposite corners of a rectangular window.

       Real Time:-
 Using the pointing device, zooms interactively to a logical extent. The cursor changes
to a magnifying glass with plus (+) and minus (–) signs. Hold your mouse left button
and move vertically to zoom in and move downward to zoom out.


       Multiline:-
       Multiline consists of between 1 and 16 parallel lines, called elements.

   o Type ml↵
   o Here you have three options:-
            Justification: by this, we mean to locate the center of cross hair to any
            line drawn. Type j↵ for justification. Again you will have three options
            i.e. top, zero, and bottom. If we press T for top, the cross hair will be at
            the top most line. In case of zero, cross hair will be in middle while in
            last case, it will be with last line.
            Scale: Type s↵ for scale. It is used to provide the distance between two
            connective lines. It must be given in inches as it does not accept value
            in feet’s.
            Style: Type st↵ for style. It allows you to select style of line. You can
            define different styles and number of lines by Selecting Format >
            Multiline Style. You will see that a dialog box will appear as shown in
            Fig13.Here you have a lot of options. You can use it by your self but
            remember that the maximum number of lines that be added are 16.


                                          21
www
  w.aboutcivil.com
               c                shin
                                   nwari913@y
                                            ymail.com


                                Fig-1
                                    13


                     Fig-14-a


                                                    Fig
                                                      g-14-b


                                                   Fig-
                                                      -15
www.aboutcivil.com                                              shinwari913@ymail.com

      Trim:-
      You can shorten or lengthen objects to meet the edges of other objects. This
means you can create an object such as a line first and then later adjust it to fit exactly
between other objects.

    o Type TR↵
    o Now select the object(s) to which will serve as cutting edges ↵
    o Now select the objects which you want to trim as shown in FIG14
Remember that line will be trimmed from the nearest corner at which we will select
the line.
The other easiest ways is to Type TR and press Enter two times then select the cutting
edges. But for this case, intersection of two or more lines is must. While in the above
case it was not essential!

After selecting the first line, we will observe some more options as shown in FIG15
Let us discuss each of them;

       Projection:-
              By default it is UCS and tries to keep it so.

       Edge:-
                In it, there are two options Extend and No Extend. If we type extend
       (by default it is extend) then the above process is done i.e. without intersection
       of objects, we can trim them. But if we make it No Extend then without
       intersection, trim command will not work. Remember that once you have
       changed the trim command to No Extend, you must change it to Extend to
       work properly as described above.

       Undo:-
                It is used to undo your last action.

         Chamfer:-
         Using CHAMFER is a fast way of creating a line between two nonparallel
lines. It is usually used to represent a beveled edge on a corner. CHAMFER can also
be used to bevel all corners of a Polyline.

You can chamfer lines, Polylines, Xlines, and rays.

   o Type cha↵
   o (We will see different sub-options/commands which will be discussed later.)
   o Now select the first line which is labeled as A in Fig16.
   o After that we will be asked for second line. So select second line which is
     labeled as B in Fig16.
   o We will see that the corner is chamfered (if you see no chamfering although in
     command window you can see that the command has been applied then you
     have to change the chamfer settings which are described below in sub-
     commands).

                                                                                Fig-17
     Fig-16


                                            23
www.aboutcivil.com                                             shinwari913@ymail.com


Now let us explain its sub-commands.

       Polyline:-
       It is used to chamfer a Polyline and nothing else.

        Distance:-
        It is used to change the chamfer distance. It will ask you to enter first chamfer
distance in which you should enter the distance on the first line from the corner to the
end of chamfering. Similarly it will ask for second chamfer distance in which you
should enter the distance on the second line from the corner to the end of chamfering.
For instance, in Fig-17, the first and second chamfer distance is 1"while in Fig-18; the
first chamfer distance is 1′ while second chamfer distance is 3".

        Angle:-
        In this option/sub-command, you can change the chamfer length and angle.
For illustration, see the Fig-19 and Fig-20

 In Fig19, the chamfer length and angle, both are taken as 0 which is the default value
but in Fig-20, the chamfer length on the first line is 2" and the chamfer angle from the
first line is 60º. (The value of angle can be entered 0-89 only and no negative values!)

       Trim:-
       Till now we were using chamfer in Trim mode. If we change it to Notrim then
the chamfering will be done as shown in Fig-21

       Method:-
       Now let us suppose that in sub-command Distance, we have first and second
chamfer distance as 6". And in Angle, we have 1" chamfer length and 75º chamfer
angle. Now we want to chamfer some non parallel lines by Distance and some by
Angle. Method provides us this facility. In Fig22, the lines are chamfered by angle
method while in Fig-23; the lines are chamfered by distance method. Remember that
if we will change the default values of Angle then the method is automatically
changed to Angle till it is changed manually.

     Multiple:-
     It is used to chamfer more than two non-parallel lines. To escape from this
command, press Esc key of your keyboard.

        Fillet:-
        Filleting joins two objects with a smoothly fitted arc of a specified radius. An
inside corner is called a fillet and an outside corner is called a round; we can create
both using FILLET in AutoCAD.

You can fillet:-

       Arcs
       Circles
       Ellipses and elliptical arcs
       Lines
       Polylines


                                           24
www.aboutcivil.com                  shinwari913@ymail.com


Fig-18                                 Fig-19


                                 Fig-21
     Fig-20


   Fig-22                              Fig-23


                                  25
www.aboutcivil.com                                             shinwari913@ymail.com

                  Rays
                  Splines
                  Xlines

           Let us discuss the fillet command and its sub commands;

           You can activate the command by typing f↵

                   Radius:-
                   Your first task is to set the require radius. So type r↵
           The default radius is 0′-0″. Let us change it to 3″. So type 3↵ (Don’t forget to set the
           units before starting drawing).
           Now we have to fillet side 1 and 2 of box shown in Fig-24-a. After the selecting the
           two sides, the box will be changed and its sides 1 and 2 will be filleted as shown in
           Fig-24-b.
           If we change radius to 0 then the two sides will meet forming a normal corner as
           shown in Fig-24-c. In this Fig., we can easily observe that the two sides of the box are
           met at 0 radius. But first you have to delete the filleted or curved line. In this case I
           have redraw it for illustration.

                   Trim:-
                   Enter t↵ for trim mode. If want not to erase the lines after filleting the change
           this mode to no trim by entering n↵ and then after filleting we will get filleting
           objects just like in Fig25-c.

                  Multiple:-
                  If we want to fillet more than one side then activate this sub command.

Fig-24-a                                                     Fig-24-b


                               Fig-24-c


                                                      26
www.aboutcivil.com                                              shinwari913@ymail.com

LECTURE 4

       Text:-
       There are two types of texts in Auto Cad;

        Single Line Text:-
        This can be activated by typing text↵. Click on the start point (on screen).
Then you have to specify the height of text. Either directly enter the height value or
move the cross hair and you will see a rubber band. Use it for appropriate height and
then press left click of the mouse. After that you can enter the angle value e.g.40 etc.
        Here we will also see the sub commands:-
    o Justify:-
It has further sub commands;
    o Align:-
                If it is activated, then we have to specify the two points and text will be
adjusted according to the area and we will not be bothered of height.
    o Fit:-
                In fit, we will give height, so instead of changing the height
automatically, the text will shrink or grow to fit in the required area.
    o Center/Middle etc:-
                Now after fit, the difference is of the grip points of the text and its
alignment and nothing else. Here is the full name of the symbols used;-                       Fig-25

TL = Top Left
TC = Top Center
TR = Top Right
ML = Middle Left
MC = Middle Center
MR = Middle Right
BL = Bottom Left
BC = Bottom Center
BR = Bottom Right

    o Style:-
Style is the defined style of text.
By default a text style, Standard, is defined. We can also define our own text styles.

   •    Defining/Creating a text Style:-
                Type st↵ or select Format > Text Style. A Text Style dialog box will
be displayed as shown in Fig-25. Here you can change the settings. By clicking on
button New, we can define our own styles. The name of the style if written in Style,
sub command of text, then that style will be used to write the text. So in this way, we
are able to write text in different styles easily.


We can also underline the text and many other tricks can be done like;
Write %%P to have a ± sign.
Write %%D to have a º (degree) sign.


                                            27
www.aboutcivil.com                                             shinwari913@ymail.com

Write %%U to underline the text.
Write %%O to over line the text.
Write %%U%%O to both underline and over line the text.
Write %%C to have Ø (diameter) sign.

        Multiline Text:-
        A multiline text (mtext) object includes one or more paragraphs of text that
can be manipulated as a single object.
Type t↵ or type mtext↵ or Select Draw > Multiline Text.
Before entering or importing text, we specify opposite corners of a text bounding box
that defines the width of the paragraphs in the multiline text object. The length of the
multiline text object depends on the amount of text, not the length of the bounding
box.

         Multiline Vs Single Line Text:-
                 The main difference between the two is that in single line text, if we
want to select it, a single line of text is selected and, therefore, can be edited
individually. While in multiline text, we can not edit a single line of text but we have
to edit the entire paragraph.

        Quick Text:-
        Type qtext↵.
When AutoCAD opens or regenerates a drawing, if the drawing contains numerous
text objects, it can take quite some time to complete a selection process, especially if
the text uses complex fonts. If we want to speed up the process and do not need to
actually see the existing text, enable the Quick Text mode (QTEXT).
When Quick Text is enabled, text-based objects are displayed as simple rectangles
that contain no characters. When we enable Quick Text mode, we need issue a
REGEN command to redisplay the text as simple rectangles.
When Quick Text is enabled, new text objects are displayed as text characters while
the TEXT and MTEXT commands are active, which makes it easier to read what we
are typing.

       Region:-
       Type reg↵ for region. This is used to change lines (closed lines) into a single
Polyline.

         Ellipse:-
         Type el↵ for ellipse. Then select the end points of the axis. After that either
give the distance to other axis or rotation value which must not exceed than 89.4. If
we enter 0 then we will get a circle!
(Here we have also some more options but I am not going into detail. One can search
it in the Auto Cad help by typing ellipse in the Ask tab while List of components to
search in the drop down dialog box should be User documentation set. Then press
enter and the select Draw Ellipses in the search results. There click on Reference and
the select ELLIPSE. You can take help from there. Just click on Arc etc and
explanation will be displayed.


                                           28
www.aboutcivil.com                                           shinwari913@ymail.com

           LECTURE 5

                  Using of commands:-
                  We are now at the stage to draw some drawings. Many new commands will be
           introduced while drawing.

                  Wall Footing:-
                           So let us start with wall footing. It is a common kind of foundation.
           [Save this and every drawing after this as it will be used in future lectures)
              1) Start the AutoCAD and set the units. But in units to scale drag and drop
                  content should be centimeters. You might be asked to ensure that you have
                  selected centimeters; click on OK.
              2) Save this drawing by the name of
              3) Type l↵. (Here we are making a rectangle of 70x15 cm)
              4) Select any arbitrary point on screen.
              5) Press F8 to straight the line (i.e. to ON the ortho, if it is OFF).
              6) Now move the mouse towards your left or right and then type 70↵↵ (It will
                  act as our mirror line).
              7) If you are unable to see the line, type z↵ and then a↵ to zoom all.
              8) Now similarly make the breadth of rectangle 15 and further complete the
                  rectangle as shown in Fig-w-01
              9) Now make sure that in the object snap dialog box (type os↵ for object snap
                  dialog box), the Midpoint is checked and the oSNAP tag at the status bar is
                  pressed in i.e. OSNAP is ON (we can also use F3 to ON/OFF the OSNAP).
              10) Type l↵ and move the cursor on the somewhat mid of the top line of the
                  rectangle. Here we will see a rectangular shape marked as Midpoint as shown
                  in Fig-w-02. Using this midpoint, draw a line of approximately 50 as shown in
                  Fig-w-03.
              11) Now type o↵ for offset. Type offset distance as 15↵. Then select the left side
                  of rectangle and then move your cross hair towards the right an click. The
                  command will be still active, so select the right side of the rectangle and move
                  your cursor towards left and click on screen. Press enter to deactivate the
                  command. You will now see the drawing as shown in Fig-w-04.
              12) Now we got 15cm mark from the either sides. Type pl↵ for polyline and select
                  left top offset, move your cursor (or you can say cross hair) upward and type
                  10↵. The command is still active, so move your cursor towards right and type
                  5↵. Then move your cursor toward upward and type 10↵. Again move your
                  cursor towards right and type5↵. Now move your cursor upward and type 30↵
                  as shown in Fig-w-05
              13) Type mi↵ for mirror. Select the Polyline which has been drawn in above step
                  and press enter. Now select the end points of the midline which was drawn is
                  step no. e. then type no↵ (or simply n) to avoid deleting our source Polyline.
                  The Figure will be as shown in Fig-w-06
              14) Now delete the lines by first selecting them and then either press delete button
                  of the keyboard or by typing e↵ so that your drawing is seemed to as Fig-w-
                  07.

Fig-w-01                                                   Fig-w-02


                                                     29
www.aboutcivil.com                                           shinwari913@ymail.com

   15) Now we have to draw a continuation line at the top of wall footing as shown in
       Fig-w-08. For this, type l↵ and move shift your cursor on to the left topmost
       corner. Then move it towards left and you will see a dotted line showing tht
       you are align with the specified corner. Now click on arbitrary point but
       aligned with the left top most corner. ON the ortho if it is OFF. Drag the
       cursor/cross hair towards right till you till the approximate mid point of the
       tube type shape. Click on screen and then move the cursor upward to
       reasonable distance and then again click on screen. Now OFF the ortho. And
       make the line shape as shown in Fig-w-08.
   16) Now we will do hatching. [Many drafting applications use a process called
       hatching to fill an area with a pattern. The pattern is used to differentiate
       components of a project or to signify the material composing an object.]. Type
       h↵ for hatching. A new dialog box, Boundary Hatch and Fill, will open as
       shown in Fig-w-09.
   17) Click on pick points and then select the inner portion of rectangle (which is
       shown in FIGw-01., by clicking inside it). [If there is error of valid hatch
       boundary not found, it means that the corners of the rectangle are not closed
       properly; so make sure that all the corners of the rectangle are jointed with
       each other]. After selecting the inner point, the side of the rectangle will be
       changed into dotted line. Press enter and again the previous hatch dialog box
       will appear. Make sure that in this dialog box, the type is Predefined. Now
       either click on the text box type shape or in front of Pattern there is a small
       browse button, click on it. You will see a new dialog box, Hatch Pattern
       Palette. There are many patterns. Select the AR-CONC (This is the pattern of
       Concrete) in the Other Predefined tag. Click on ok.
   18) Now click on Preview button at the bottom most left corner of the Boundary
       Hatch and Fill dialog box. If you see that hatching is done properly then well
       and good otherwise press Esc on your keyboard and you will be returned to
       Boundary Hatch and Fill dialog box. Change the scale (More the scale value,
       more will be distance between the hatching pattern components) and the by
       trial and error method, set the hatching scale. When it is done, do right click.
       Fig-w-10.
   19) Now do the same above process of hatching in the rod type (or you can say
       tube type) shaped steps. But now you will select the pattern STEEL which is
       just like the pattern of Bricks.
                        The drawing is now ready and will seem like FIG w-11.


                                         30
www.aboutcivil.com                   shinwari913@ymail.com


      Fig-w-09


Fig-w-10                       Fig-w-11


                          31
www
  w.aboutcivil.c
               com                                                shin
                                                                     nwari913@y
                                                                              ymail.com

LEC
  CTURE 6

        Inverted Arch Foundation:-
        Now we w draw inv
                 will        verted arch ffoundation a shown in F
                                                     as         Fig-I-01. Bu here we
                                                                           ut
will also introduc the use of layers to so extent. The layers w be used in detail
     a           ce         f            ome         T         will         n
when we will dra a map.
    n            aw

        Layers:-
        It is an or
                  rganizing too that operat like an el
                              ol          tes        lectronic ver
                                                                 rsion of traditional;
     parent overla on a draw
transp             ays         wing board.1
        Layers ca be assigne color and linetype, an their visib
                  an          ed                    nd          bility can be
    rolled.
contr

          Setting Up Layers:-
                  U
          Now let u start to set some layers. For this pa
                   us           t                          articular dra
                                                                       awing, we wi set two
                                                                                      ill
layers. One, named as rough, and second named as n
                                ,           d,            neat. The linnes/objects dr rawn onto
rough layer will b those whi are draw to help in drawing the drawing. W
      h            be           ich        wn                                       While on
the ot ther hand, th neat draw
                   he          wing will be o neat layer
                                             on            r.
The layer bar, wh is, by de
      l            hich         efault, present at object pproperties to
                                                                       oolbar, is sho in
                                                                                     own
Fig-I-02.
Now let us explai the FIG I- We can see that ther are differe options i.e. Color,
                    in          -02.                       re           ent          i
freeze On/Off et
       e,          tc.
     o Layer Na    ame:-
Here the name of current laye is written. Any object drawn will be on this cu
                   f            er           .            t                           urrent
layer. We must have at least one layer. B default we have a laye named as 0.
                  h              o          By            e             er
     o Lock/Unl     lock:-
      used to lock or unlock a layer. If a la
It is u                                     ayer is locked the object on that lay will
                                                           d,           ts           yer
visibl but not be able to be m
       le          e            moved nor can it be copi or deleted.
                                                           ied
     o Color:-
The color assigne to the layer is shown in the box m
      c            ed                                    marked in abo Fig-I-02 as
                                                                        ove          2,
Color r.
     o Freeze or Thaw:-
                   r
This is used to fre eeze or thaw the layer in current or a viewports When a la
                               w            n              all          s.           ayer is
freeze all objects on that laye will becom invisible
       e,          s            er           me           e.
     o On/Off:-
This is used to make the laye visible or i
                 m             er            invisible. If a layer is off then all the objects
                                                                        f            e
drawn on that lay will be made invisibl But there is some cha
       n           yer         m             le.                       ange in freez zing an
on/Off of a layer.  .
e.g. if we select all the object (Ctrl+A), t objects o Off layer are also sel
       f           a            ts            the         on            r            lected but
not if they are on the freeze layer.
      f           n

      1) Type la↵ or click on
       )                         which is located at th object pro
                                        s             he         operties tool
                                                                             lbar, layer
         properties manager w be displayed as show in Fig-I-03. Let us ma the
                  s         will                    wn                       ake
         two layers.


1
    AUT
      TOCAD 2000 b David Frey
                 by
www
             w.aboutcivil.c
                          com   shinwari913@ymail.com
                                   n        y


                   Fig-I-0
                         01


    Fig-I-02
    F


Fig-I
    I-03
www.aboutcivil.com                                                           shinwari913@ymail.com

    2) Click on New. A new layer, Layer1, will be made. Name it as Rough and
       press comma on your key board and you will automatically transferred to a
       new layer!

    3) Name the second layer as neat. (We can rename the layer by double click on
       its name)
    4) Change the color of the layers by clicking on the small box under the Color
       title. Select Color dialog box will be displayed. Here we can change the color
       of the layer. So change the color of neat to red and that of rough to green, for
       instance and press Ok.

    5) Click on the continuous which is the default linetype of the neat layer. Select
       Linetype dialog box will appear. Click on Load and select
       ACAD_ISO003w100 which is probably lying at second number and click Ok.
       Similarly load ACAD_ISO007w100 which is probably lying at sixth number.

    6) We will see that three different lines are now loaded in Select Linetype dialog
       box. One is previous one that is continuous, two are newer that are
       ACAD_ISO003w100 and ACAD_ISO007w100. Select the
       ACAD_ISO007w100 i.e. ISO dot and click Ok. We will see that ISO dot is
       the line type of neat layer. Similarly make the ACAD_ISO003w100 as the
       linetype for rough layer.

    7) Now make the rough as your current layer♦ and draw a line. You will see that
       a dashed space line will be drawn. If you are seeing a continuous line, then
       type ltscale↵ to change the linetype scale. By trial and error method, set it.
       Remember that only positive and non-zero values are accepted!

    8) Make the neat layer as your current layer and draw some lines for check.

         Changing the layer of an object:-
         There are different ways to change the layer of an object.

    1) Select the object and then in layers drop down list, select the desired layer.

    2) Double click on an object; a mini window type will appear which will be
       showing the properties of the select object. There, we can also change the
       layer of the object. Not only layer but certain other properties like line width
       etc an also be changed.

    3) Select the object and then type ch↵. Or first type ch↵ and then select the
       object.

       Changing the different properties of an object:-
       We can change different properties of an object with bringing changes in the
properties of the layer. This can be easily done either by using ch command, described
above or directly select an object and use the object properties tool bar drop down


♦
  E.g. in second Figure of this lecture, the 0 layer is current layer. Just go to the drop down list and
click on the rough, the rough layer will be made your current layer.


                                                     34
www.aboutcivil.com                                             shinwari913@ymail.com

lists. Remember that in the drop down lists, if By Layer is selected then the object will
match its properties with the current layer.

        Match Properties:-
        We can make two make the properties of two objects the same by typing ma↵
(match properties). Then select the object which will act like the source. Then select
the second object. The second object properties will be changed and will be same to
the properties of the first object.

       Coming Back to Inverted Arch Foundation:-
       Now let us now start our drawing. Start AutoCad and set the units as usual!

   1) First of all make a rectangle by rec↵. Select any point on screen as your
      starting point. Then enter the dimensions as 83”, 45”↵. Then click on the
      rectangle, you will see that it will act as a Polyline. But it is very difficult to
      work with this type of rectangle. So to change the Polyline into individual
      simple lines, we use explode command. Type x↵ to explode. Then select the
      whole rectangle, either by using box window or cross window↵. Now we can
      select each individual line. Fig-I-04

   2) Now Type o↵ for offset. Type 26↵ as the offset distance. Select the left side of
      the rectangle and click towards the right side. Now your drawing must look
      like as shown in Fig-I-05

   3) Now you can press space bar of your keyboard two times; once for exiting out
      from offset command and second for repeat the offset command or simply
      press Esc key of the key board and Type o for offset. Similarly select the left
      side of the rectangle. Now the offset distance will be 3’↵ and click towards the
      right side. Now we have made a column. As shown in Fig-I-06

   4) Type o↵ for offset. Type 62↵ as the offset distance. Select the left side of the
      rectangle and click towards the right side.

   5) Type o↵ for offset. Type 6’↵ as the offset distance. Select the left side of the
      rectangle and click towards the right side.

   6) Type o↵ for offset. Type 98’↵ as the offset distance. Select the left side of the
      rectangle and click towards the right side.

   7) Type o↵ for offset. Type 9’↵ as the offset distance. Select the left side of the
      rectangle and click towards the right side. As shown in Fig-I-07
   8) Type o↵ for offset. Type 24↵ as the offset distance. Select the bottom line of
      the main rectangle and make offset towards the above direction Fig-I-08


                                           35
www.aboutcivil.com                   shinwari913@ymail.com

           `


      Fig-I-04
                                        Fig-I-05


    Fig-I-06                         Fig-I-07


Fig-I-08                             Fig-I-10


Fig-I-09


                                36
www.aboutcivil.com                                               shinwari913@ymail.com

      9) Type cha↵ for chamfer. Set chamfer distance, both first and second, to 3. Also
         the trim mode should be NO trim ϒ. Now select the line A and then select the
         line B. Then press space bar or Enter button of your keyboard to repeat the
         chamfer command. Then select the line C and then select the line B.Fig-I-09.
         Do similar process with other two columns. In last, delete the line B and by
         using trim command, make your drawing as shown in Fig-I-10

      10) Now take offset of 20 inches of the top above side of the main rectangle (In
          Fig-I-11, it is shown as dotted line). Then Type ex↵↵ and then click on the top
          edges of the columns till they meet the line which you have just drawn. Then
          Delete the line which was shown in Fig-I-11 as dotted line.

      11) Now draw the line as shown in Fig-I-12. And then by using trim command,
          remove some parts of the lines so that your drawing resembles to Fig-I-13.

      12) Type c↵ for circle. Now be sure that mid point is selected in OSNAP. The
          shortcut for activating a single OSNAP (i.e. object snap), I call it OSNAP
          shortcut, is just hold on the Shift key of your keyboard and do right click on
          the screen. You will observe a number of options like End point, mid point
          etc. Click on Mid point. Now by doing so, you have turned off all the snaps
          except mid point! This works even your OSNAP is OFF! So after doing so,
          select the center of circle as showed in Fig-I-14. Now you will be asked for
          radius. Select End Point in OSNAP shortcut and select the point A. Now your
          drawing will somewhat like Fig-I-15

      13) Repeat the command circle and select the same mid point as was shown in
          Fig-I-14 but select point B this time, when asked for radius. Now your
          drawing will resemble to Fig-I-16

      14) Using the trim/delete, modify your drawing as shown in Fig-I-17

      15) Do the same procedure with the rest of columns. At last your drawing will
          resemble to Fig-I-18. There might be a slight difference at the bottom of the
          arcs but don’t worry about that and leave it as they are!

      16) Now rest of the task is easy. Just delete the left and right most side of the main
          rectangle and draw again lines showing the continuity as shown in Fig-I-19.
          Use of ortho will make it easy to draw these lines. Also make sure that the line
          is touching the end points of arcs other wise there might be problem in
          hatching.
      17) Now use the trim command and trim the top side of the main rectangle. Also
          make offset of these trimmed lines (Now it has been changed in lines!!) at
          distance of 8″ above the rectangle. Then joint this offset with rectangle as
          shown in Fig-I-20


ϒ
    The chamfer command is explained above.


                                              37
www.aboutcivil.com                     shinwari913@ymail.com

                                        Fig-I-12

Fig-I-11


 Fig-I-13
                                         Fig-I-14


 Fig-I-15

                                          Fig-I-16


   Fig-I-17                             Fig-I-18


                                   38
www.aboutcivil.com                     shinwari913@ymail.com


Fig-I-19                                 Fig-I-20


Fig-I-21
                                        Fig-I-22


 Fig-I-23                             Fig-I-24


                                 39
www.aboutcivil.com                                           shinwari913@ymail.com

   18) Now we will do hatching. Type h↵ for hatching. At the Hatch tab, click on
       pick points and then select all the internal areas of the arcs one by one, by
       clicking inside them. Now click in swatch, a dialog box will appear. Go to ISO
       tab and select the first one i.e. ISO02W100. Click on OK button. Then change
       angle to 90 and scale to 0.5. click on Preview. If you are satisfied, the press ↵
       otherwise press Esc and then set the scale till you get a better hatch. Fig-I-21

   19) Similarly do hatching in the area under the arcs by having the hatch pattern as
       AR-CONC at the Other Predefined tag, set scale to 1 and angle to 0. Fig-I-22

   20) Similarly do hatching in the top most area which are in the shape of small
       rectangles. The hatch pattern will be MUDST at Other Predefined tag. Scale
       should be 10 and angle should be 0. The delete the upper most and side lines.
       Fig-I-23

   21) Now the last step is to hatch the columns. So first of all close the top mouths
       of columns and do hatching by selecting the interior area of the columns. The
       hatch pattern should be ANSI32 at ANSI tab. Scale should be 10 and angle
       should be 0 Fig-I-24

           Congratulations! We have made the inverted arch foundation successfully.
   In the coming lecture we will be drawing the plan of a home.


                                          40
www.aboutcivil.com                                                         shinwari913@ymail.com

LECTURE 7

Now its time to draw a plan of a house. Let us assume that the area of the plot is 70′ x
50′

      1) As usual set the units to Architectural and precision to 0′-0″. It will make us
         enable to enter the values not only in inches but also in feet. (remember that
         any data which we enter as a feet must have symbol ’)

   2) Let us make some layers. Type la↵ for layer dialog box. Then make few layers
       of following specification;
NAME OF THE LAYER COLOR OF THE LAYER LINE STYLE
Text                        Green                      Continuous
Dimensions                  Red                        Continuous
Perdas                      White                      ISO Dash

      3) Make 0 as the current layer. Draw a rectangle of 70′ x 50′ (Using line
         command and not by rec command otherwise you will have to explode it) Fig-
         P-01

      4) Now using the offset command offset each side of the rectangle 9″ to the
         inside♠ as shown in Fig-P -02

      5) Type o↵ for offset and then offset the inner most top line 4′ to the bottom♣ as
         shown in Fig-P -03

      6) Offset the line drawn in Step 5, 9″ (i.e. Type 9↵ which will mean 9 inches)to
         the bottom as shown in Fig-P -04

      7) Offset the line drawn in Step5, 15′ (i.e. 15 feet) to the bottom and then offset
         this line 9″ to the bottom as shown in Fig-P -05

      8) Offset the line A in Fig-P -05, 4′ towards the right. Then offset the same line
         9″ towards the right. Fig-P-06

      9) Offset the line A in FIG p-06, 6.5′ towards the right. Then offset this line 4.5″
         towards the right. Now offset this line 15′ towards the right and then offset this
         line 9″ towards the right.Fig-P-07

      10) Offset the last line in step 9, 15′ towards right and then offset this line 4.5″
          towards the right. Then trim all extra lines so that your drawing should match
          to Fig-P-08 we can see that we have made two rooms for which two baths are
          attached.


♠
    To quit from a command, press Esc Key of the key board.
♣
    In Figures, one side of the drawing will be shown due to less space.


                                                    41
www.aboutcivil.com                       shinwari913@ymail.com


 Fig-P-01                             Fig-P-02


 Fig-P-03                                 Fig-P-04


 Fig-P-05                                   Fig-P-06


Fig-P-07                                    Fig-P-08


                                 42
www.aboutcivil.com                                             shinwari913@ymail.com

   11) Now let us make doors for the two rooms and bathrooms. Now zoom in the
       first room. Offset the line A of FIG p-09, 9″ to the left and then offset this line
       3.5′ to the left so that your drawing resembles to Fig-P-10

   12) Now Type c↵ for circle and click on point A shown in FIGp-10. Then type
       3.5′ as the radius and Fig-P-11

   13) Now using the trim command, trim all the extra lines and your drawing will be
       like Fig-P-12

   14) Now zoom in to the area which is encircled in FIGp-12. After zooming in,
       your drawing will be like Fig-P-13

   15) Now using the trim command, make your drawing like Fig-P-14


                                           43
www.aboutcivil.com                     shinwari913@ymail.com

Fig-P-09                             Fig-P-10


Fig-P-11                               Fig-P-12


Fig-P-13
                                      Fig-P-14


                                44
www.aboutcivil.com                                                  shinwari913@ymail.com


                                                                     Polyline, 23
                                                                     Pop-Up-List, 11
               A                                 H                   Projection, 22
Align, 26                         hatching, 29
Angle, 23                         How to Start, 5                                  Q
Assumptions, 7
                                                                     Quick Text, 27
                                                    I                quit from a command, 40
               C
                                  Introduction, 5
Center/Middle, 26                 Introduction of Main Interface,                  R
Chamfer, 22                           5
Changing Command Alias, 11        Inverted Arch Foundation, 31       Radius, 25
Changing the different                                               rectangle, 34
   properties of an object, 33                                       Rectangle, 8
Changing the layer of an                            J                Region, 27
   object, 33                                                        Repeat A Command, 11
Command Aliases, 11               Justification, 20
Command Entry, 5                  Justify, 26
Construction Line, 17                                                              S
Copy, 17                                         L                   Saving Your Drawing, 8
Copy Multiple, 17
Cursor List, 11                                                      Setting the Units, 7
                                  Layers, 31                         Setting Up Layers, 31
                                  Line, 7                            Single Line Text, 26
                                  linetype scale, 33
               D                                                     Snap Tag, 15
                                  LWT Tag, 16                        Status Bar, 15
Defining/Creating a text Style,                                      System Tag, 13
   26                                            M
Display Tag, 13
Distance, 23                                                                       T
                                  Match Properties, 34
doors, 42                         Method, 23
Drafting Tag, 13                                                     Text, 26
                                  Mirror, 19                         Transparent Commands, 11
                                  MODEL Tag, 16                      Trim, 22, 23, 25
                                  Multiline, 20
               E
                                  Multiline Text, 27
Edge, 22                          Multiline Vs Single Line Text,                   U
Erase, 17                            27
Exiting, 10                       Multiple, 23, 25                   User Preferences Tag, 13
explode, 34
                                                 O                                W
               F
                                  Open and Save Tag, 13              Wall Footing, 28
feet, 40                          Options, 13
                                  Ortho Tag, 15
Fillet, 23
                                  OSNAP, 36                                        Z
Fit, 26
                                  OSnap Tag, 15
                                  OTRACK Tag, 16                     Zoom Real Time, 19
               G
Grid Tag, 15                                     P
                                  plan of a house, 40
                                  Polar Tag, 15


                                                45

More Related Content

What's hot

Beginning game development with python and pygame
Beginning game development with python and pygameBeginning game development with python and pygame
Beginning game development with python and pygameCHREAR
 
Jscriptdeviationsfromes3
Jscriptdeviationsfromes3Jscriptdeviationsfromes3
Jscriptdeviationsfromes3losalamos
 
Yahoo Web Analytics API Reference Guide
Yahoo Web Analytics API Reference GuideYahoo Web Analytics API Reference Guide
Yahoo Web Analytics API Reference GuideAndrew Talcott
 
ES410 Report
ES410 ReportES410 Report
ES410 ReportMatt Dent
 
Dive into greasemonkey (español)
Dive into greasemonkey (español)Dive into greasemonkey (español)
Dive into greasemonkey (español)guest89b13c
 
3rd Year Formula Student Frame Project Report
3rd Year Formula Student Frame Project Report3rd Year Formula Student Frame Project Report
3rd Year Formula Student Frame Project ReportJessica Byrne
 
8807290 shell-scripting
8807290 shell-scripting8807290 shell-scripting
8807290 shell-scriptingqaleeq
 
Manual smart ideas 5
Manual smart ideas 5Manual smart ideas 5
Manual smart ideas 5spejo
 
Spring Reference
Spring ReferenceSpring Reference
Spring Referenceasas
 
"The Wandering Soul" - Level Design Document
"The Wandering Soul" - Level Design Document"The Wandering Soul" - Level Design Document
"The Wandering Soul" - Level Design DocumentGiulia Barnaba
 
Mock examhigher
Mock examhigherMock examhigher
Mock examhigherSusie Nash
 
Excel - Formula Bible
Excel - Formula BibleExcel - Formula Bible
Excel - Formula BibleMovis 2769
 
Information architecture of EURAXESS portals
Information architecture of EURAXESS portalsInformation architecture of EURAXESS portals
Information architecture of EURAXESS portalsMilan Zdravković
 
Font creatormanual
Font creatormanualFont creatormanual
Font creatormanualJorge Muñoz
 
Castor Reference Guide 1 3 1
Castor Reference Guide 1 3 1Castor Reference Guide 1 3 1
Castor Reference Guide 1 3 1paripelly
 
Official basketball rules 2010
Official basketball rules 2010Official basketball rules 2010
Official basketball rules 2010Arbitros Abs
 
TALAT Lecture 2301: Design of Members
TALAT Lecture 2301: Design of MembersTALAT Lecture 2301: Design of Members
TALAT Lecture 2301: Design of MembersCORE-Materials
 

What's hot (17)

Beginning game development with python and pygame
Beginning game development with python and pygameBeginning game development with python and pygame
Beginning game development with python and pygame
 
Jscriptdeviationsfromes3
Jscriptdeviationsfromes3Jscriptdeviationsfromes3
Jscriptdeviationsfromes3
 
Yahoo Web Analytics API Reference Guide
Yahoo Web Analytics API Reference GuideYahoo Web Analytics API Reference Guide
Yahoo Web Analytics API Reference Guide
 
ES410 Report
ES410 ReportES410 Report
ES410 Report
 
Dive into greasemonkey (español)
Dive into greasemonkey (español)Dive into greasemonkey (español)
Dive into greasemonkey (español)
 
3rd Year Formula Student Frame Project Report
3rd Year Formula Student Frame Project Report3rd Year Formula Student Frame Project Report
3rd Year Formula Student Frame Project Report
 
8807290 shell-scripting
8807290 shell-scripting8807290 shell-scripting
8807290 shell-scripting
 
Manual smart ideas 5
Manual smart ideas 5Manual smart ideas 5
Manual smart ideas 5
 
Spring Reference
Spring ReferenceSpring Reference
Spring Reference
 
"The Wandering Soul" - Level Design Document
"The Wandering Soul" - Level Design Document"The Wandering Soul" - Level Design Document
"The Wandering Soul" - Level Design Document
 
Mock examhigher
Mock examhigherMock examhigher
Mock examhigher
 
Excel - Formula Bible
Excel - Formula BibleExcel - Formula Bible
Excel - Formula Bible
 
Information architecture of EURAXESS portals
Information architecture of EURAXESS portalsInformation architecture of EURAXESS portals
Information architecture of EURAXESS portals
 
Font creatormanual
Font creatormanualFont creatormanual
Font creatormanual
 
Castor Reference Guide 1 3 1
Castor Reference Guide 1 3 1Castor Reference Guide 1 3 1
Castor Reference Guide 1 3 1
 
Official basketball rules 2010
Official basketball rules 2010Official basketball rules 2010
Official basketball rules 2010
 
TALAT Lecture 2301: Design of Members
TALAT Lecture 2301: Design of MembersTALAT Lecture 2301: Design of Members
TALAT Lecture 2301: Design of Members
 

Similar to Cad lab copy

Vegal tk11
Vegal tk11Vegal tk11
Vegal tk11Klik111
 
Xi iii plus_userguide
Xi iii plus_userguideXi iii plus_userguide
Xi iii plus_userguideTelectronica
 
ARQUIVO ROUBADO
ARQUIVO ROUBADOARQUIVO ROUBADO
ARQUIVO ROUBADOD813061988
 
Placement Portfolio
Placement PortfolioPlacement Portfolio
Placement PortfolioJPC Hanson
 
[Web开发Css系列].Apress.Pro.Css.Techniques.Nov.2006
[Web开发Css系列].Apress.Pro.Css.Techniques.Nov.2006[Web开发Css系列].Apress.Pro.Css.Techniques.Nov.2006
[Web开发Css系列].Apress.Pro.Css.Techniques.Nov.2006bmchaoshi
 
JavaScript 设计模式
JavaScript 设计模式JavaScript 设计模式
JavaScript 设计模式guest97dcac3
 
Plesk Sitebuilder 4.5 for Linux/Unix Wizard User's Guide
Plesk Sitebuilder 4.5 for Linux/Unix Wizard User's GuidePlesk Sitebuilder 4.5 for Linux/Unix Wizard User's Guide
Plesk Sitebuilder 4.5 for Linux/Unix Wizard User's Guidewebhostingguy
 
Plesk Sitebuilder 4.5 for Linux/Unix Wizard User's Guide
Plesk Sitebuilder 4.5 for Linux/Unix Wizard User's GuidePlesk Sitebuilder 4.5 for Linux/Unix Wizard User's Guide
Plesk Sitebuilder 4.5 for Linux/Unix Wizard User's Guidewebhostingguy
 
Plesk Sitebuilder 4.5 for Linux/Unix Wizard User's Guide
Plesk Sitebuilder 4.5 for Linux/Unix Wizard User's GuidePlesk Sitebuilder 4.5 for Linux/Unix Wizard User's Guide
Plesk Sitebuilder 4.5 for Linux/Unix Wizard User's Guidewebhostingguy
 

Similar to Cad lab copy (20)

Z4 mz6musersguide
Z4 mz6musersguideZ4 mz6musersguide
Z4 mz6musersguide
 
Vegal tk11
Vegal tk11Vegal tk11
Vegal tk11
 
C2675m c
C2675m cC2675m c
C2675m c
 
An introduction-to-tkinter
An introduction-to-tkinterAn introduction-to-tkinter
An introduction-to-tkinter
 
Xi iii plus_userguide
Xi iii plus_userguideXi iii plus_userguide
Xi iii plus_userguide
 
C#
C# C#
C#
 
ARQUIVO ROUBADO
ARQUIVO ROUBADOARQUIVO ROUBADO
ARQUIVO ROUBADO
 
Placement Portfolio
Placement PortfolioPlacement Portfolio
Placement Portfolio
 
Blackberry v.6.0
Blackberry v.6.0Blackberry v.6.0
Blackberry v.6.0
 
Certifications
CertificationsCertifications
Certifications
 
Begining j2 me
Begining j2 meBegining j2 me
Begining j2 me
 
[Web开发Css系列].Apress.Pro.Css.Techniques.Nov.2006
[Web开发Css系列].Apress.Pro.Css.Techniques.Nov.2006[Web开发Css系列].Apress.Pro.Css.Techniques.Nov.2006
[Web开发Css系列].Apress.Pro.Css.Techniques.Nov.2006
 
JavaScript 设计模式
JavaScript 设计模式JavaScript 设计模式
JavaScript 设计模式
 
Zwcad2011 tutorialbook+
Zwcad2011 tutorialbook+Zwcad2011 tutorialbook+
Zwcad2011 tutorialbook+
 
Dynamics AX/ X++
Dynamics AX/ X++Dynamics AX/ X++
Dynamics AX/ X++
 
Plesk Sitebuilder 4.5 for Linux/Unix Wizard User's Guide
Plesk Sitebuilder 4.5 for Linux/Unix Wizard User's GuidePlesk Sitebuilder 4.5 for Linux/Unix Wizard User's Guide
Plesk Sitebuilder 4.5 for Linux/Unix Wizard User's Guide
 
Plesk Sitebuilder 4.5 for Linux/Unix Wizard User's Guide
Plesk Sitebuilder 4.5 for Linux/Unix Wizard User's GuidePlesk Sitebuilder 4.5 for Linux/Unix Wizard User's Guide
Plesk Sitebuilder 4.5 for Linux/Unix Wizard User's Guide
 
Plesk Sitebuilder 4.5 for Linux/Unix Wizard User's Guide
Plesk Sitebuilder 4.5 for Linux/Unix Wizard User's GuidePlesk Sitebuilder 4.5 for Linux/Unix Wizard User's Guide
Plesk Sitebuilder 4.5 for Linux/Unix Wizard User's Guide
 
By d ui_styleguide_2012_fp35
By d ui_styleguide_2012_fp35By d ui_styleguide_2012_fp35
By d ui_styleguide_2012_fp35
 
FCN Communicators Guide - December 2000
FCN Communicators Guide - December 2000FCN Communicators Guide - December 2000
FCN Communicators Guide - December 2000
 

More from Dreams Design

Os linux complete notes
Os linux complete notesOs linux complete notes
Os linux complete notesDreams Design
 
Dbms book-special-notes
Dbms book-special-notesDbms book-special-notes
Dbms book-special-notesDreams Design
 
Dbms completed part-1
Dbms completed part-1Dbms completed part-1
Dbms completed part-1Dreams Design
 
Train the-trainer-training
Train the-trainer-trainingTrain the-trainer-training
Train the-trainer-trainingDreams Design
 
Training 1207897380040065-8 (1)
Training 1207897380040065-8 (1)Training 1207897380040065-8 (1)
Training 1207897380040065-8 (1)Dreams Design
 
Training and development
Training and developmentTraining and development
Training and developmentDreams Design
 
Shaping the role of human resource
Shaping the role of human resourceShaping the role of human resource
Shaping the role of human resourceDreams Design
 
Principles of-adult-learning-1213909045189160-9(2)
Principles of-adult-learning-1213909045189160-9(2)Principles of-adult-learning-1213909045189160-9(2)
Principles of-adult-learning-1213909045189160-9(2)Dreams Design
 
Measuring roi of training
Measuring roi of trainingMeasuring roi of training
Measuring roi of trainingDreams Design
 
Best practices in human resources
Best practices in human resourcesBest practices in human resources
Best practices in human resourcesDreams Design
 
Adult l earning trainingtechniques
Adult l earning trainingtechniquesAdult l earning trainingtechniques
Adult l earning trainingtechniquesDreams Design
 
Recruitment & selection ch# 15 & 16
Recruitment & selection ch# 15 & 16Recruitment & selection ch# 15 & 16
Recruitment & selection ch# 15 & 16Dreams Design
 
Recruitment & selection ch# 13 & 14
Recruitment & selection ch# 13 & 14Recruitment & selection ch# 13 & 14
Recruitment & selection ch# 13 & 14Dreams Design
 
Recruitment & selection ch 11 & 12
Recruitment & selection ch 11 & 12Recruitment & selection ch 11 & 12
Recruitment & selection ch 11 & 12Dreams Design
 

More from Dreams Design (20)

Os linux complete notes
Os linux complete notesOs linux complete notes
Os linux complete notes
 
Dbms book-special-notes
Dbms book-special-notesDbms book-special-notes
Dbms book-special-notes
 
Dbms completed part-1
Dbms completed part-1Dbms completed part-1
Dbms completed part-1
 
Dbms part- 2nd
Dbms part- 2ndDbms part- 2nd
Dbms part- 2nd
 
Mcse notes
Mcse notesMcse notes
Mcse notes
 
Ccna notes
Ccna notesCcna notes
Ccna notes
 
Trg method in org
Trg method in orgTrg method in org
Trg method in org
 
Trg evaluation
Trg evaluationTrg evaluation
Trg evaluation
 
Train the-trainer-training
Train the-trainer-trainingTrain the-trainer-training
Train the-trainer-training
 
Training 1207897380040065-8 (1)
Training 1207897380040065-8 (1)Training 1207897380040065-8 (1)
Training 1207897380040065-8 (1)
 
Training techniques
Training techniquesTraining techniques
Training techniques
 
Training and development
Training and developmentTraining and development
Training and development
 
Shaping the role of human resource
Shaping the role of human resourceShaping the role of human resource
Shaping the role of human resource
 
Principles of-adult-learning-1213909045189160-9(2)
Principles of-adult-learning-1213909045189160-9(2)Principles of-adult-learning-1213909045189160-9(2)
Principles of-adult-learning-1213909045189160-9(2)
 
Measuring roi of training
Measuring roi of trainingMeasuring roi of training
Measuring roi of training
 
Best practices in human resources
Best practices in human resourcesBest practices in human resources
Best practices in human resources
 
Adult l earning trainingtechniques
Adult l earning trainingtechniquesAdult l earning trainingtechniques
Adult l earning trainingtechniques
 
Recruitment & selection ch# 15 & 16
Recruitment & selection ch# 15 & 16Recruitment & selection ch# 15 & 16
Recruitment & selection ch# 15 & 16
 
Recruitment & selection ch# 13 & 14
Recruitment & selection ch# 13 & 14Recruitment & selection ch# 13 & 14
Recruitment & selection ch# 13 & 14
 
Recruitment & selection ch 11 & 12
Recruitment & selection ch 11 & 12Recruitment & selection ch 11 & 12
Recruitment & selection ch 11 & 12
 

Recently uploaded

Cheap Rate Call girls Kalkaji 9205541914 shot 1500 night
Cheap Rate Call girls Kalkaji 9205541914 shot 1500 nightCheap Rate Call girls Kalkaji 9205541914 shot 1500 night
Cheap Rate Call girls Kalkaji 9205541914 shot 1500 nightDelhi Call girls
 
WAEC Carpentry and Joinery Past Questions
WAEC Carpentry and Joinery Past QuestionsWAEC Carpentry and Joinery Past Questions
WAEC Carpentry and Joinery Past QuestionsCharles Obaleagbon
 
VIP Russian Call Girls in Saharanpur Deepika 8250192130 Independent Escort Se...
VIP Russian Call Girls in Saharanpur Deepika 8250192130 Independent Escort Se...VIP Russian Call Girls in Saharanpur Deepika 8250192130 Independent Escort Se...
VIP Russian Call Girls in Saharanpur Deepika 8250192130 Independent Escort Se...Suhani Kapoor
 
PODSCAPE - Brochure 2023_ prefab homes in Bangalore India
PODSCAPE - Brochure 2023_ prefab homes in Bangalore IndiaPODSCAPE - Brochure 2023_ prefab homes in Bangalore India
PODSCAPE - Brochure 2023_ prefab homes in Bangalore IndiaYathish29
 
Chapter 19_DDA_TOD Policy_First Draft 2012.pdf
Chapter 19_DDA_TOD Policy_First Draft 2012.pdfChapter 19_DDA_TOD Policy_First Draft 2012.pdf
Chapter 19_DDA_TOD Policy_First Draft 2012.pdfParomita Roy
 
Design Portfolio - 2024 - William Vickery
Design Portfolio - 2024 - William VickeryDesign Portfolio - 2024 - William Vickery
Design Portfolio - 2024 - William VickeryWilliamVickery6
 
CALL ON ➥8923113531 🔝Call Girls Aminabad Lucknow best Night Fun service
CALL ON ➥8923113531 🔝Call Girls Aminabad Lucknow best Night Fun serviceCALL ON ➥8923113531 🔝Call Girls Aminabad Lucknow best Night Fun service
CALL ON ➥8923113531 🔝Call Girls Aminabad Lucknow best Night Fun serviceanilsa9823
 
Cheap Rate ➥8448380779 ▻Call Girls In Iffco Chowk Gurgaon
Cheap Rate ➥8448380779 ▻Call Girls In Iffco Chowk GurgaonCheap Rate ➥8448380779 ▻Call Girls In Iffco Chowk Gurgaon
Cheap Rate ➥8448380779 ▻Call Girls In Iffco Chowk GurgaonDelhi Call girls
 
A level Digipak development Presentation
A level Digipak development PresentationA level Digipak development Presentation
A level Digipak development Presentationamedia6
 
Kala jadu for love marriage | Real amil baba | Famous amil baba | kala jadu n...
Kala jadu for love marriage | Real amil baba | Famous amil baba | kala jadu n...Kala jadu for love marriage | Real amil baba | Famous amil baba | kala jadu n...
Kala jadu for love marriage | Real amil baba | Famous amil baba | kala jadu n...babafaisel
 
Recommendable # 971589162217 # philippine Young Call Girls in Dubai By Marina...
Recommendable # 971589162217 # philippine Young Call Girls in Dubai By Marina...Recommendable # 971589162217 # philippine Young Call Girls in Dubai By Marina...
Recommendable # 971589162217 # philippine Young Call Girls in Dubai By Marina...home
 
Revit Understanding Reference Planes and Reference lines in Revit for Family ...
Revit Understanding Reference Planes and Reference lines in Revit for Family ...Revit Understanding Reference Planes and Reference lines in Revit for Family ...
Revit Understanding Reference Planes and Reference lines in Revit for Family ...Narsimha murthy
 
VIP Call Girls Bhiwandi Ananya 8250192130 Independent Escort Service Bhiwandi
VIP Call Girls Bhiwandi Ananya 8250192130 Independent Escort Service BhiwandiVIP Call Girls Bhiwandi Ananya 8250192130 Independent Escort Service Bhiwandi
VIP Call Girls Bhiwandi Ananya 8250192130 Independent Escort Service BhiwandiSuhani Kapoor
 
VIP College Call Girls Gorakhpur Bhavna 8250192130 Independent Escort Service...
VIP College Call Girls Gorakhpur Bhavna 8250192130 Independent Escort Service...VIP College Call Girls Gorakhpur Bhavna 8250192130 Independent Escort Service...
VIP College Call Girls Gorakhpur Bhavna 8250192130 Independent Escort Service...Suhani Kapoor
 
Call Girls in Kalkaji Delhi 8264348440 call girls ❤️
Call Girls in Kalkaji Delhi 8264348440 call girls ❤️Call Girls in Kalkaji Delhi 8264348440 call girls ❤️
Call Girls in Kalkaji Delhi 8264348440 call girls ❤️soniya singh
 
NO1 Famous Amil Baba In Karachi Kala Jadu In Karachi Amil baba In Karachi Add...
NO1 Famous Amil Baba In Karachi Kala Jadu In Karachi Amil baba In Karachi Add...NO1 Famous Amil Baba In Karachi Kala Jadu In Karachi Amil baba In Karachi Add...
NO1 Famous Amil Baba In Karachi Kala Jadu In Karachi Amil baba In Karachi Add...Amil baba
 
call girls in Harsh Vihar (DELHI) 🔝 >༒9953330565🔝 genuine Escort Service 🔝✔️✔️
call girls in Harsh Vihar (DELHI) 🔝 >༒9953330565🔝 genuine Escort Service 🔝✔️✔️call girls in Harsh Vihar (DELHI) 🔝 >༒9953330565🔝 genuine Escort Service 🔝✔️✔️
call girls in Harsh Vihar (DELHI) 🔝 >༒9953330565🔝 genuine Escort Service 🔝✔️✔️9953056974 Low Rate Call Girls In Saket, Delhi NCR
 
Best VIP Call Girls Noida Sector 44 Call Me: 8448380779
Best VIP Call Girls Noida Sector 44 Call Me: 8448380779Best VIP Call Girls Noida Sector 44 Call Me: 8448380779
Best VIP Call Girls Noida Sector 44 Call Me: 8448380779Delhi Call girls
 

Recently uploaded (20)

Cheap Rate Call girls Kalkaji 9205541914 shot 1500 night
Cheap Rate Call girls Kalkaji 9205541914 shot 1500 nightCheap Rate Call girls Kalkaji 9205541914 shot 1500 night
Cheap Rate Call girls Kalkaji 9205541914 shot 1500 night
 
WAEC Carpentry and Joinery Past Questions
WAEC Carpentry and Joinery Past QuestionsWAEC Carpentry and Joinery Past Questions
WAEC Carpentry and Joinery Past Questions
 
VIP Russian Call Girls in Saharanpur Deepika 8250192130 Independent Escort Se...
VIP Russian Call Girls in Saharanpur Deepika 8250192130 Independent Escort Se...VIP Russian Call Girls in Saharanpur Deepika 8250192130 Independent Escort Se...
VIP Russian Call Girls in Saharanpur Deepika 8250192130 Independent Escort Se...
 
PODSCAPE - Brochure 2023_ prefab homes in Bangalore India
PODSCAPE - Brochure 2023_ prefab homes in Bangalore IndiaPODSCAPE - Brochure 2023_ prefab homes in Bangalore India
PODSCAPE - Brochure 2023_ prefab homes in Bangalore India
 
Chapter 19_DDA_TOD Policy_First Draft 2012.pdf
Chapter 19_DDA_TOD Policy_First Draft 2012.pdfChapter 19_DDA_TOD Policy_First Draft 2012.pdf
Chapter 19_DDA_TOD Policy_First Draft 2012.pdf
 
Design Portfolio - 2024 - William Vickery
Design Portfolio - 2024 - William VickeryDesign Portfolio - 2024 - William Vickery
Design Portfolio - 2024 - William Vickery
 
CALL ON ➥8923113531 🔝Call Girls Aminabad Lucknow best Night Fun service
CALL ON ➥8923113531 🔝Call Girls Aminabad Lucknow best Night Fun serviceCALL ON ➥8923113531 🔝Call Girls Aminabad Lucknow best Night Fun service
CALL ON ➥8923113531 🔝Call Girls Aminabad Lucknow best Night Fun service
 
Cheap Rate ➥8448380779 ▻Call Girls In Iffco Chowk Gurgaon
Cheap Rate ➥8448380779 ▻Call Girls In Iffco Chowk GurgaonCheap Rate ➥8448380779 ▻Call Girls In Iffco Chowk Gurgaon
Cheap Rate ➥8448380779 ▻Call Girls In Iffco Chowk Gurgaon
 
A level Digipak development Presentation
A level Digipak development PresentationA level Digipak development Presentation
A level Digipak development Presentation
 
young call girls in Vivek Vihar🔝 9953056974 🔝 Delhi escort Service
young call girls in Vivek Vihar🔝 9953056974 🔝 Delhi escort Serviceyoung call girls in Vivek Vihar🔝 9953056974 🔝 Delhi escort Service
young call girls in Vivek Vihar🔝 9953056974 🔝 Delhi escort Service
 
Kala jadu for love marriage | Real amil baba | Famous amil baba | kala jadu n...
Kala jadu for love marriage | Real amil baba | Famous amil baba | kala jadu n...Kala jadu for love marriage | Real amil baba | Famous amil baba | kala jadu n...
Kala jadu for love marriage | Real amil baba | Famous amil baba | kala jadu n...
 
Recommendable # 971589162217 # philippine Young Call Girls in Dubai By Marina...
Recommendable # 971589162217 # philippine Young Call Girls in Dubai By Marina...Recommendable # 971589162217 # philippine Young Call Girls in Dubai By Marina...
Recommendable # 971589162217 # philippine Young Call Girls in Dubai By Marina...
 
Revit Understanding Reference Planes and Reference lines in Revit for Family ...
Revit Understanding Reference Planes and Reference lines in Revit for Family ...Revit Understanding Reference Planes and Reference lines in Revit for Family ...
Revit Understanding Reference Planes and Reference lines in Revit for Family ...
 
VIP Call Girls Bhiwandi Ananya 8250192130 Independent Escort Service Bhiwandi
VIP Call Girls Bhiwandi Ananya 8250192130 Independent Escort Service BhiwandiVIP Call Girls Bhiwandi Ananya 8250192130 Independent Escort Service Bhiwandi
VIP Call Girls Bhiwandi Ananya 8250192130 Independent Escort Service Bhiwandi
 
VIP College Call Girls Gorakhpur Bhavna 8250192130 Independent Escort Service...
VIP College Call Girls Gorakhpur Bhavna 8250192130 Independent Escort Service...VIP College Call Girls Gorakhpur Bhavna 8250192130 Independent Escort Service...
VIP College Call Girls Gorakhpur Bhavna 8250192130 Independent Escort Service...
 
Call Girls in Kalkaji Delhi 8264348440 call girls ❤️
Call Girls in Kalkaji Delhi 8264348440 call girls ❤️Call Girls in Kalkaji Delhi 8264348440 call girls ❤️
Call Girls in Kalkaji Delhi 8264348440 call girls ❤️
 
NO1 Famous Amil Baba In Karachi Kala Jadu In Karachi Amil baba In Karachi Add...
NO1 Famous Amil Baba In Karachi Kala Jadu In Karachi Amil baba In Karachi Add...NO1 Famous Amil Baba In Karachi Kala Jadu In Karachi Amil baba In Karachi Add...
NO1 Famous Amil Baba In Karachi Kala Jadu In Karachi Amil baba In Karachi Add...
 
call girls in Harsh Vihar (DELHI) 🔝 >༒9953330565🔝 genuine Escort Service 🔝✔️✔️
call girls in Harsh Vihar (DELHI) 🔝 >༒9953330565🔝 genuine Escort Service 🔝✔️✔️call girls in Harsh Vihar (DELHI) 🔝 >༒9953330565🔝 genuine Escort Service 🔝✔️✔️
call girls in Harsh Vihar (DELHI) 🔝 >༒9953330565🔝 genuine Escort Service 🔝✔️✔️
 
Best VIP Call Girls Noida Sector 44 Call Me: 8448380779
Best VIP Call Girls Noida Sector 44 Call Me: 8448380779Best VIP Call Girls Noida Sector 44 Call Me: 8448380779
Best VIP Call Girls Noida Sector 44 Call Me: 8448380779
 
escort service sasti (*~Call Girls in Prasad Nagar Metro❤️9953056974
escort service sasti (*~Call Girls in Prasad Nagar Metro❤️9953056974escort service sasti (*~Call Girls in Prasad Nagar Metro❤️9953056974
escort service sasti (*~Call Girls in Prasad Nagar Metro❤️9953056974
 

Cad lab copy

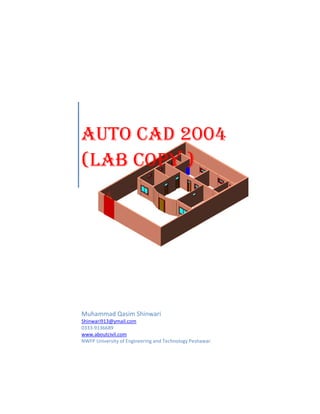
  • 1. AUTO CAD 2004 (LAB COPY ) Muhammad Qasim Shinwari Shinwari913@ymail.com 0333-9136689 www.aboutcivil.com NWFP University of Engineering and Technology Peshawar.
  • 2. www.aboutcivil.com shinwari913@ymail.com PREFACE AutoCAD stands for Automatically Computer Aided Drafting/Designing. It is an electronic tool that enables you to make quick and accurate drawings with the use of a computer. Unlike the traditional methods of making drawings on a drawing board, with CAD you can sit back in an easy chair and create wonderful drawings just by clicking the buttons of a keyboard. Moreover, drawings created with CAD have a number of advantages over drawings created on a drawing board. CAD drawings are neat, clean and highly presentable. Electronic drawings can be modified quite easily and can be presented in a variety of formats. I have tried my best to make a copy for AutoCAD 2004. Approximately all basic commands are introduced in it. Special thanks to Sir Mubashir as he taught me AutoCAD in a very nice manner. Muhammad Qasim Shinwari 26th Jan, 2007 2
  • 3. www.aboutcivil.com shinwari913@ymail.com Table of Contents LECTURE 1 ................................................................................................................... 6 Introduction:- ...................................................................................................... 6 How to Start? ............................................................................................................. 6 Introduction of Main Interface:- ......................................................................... 6 Command Entry:-................................................................................................ 6 My Assumptions in This Copy ........................................................................... 8 Setting the Units:- ........................................................................................ 8 Draw a Line:- ............................................................................................... 8 Draw a Rectangle:- ...................................................................................... 9 Saving Your Drawing:- ............................................................................... 9 Exiting:- ..................................................................................................... 11 LECTURE 2 ................................................................................................................. 12 Cursor List:- ...................................................................................................... 12 Pop-Up-List:- .................................................................................................... 12 How To Repeat A Command:- ......................................................................... 12 Transparent Commands:- .................................................................................. 12 Command Aliases:- ........................................................................................... 12 Changing Command Alias:- ............................................................................. 12 Text Window: - (F2) ......................................................................................... 13 Cross Window and Box Window:- ................................................................... 13 Options:- ........................................................................................................... 14 Display Tag:- ............................................................................................. 14 Open and Save Tag:- ................................................................................. 14 System Tag:- .............................................................................................. 14 User Preferences Tag:- .............................................................................. 14 Drafting Tag:- ............................................................................................ 14 Status Bar:-........................................................................................................ 16 Snap Tag:-.................................................................................................. 16 Grid Tag:- .................................................................................................. 16 Ortho Tag:- ................................................................................................ 16 Polar Tag:- ................................................................................................. 16 OSnap Tag:-............................................................................................... 16 OTRACK Tag:- ......................................................................................... 17 3
  • 4. www.aboutcivil.com shinwari913@ymail.com LWT Tag:- ................................................................................................. 17 MODEL Tag:- ........................................................................................... 17 LECTURE 3 ................................................................................................................. 18 Erase:- ............................................................................................................... 18 Copy:- ............................................................................................................... 18 Copy Multiple:- ................................................................................................. 18 Construction Line:- ........................................................................................... 18 Mirror:- ............................................................................................................. 20 Zoom Real Time:- ............................................................................................. 20 All:-............................................................................................................ 20 Center:- ...................................................................................................... 20 Dynamic:- .................................................................................................. 20 Extents:- ..................................................................................................... 20 Previous:- ................................................................................................... 21 Scale:- ........................................................................................................ 21 Window:- ................................................................................................... 21 Real Time:- ................................................................................................ 21 Multiline:- ......................................................................................................... 21 Trim:- ................................................................................................................ 23 Projection:- ................................................................................................ 23 Edge:-......................................................................................................... 23 Undo:- ........................................................................................................ 23 Chamfer:- .......................................................................................................... 23 Polyline:- ................................................................................................... 24 Distance:- ................................................................................................... 24 Angle:- ....................................................................................................... 24 Trim:- ......................................................................................................... 24 Method:- .................................................................................................... 24 Multiple:- ................................................................................................... 24 Fillet:-................................................................................................................ 24 Radius:- ...................................................................................................... 26 Trim:- ......................................................................................................... 26 Multiple:- ................................................................................................... 26 LECTURE 4 ................................................................................................................. 27 Text:- ................................................................................................................. 27 Single Line Text:- ...................................................................................... 27 Multiline Text:-.......................................................................................... 28 4
  • 5. www.aboutcivil.com shinwari913@ymail.com Multiline Vs Single Line Text:- .................................................................... 28 Quick Text:- ...................................................................................................... 28 Region:-............................................................................................................. 28 Ellipse:- ............................................................................................................. 28 LECTURE 5 ................................................................................................................. 29 Using of commands:- ........................................................................................ 29 Wall Footing:- ................................................................................................... 29 LECTURE 6 ................................................................................................................. 32 Inverted Arch Foundation:-............................................................................... 32 Layers:- ............................................................................................................. 32 Setting Up Layers:-.................................................................................... 32 Changing the layer of an object:- .............................................................. 34 Changing the different properties of an object:- ........................................ 34 Match Properties:- ..................................................................................... 35 Coming Back to Inverted Arch Foundation:- ................................................... 35 LECTURE 7 ................................................................................................................. 41 5
  • 6. www.aboutcivil.com shinwari913@ymail.com LECTURE 1 Introduction:- AutoCAD stands for Automatically Computer Aided Designing/ Drafting. As the name shows, this software is used for drafting purposes. Although it can be used for many other useful purposes yet we will concentrate on drafting. How to Start? There are many ways of starting Auto CAD. Some are given below; o Start> Programs> Auto Desk> Auto CAD 2004> Auto CAD 2004 o Go to the drive where you have installed Auto CAD. By default Auto CAD is installed in c drive. Go to that drive and find Auto CAD 2004 folder. In this folder, double click on acad.exe file. Introduction of Main Interface:- Once AutoCAD is loaded, move the mouse around until you see a crosshair cursor. You will see somewhat interface as shown in Fig1 Explanation:- Now let us explain some properties or features of Auto CAD 2004 (As shown in above Figure); o The standard Windows drop-down menus. o The standard Windows toolbar below the menus, it includes: File-New, File- Open, File-Save, Print and "Find and Replace"(!!). o In addition to the standard toolbar there will be a number of AutoCAD specific toolbars: Object Properties, Draw and Modify (there may be others...?). o The graphics area or drawing area - that's the area where you draw - note the scroll bars and the axis label. o View Tabs - these 'tabs' give access to different view of the current drawing. The "model" tab should be selected at present. o The command area - this small window (by default) has space for three lines of text - this is where you type commands. o The status area, at the bottom of the AutoCAD window, this includes the current cursor position. Command Entry:- Typically there are three ways of giving a command! 6
  • 7. www.aboutcivil.com shinwari913@ymail.com Fig-1 Fig-2 7
  • 8. www.aboutcivil.com shinwari913@ymail.com o Type the command using the keyboard - the command is displayed in the command area. o Select the command from a menu. o Select the command's icon from a toolbar. My Assumptions in This Copy o When I want you to type a command in the command area the AutoCAD command will be written like: Type QSAVE ↵ o When I want you to select a command from a menu, it will look like: Select File> Save o When I want you to pick a command from a toolbar, I'll write: Select Save o Despite all of the above, I'll probably use a combination of the above like: Select File> Save (or type QSAVE) o When will want you to click the left mouse button, I’ll write: Clickϒ Setting the Units:- The first step in Auto CAD is to set the units. For this purpose: Type UN↵ You will observe a new dialog box will appear as shown in Fig2. In this dialog box, in the Length Group Box, change type to Architectural and change Precision to 0′- 00″. In the Angle Group box, change type to Decimal and Precision to 0.00. In the same area, you will find clockwise check box: check it if you want to take clockwise angles to be entered as positive. Similarly, in the Drag-and-Drop scale Group Box, change scale drag-and-drop content to inches. Fig2 Draw a Line:- First of all we will draw a line. o Type LINE (or simply l)↵. You will see some comments in the command line that is LINE Specify first point: ϒ But the use of commands will be preferred by me. 8
  • 9. www.aboutcivil.com shinwari913@ymail.com o Press F8 to make the line straight. <Ortho on> will be written in the command line. o Select first point on screen. And you will be asked for more points; Specify next point or [Undo]: Note that all the Figures I will draw in o Select second point on screen. white back ground. The back ground can be changed. But it will come later. o Press Enter. You will see that a line will be drawn as shown in Fig3. Draw a Rectangle:- Now we will draw a rectangle. o Type Rectangle↵ (or select rectangle icon from the draw tool bar. The rectangle icon is somewhat like) o Type 50′, 50′↵ o Type 100’, 100’↵ o You will see that there is no rectangle drawn but that’s not the cause. Rectangle is drawn but you are unable to see it. You have to zoom out your graphics area. For this purpose either; o Whorl your mouse wheel towards your self or if no wheel exists in your mouse then o Type z↵ o Type a↵ zoom all the graphics area. Now you will be able to see the rectangle as shown in Fig4 Saving Your Drawing:- There are different methods to save your drawing: o Select the Save icon from the standard toolbar. o Type qsave↵ o Select File> Save. 9
  • 10. www.aboutcivil.com shinwari913@ymail.com The drawing has not been saved before, so AutoCAD will display the SAVE AS dialog box, select the appropriate Drive and Directory. Fig-3 Fig-4 10
  • 11. www.aboutcivil.com shinwari913@ymail.com Exiting:- There are many ways to exit:- o Press Ctrl+Q o Click on exit button of the control box of the main windows form. o Type quit↵ Select File> Exit. 11
  • 12. www w.aboutcivil.c com shin nwari913@y ymail.com LEC CTURE 2 In this lec cture, we wil get inform ll mation about different opt tions of Auto CAD 2004 so that we may be able to change A m Auto CAD 20 display e according to our 004 etc own requirement But before going forw r ts. e ward, first let us define so termino t ome ologies which will be use frequently in future. h ed y Fig g-5 Cursor L List:- The list displayed wh we right click on in th model wh none of the hen he hile mand is activ comm vated is calle as Cursor List. It is sh ed r hown in Fig5 5 At the top of the curso list, we ca see that R p or an Repeat will b written for the last be r mand used. S we can us the last us comman from curso list. comm So se sed nd or Pop-Up- -List:- Unlike cu ursor list, the list displaye when we right click o in the mo while e ed on odel any o of the co one ommands is activated, is called Pop-U a Up-List. It is shown in F s Fig6 How To Repeat A Command d:- There are many ways to repeat a c command; Press Enter. s Fig-6 In Cu ursor list, sel Repeat. lect Press Spacebar. s Type Multiple ↵ e Transpa arent Com mmands:- The comm mands which can be used while othe commands are activate are h d er s ed know as Transparent Comm wn mands. E.g. P Zoom etc Pan, e Comman Aliases nd s:- A comma alias is an abbreviati that you enter on the command li and a ion ine instea of enterin the entire command n ad ng name. For example, you can enter c instead of c e u circle to start the CIRCL command An alias t LE d. is not the same as a keyboard shortcut, w t s d which is a commbination of keystrokes, such as f CTRL for SAV L+S VE. An al can be d lias defined for an AutoCAD command, device driv command or ny D ver d, extern comman nal nd. Changin Comma Alias:- ng and You can c change exist ting aliases o add new ones by editin acad.pgp in or o ng Notep or any te editor that saves files in ASCII f pad ext s format. To op the PGP file, on pen P the Tools T
  • 13. www.aboutcivil.com shinwari913@ymail.com Menu, click Customize > Edit Custom Files >Program Parameters (acad.pgp). The file can also contain comment lines preceded by a semicolon (;). Note: - Before editing acad.pgp, first create a backup so that you can restore it later, if necessary. To define a command alias, add a line to the command alias section of the acad.pgp file using the following syntax: Abbreviation,*command Where abbreviation is the command alias that you enter at the Command prompt and command is the command being abbreviated. You must enter an asterisk (*) before the command name to identify the line as a command alias definition. If you can enter a command transparently, you can also enter its alias transparently. When you enter the command alias, the full command name is displayed at the Command prompt and the command is executed. You can create command aliases that include the special hyphen (–) prefix, such as those listed here, that access the command line version of certain commands. BH, *-BHATCH BD, *-BOUNDARY Note: - You cannot use command aliases in command scripts. Using command aliases in menu files is not recommended. If you edit acad.pgp while AutoCAD is running, enter reinit in order to use the revised file. Restarting AutoCAD automatically reloads the file. Text Window: - (F2) The text window shows the history of the commands used. It can be accessed form View > Display > Text Window. Cross Window and Box Window:- You can select objects by specifying opposite corners to define a rectangular area. After specifying the first corner point, you can Drag your cursor from left to right to create an enclosing window (Box Window) selection. Only objects that the rectangular window entirely encloses are selected. Drag your cursor from right to left to create a crossing selection. Objects that the rectangular window encloses or crosses are selected. When selecting objects with a window selection, usually the entire object must be contained in the window selection box. However, if an object with a noncontinuous (dashed) linetype is only partially visible in the viewport and all the visible vectors of the linetype can be enclosed within the selection window, the entire object is selected. 13
  • 14. www.aboutcivil.com shinwari913@ymail.com Options:- Type op↵ You will see a dialog box as shown in Fig 7. You are observing different tags like Files, Display etc. Let us explain its use. Display Tag:- Click on display tag. You will see a number of options in it. For the time being, we will deal with Window elements. In this Group Box, the first checkbox is of Display scroll bars in drawing windows. If it is checked then you will have scroll bars in your drawing wing, of course its existence is essential. So try to remain it checked. The other checkbox is of Display screen menu. If you want to have an additional menu which will have the entire draw and modify commands including undo and redo options then check the Display screen menu checkbox. But I will advise you to keep it unchecked as it will give us comparatively larger drawing area. After two checkboxes, we’ve two buttons. If you want to change the fonts of Auto CAD then click on Fonts Button. The other button is of Colors. Click it and you will have a mini dialog box which will have different options. You can change the color of text, back color of model and layouts etc. Open and Save Tag:- In this tag, find File Safety Precautions Group Box. It is recommended to check the Automatic Save so that Auto CAD will save your drawing automatically. Below this is the text box labeled as Minutes between saves. Write, for instance, 3; now your drawing will be automatically saved after every three minutes. Below this, there is a button of Security options. You can use it to protect your drawing by giving a certain password. System Tag:- If you are getting creating new drawing dialog box at start up as shown in Fig8, you can make it disable to be displayed. This can be done by the startup drop down menu in the General Options Group Box at the System tag. User Preferences Tag:- You can customize your right click. You can do it by clicking Right click customization button in Windows standard behavior Group Box at the User Preferences Tag. Drafting Tag:- Here you can change the Auto Snap marker color (while drawing lines, you might have seen a square box showing you the midpoint or endpoint etc of a line. If your Auto CAD is not displaying this, press F3. It will be also discussed in the coming Status Bar settings) The Auto Snap marker color and its size as well as size of aperture can also be changed at the same windows form. 14
  • 15. www w.aboutcivil.c com shinwari913@y n ymail.com Fig-7 Fig-9 9 Fig-8 F
  • 16. www.aboutcivil.com shinwari913@ymail.com Status Bar:- You can see status bar in the Fig1. Now let us explain its uses and settings:- Snap Tag:- The first tag that lies at status bar is Snap. Actually when you move your mouse while the cross hair is displayed in the model, Snap enables us to control the cross hair movement. Right click on the Snap tag and click on Settings. You will observe a new dialog box as shown in Fig9 In this dialog box, you must be on Snap and Grid tag. The other two tags i.e. Polar tracking and object snap will be discussed later. Change the values of Snap X spacing and/or Snap Y spacing and click on OK. Now you will see that there will be change in the movement of cross hair. For instance, if you have increased the spacing then the cross hair will jump from one point to another. Grid Tag:- The grid is a rectangular pattern of dots that extends over the area you specify as the drawing limits. Using the grid is similar to placing a sheet of grid paper under a drawing. The grid helps you align objects and visualize the distances between them. The grid is not plotted. If you zoom in or out of your drawing, you may need to adjust grid spacing to be more appropriate for the new magnification. To display a grid and set grid spacing From the Tools menu, choose Drafting Settings (or Type Dsettings) In the Drafting Settings dialog box, Snap & Grid tab, select Grid On to display the grid. Under Snap Type and Style, make sure Grid Snap and Rectangular Snap are selected. For grid X Spacing, enter the horizontal grid spacing in units. To use the same value for vertical grid spacing, press ENTER. Otherwise, enter a new value for grid Y Spacing. Choose OK. Although the grid dots do not necessarily correspond to the current snap interval, they do reflect the current snap angle and isometric snap and grid settings. Ortho Tag:- If we want the movement of cross hair to be constrained in vertical or horizontal direction, we use grid. To turn it on, either press F8 or click on Ortho tag. When ortho is ON, Polar will be OFF. Polar Tag:- When we don’t want the movement of cross hair to be constrained in vertical or horizontal direction, we use Polar. To turn it ON, Press F8. When polar is ON, Ortho will be OFF. OSnap Tag:- Object snaps constrain point specification to exact locations, such as a midpoint or an intersection, on existing objects. Using object snaps is a quick way to locate an exact position on an object without having to know the coordinate or draw construction lines. For example, you can use an object snap to draw a line to the 16
  • 17. www.aboutcivil.com shinwari913@ymail.com center of a circle or to the midpoint of a Polyline segment. You can specify an object snap whenever AutoCAD prompts for a point. To turn it ON, press F3 We can change its settings by Right Clicking on the OSnap Tag and click on settings. OTRACK Tag:- Auto Track helps you draw objects at specific angles or in specific relationships to other objects. When you turn on Auto Track, temporary alignment paths help you create objects at precise positions and angles. Auto Track includes two tracking options: polar tracking and object snap tracking. You can toggle Auto Track on and off with the Polar and Otrack buttons on the status bar. Object snap tracking works in conjunction with object snaps. You must set an object snap before you can track from an object's snap point. LWT Tag:- This is used to increase or decrease the line weight. MODEL Tag:- This is used to toggle between model and paper. 17
  • 18. www.aboutcivil.com shinwari913@ymail.com LECTURE 3 Let us learn how to use the following commands:- Erase:- There many ways to erase an object. o Type E↵ o Select the objects which you want to erase ↵ The easiest and fast way to delete an object is to select the object and then press Delete button of your key board. Copy:- o Type co↵ o Select the object(s) ↵ o Select the base point. (By base point it is meant to select a point from which you want it to be copied.) o Either type distance ↵ or specify any point on screen. Copy Multiple:- If we want to copy an object more than once, the easiest way is; o Type co↵ o Select object↵ o Type m↵ o Select base point as in above case. o Click on required space to have multiple copies as shown in Fig10 o Press ↵ when you want to finish multiple copying. Construction Line:- This is used for multiple purposes like:- • To draw horizontal, vertical or angular line. • To draw offset (off set is used to draw the walls etc) and projections etc. • To bisect an angle. • To check a certain line for horizontal or vertical etc. o Type XL↵ o Type H for horizontal or V for vertical line. We will see that a line of infinite length is drawn. Now we can use it for our required purposes like to check any line in our drawing etc. o If you want angular line, Type XL↵ and then press A for angle. And then you will be asked to enter angle. Type the angle value and press↵. Here we can also press R to use a line as a reference. 18
  • 19. www.aboutcivil.com shinwari913@ymail.com Fig-10 Fig-11 Fig-12 19
  • 20. www.aboutcivil.com shinwari913@ymail.com o If we want to bisect an angle, Type XL↵ then Type B↵ then select the angle vertex. After this, select the start point of the angle and then select end point and press ↵ as shown in Fig11. To draw the offset, Type XL↵ then Type O↵. After this, either:- Type the distance of offset and press ↵.Then select the line. Then move the cursor to the side where you want offset and click the left mouse button. OR type T↵. Now select the line. Then click at any point and you will have that much offset. Mirror:- Mirroring creates a mirror image of objects. It is useful for creating symmetrical objects because you can quickly draw half the object and then mirror it instead of drawing the entire object. You flip objects about an axis called a mirror line to create a mirror image. To specify this temporary mirror line, you enter two points. You can choose whether to delete or retain the original objects. Mirroring works in any plane parallel to the XY plane of the current UCS. o Type mi↵ o Select object↵ o Then select first and second points of mirror line. o Press Y to delete the source object or N to avoid deleting source object and press enter. o Fig12 Zoom Real Time:- You might have observed that some times when you draw an object; it can not be seen fully. To make the object fully visible, we use zoom real time. Type z↵ Now a number of options are available which are briefly described below; All:- This is used to present the full drawing in the present viewport. Center:- This is used to show a window defined by a center point and a magnification value or height. A lesser value for the height enlarges the magnification. A bigger value reduces the magnification. Dynamic:- It is used to show the generated portion of the drawing with a view box. The view box represents our viewport, which we can reduce in size or enlarge and move around the drawing. Positioning and sizing the view box pans or zooms to fill the viewport with the image inside the view box. Extents:- It is used to show the drawing extents and results in the largest possible display of all the objects. 20
  • 21. www.aboutcivil.com shinwari913@ymail.com Previous:- Zooms to display the previous view. You can restore up to 10 previous views. Scale:- Zooms the display at a specified scale factor. Enter a value followed by x to specify the scale relative to the current view. For example, entering .5x causes each object to be displayed at half its current size on the screen. Enter a value followed by xp to specify the scale relative to paper space units. For example, entering .5xp displays model space at half the scale of paper space units. You can create a layout with each viewport displaying objects at a different scale. Enter a value to specify the scale relative to the limits of the drawing. (This option is rarely used.) For example, entering 2 displays objects at twice the size they would appear if you were zoomed to the limits of the drawing. Window:- Zooms to display an area specified by two opposite corners of a rectangular window. Real Time:- Using the pointing device, zooms interactively to a logical extent. The cursor changes to a magnifying glass with plus (+) and minus (–) signs. Hold your mouse left button and move vertically to zoom in and move downward to zoom out. Multiline:- Multiline consists of between 1 and 16 parallel lines, called elements. o Type ml↵ o Here you have three options:- Justification: by this, we mean to locate the center of cross hair to any line drawn. Type j↵ for justification. Again you will have three options i.e. top, zero, and bottom. If we press T for top, the cross hair will be at the top most line. In case of zero, cross hair will be in middle while in last case, it will be with last line. Scale: Type s↵ for scale. It is used to provide the distance between two connective lines. It must be given in inches as it does not accept value in feet’s. Style: Type st↵ for style. It allows you to select style of line. You can define different styles and number of lines by Selecting Format > Multiline Style. You will see that a dialog box will appear as shown in Fig13.Here you have a lot of options. You can use it by your self but remember that the maximum number of lines that be added are 16. 21
  • 22. www w.aboutcivil.com c shin nwari913@y ymail.com Fig-1 13 Fig-14-a Fig g-14-b Fig- -15
  • 23. www.aboutcivil.com shinwari913@ymail.com Trim:- You can shorten or lengthen objects to meet the edges of other objects. This means you can create an object such as a line first and then later adjust it to fit exactly between other objects. o Type TR↵ o Now select the object(s) to which will serve as cutting edges ↵ o Now select the objects which you want to trim as shown in FIG14 Remember that line will be trimmed from the nearest corner at which we will select the line. The other easiest ways is to Type TR and press Enter two times then select the cutting edges. But for this case, intersection of two or more lines is must. While in the above case it was not essential! After selecting the first line, we will observe some more options as shown in FIG15 Let us discuss each of them; Projection:- By default it is UCS and tries to keep it so. Edge:- In it, there are two options Extend and No Extend. If we type extend (by default it is extend) then the above process is done i.e. without intersection of objects, we can trim them. But if we make it No Extend then without intersection, trim command will not work. Remember that once you have changed the trim command to No Extend, you must change it to Extend to work properly as described above. Undo:- It is used to undo your last action. Chamfer:- Using CHAMFER is a fast way of creating a line between two nonparallel lines. It is usually used to represent a beveled edge on a corner. CHAMFER can also be used to bevel all corners of a Polyline. You can chamfer lines, Polylines, Xlines, and rays. o Type cha↵ o (We will see different sub-options/commands which will be discussed later.) o Now select the first line which is labeled as A in Fig16. o After that we will be asked for second line. So select second line which is labeled as B in Fig16. o We will see that the corner is chamfered (if you see no chamfering although in command window you can see that the command has been applied then you have to change the chamfer settings which are described below in sub- commands). Fig-17 Fig-16 23
  • 24. www.aboutcivil.com shinwari913@ymail.com Now let us explain its sub-commands. Polyline:- It is used to chamfer a Polyline and nothing else. Distance:- It is used to change the chamfer distance. It will ask you to enter first chamfer distance in which you should enter the distance on the first line from the corner to the end of chamfering. Similarly it will ask for second chamfer distance in which you should enter the distance on the second line from the corner to the end of chamfering. For instance, in Fig-17, the first and second chamfer distance is 1"while in Fig-18; the first chamfer distance is 1′ while second chamfer distance is 3". Angle:- In this option/sub-command, you can change the chamfer length and angle. For illustration, see the Fig-19 and Fig-20 In Fig19, the chamfer length and angle, both are taken as 0 which is the default value but in Fig-20, the chamfer length on the first line is 2" and the chamfer angle from the first line is 60º. (The value of angle can be entered 0-89 only and no negative values!) Trim:- Till now we were using chamfer in Trim mode. If we change it to Notrim then the chamfering will be done as shown in Fig-21 Method:- Now let us suppose that in sub-command Distance, we have first and second chamfer distance as 6". And in Angle, we have 1" chamfer length and 75º chamfer angle. Now we want to chamfer some non parallel lines by Distance and some by Angle. Method provides us this facility. In Fig22, the lines are chamfered by angle method while in Fig-23; the lines are chamfered by distance method. Remember that if we will change the default values of Angle then the method is automatically changed to Angle till it is changed manually. Multiple:- It is used to chamfer more than two non-parallel lines. To escape from this command, press Esc key of your keyboard. Fillet:- Filleting joins two objects with a smoothly fitted arc of a specified radius. An inside corner is called a fillet and an outside corner is called a round; we can create both using FILLET in AutoCAD. You can fillet:- Arcs Circles Ellipses and elliptical arcs Lines Polylines 24
  • 25. www.aboutcivil.com shinwari913@ymail.com Fig-18 Fig-19 Fig-21 Fig-20 Fig-22 Fig-23 25
  • 26. www.aboutcivil.com shinwari913@ymail.com Rays Splines Xlines Let us discuss the fillet command and its sub commands; You can activate the command by typing f↵ Radius:- Your first task is to set the require radius. So type r↵ The default radius is 0′-0″. Let us change it to 3″. So type 3↵ (Don’t forget to set the units before starting drawing). Now we have to fillet side 1 and 2 of box shown in Fig-24-a. After the selecting the two sides, the box will be changed and its sides 1 and 2 will be filleted as shown in Fig-24-b. If we change radius to 0 then the two sides will meet forming a normal corner as shown in Fig-24-c. In this Fig., we can easily observe that the two sides of the box are met at 0 radius. But first you have to delete the filleted or curved line. In this case I have redraw it for illustration. Trim:- Enter t↵ for trim mode. If want not to erase the lines after filleting the change this mode to no trim by entering n↵ and then after filleting we will get filleting objects just like in Fig25-c. Multiple:- If we want to fillet more than one side then activate this sub command. Fig-24-a Fig-24-b Fig-24-c 26
  • 27. www.aboutcivil.com shinwari913@ymail.com LECTURE 4 Text:- There are two types of texts in Auto Cad; Single Line Text:- This can be activated by typing text↵. Click on the start point (on screen). Then you have to specify the height of text. Either directly enter the height value or move the cross hair and you will see a rubber band. Use it for appropriate height and then press left click of the mouse. After that you can enter the angle value e.g.40 etc. Here we will also see the sub commands:- o Justify:- It has further sub commands; o Align:- If it is activated, then we have to specify the two points and text will be adjusted according to the area and we will not be bothered of height. o Fit:- In fit, we will give height, so instead of changing the height automatically, the text will shrink or grow to fit in the required area. o Center/Middle etc:- Now after fit, the difference is of the grip points of the text and its alignment and nothing else. Here is the full name of the symbols used;- Fig-25 TL = Top Left TC = Top Center TR = Top Right ML = Middle Left MC = Middle Center MR = Middle Right BL = Bottom Left BC = Bottom Center BR = Bottom Right o Style:- Style is the defined style of text. By default a text style, Standard, is defined. We can also define our own text styles. • Defining/Creating a text Style:- Type st↵ or select Format > Text Style. A Text Style dialog box will be displayed as shown in Fig-25. Here you can change the settings. By clicking on button New, we can define our own styles. The name of the style if written in Style, sub command of text, then that style will be used to write the text. So in this way, we are able to write text in different styles easily. We can also underline the text and many other tricks can be done like; Write %%P to have a ± sign. Write %%D to have a º (degree) sign. 27
  • 28. www.aboutcivil.com shinwari913@ymail.com Write %%U to underline the text. Write %%O to over line the text. Write %%U%%O to both underline and over line the text. Write %%C to have Ø (diameter) sign. Multiline Text:- A multiline text (mtext) object includes one or more paragraphs of text that can be manipulated as a single object. Type t↵ or type mtext↵ or Select Draw > Multiline Text. Before entering or importing text, we specify opposite corners of a text bounding box that defines the width of the paragraphs in the multiline text object. The length of the multiline text object depends on the amount of text, not the length of the bounding box. Multiline Vs Single Line Text:- The main difference between the two is that in single line text, if we want to select it, a single line of text is selected and, therefore, can be edited individually. While in multiline text, we can not edit a single line of text but we have to edit the entire paragraph. Quick Text:- Type qtext↵. When AutoCAD opens or regenerates a drawing, if the drawing contains numerous text objects, it can take quite some time to complete a selection process, especially if the text uses complex fonts. If we want to speed up the process and do not need to actually see the existing text, enable the Quick Text mode (QTEXT). When Quick Text is enabled, text-based objects are displayed as simple rectangles that contain no characters. When we enable Quick Text mode, we need issue a REGEN command to redisplay the text as simple rectangles. When Quick Text is enabled, new text objects are displayed as text characters while the TEXT and MTEXT commands are active, which makes it easier to read what we are typing. Region:- Type reg↵ for region. This is used to change lines (closed lines) into a single Polyline. Ellipse:- Type el↵ for ellipse. Then select the end points of the axis. After that either give the distance to other axis or rotation value which must not exceed than 89.4. If we enter 0 then we will get a circle! (Here we have also some more options but I am not going into detail. One can search it in the Auto Cad help by typing ellipse in the Ask tab while List of components to search in the drop down dialog box should be User documentation set. Then press enter and the select Draw Ellipses in the search results. There click on Reference and the select ELLIPSE. You can take help from there. Just click on Arc etc and explanation will be displayed. 28
  • 29. www.aboutcivil.com shinwari913@ymail.com LECTURE 5 Using of commands:- We are now at the stage to draw some drawings. Many new commands will be introduced while drawing. Wall Footing:- So let us start with wall footing. It is a common kind of foundation. [Save this and every drawing after this as it will be used in future lectures) 1) Start the AutoCAD and set the units. But in units to scale drag and drop content should be centimeters. You might be asked to ensure that you have selected centimeters; click on OK. 2) Save this drawing by the name of 3) Type l↵. (Here we are making a rectangle of 70x15 cm) 4) Select any arbitrary point on screen. 5) Press F8 to straight the line (i.e. to ON the ortho, if it is OFF). 6) Now move the mouse towards your left or right and then type 70↵↵ (It will act as our mirror line). 7) If you are unable to see the line, type z↵ and then a↵ to zoom all. 8) Now similarly make the breadth of rectangle 15 and further complete the rectangle as shown in Fig-w-01 9) Now make sure that in the object snap dialog box (type os↵ for object snap dialog box), the Midpoint is checked and the oSNAP tag at the status bar is pressed in i.e. OSNAP is ON (we can also use F3 to ON/OFF the OSNAP). 10) Type l↵ and move the cursor on the somewhat mid of the top line of the rectangle. Here we will see a rectangular shape marked as Midpoint as shown in Fig-w-02. Using this midpoint, draw a line of approximately 50 as shown in Fig-w-03. 11) Now type o↵ for offset. Type offset distance as 15↵. Then select the left side of rectangle and then move your cross hair towards the right an click. The command will be still active, so select the right side of the rectangle and move your cursor towards left and click on screen. Press enter to deactivate the command. You will now see the drawing as shown in Fig-w-04. 12) Now we got 15cm mark from the either sides. Type pl↵ for polyline and select left top offset, move your cursor (or you can say cross hair) upward and type 10↵. The command is still active, so move your cursor towards right and type 5↵. Then move your cursor toward upward and type 10↵. Again move your cursor towards right and type5↵. Now move your cursor upward and type 30↵ as shown in Fig-w-05 13) Type mi↵ for mirror. Select the Polyline which has been drawn in above step and press enter. Now select the end points of the midline which was drawn is step no. e. then type no↵ (or simply n) to avoid deleting our source Polyline. The Figure will be as shown in Fig-w-06 14) Now delete the lines by first selecting them and then either press delete button of the keyboard or by typing e↵ so that your drawing is seemed to as Fig-w- 07. Fig-w-01 Fig-w-02 29
  • 30. www.aboutcivil.com shinwari913@ymail.com 15) Now we have to draw a continuation line at the top of wall footing as shown in Fig-w-08. For this, type l↵ and move shift your cursor on to the left topmost corner. Then move it towards left and you will see a dotted line showing tht you are align with the specified corner. Now click on arbitrary point but aligned with the left top most corner. ON the ortho if it is OFF. Drag the cursor/cross hair towards right till you till the approximate mid point of the tube type shape. Click on screen and then move the cursor upward to reasonable distance and then again click on screen. Now OFF the ortho. And make the line shape as shown in Fig-w-08. 16) Now we will do hatching. [Many drafting applications use a process called hatching to fill an area with a pattern. The pattern is used to differentiate components of a project or to signify the material composing an object.]. Type h↵ for hatching. A new dialog box, Boundary Hatch and Fill, will open as shown in Fig-w-09. 17) Click on pick points and then select the inner portion of rectangle (which is shown in FIGw-01., by clicking inside it). [If there is error of valid hatch boundary not found, it means that the corners of the rectangle are not closed properly; so make sure that all the corners of the rectangle are jointed with each other]. After selecting the inner point, the side of the rectangle will be changed into dotted line. Press enter and again the previous hatch dialog box will appear. Make sure that in this dialog box, the type is Predefined. Now either click on the text box type shape or in front of Pattern there is a small browse button, click on it. You will see a new dialog box, Hatch Pattern Palette. There are many patterns. Select the AR-CONC (This is the pattern of Concrete) in the Other Predefined tag. Click on ok. 18) Now click on Preview button at the bottom most left corner of the Boundary Hatch and Fill dialog box. If you see that hatching is done properly then well and good otherwise press Esc on your keyboard and you will be returned to Boundary Hatch and Fill dialog box. Change the scale (More the scale value, more will be distance between the hatching pattern components) and the by trial and error method, set the hatching scale. When it is done, do right click. Fig-w-10. 19) Now do the same above process of hatching in the rod type (or you can say tube type) shaped steps. But now you will select the pattern STEEL which is just like the pattern of Bricks. The drawing is now ready and will seem like FIG w-11. 30
  • 31. www.aboutcivil.com shinwari913@ymail.com Fig-w-09 Fig-w-10 Fig-w-11 31
  • 32. www w.aboutcivil.c com shin nwari913@y ymail.com LEC CTURE 6 Inverted Arch Foundation:- Now we w draw inv will verted arch ffoundation a shown in F as Fig-I-01. Bu here we ut will also introduc the use of layers to so extent. The layers w be used in detail a ce f ome T will n when we will dra a map. n aw Layers:- It is an or rganizing too that operat like an el ol tes lectronic ver rsion of traditional; parent overla on a draw transp ays wing board.1 Layers ca be assigne color and linetype, an their visib an ed nd bility can be rolled. contr Setting Up Layers:- U Now let u start to set some layers. For this pa us t articular dra awing, we wi set two ill layers. One, named as rough, and second named as n , d, neat. The linnes/objects dr rawn onto rough layer will b those whi are draw to help in drawing the drawing. W h be ich wn While on the ot ther hand, th neat draw he wing will be o neat layer on r. The layer bar, wh is, by de l hich efault, present at object pproperties to oolbar, is sho in own Fig-I-02. Now let us explai the FIG I- We can see that ther are differe options i.e. Color, in -02. re ent i freeze On/Off et e, tc. o Layer Na ame:- Here the name of current laye is written. Any object drawn will be on this cu f er . t urrent layer. We must have at least one layer. B default we have a laye named as 0. h o By e er o Lock/Unl lock:- used to lock or unlock a layer. If a la It is u ayer is locked the object on that lay will d, ts yer visibl but not be able to be m le e moved nor can it be copi or deleted. ied o Color:- The color assigne to the layer is shown in the box m c ed marked in abo Fig-I-02 as ove 2, Color r. o Freeze or Thaw:- r This is used to fre eeze or thaw the layer in current or a viewports When a la w n all s. ayer is freeze all objects on that laye will becom invisible e, s er me e. o On/Off:- This is used to make the laye visible or i m er invisible. If a layer is off then all the objects f e drawn on that lay will be made invisibl But there is some cha n yer m le. ange in freez zing an on/Off of a layer. . e.g. if we select all the object (Ctrl+A), t objects o Off layer are also sel f a ts the on r lected but not if they are on the freeze layer. f n 1) Type la↵ or click on ) which is located at th object pro s he operties tool lbar, layer properties manager w be displayed as show in Fig-I-03. Let us ma the s will wn ake two layers. 1 AUT TOCAD 2000 b David Frey by
  • 33. www w.aboutcivil.c com shinwari913@ymail.com n y Fig-I-0 01 Fig-I-02 F Fig-I I-03
  • 34. www.aboutcivil.com shinwari913@ymail.com 2) Click on New. A new layer, Layer1, will be made. Name it as Rough and press comma on your key board and you will automatically transferred to a new layer! 3) Name the second layer as neat. (We can rename the layer by double click on its name) 4) Change the color of the layers by clicking on the small box under the Color title. Select Color dialog box will be displayed. Here we can change the color of the layer. So change the color of neat to red and that of rough to green, for instance and press Ok. 5) Click on the continuous which is the default linetype of the neat layer. Select Linetype dialog box will appear. Click on Load and select ACAD_ISO003w100 which is probably lying at second number and click Ok. Similarly load ACAD_ISO007w100 which is probably lying at sixth number. 6) We will see that three different lines are now loaded in Select Linetype dialog box. One is previous one that is continuous, two are newer that are ACAD_ISO003w100 and ACAD_ISO007w100. Select the ACAD_ISO007w100 i.e. ISO dot and click Ok. We will see that ISO dot is the line type of neat layer. Similarly make the ACAD_ISO003w100 as the linetype for rough layer. 7) Now make the rough as your current layer♦ and draw a line. You will see that a dashed space line will be drawn. If you are seeing a continuous line, then type ltscale↵ to change the linetype scale. By trial and error method, set it. Remember that only positive and non-zero values are accepted! 8) Make the neat layer as your current layer and draw some lines for check. Changing the layer of an object:- There are different ways to change the layer of an object. 1) Select the object and then in layers drop down list, select the desired layer. 2) Double click on an object; a mini window type will appear which will be showing the properties of the select object. There, we can also change the layer of the object. Not only layer but certain other properties like line width etc an also be changed. 3) Select the object and then type ch↵. Or first type ch↵ and then select the object. Changing the different properties of an object:- We can change different properties of an object with bringing changes in the properties of the layer. This can be easily done either by using ch command, described above or directly select an object and use the object properties tool bar drop down ♦ E.g. in second Figure of this lecture, the 0 layer is current layer. Just go to the drop down list and click on the rough, the rough layer will be made your current layer. 34
  • 35. www.aboutcivil.com shinwari913@ymail.com lists. Remember that in the drop down lists, if By Layer is selected then the object will match its properties with the current layer. Match Properties:- We can make two make the properties of two objects the same by typing ma↵ (match properties). Then select the object which will act like the source. Then select the second object. The second object properties will be changed and will be same to the properties of the first object. Coming Back to Inverted Arch Foundation:- Now let us now start our drawing. Start AutoCad and set the units as usual! 1) First of all make a rectangle by rec↵. Select any point on screen as your starting point. Then enter the dimensions as 83”, 45”↵. Then click on the rectangle, you will see that it will act as a Polyline. But it is very difficult to work with this type of rectangle. So to change the Polyline into individual simple lines, we use explode command. Type x↵ to explode. Then select the whole rectangle, either by using box window or cross window↵. Now we can select each individual line. Fig-I-04 2) Now Type o↵ for offset. Type 26↵ as the offset distance. Select the left side of the rectangle and click towards the right side. Now your drawing must look like as shown in Fig-I-05 3) Now you can press space bar of your keyboard two times; once for exiting out from offset command and second for repeat the offset command or simply press Esc key of the key board and Type o for offset. Similarly select the left side of the rectangle. Now the offset distance will be 3’↵ and click towards the right side. Now we have made a column. As shown in Fig-I-06 4) Type o↵ for offset. Type 62↵ as the offset distance. Select the left side of the rectangle and click towards the right side. 5) Type o↵ for offset. Type 6’↵ as the offset distance. Select the left side of the rectangle and click towards the right side. 6) Type o↵ for offset. Type 98’↵ as the offset distance. Select the left side of the rectangle and click towards the right side. 7) Type o↵ for offset. Type 9’↵ as the offset distance. Select the left side of the rectangle and click towards the right side. As shown in Fig-I-07 8) Type o↵ for offset. Type 24↵ as the offset distance. Select the bottom line of the main rectangle and make offset towards the above direction Fig-I-08 35
  • 36. www.aboutcivil.com shinwari913@ymail.com ` Fig-I-04 Fig-I-05 Fig-I-06 Fig-I-07 Fig-I-08 Fig-I-10 Fig-I-09 36
  • 37. www.aboutcivil.com shinwari913@ymail.com 9) Type cha↵ for chamfer. Set chamfer distance, both first and second, to 3. Also the trim mode should be NO trim ϒ. Now select the line A and then select the line B. Then press space bar or Enter button of your keyboard to repeat the chamfer command. Then select the line C and then select the line B.Fig-I-09. Do similar process with other two columns. In last, delete the line B and by using trim command, make your drawing as shown in Fig-I-10 10) Now take offset of 20 inches of the top above side of the main rectangle (In Fig-I-11, it is shown as dotted line). Then Type ex↵↵ and then click on the top edges of the columns till they meet the line which you have just drawn. Then Delete the line which was shown in Fig-I-11 as dotted line. 11) Now draw the line as shown in Fig-I-12. And then by using trim command, remove some parts of the lines so that your drawing resembles to Fig-I-13. 12) Type c↵ for circle. Now be sure that mid point is selected in OSNAP. The shortcut for activating a single OSNAP (i.e. object snap), I call it OSNAP shortcut, is just hold on the Shift key of your keyboard and do right click on the screen. You will observe a number of options like End point, mid point etc. Click on Mid point. Now by doing so, you have turned off all the snaps except mid point! This works even your OSNAP is OFF! So after doing so, select the center of circle as showed in Fig-I-14. Now you will be asked for radius. Select End Point in OSNAP shortcut and select the point A. Now your drawing will somewhat like Fig-I-15 13) Repeat the command circle and select the same mid point as was shown in Fig-I-14 but select point B this time, when asked for radius. Now your drawing will resemble to Fig-I-16 14) Using the trim/delete, modify your drawing as shown in Fig-I-17 15) Do the same procedure with the rest of columns. At last your drawing will resemble to Fig-I-18. There might be a slight difference at the bottom of the arcs but don’t worry about that and leave it as they are! 16) Now rest of the task is easy. Just delete the left and right most side of the main rectangle and draw again lines showing the continuity as shown in Fig-I-19. Use of ortho will make it easy to draw these lines. Also make sure that the line is touching the end points of arcs other wise there might be problem in hatching. 17) Now use the trim command and trim the top side of the main rectangle. Also make offset of these trimmed lines (Now it has been changed in lines!!) at distance of 8″ above the rectangle. Then joint this offset with rectangle as shown in Fig-I-20 ϒ The chamfer command is explained above. 37
  • 38. www.aboutcivil.com shinwari913@ymail.com Fig-I-12 Fig-I-11 Fig-I-13 Fig-I-14 Fig-I-15 Fig-I-16 Fig-I-17 Fig-I-18 38
  • 39. www.aboutcivil.com shinwari913@ymail.com Fig-I-19 Fig-I-20 Fig-I-21 Fig-I-22 Fig-I-23 Fig-I-24 39
  • 40. www.aboutcivil.com shinwari913@ymail.com 18) Now we will do hatching. Type h↵ for hatching. At the Hatch tab, click on pick points and then select all the internal areas of the arcs one by one, by clicking inside them. Now click in swatch, a dialog box will appear. Go to ISO tab and select the first one i.e. ISO02W100. Click on OK button. Then change angle to 90 and scale to 0.5. click on Preview. If you are satisfied, the press ↵ otherwise press Esc and then set the scale till you get a better hatch. Fig-I-21 19) Similarly do hatching in the area under the arcs by having the hatch pattern as AR-CONC at the Other Predefined tag, set scale to 1 and angle to 0. Fig-I-22 20) Similarly do hatching in the top most area which are in the shape of small rectangles. The hatch pattern will be MUDST at Other Predefined tag. Scale should be 10 and angle should be 0. The delete the upper most and side lines. Fig-I-23 21) Now the last step is to hatch the columns. So first of all close the top mouths of columns and do hatching by selecting the interior area of the columns. The hatch pattern should be ANSI32 at ANSI tab. Scale should be 10 and angle should be 0 Fig-I-24 Congratulations! We have made the inverted arch foundation successfully. In the coming lecture we will be drawing the plan of a home. 40
  • 41. www.aboutcivil.com shinwari913@ymail.com LECTURE 7 Now its time to draw a plan of a house. Let us assume that the area of the plot is 70′ x 50′ 1) As usual set the units to Architectural and precision to 0′-0″. It will make us enable to enter the values not only in inches but also in feet. (remember that any data which we enter as a feet must have symbol ’) 2) Let us make some layers. Type la↵ for layer dialog box. Then make few layers of following specification; NAME OF THE LAYER COLOR OF THE LAYER LINE STYLE Text Green Continuous Dimensions Red Continuous Perdas White ISO Dash 3) Make 0 as the current layer. Draw a rectangle of 70′ x 50′ (Using line command and not by rec command otherwise you will have to explode it) Fig- P-01 4) Now using the offset command offset each side of the rectangle 9″ to the inside♠ as shown in Fig-P -02 5) Type o↵ for offset and then offset the inner most top line 4′ to the bottom♣ as shown in Fig-P -03 6) Offset the line drawn in Step 5, 9″ (i.e. Type 9↵ which will mean 9 inches)to the bottom as shown in Fig-P -04 7) Offset the line drawn in Step5, 15′ (i.e. 15 feet) to the bottom and then offset this line 9″ to the bottom as shown in Fig-P -05 8) Offset the line A in Fig-P -05, 4′ towards the right. Then offset the same line 9″ towards the right. Fig-P-06 9) Offset the line A in FIG p-06, 6.5′ towards the right. Then offset this line 4.5″ towards the right. Now offset this line 15′ towards the right and then offset this line 9″ towards the right.Fig-P-07 10) Offset the last line in step 9, 15′ towards right and then offset this line 4.5″ towards the right. Then trim all extra lines so that your drawing should match to Fig-P-08 we can see that we have made two rooms for which two baths are attached. ♠ To quit from a command, press Esc Key of the key board. ♣ In Figures, one side of the drawing will be shown due to less space. 41
  • 42. www.aboutcivil.com shinwari913@ymail.com Fig-P-01 Fig-P-02 Fig-P-03 Fig-P-04 Fig-P-05 Fig-P-06 Fig-P-07 Fig-P-08 42
  • 43. www.aboutcivil.com shinwari913@ymail.com 11) Now let us make doors for the two rooms and bathrooms. Now zoom in the first room. Offset the line A of FIG p-09, 9″ to the left and then offset this line 3.5′ to the left so that your drawing resembles to Fig-P-10 12) Now Type c↵ for circle and click on point A shown in FIGp-10. Then type 3.5′ as the radius and Fig-P-11 13) Now using the trim command, trim all the extra lines and your drawing will be like Fig-P-12 14) Now zoom in to the area which is encircled in FIGp-12. After zooming in, your drawing will be like Fig-P-13 15) Now using the trim command, make your drawing like Fig-P-14 43
  • 44. www.aboutcivil.com shinwari913@ymail.com Fig-P-09 Fig-P-10 Fig-P-11 Fig-P-12 Fig-P-13 Fig-P-14 44
  • 45. www.aboutcivil.com shinwari913@ymail.com Polyline, 23 Pop-Up-List, 11 A H Projection, 22 Align, 26 hatching, 29 Angle, 23 How to Start, 5 Q Assumptions, 7 Quick Text, 27 I quit from a command, 40 C Introduction, 5 Center/Middle, 26 Introduction of Main Interface, R Chamfer, 22 5 Changing Command Alias, 11 Inverted Arch Foundation, 31 Radius, 25 Changing the different rectangle, 34 properties of an object, 33 Rectangle, 8 Changing the layer of an J Region, 27 object, 33 Repeat A Command, 11 Command Aliases, 11 Justification, 20 Command Entry, 5 Justify, 26 Construction Line, 17 S Copy, 17 L Saving Your Drawing, 8 Copy Multiple, 17 Cursor List, 11 Setting the Units, 7 Layers, 31 Setting Up Layers, 31 Line, 7 Single Line Text, 26 linetype scale, 33 D Snap Tag, 15 LWT Tag, 16 Status Bar, 15 Defining/Creating a text Style, System Tag, 13 26 M Display Tag, 13 Distance, 23 T Match Properties, 34 doors, 42 Method, 23 Drafting Tag, 13 Text, 26 Mirror, 19 Transparent Commands, 11 MODEL Tag, 16 Trim, 22, 23, 25 Multiline, 20 E Multiline Text, 27 Edge, 22 Multiline Vs Single Line Text, U Erase, 17 27 Exiting, 10 Multiple, 23, 25 User Preferences Tag, 13 explode, 34 O W F Open and Save Tag, 13 Wall Footing, 28 feet, 40 Options, 13 Ortho Tag, 15 Fillet, 23 OSNAP, 36 Z Fit, 26 OSnap Tag, 15 OTRACK Tag, 16 Zoom Real Time, 19 G Grid Tag, 15 P plan of a house, 40 Polar Tag, 15 45