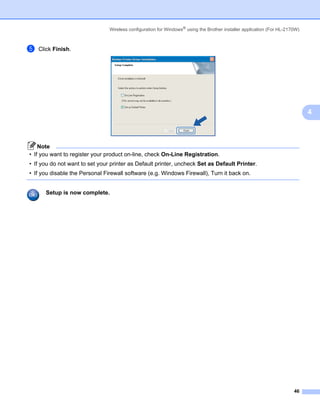
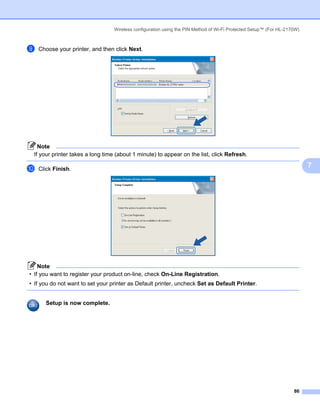
Downloaded 22 times


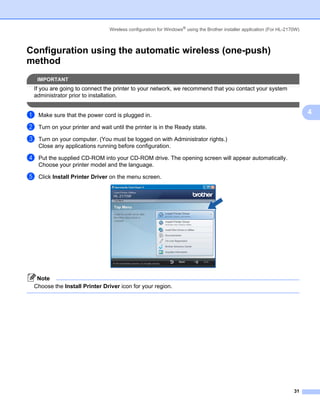


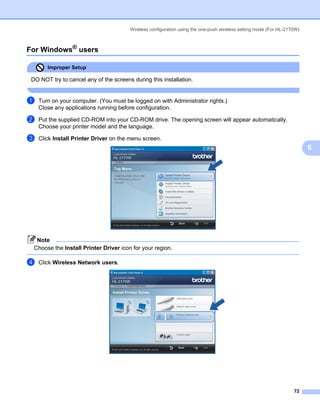
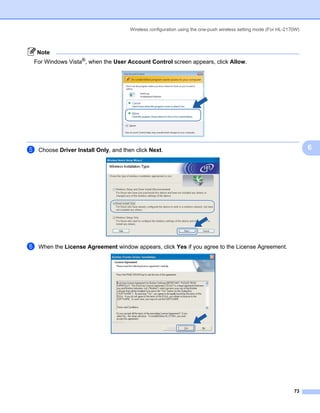
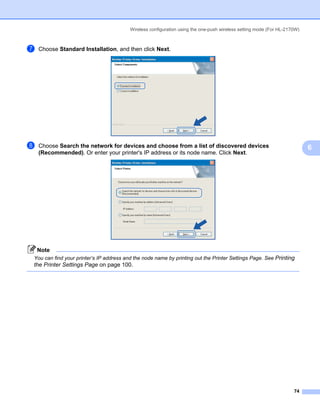
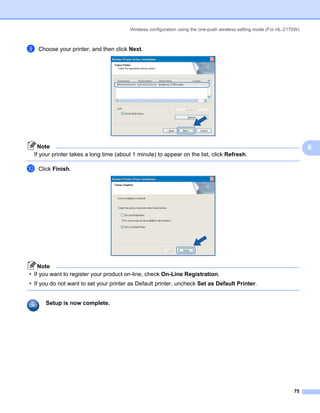

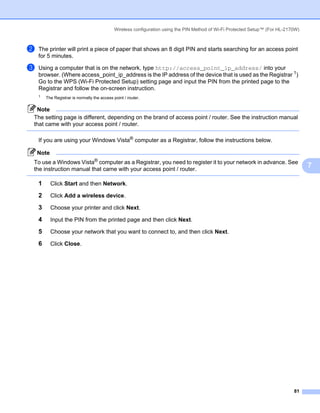


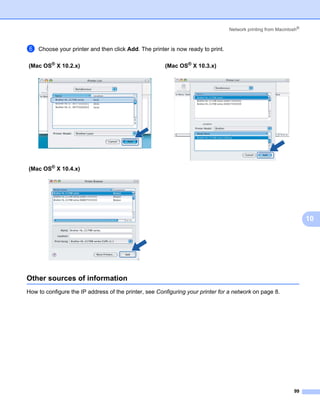
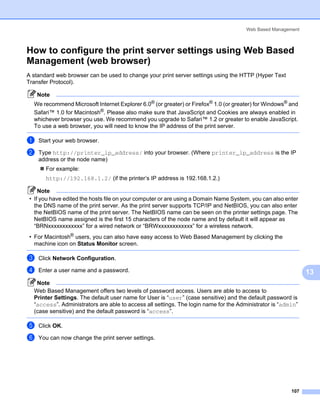

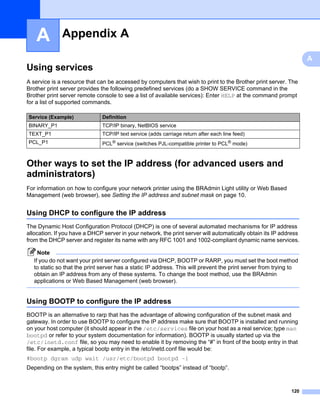
![Appendix A
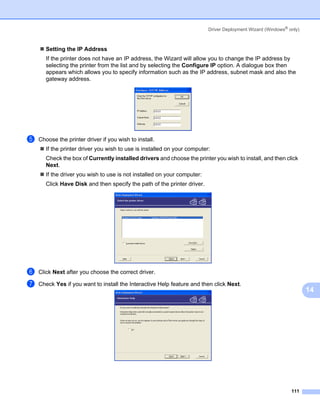
Using the Brother Web BRAdmin server software for IIS* to configure the IP
address A
A
The Web BRAdmin server software is designed to manage all LAN/WAN Brother network connected devices.
By installing the Web BRAdmin server software on a computer running IIS 1, Administrators with a web
browser can connect to the Web BRAdmin server, which then communicates with the device itself. Unlike the
BRAdmin Professional utility - which is designed for Windows® systems only - the Web BRAdmin server
software can be accessed from any client computer with a web browser that supports Java.
Please note this software is not included on the CD-ROM that was supplied with your Brother product.
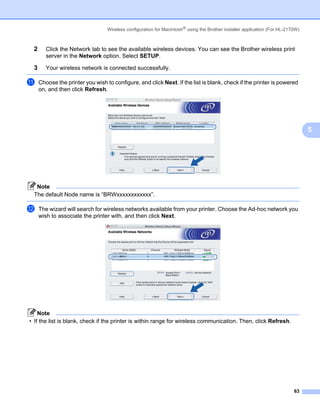
Please visit http://solutions.brother.com to learn more about this software and to download it.
1
Internet Information Server 4.0 or Internet Information Services 5.0 / 5.1 / 6.0 / 7.0
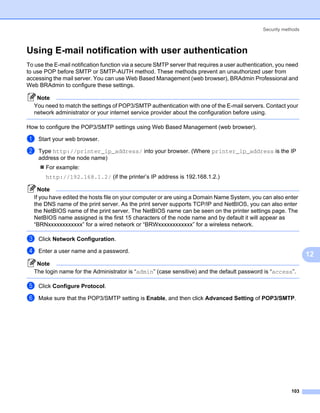
Installation when using Web Services
(For Windows Vista® users) A
Note
Verify the host computer and print server are either on the same subnet, or that the router is properly
configured to pass data between the two devices.
a Click Start, then choose Network.
b The machine’s Web Services Name will be shown with the printer icon. Right click the machine you want
to install.
Note
The Web Services Name for the Brother machine is your model name and the Ethernet address of your
machine (e.g. Brother HL-XXXX series [XXXXXXXXXXXX]).
c From the pull down menu, click Install.
d When the User Account Control screen appears, do the following.
Users who have administrator rights: Click Continue.
For users who do not have administrator rights: Enter the administrator password and click OK.
e Select Locate and install driver software.
f Insert Brother CD-ROM.
g Select Don’t search online and then Browse my computer for driver software on your computer.
h Select your CD-ROM drive, and then select the install your language PCL win2kxpvista folder.
i Click Next to begin installation.
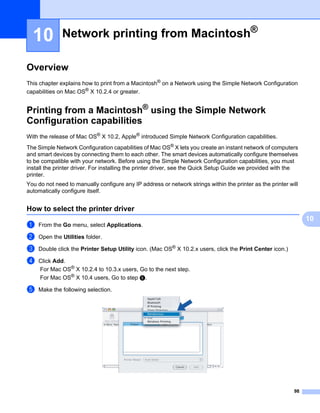
124](https://image.slidesharecdn.com/brother2170w-090908003221-phpapp01/85/brother-2170-131-320.jpg)


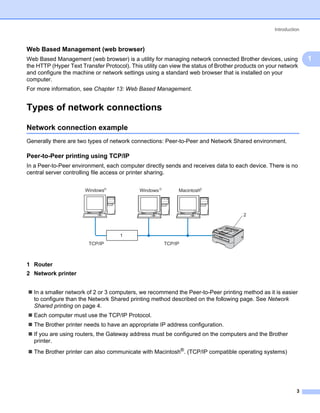
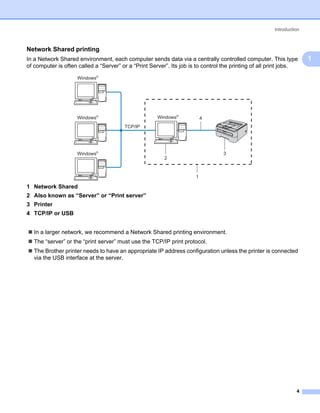
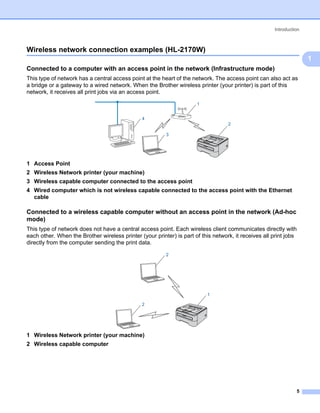
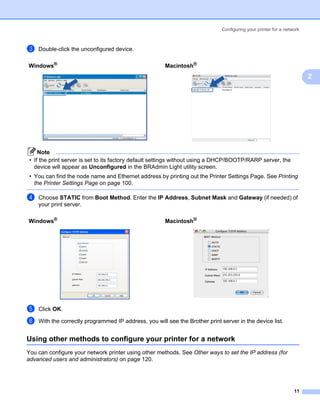
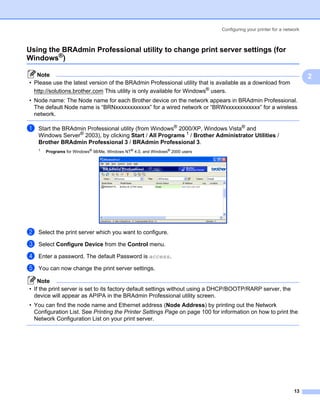
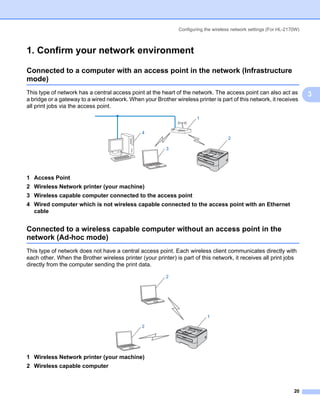
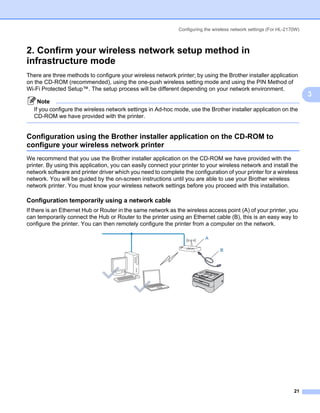
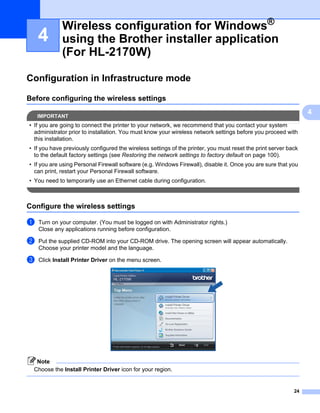
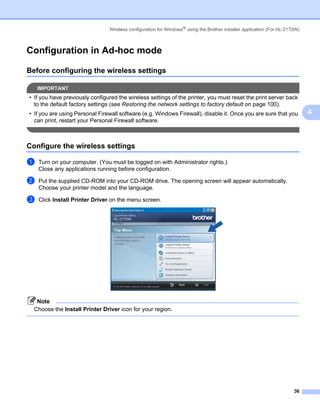
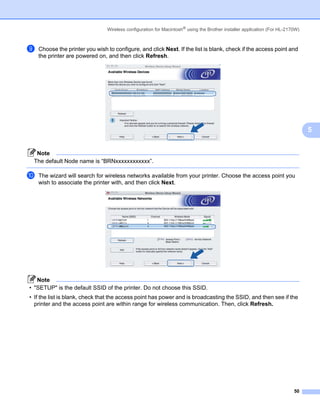
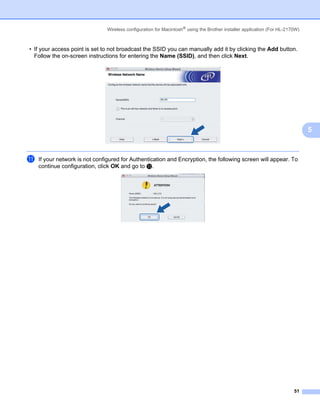
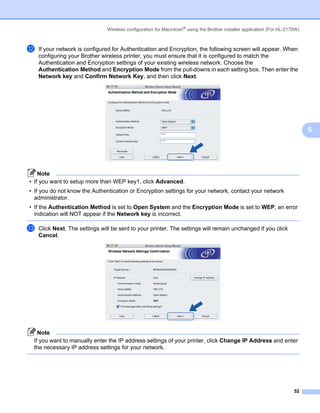
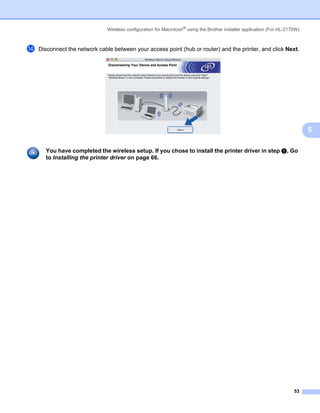
The document provides an overview of the network features and capabilities of the Brother HL-2150N and HL-2170W multi-function printers, including: - Network printing via Ethernet or wireless (HL-2170W only) connections using TCP/IP protocols - Management utilities like BRAdmin Light and BRAdmin Professional for configuring network settings - Support for printing from Windows and Macintosh operating systems


