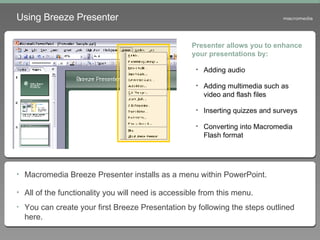
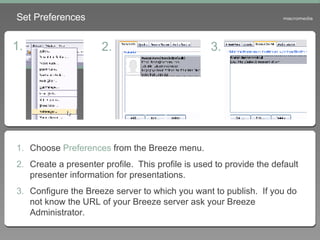
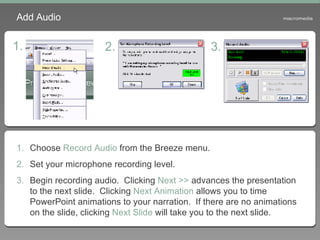
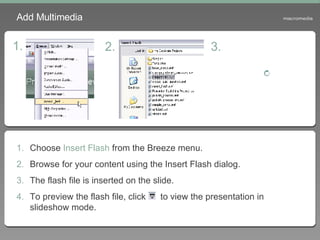
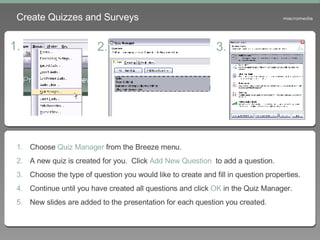
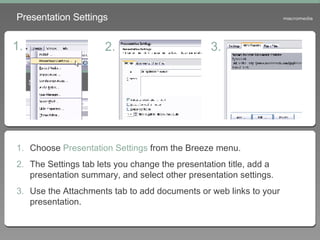
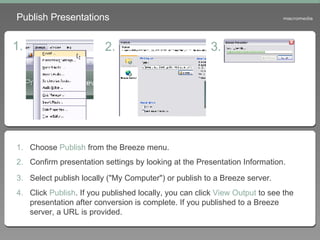
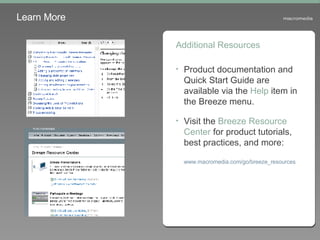
Getting Started with Macromedia Breeze Presenter
Using Breeze Presenter Macromedia Breeze Presenter installs as a menu within PowerPoint. All of the functionality you will need is accessible from this menu. You can create your first Breeze Presentation by following the steps outlined here. Presenter allows you to enhance your presentations by: Adding audio  Adding multimedia such as video and flash files Inserting quizzes and surveys Converting into Macromedia Flash format
Set Preferences Choose  Preferences  from the Breeze menu. Create a presenter profile.  This profile is used to provide the default presenter information for presentations. Configure the Breeze server to which you want to publish.  If you do not know the URL of your Breeze server ask your Breeze Administrator. 1. 2. 3.
Add Audio Choose  Record Audio  from the Breeze menu. Set your microphone recording level. Begin recording audio.  Clicking  Next >>  advances the presentation to the next slide.  Clicking  Next Animation  allows you to time PowerPoint animations to your narration.  If there are no animations on the slide, clicking  Next Slide  will take you to the next slide. 1. 2. 3.
Choose  Insert Flash  from the Breeze menu. Browse for your content using the Insert Flash dialog. The flash file is inserted on the slide. To preview the flash file, click  to view the presentation in slideshow mode. Add Multimedia 1. 2. 3.
Create Quizzes and Surveys Choose  Quiz Manager  from the Breeze menu. A new quiz is created for you.  Click  Add New Question  to add a question. Choose the type of question you would like to create and fill in question properties. Continue until you have created all questions and click  OK  in the Quiz Manager. New slides are added to the presentation for each question you created. 1. 2. 3.
Presentation Settings Choose  Presentation Settings  from the Breeze menu. The Settings tab lets you change the presentation title, add a presentation summary, and select other presentation settings. Use the Attachments tab to add documents or web links to your presentation. 1. 2. 3.
Publish Presentations Choose  Publish  from the Breeze menu. Confirm presentation settings by looking at the Presentation Information. Select publish locally ("My Computer") or publish to a Breeze server.   Click  Publish . If you published locally, you can click  View Output  to see the presentation after conversion is complete. If you published to a Breeze server, a URL is provided. 1. 2. 3.
Learn More Additional Resources Product documentation and Quick Start Guide are available via the  Help  item in the Breeze menu. Visit the  Breeze Resource Center  for product tutorials, best practices, and more:  www.macromedia.com/go/breeze_resources

Breeze, plugin para insertar pelis de Fash en Power Point

  • 1.
    Getting Started withMacromedia Breeze Presenter
  • 2.
    Using Breeze PresenterMacromedia Breeze Presenter installs as a menu within PowerPoint. All of the functionality you will need is accessible from this menu. You can create your first Breeze Presentation by following the steps outlined here. Presenter allows you to enhance your presentations by: Adding audio Adding multimedia such as video and flash files Inserting quizzes and surveys Converting into Macromedia Flash format
  • 3.
    Set Preferences Choose Preferences from the Breeze menu. Create a presenter profile. This profile is used to provide the default presenter information for presentations. Configure the Breeze server to which you want to publish. If you do not know the URL of your Breeze server ask your Breeze Administrator. 1. 2. 3.
  • 4.
    Add Audio Choose Record Audio from the Breeze menu. Set your microphone recording level. Begin recording audio. Clicking Next >> advances the presentation to the next slide. Clicking Next Animation allows you to time PowerPoint animations to your narration. If there are no animations on the slide, clicking Next Slide will take you to the next slide. 1. 2. 3.
  • 5.
    Choose InsertFlash from the Breeze menu. Browse for your content using the Insert Flash dialog. The flash file is inserted on the slide. To preview the flash file, click to view the presentation in slideshow mode. Add Multimedia 1. 2. 3.
  • 6.
    Create Quizzes andSurveys Choose Quiz Manager from the Breeze menu. A new quiz is created for you. Click Add New Question to add a question. Choose the type of question you would like to create and fill in question properties. Continue until you have created all questions and click OK in the Quiz Manager. New slides are added to the presentation for each question you created. 1. 2. 3.
  • 7.
    Presentation Settings Choose Presentation Settings from the Breeze menu. The Settings tab lets you change the presentation title, add a presentation summary, and select other presentation settings. Use the Attachments tab to add documents or web links to your presentation. 1. 2. 3.
  • 8.
    Publish Presentations Choose Publish from the Breeze menu. Confirm presentation settings by looking at the Presentation Information. Select publish locally ("My Computer") or publish to a Breeze server. Click Publish . If you published locally, you can click View Output to see the presentation after conversion is complete. If you published to a Breeze server, a URL is provided. 1. 2. 3.
  • 9.
    Learn More AdditionalResources Product documentation and Quick Start Guide are available via the Help item in the Breeze menu. Visit the Breeze Resource Center for product tutorials, best practices, and more: www.macromedia.com/go/breeze_resources