A bitewing radiograph is a dental x-ray that focuses on the crowns of the upper and lower teeth in a specific area, primarily used to detect decay between teeth, bone loss and changes in the gum line.
BITEWING RADIOGRAPS
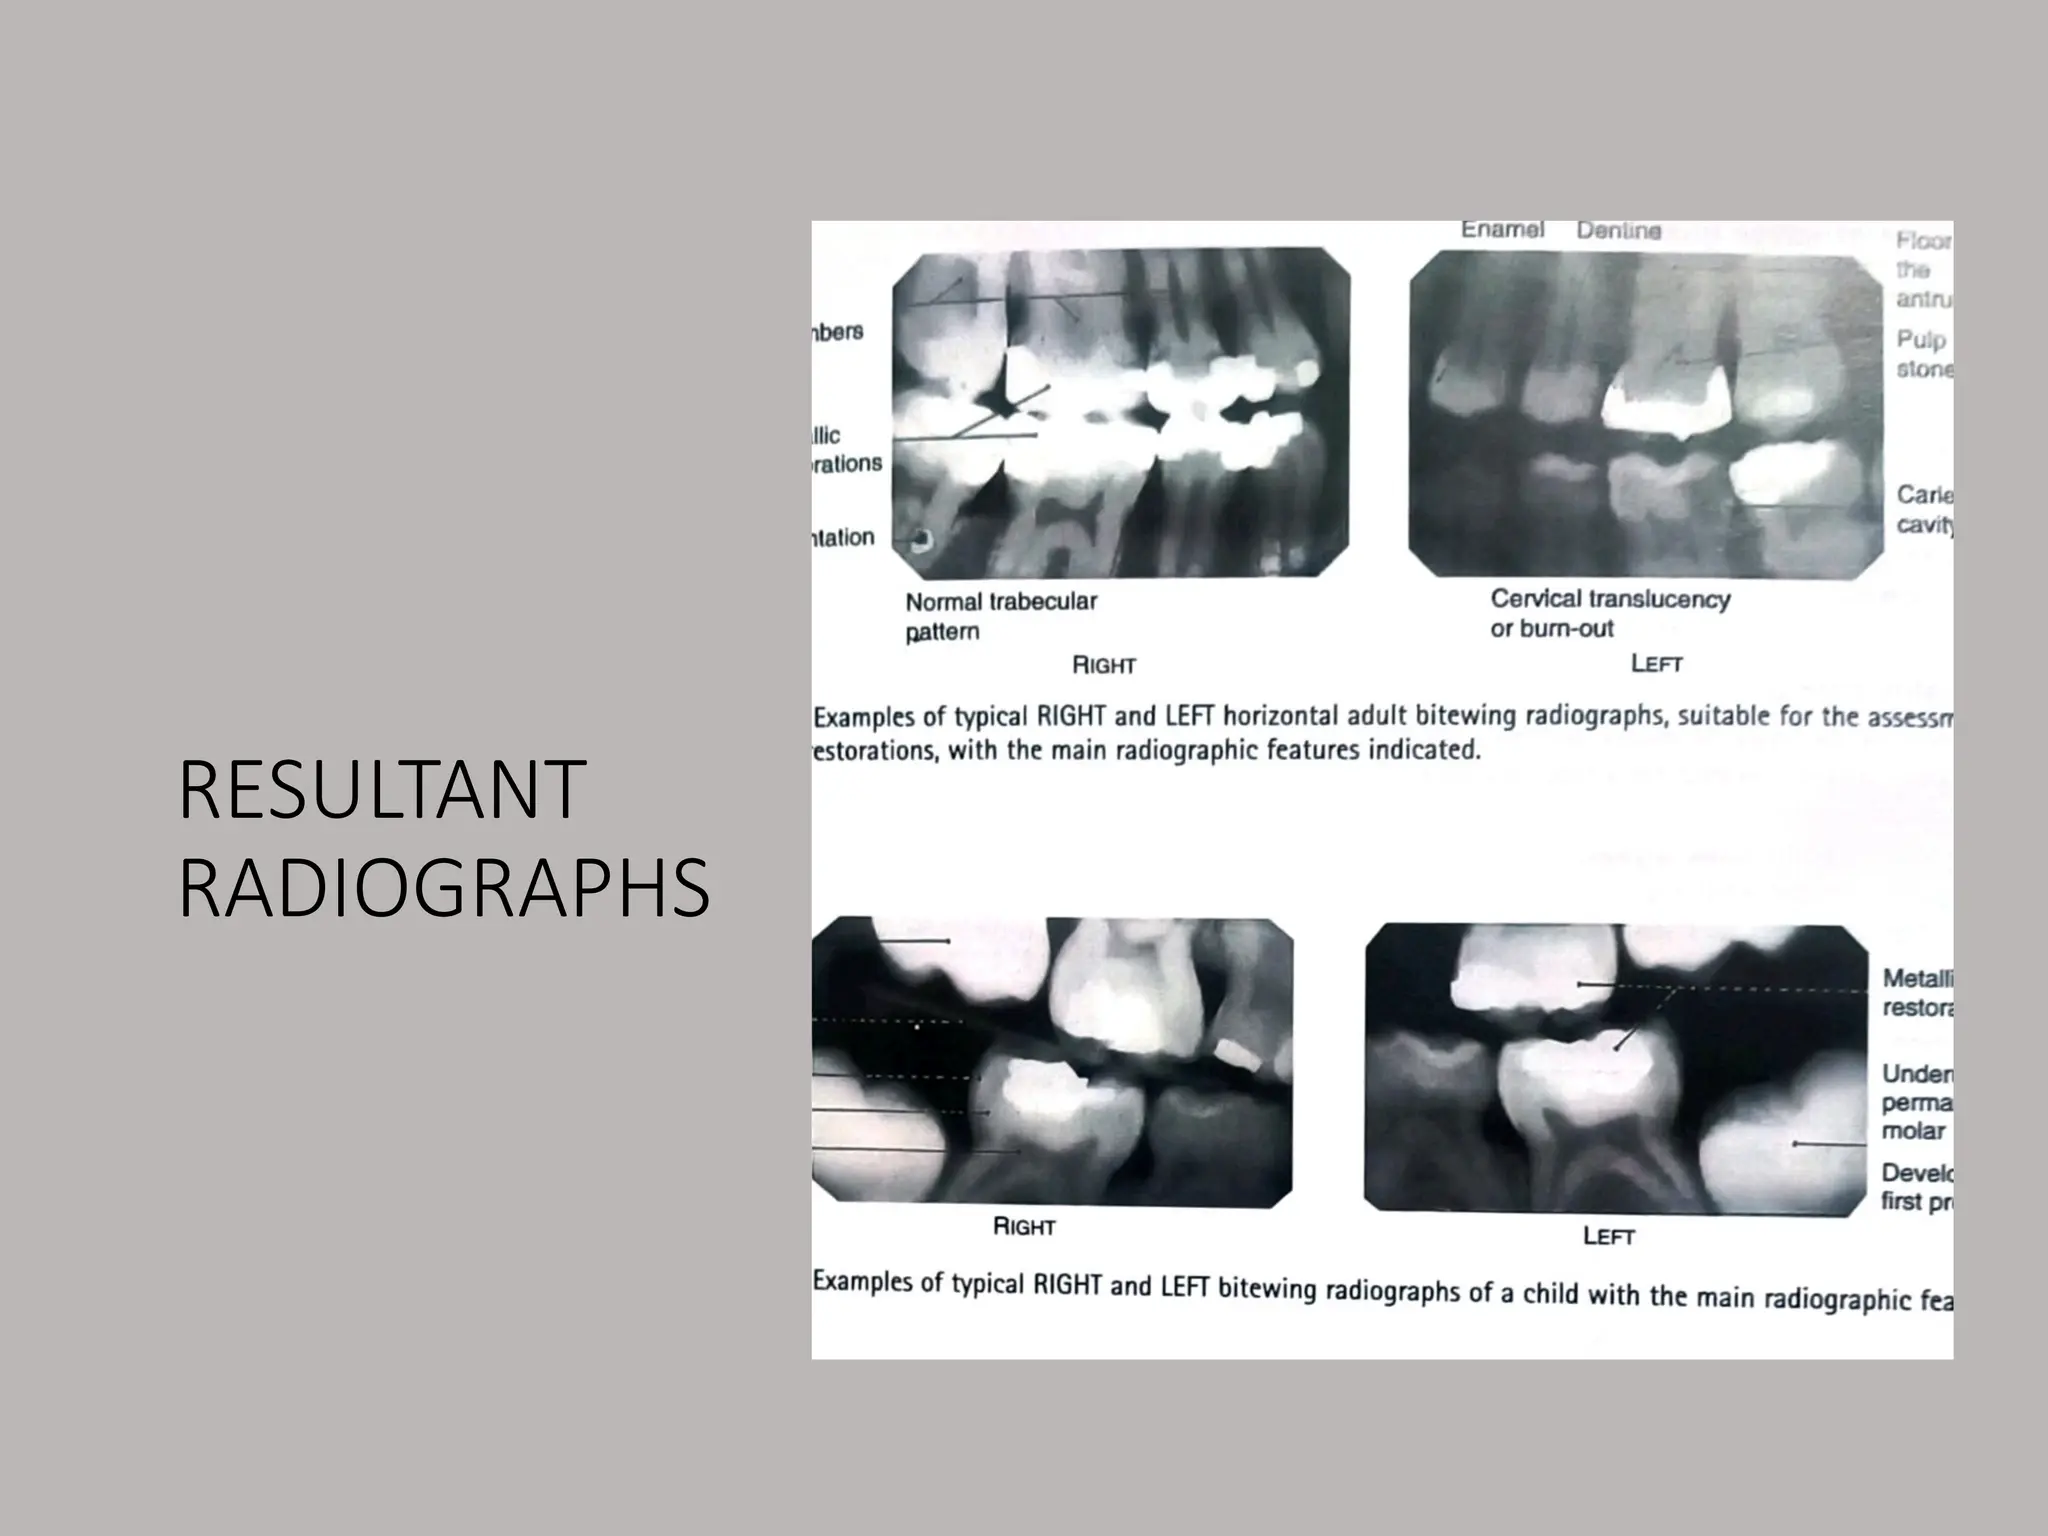
Bitewing radiographsshow the upper and lower
teeth in one specific area of the mouth.
These dental X-rays help the dentist detect decay
between your teeth or any changes that occur just
below your gum line.
MAIN INDICATIONS
1) Detection of caries lesion.
2) Monitoring the progression of dental
caries.
3) Assessment of existing restorations
4) Assessment of periodontal status.
IDEAL
TECHNIQUE
REQUIREMENTS
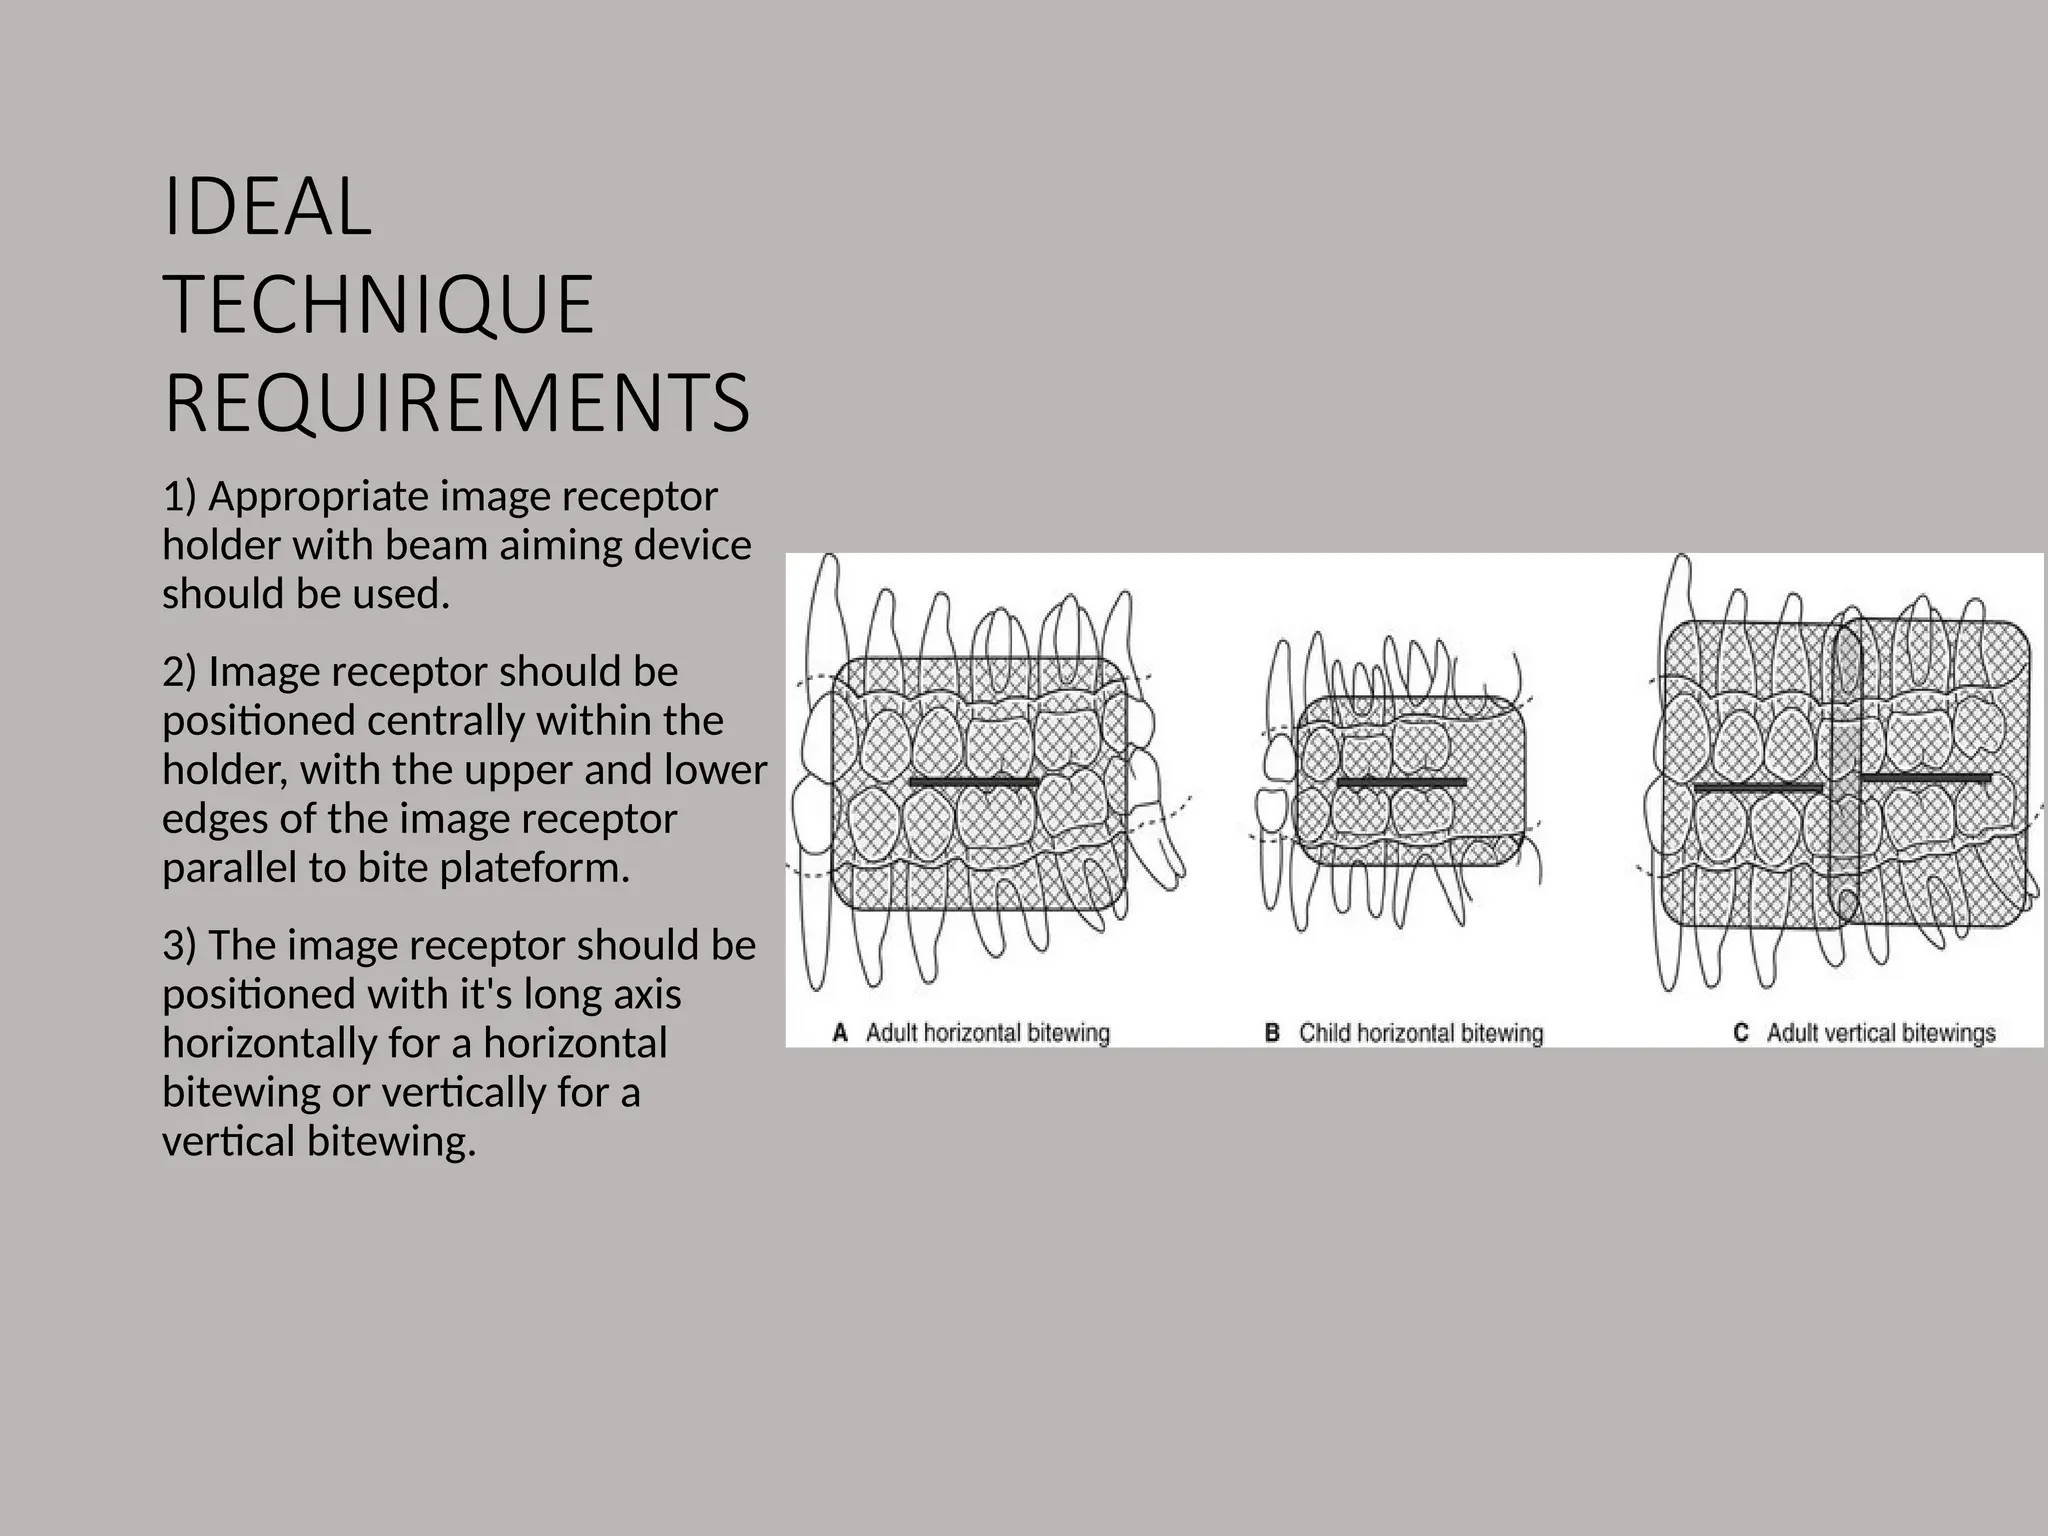
1) Appropriate imagereceptor
holder with beam aiming device
should be used.
2) Image receptor should be
positioned centrally within the
holder, with the upper and lower
edges of the image receptor
parallel to bite plateform.
3) The image receptor should be
positioned with it's long axis
horizontally for a horizontal
bitewing or vertically for a
vertical bitewing.
5.
IDEAL
TECHNIQUE
REQUIREMENTS
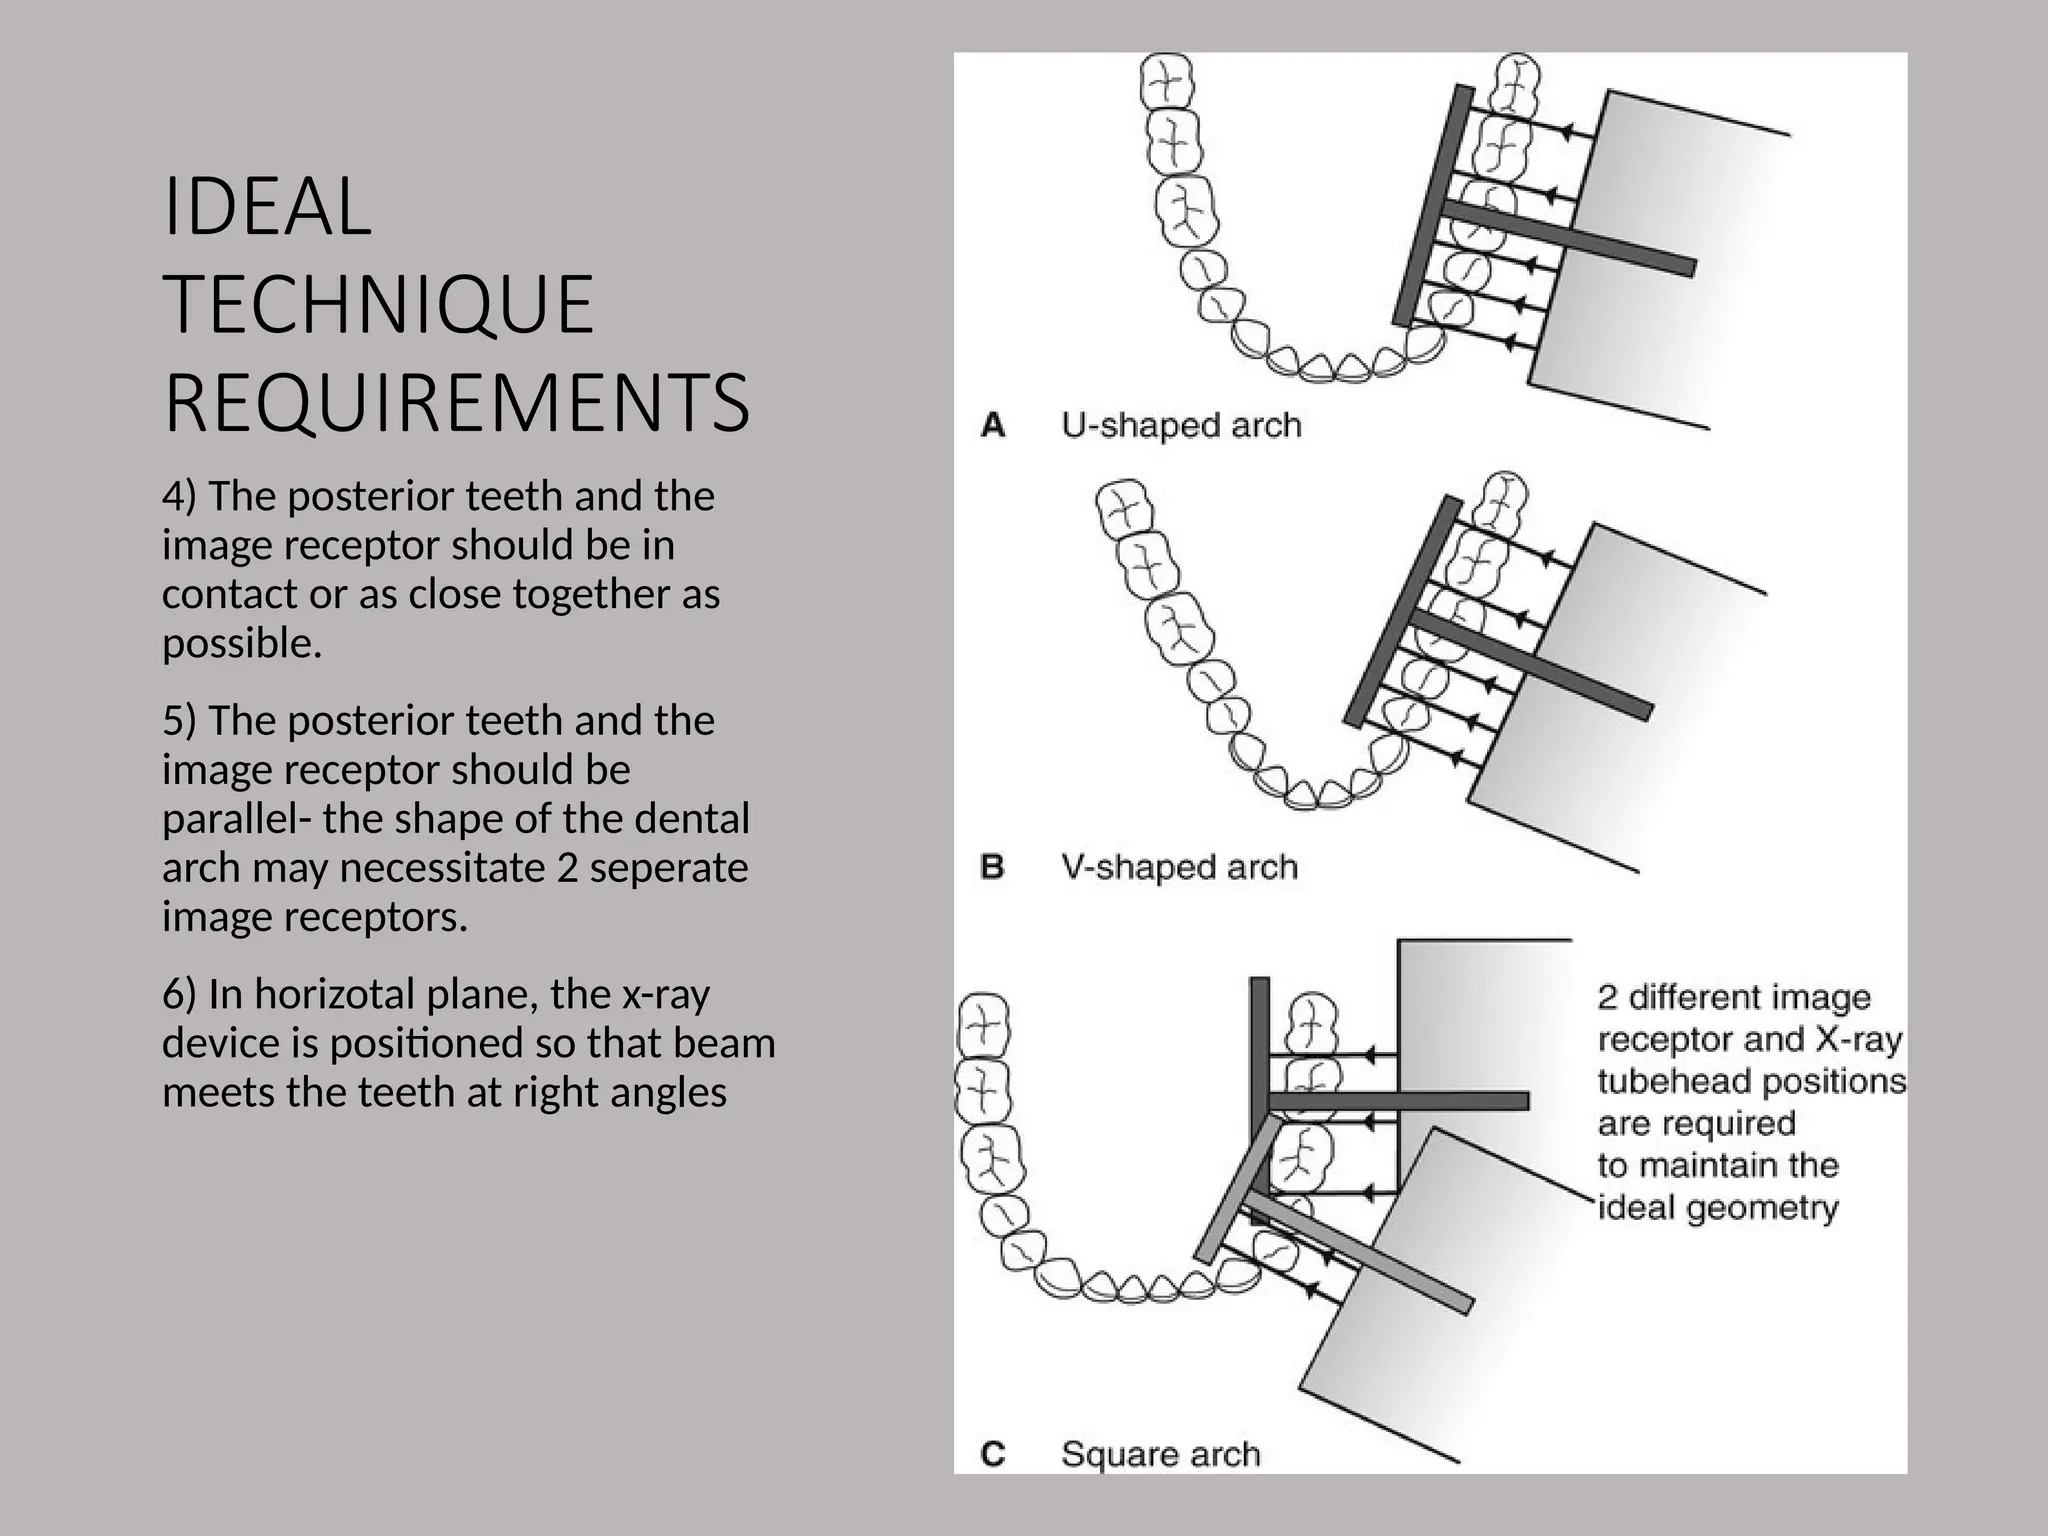
4) The posteriorteeth and the
image receptor should be in
contact or as close together as
possible.
5) The posterior teeth and the
image receptor should be
parallel- the shape of the dental
arch may necessitate 2 seperate
image receptors.
6) In horizotal plane, the x-ray
device is positioned so that beam
meets the teeth at right angles
6.
IDEAL
TECHNIQUE
REQUIREMENTS
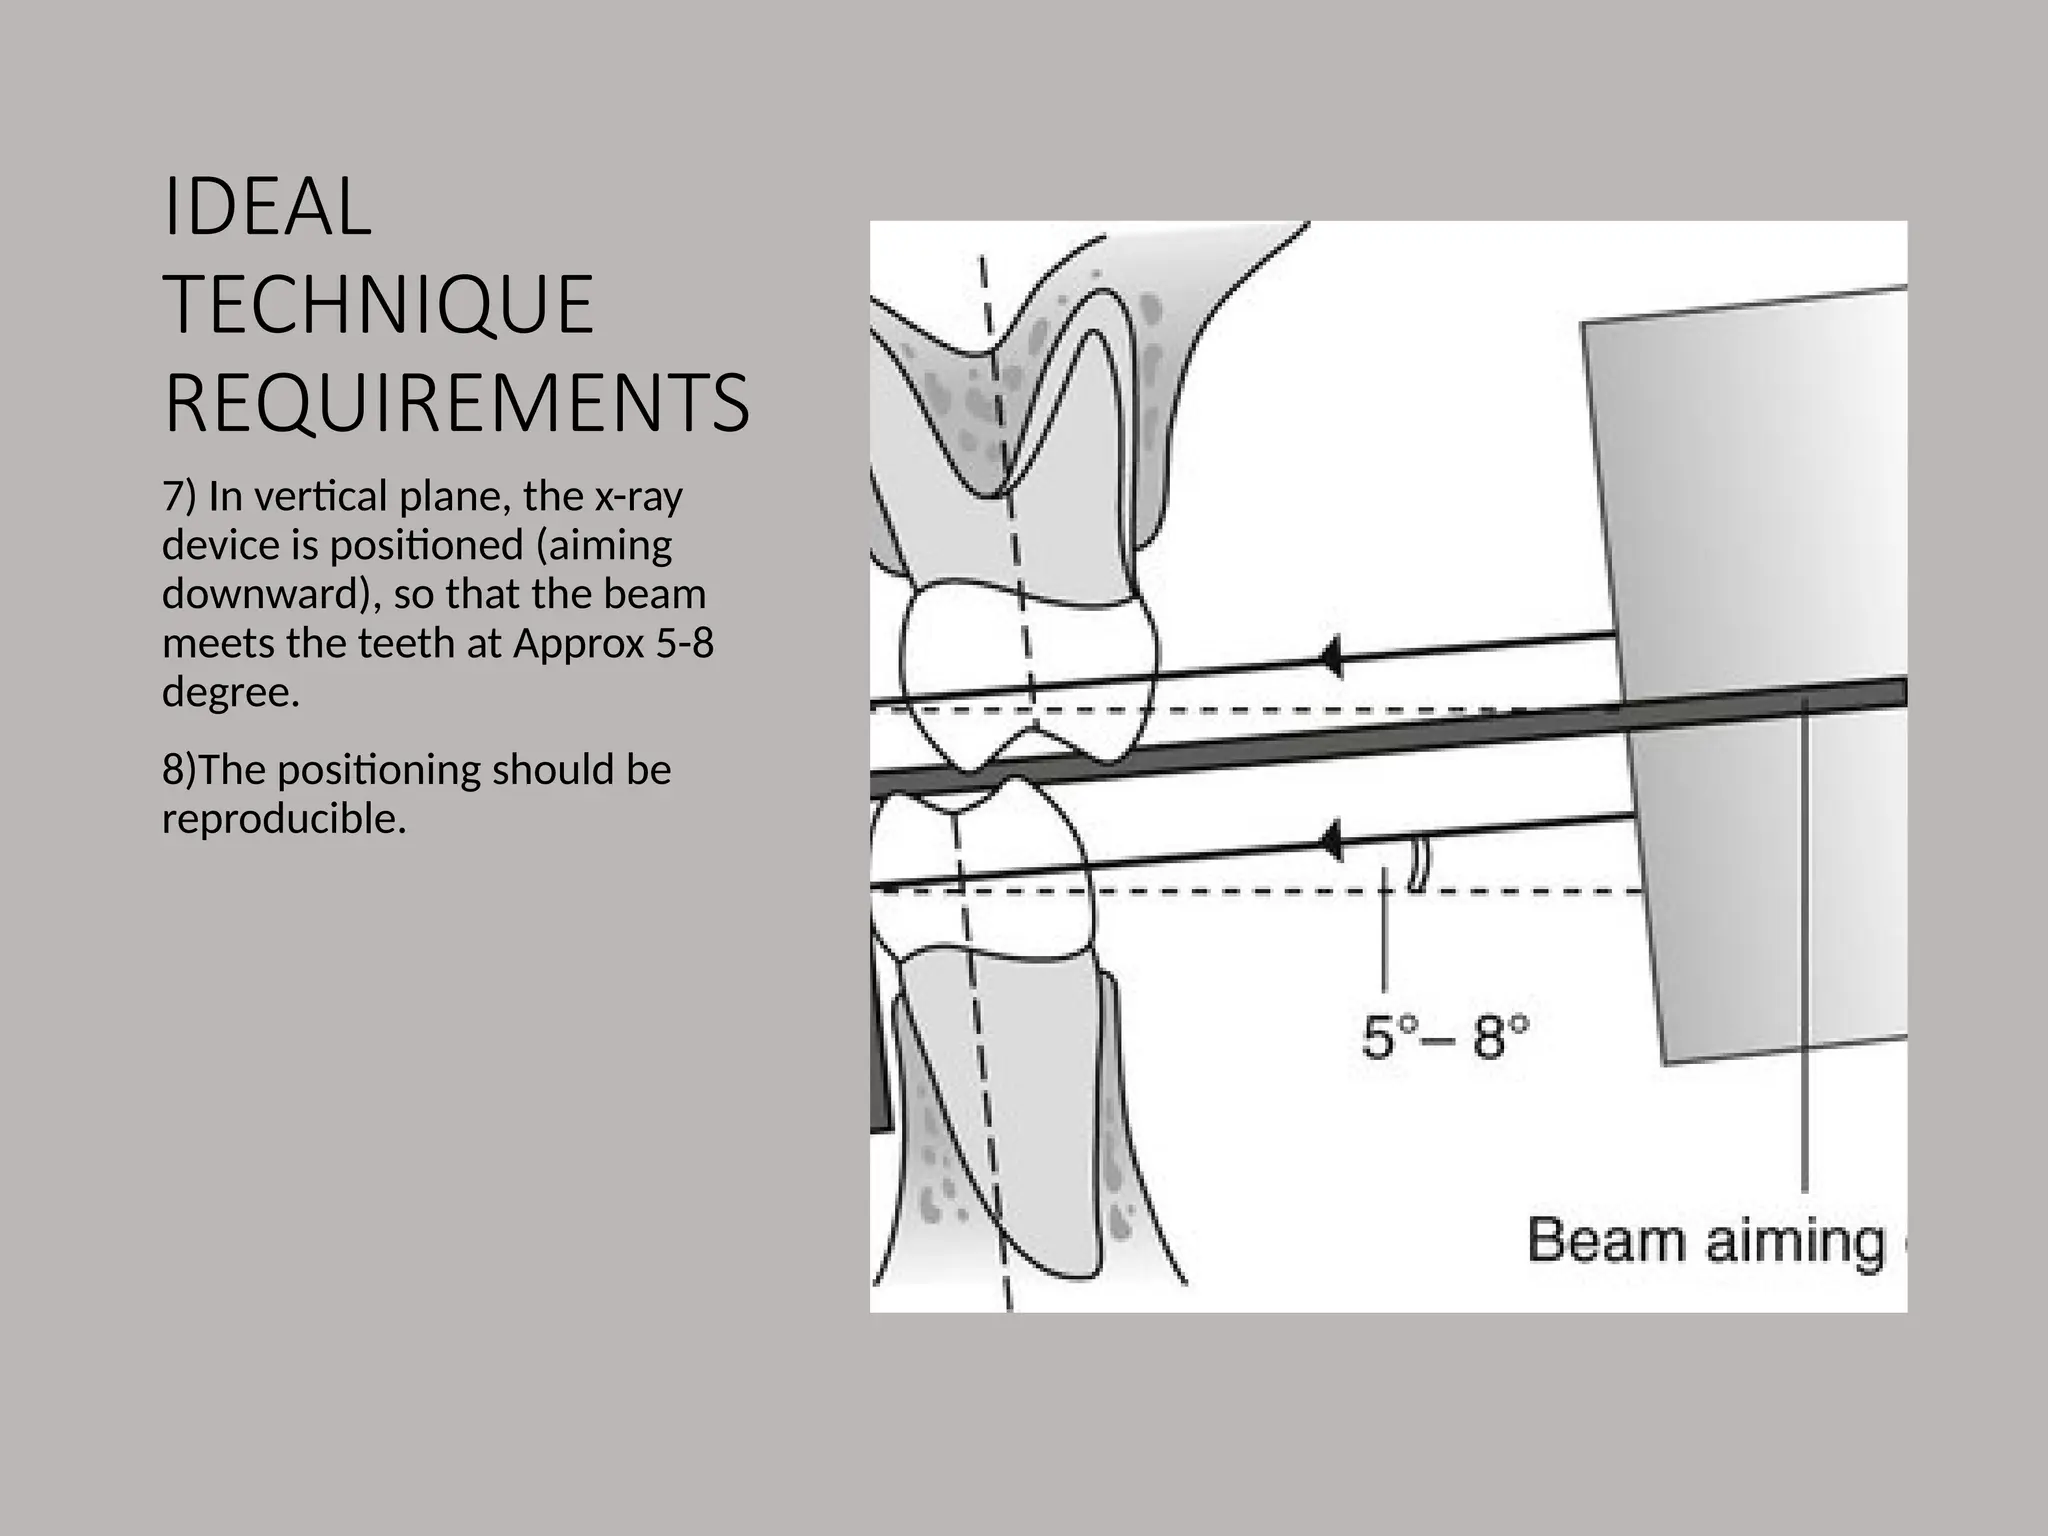
7) In verticalplane, the x-ray
device is positioned (aiming
downward), so that the beam
meets the teeth at Approx 5-8
degree.
8)The positioning should be
reproducible.
7.
POSITIONING
TECHNIQUES
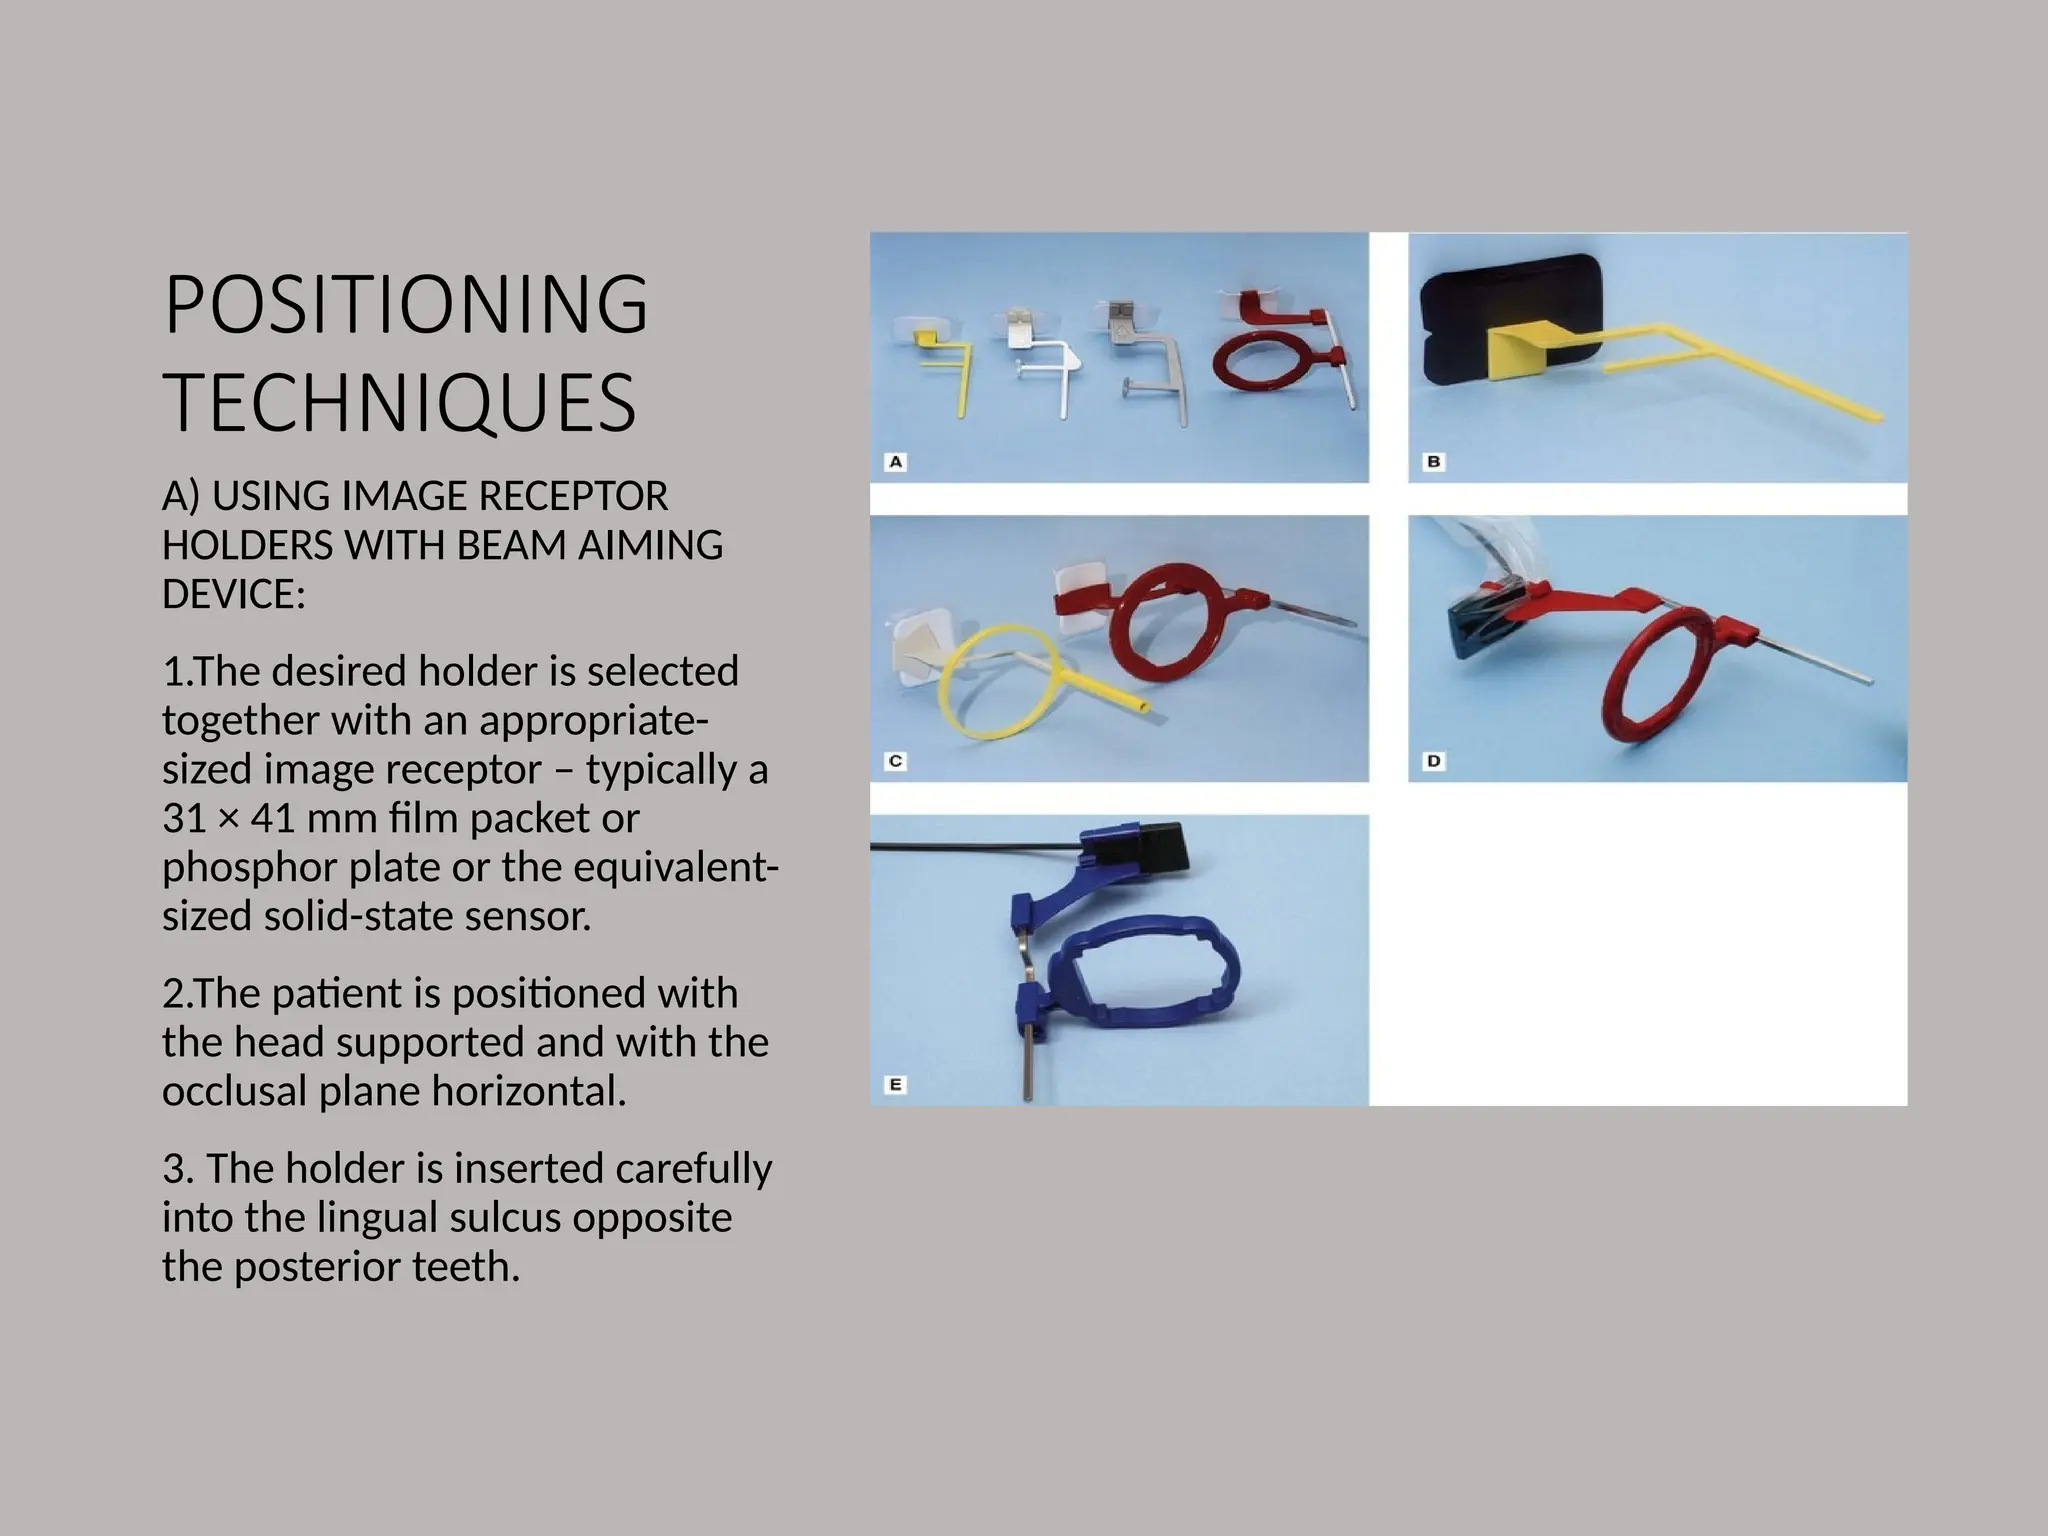
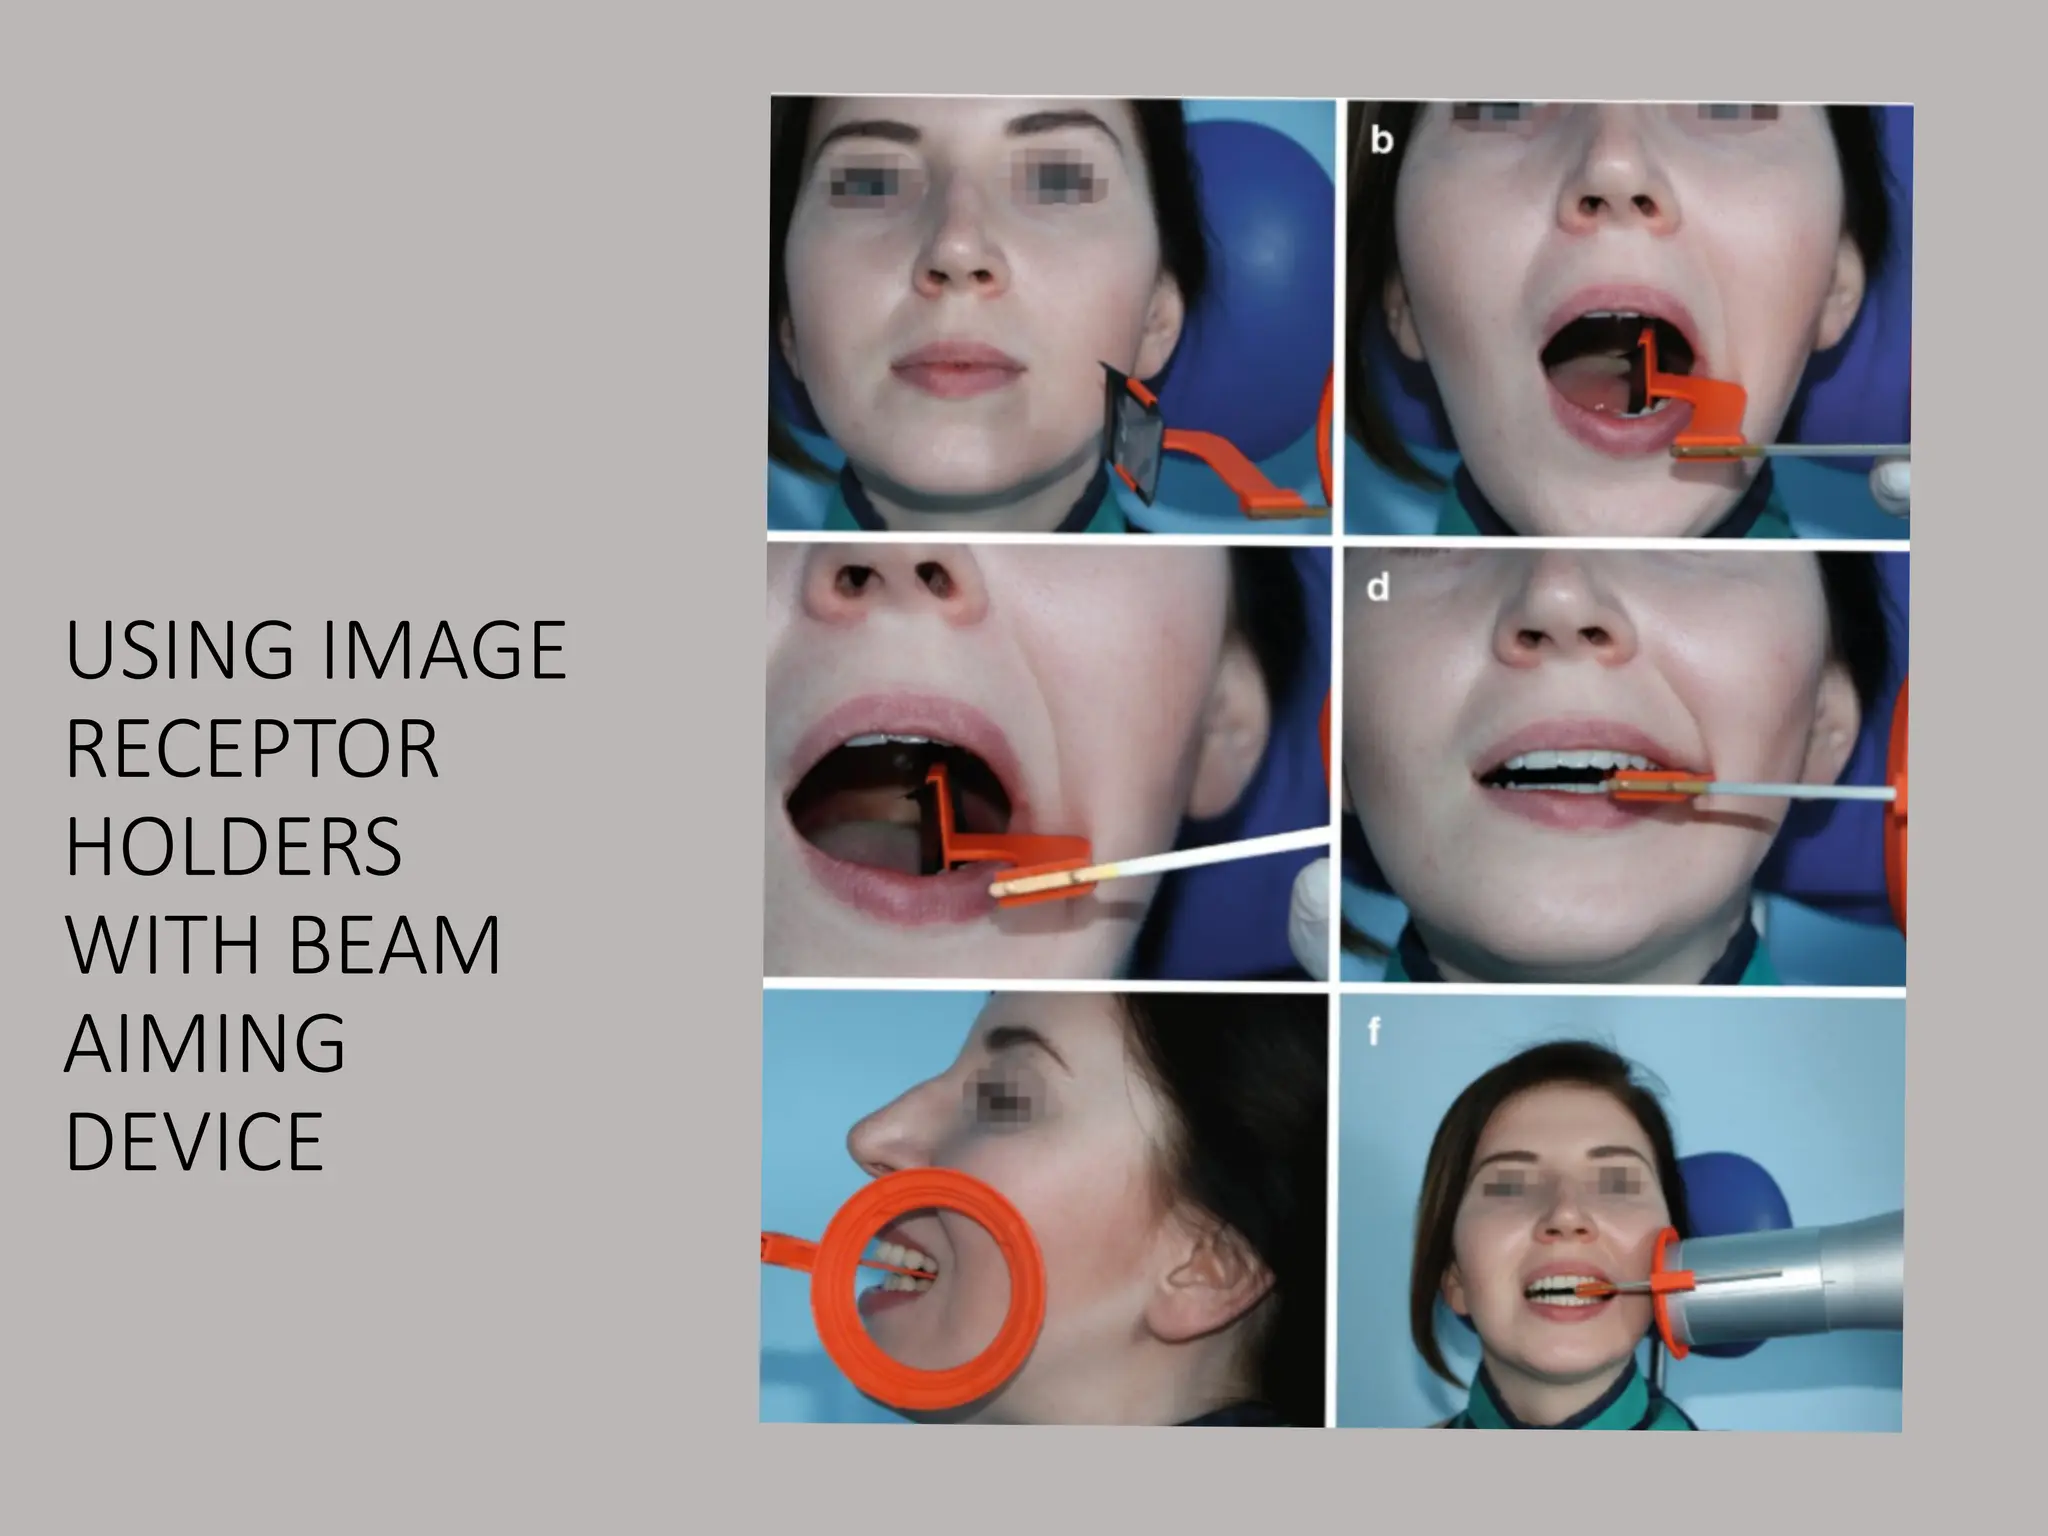
A) USING IMAGERECEPTOR
HOLDERS WITH BEAM AIMING
DEVICE:
1.The desired holder is selected
together with an appropriate-
sized image receptor – typically a
31 × 41 mm film packet or
phosphor plate or the equivalent-
sized solid-state sensor.
2.The patient is positioned with
the head supported and with the
occlusal plane horizontal.
3. The holder is inserted carefully
into the lingual sulcus opposite
the posterior teeth.
POSITIONING TECHNIQUES
4. Theanterior edge of the image
receptor should be positioned
opposite the distal aspect of the
lower canine – in this position the
image receptor extends usually just
beyond the mesial aspect of the
lower third molar.
5. The patient is asked to close the
teeth firmly together onto the bite
platform.
6.The X-ray tubehead is aligned
using the beam-aiming device to
achieve optimal horizontal and
vertical angulations.
7. The exposure is made.
10.
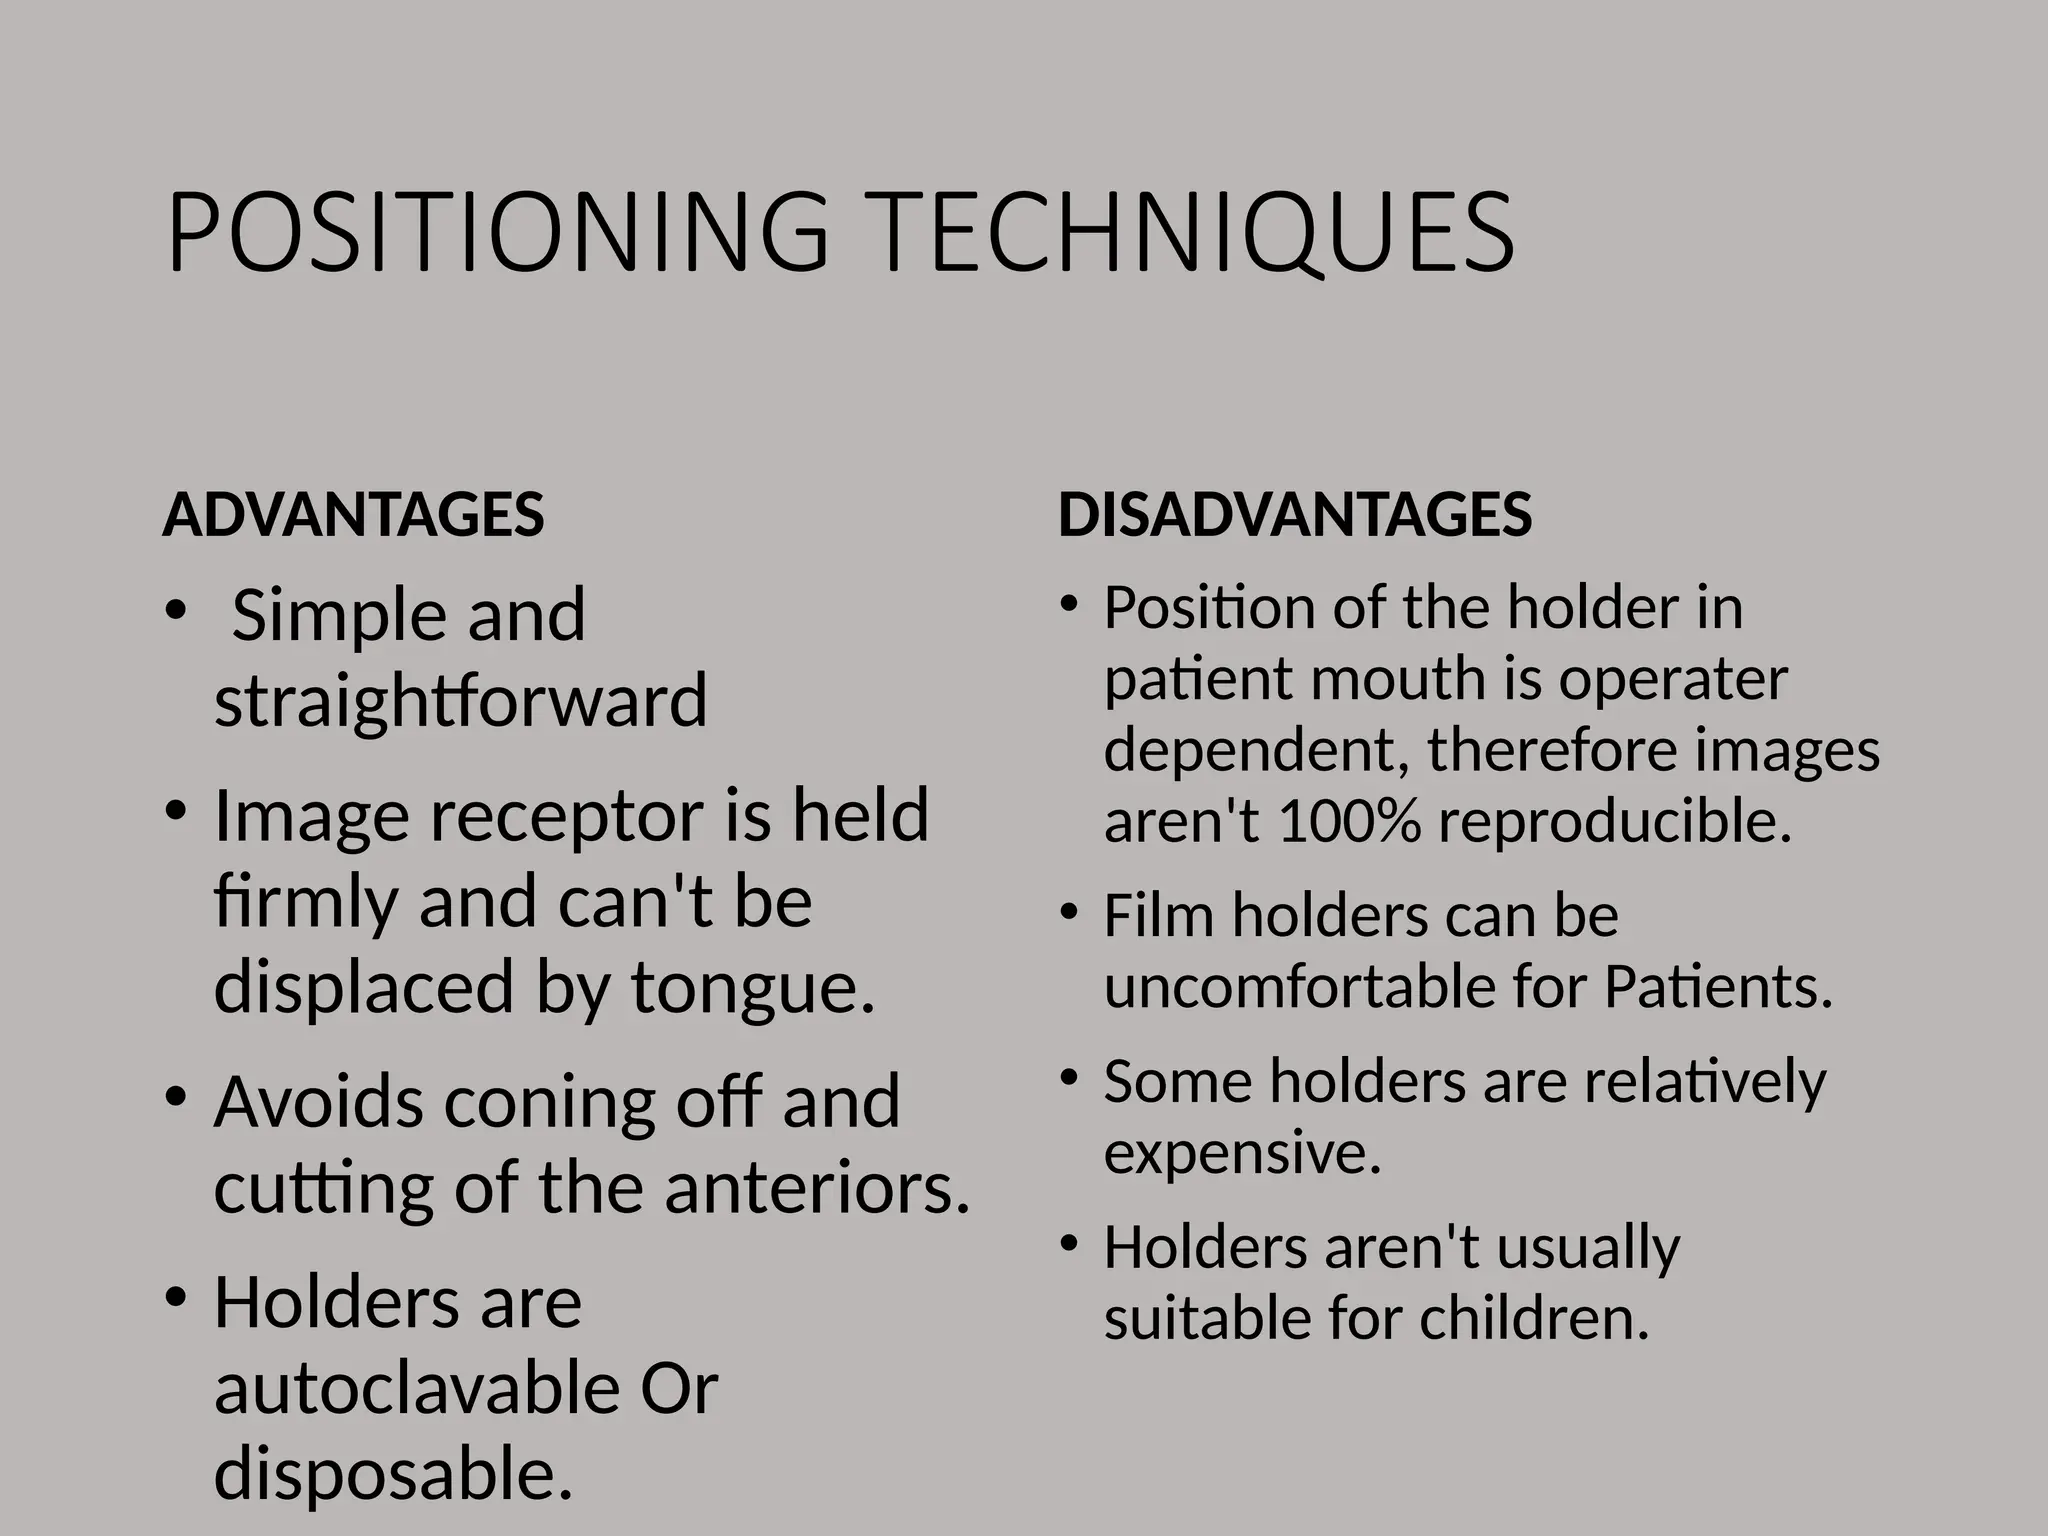
POSITIONING TECHNIQUES
ADVANTAGES
• Simpleand
straightforward
• Image receptor is held
firmly and can't be
displaced by tongue.
• Avoids coning off and
cutting of the anteriors.
• Holders are
autoclavable Or
disposable.
DISADVANTAGES
• Position of the holder in
patient mouth is operater
dependent, therefore images
aren't 100% reproducible.
• Film holders can be
uncomfortable for Patients.
• Some holders are relatively
expensive.
• Holders aren't usually
suitable for children.
11.
POSITIONING
TECHNIQUES
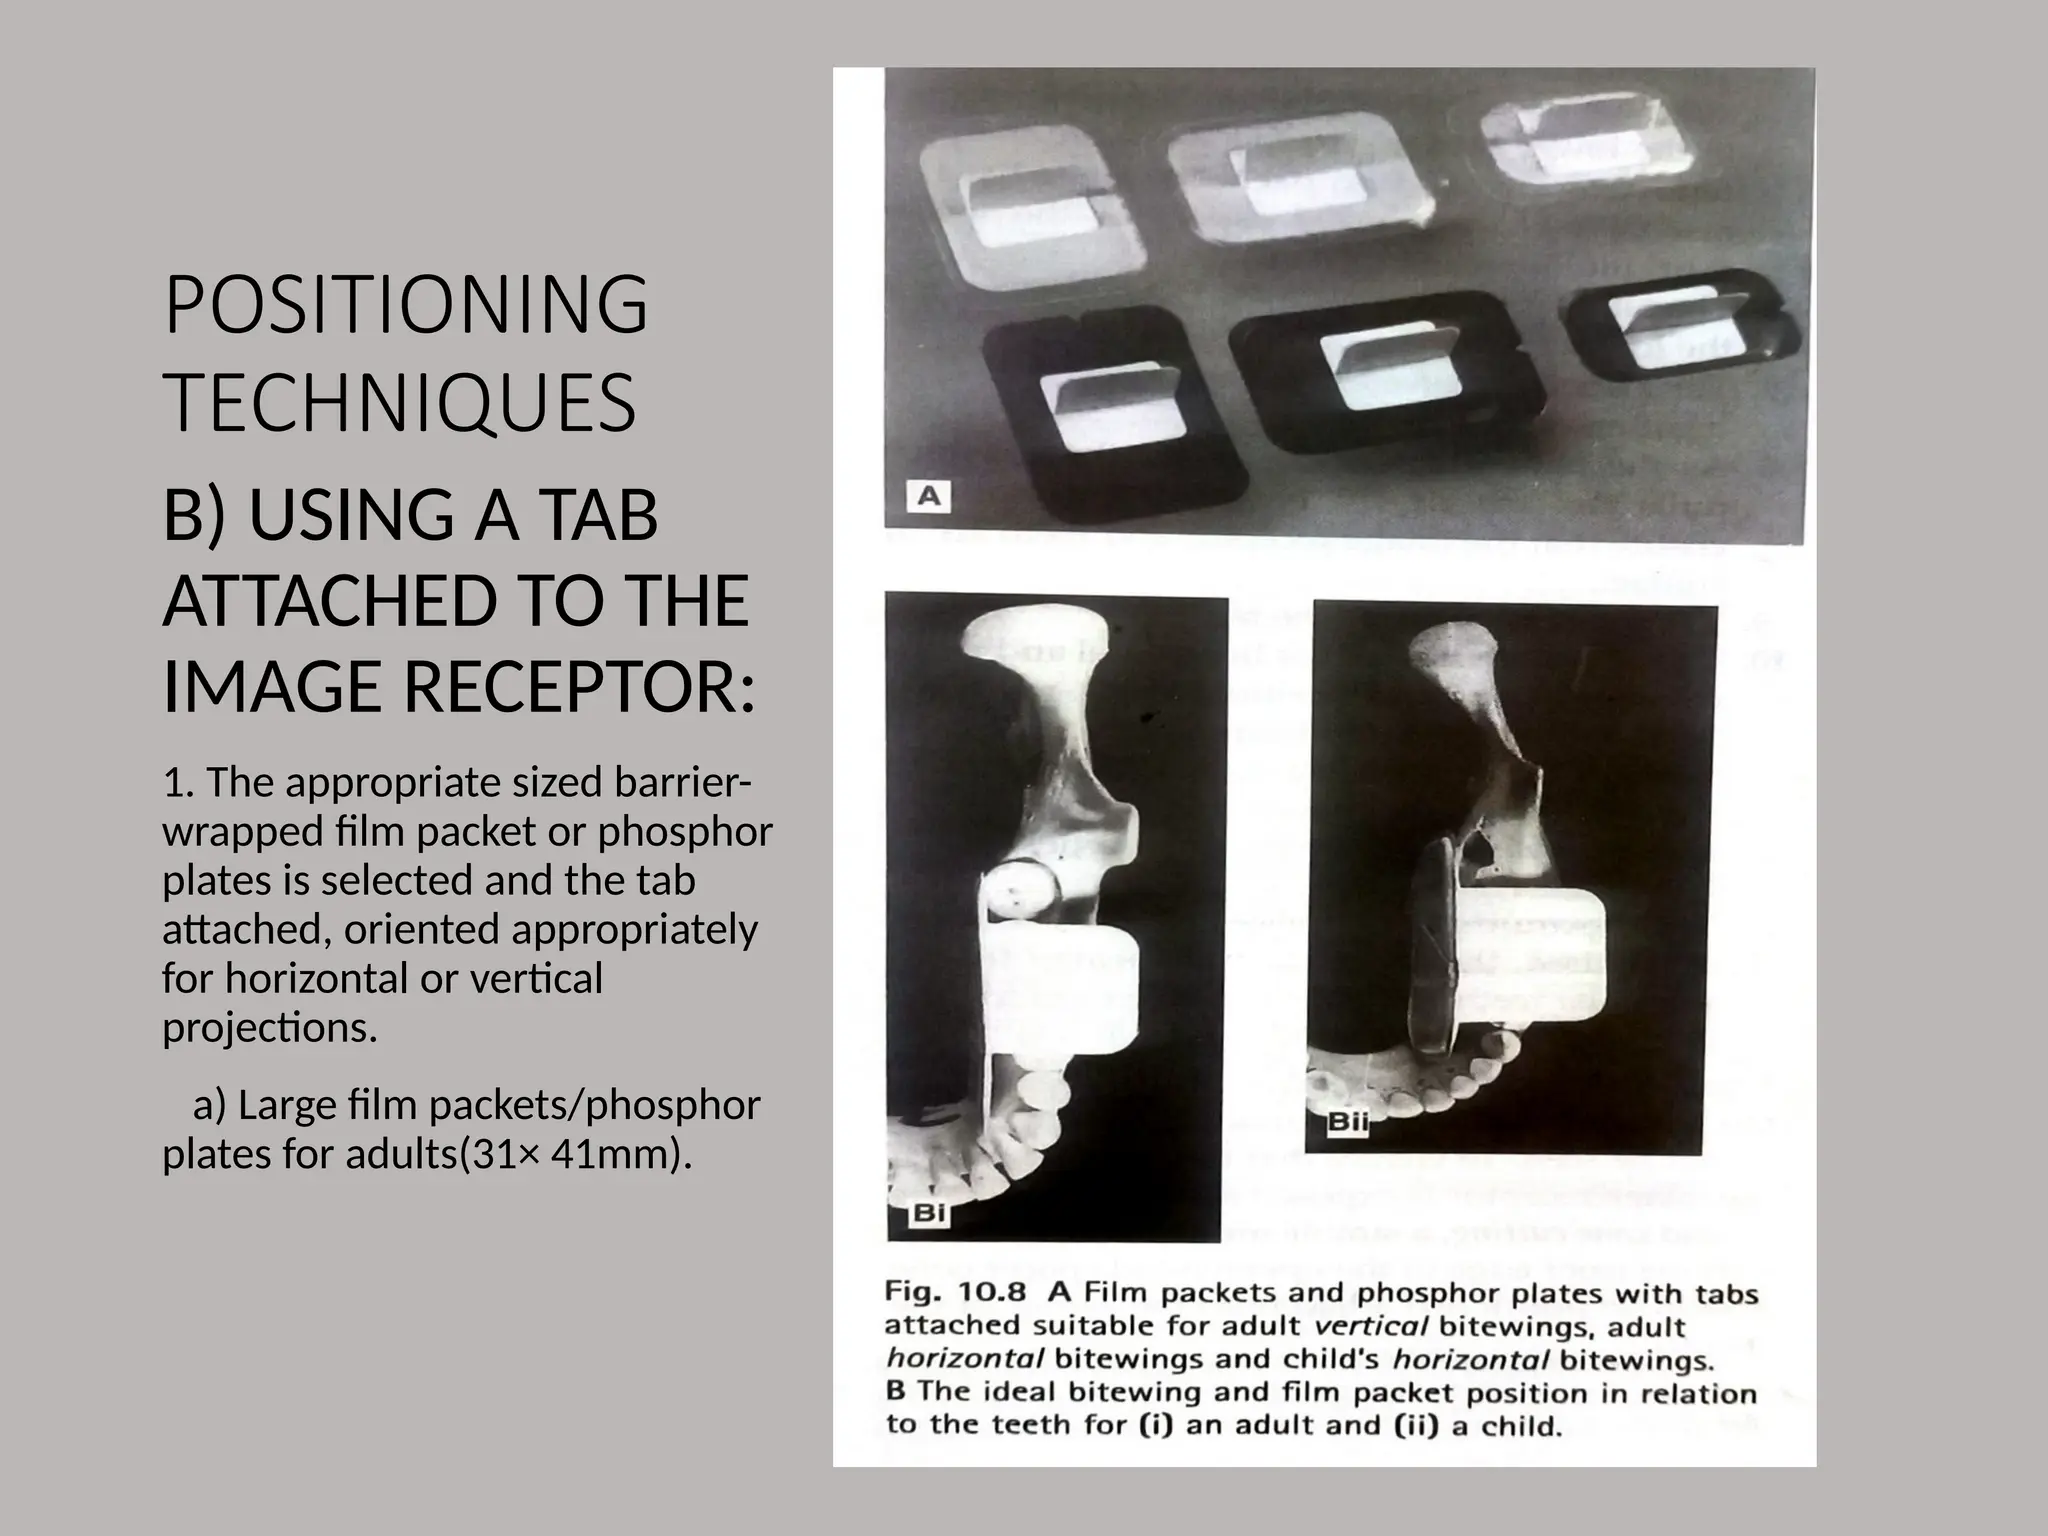
B) USING ATAB
ATTACHED TO THE
IMAGE RECEPTOR:
1. The appropriate sized barrier-
wrapped film packet or phosphor
plates is selected and the tab
attached, oriented appropriately
for horizontal or vertical
projections.
a) Large film packets/phosphor
plates for adults(31× 41mm).
12.
USING A TABATTACHED TO THE
IMAGE RECEPTOR
B) Small film packets/phosphr
plates(22×35mm) for children.
2. The patient is positioned with
the head supported and with the
occlusal plane horizontal.
3. The shape of the dental arch and
the no. Of films required are
assesed.
4. The operator holds the tab
between thumb and forefinger and
inserts the image receptor into the
lingual sulcus opposite the
posterior teeth.
5. The tab is placed on to the occlusal
surfaces of the lower teeth.
6. The pt is asked to close the teeth
firmly together on the tab.
7.The operator pulls the tab firmly
between the teeth to ensure that the
image receptor and teeth are in
contact.
8. The opertor releases the tab and
assess the horizontal and vertical
angulations and positions the x-ray
tubehead, so that x-ray beam is
directled perpendicular to the teeth
and image receptor.
9. The exposure is made.
13.
USING A TABATTACHED TO THE
IMAGE RECEPTOR
• ADVANTAGES
1. Simple
2. Inexpensive
3. The tabs are disposable so no
extra cross infection control
procedures required.
4. Can be used easily in children.
• DISADVANTAGES
1. Arbitrary, operater dependent
assessment and vertical angulations
of the x-ray tubehead.
2. Images not accurately
reproducible, not ideal for
monitoring for caries progression.
3. Coning off or come cutting of
anterior part of image receptor is
common.
4. Not compatible with using solid
state digital sensors.
5. The tongue can easily displace the
image receptors.