Apache Spark 2x Cookbook Cloudready Recipes For Analytics And Data Science 2nd Rishi Yadav
Apache Spark 2x Cookbook Cloudready Recipes For Analytics And Data Science 2nd Rishi Yadav
Apache Spark 2x Cookbook Cloudready Recipes For Analytics And Data Science 2nd Rishi Yadav


![s3.zettabytes.com
s4.zettabytes.com
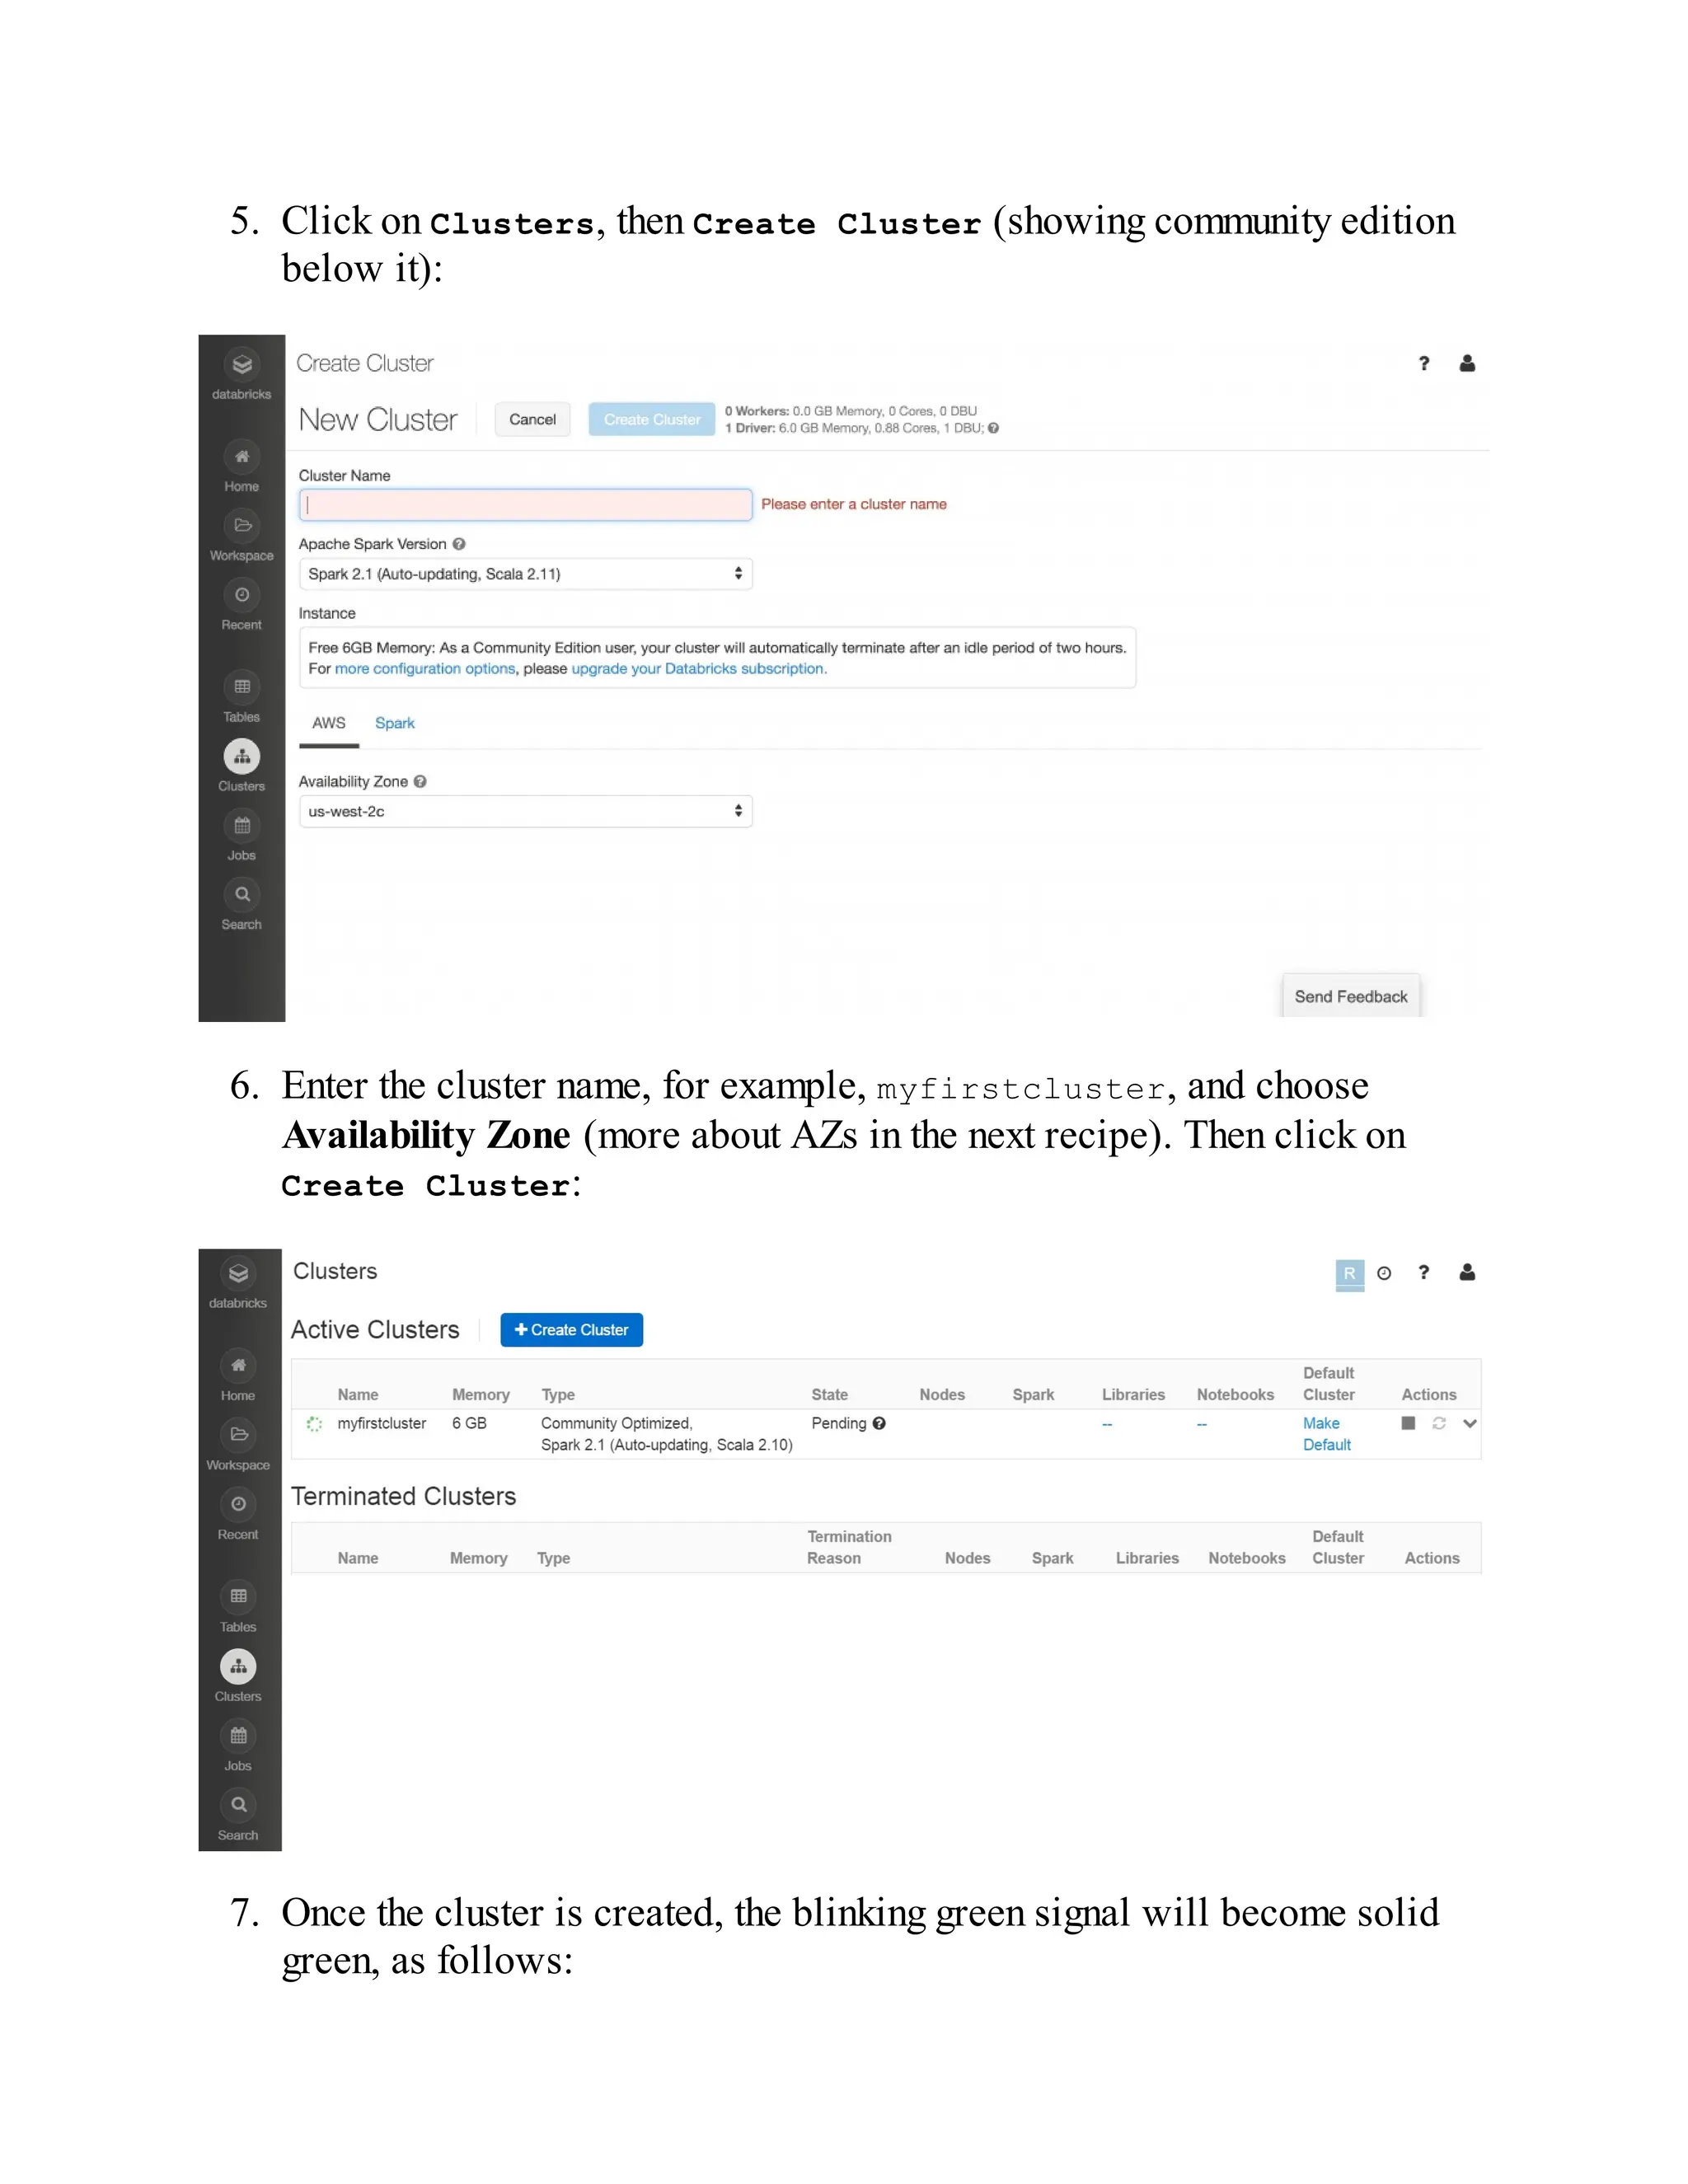
s5.zettabytes.com
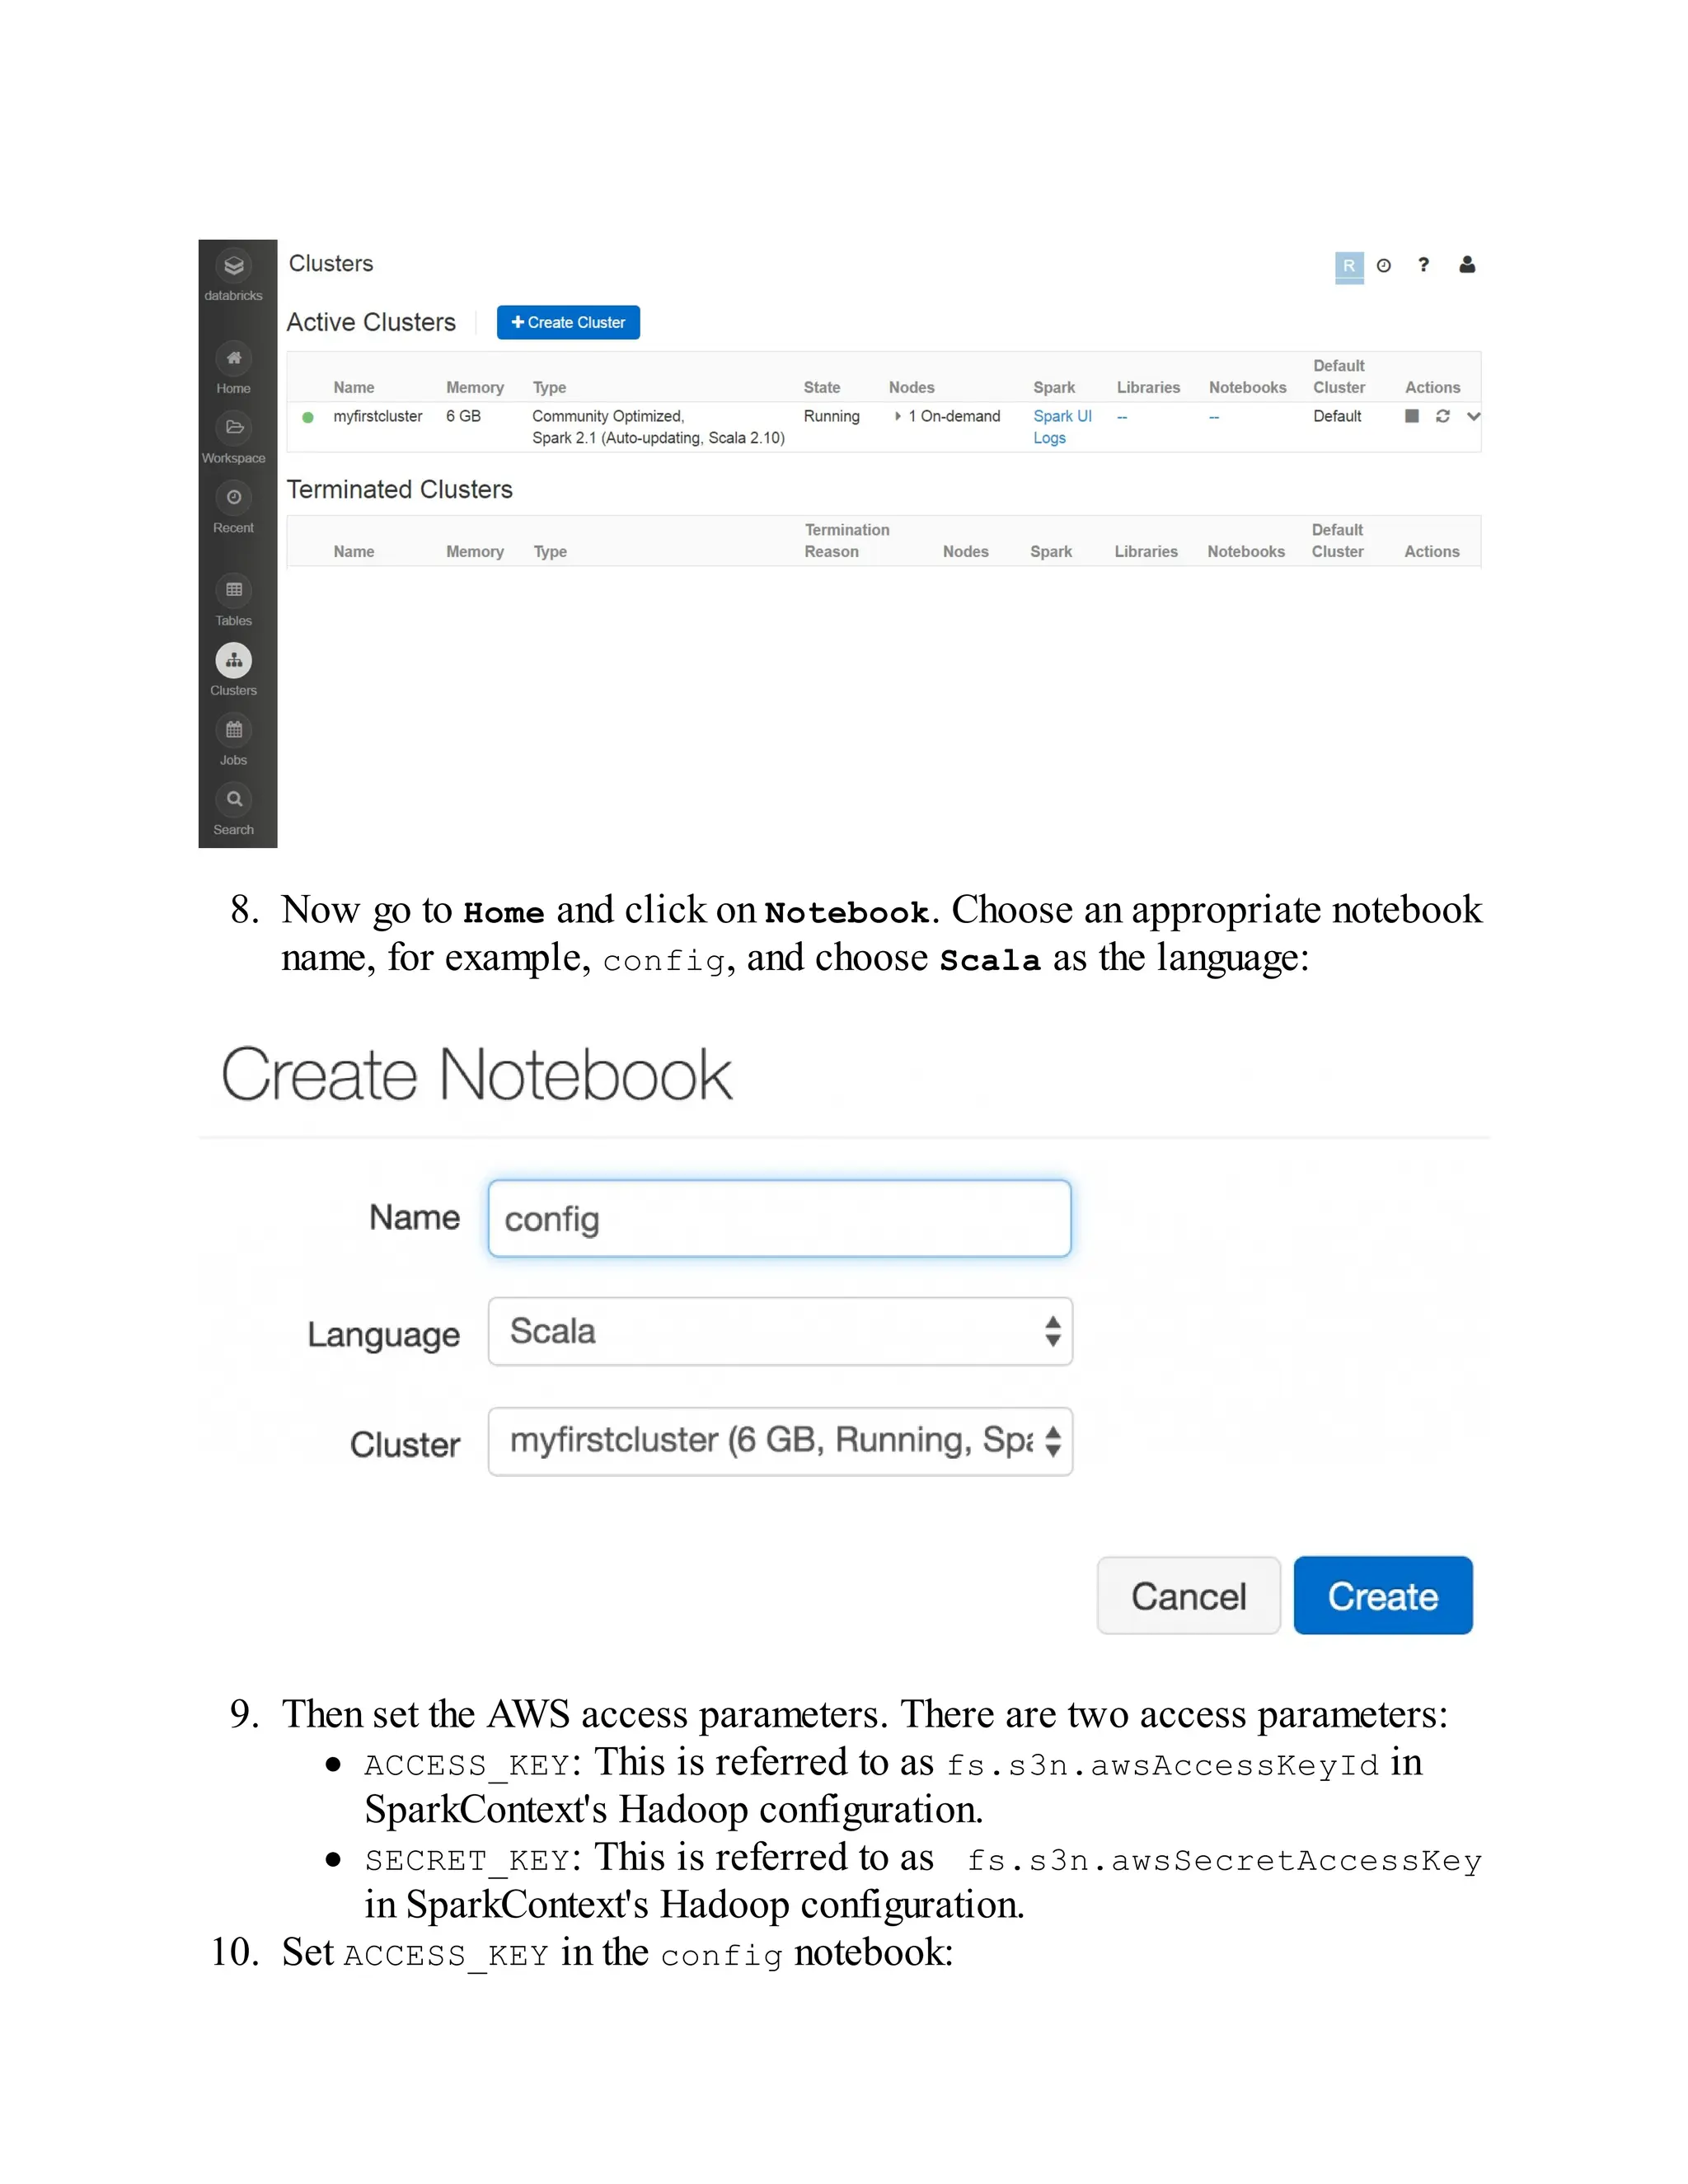
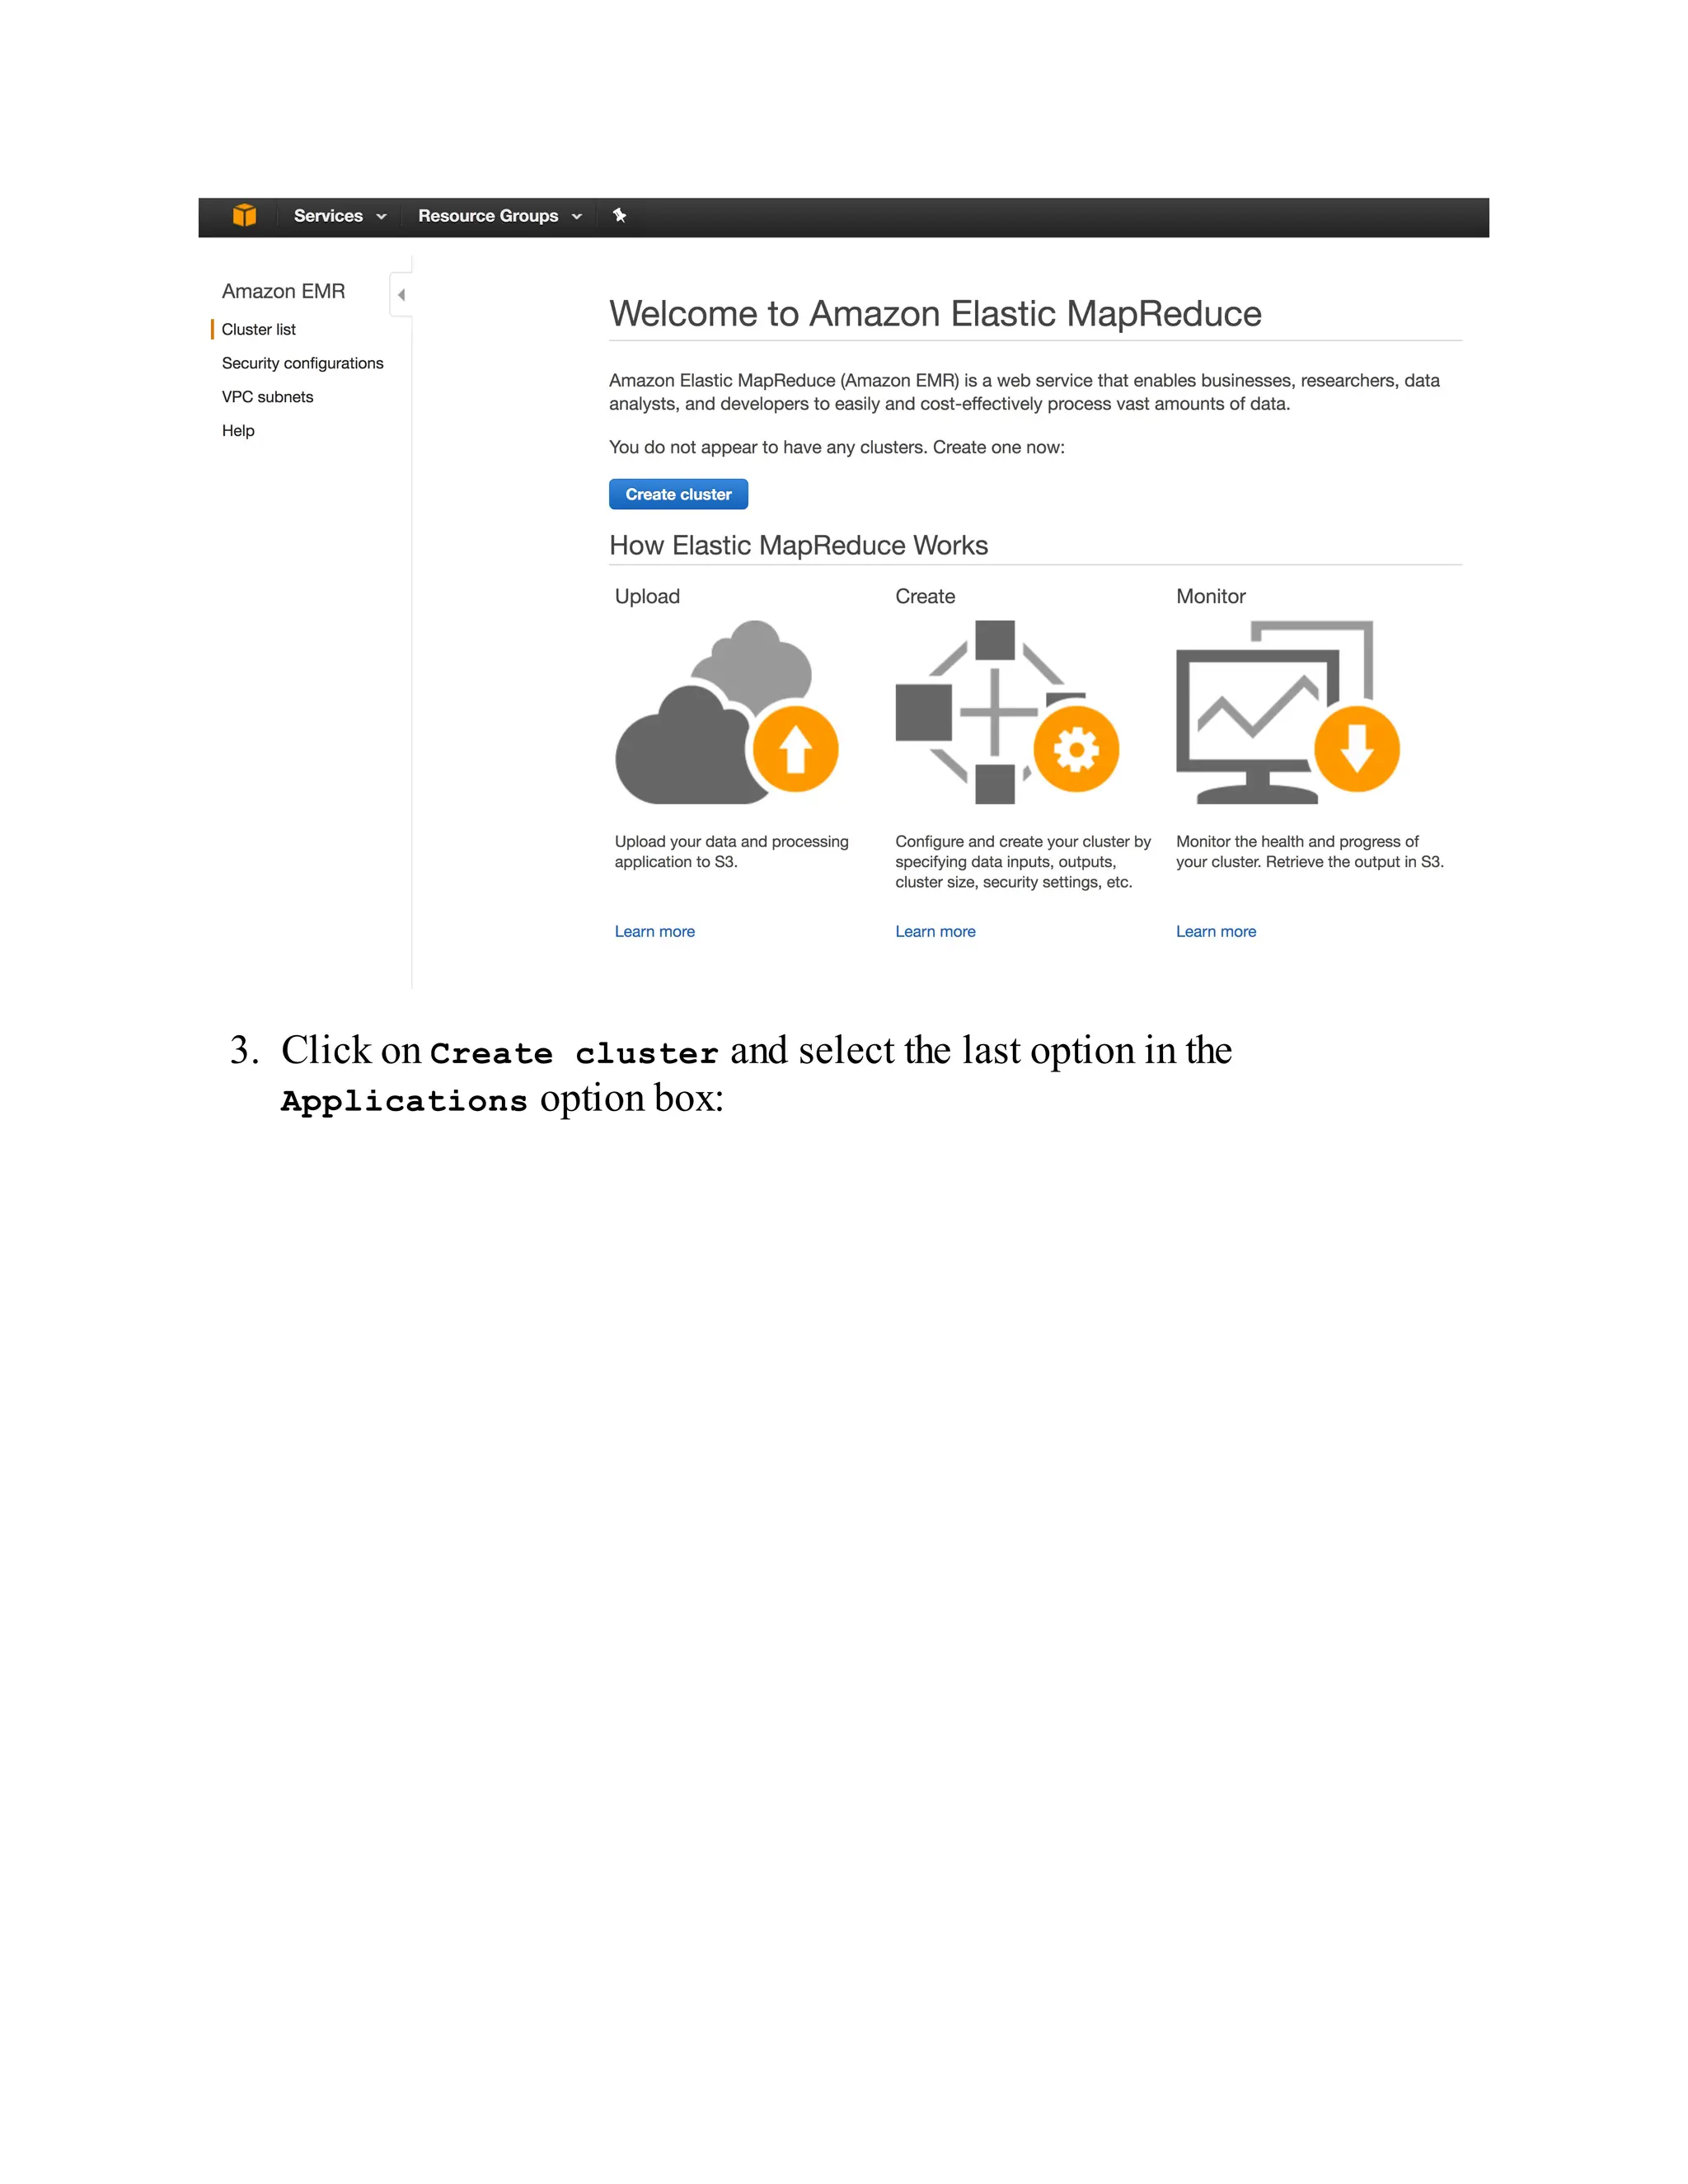
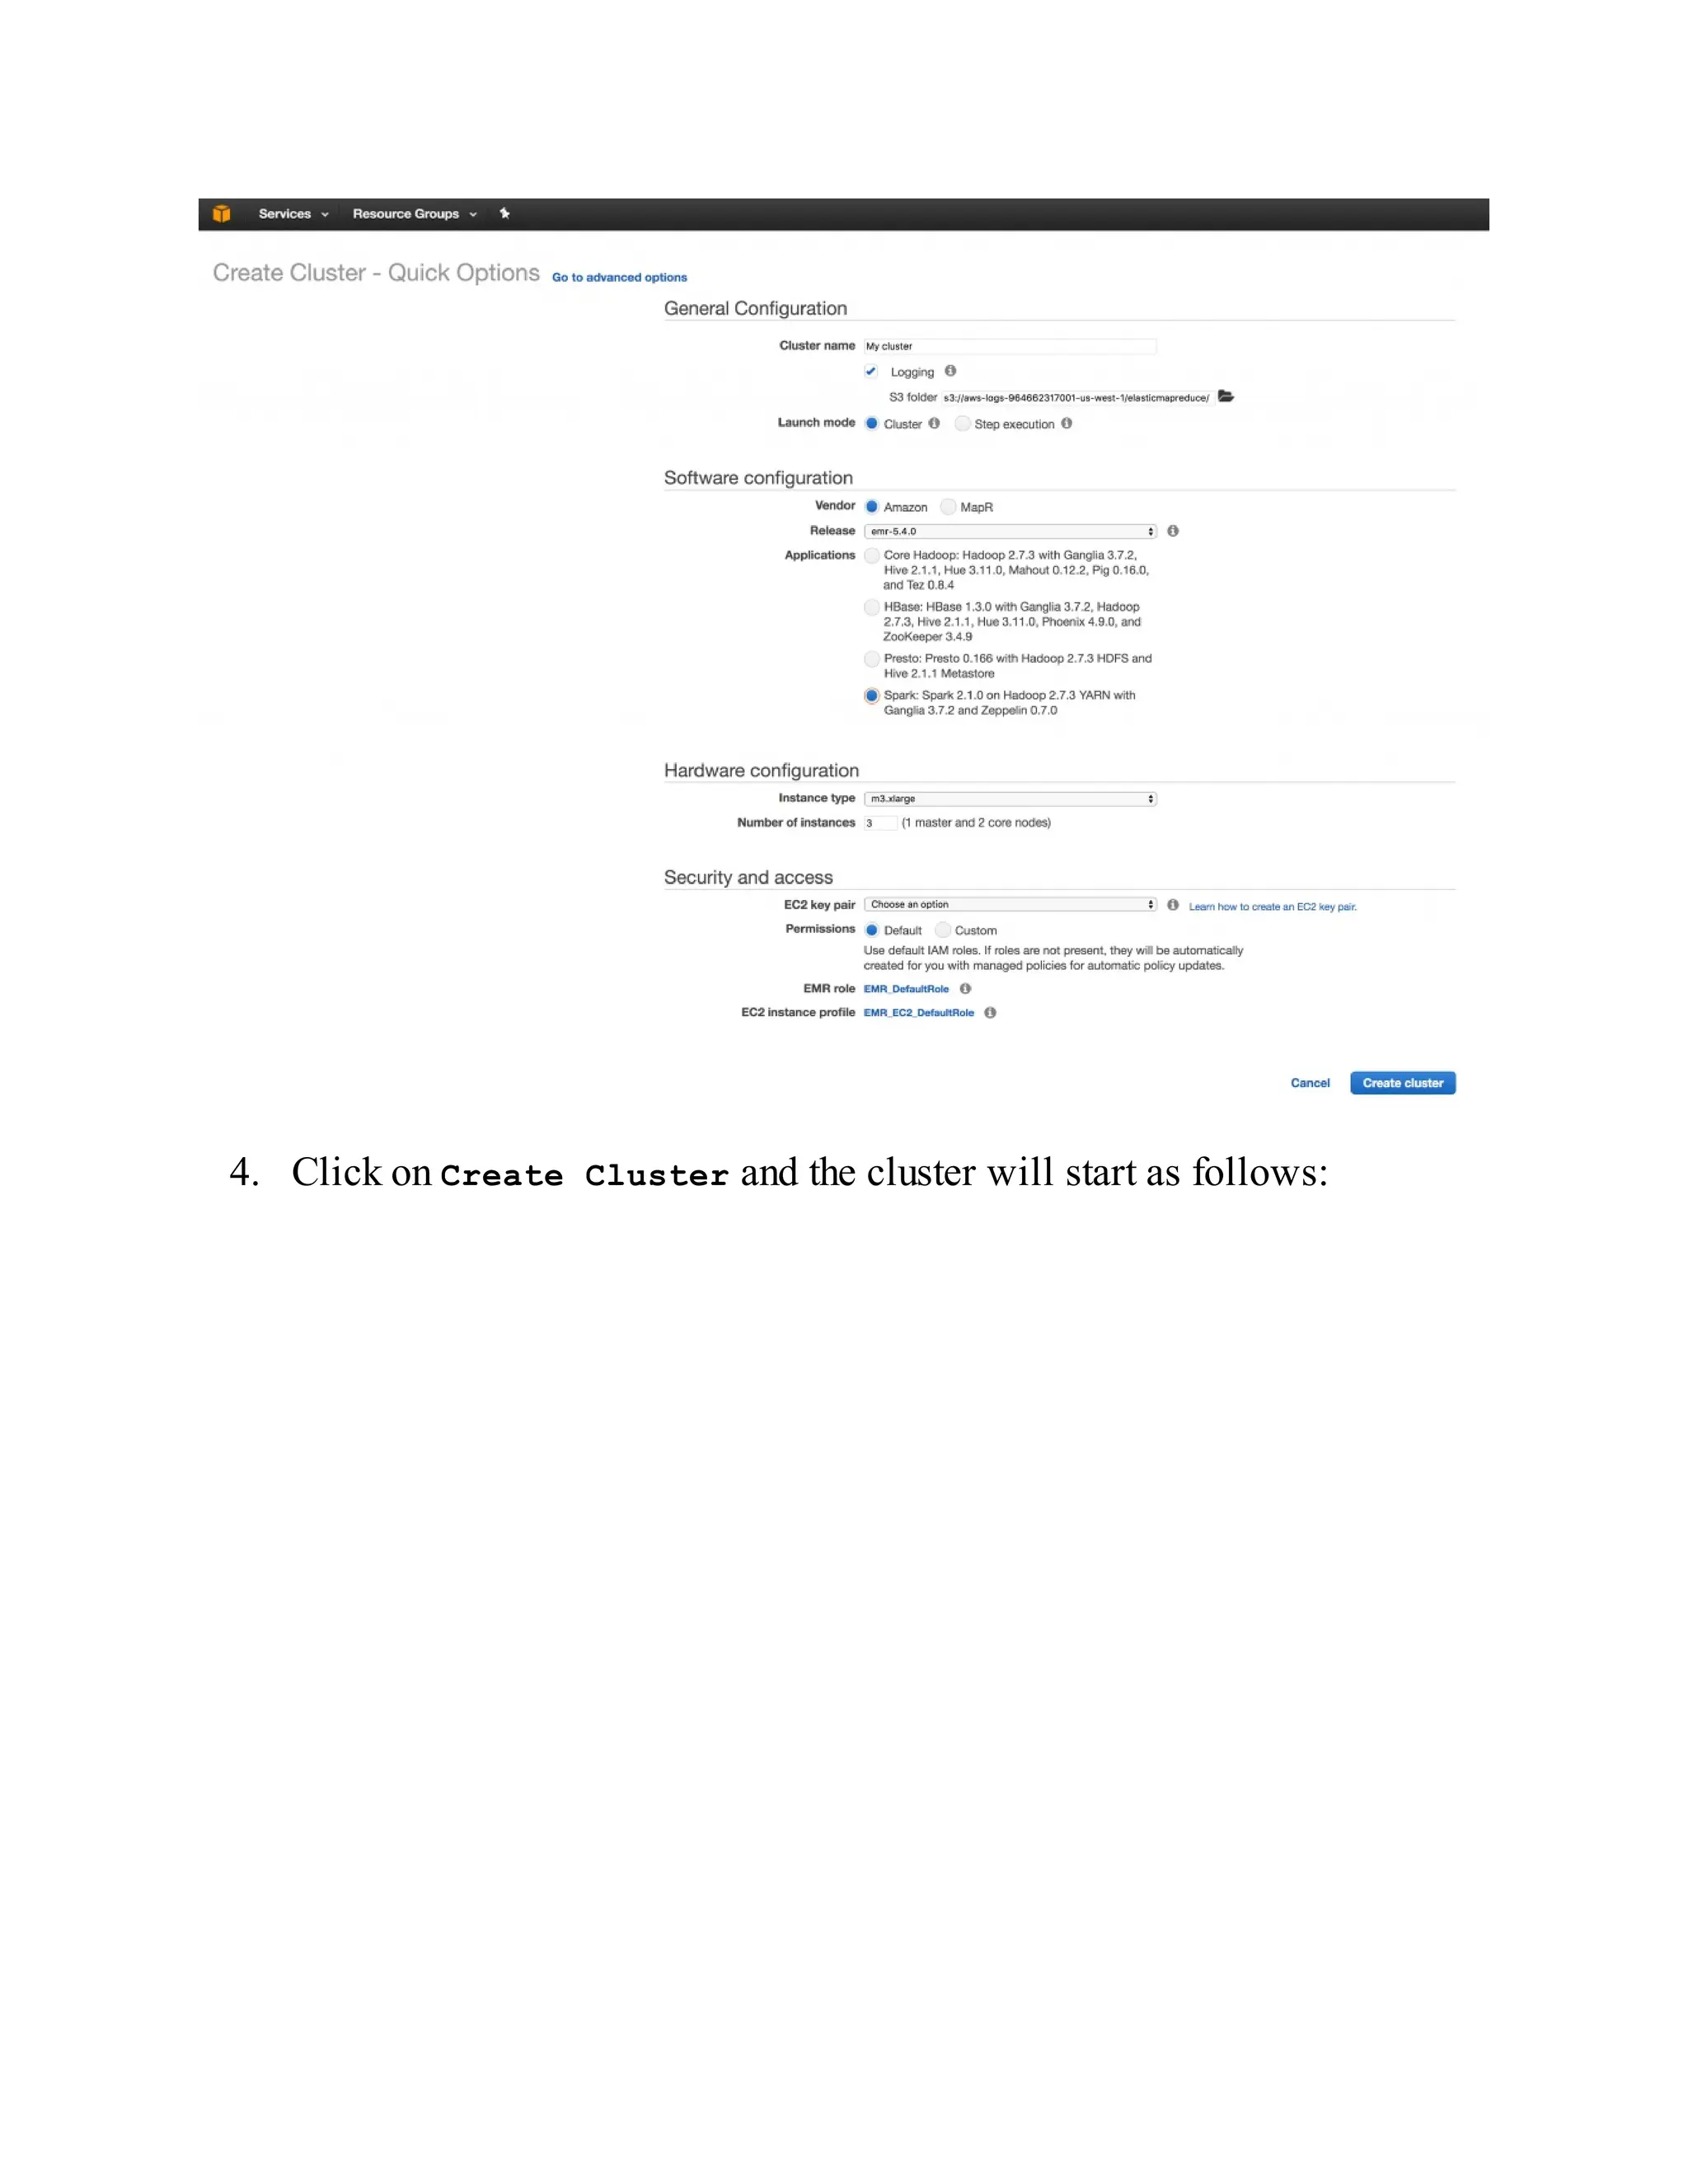
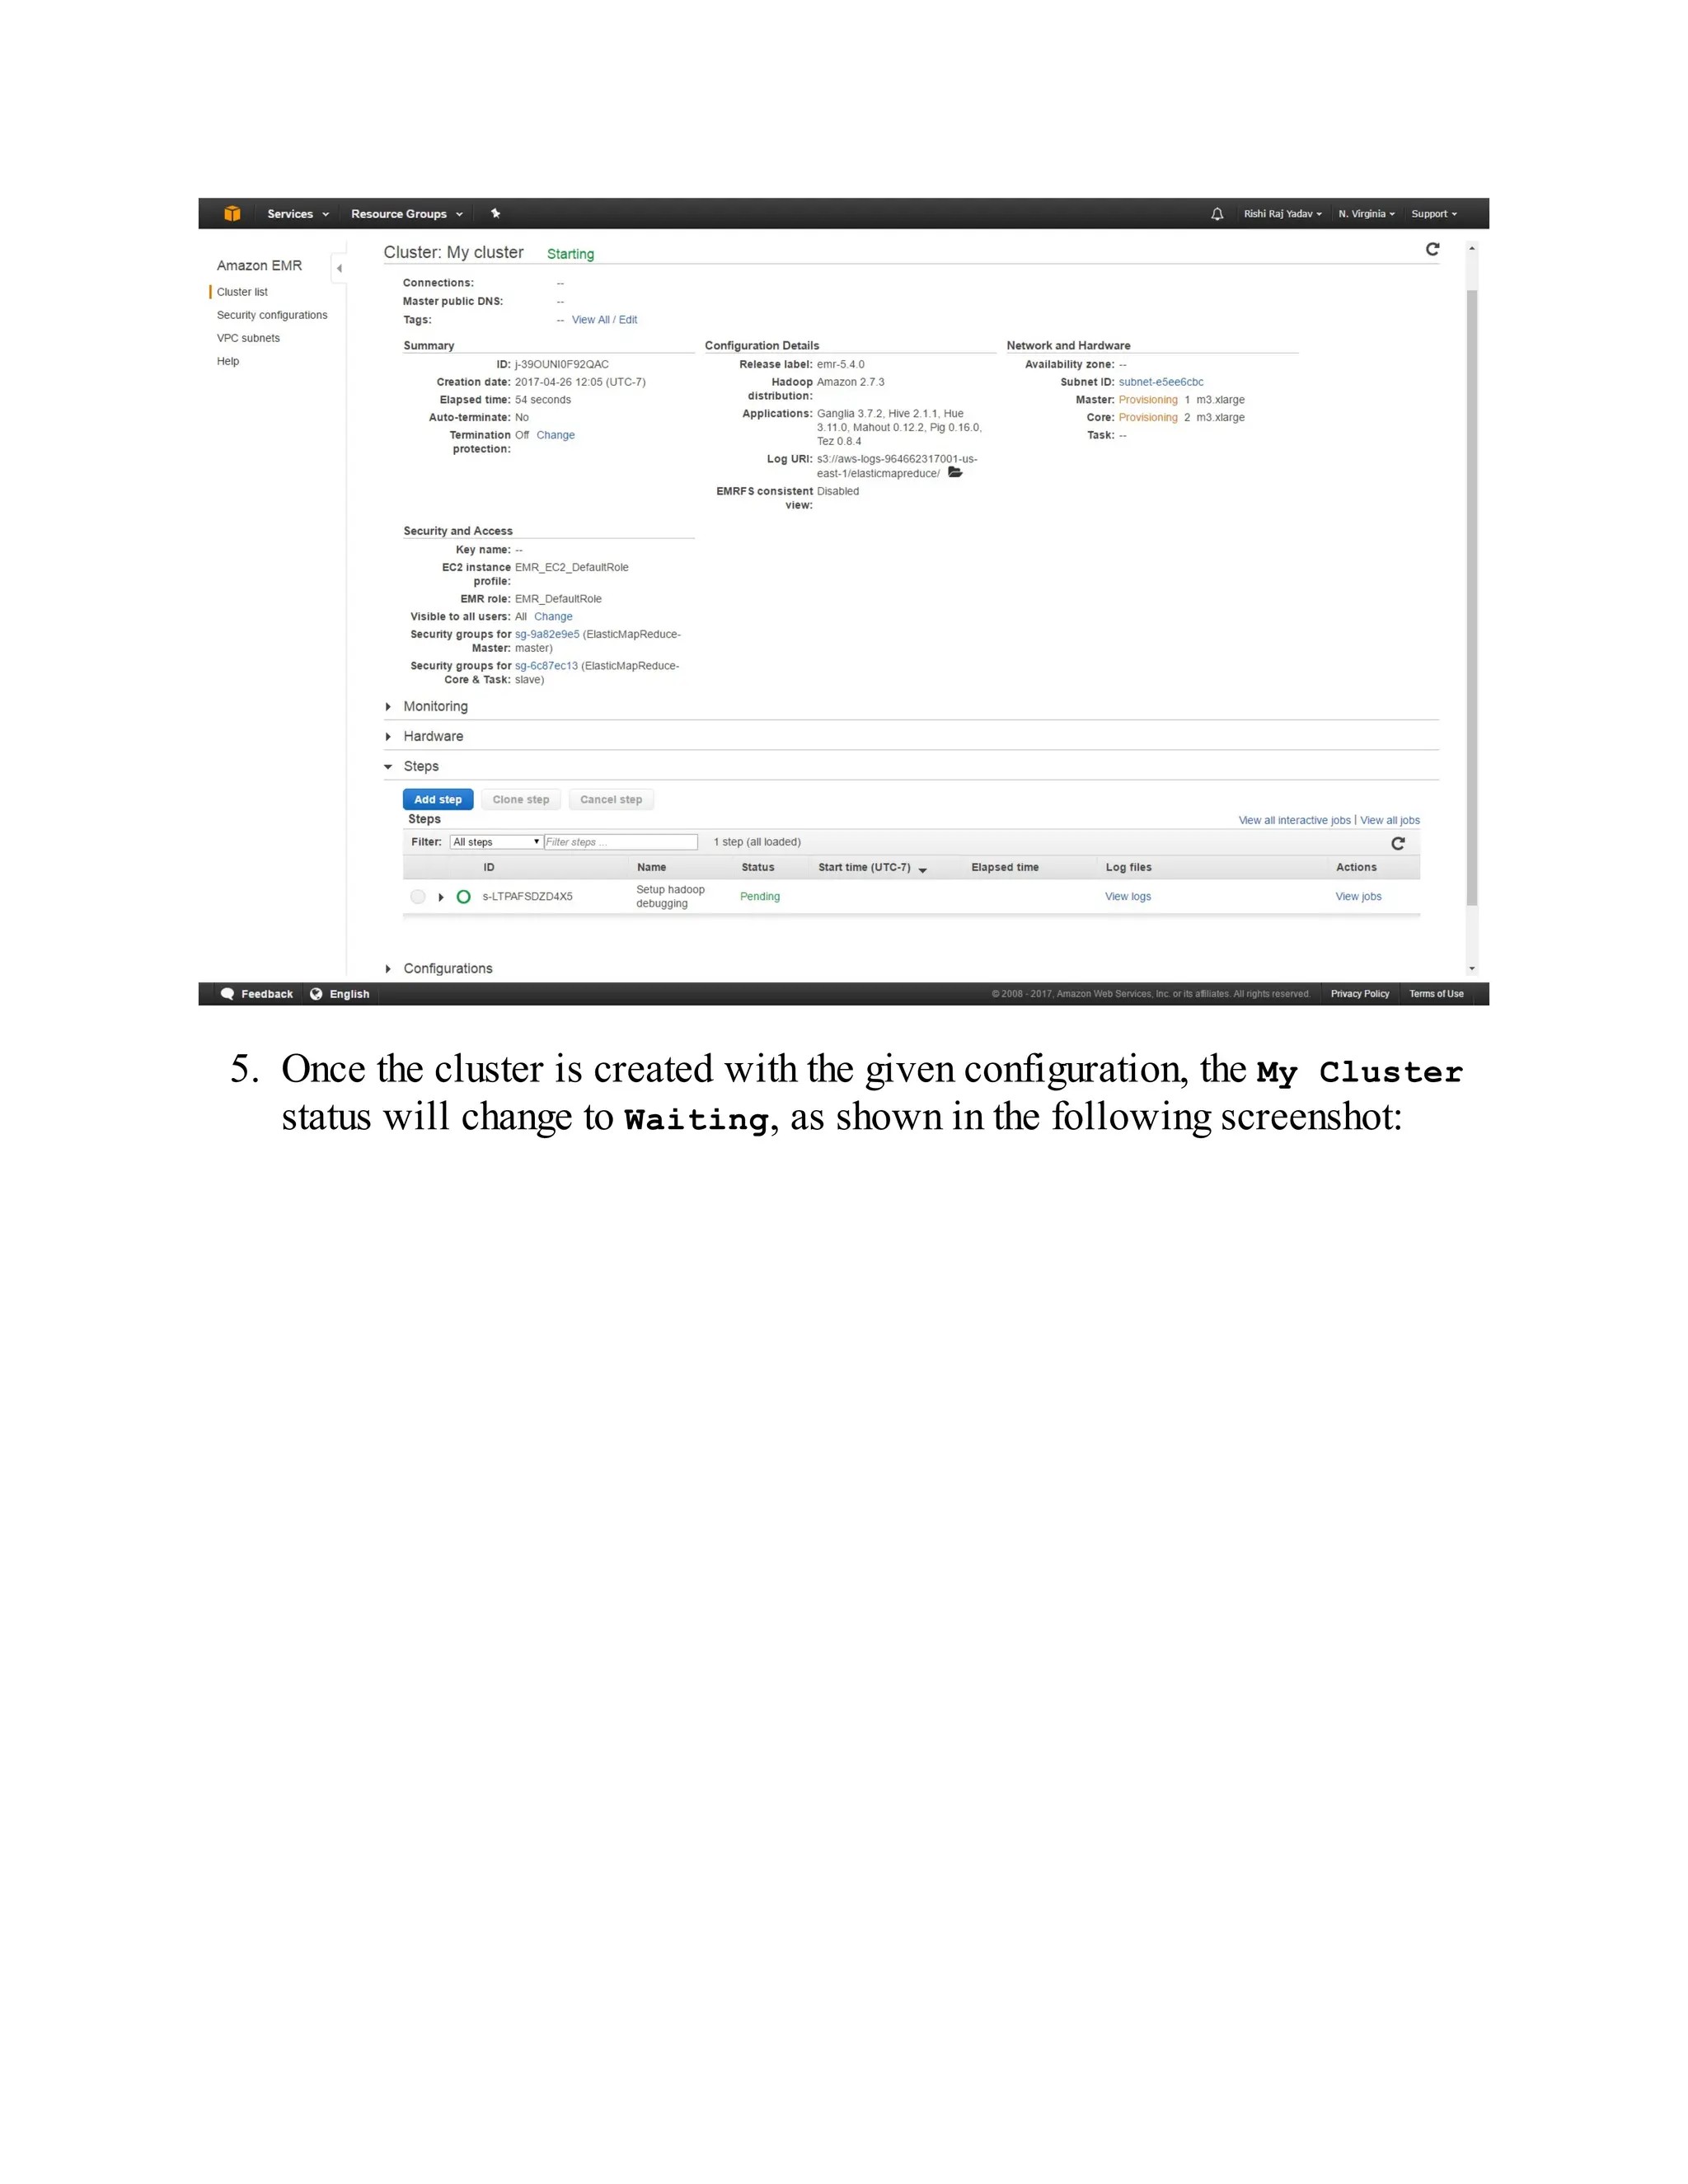
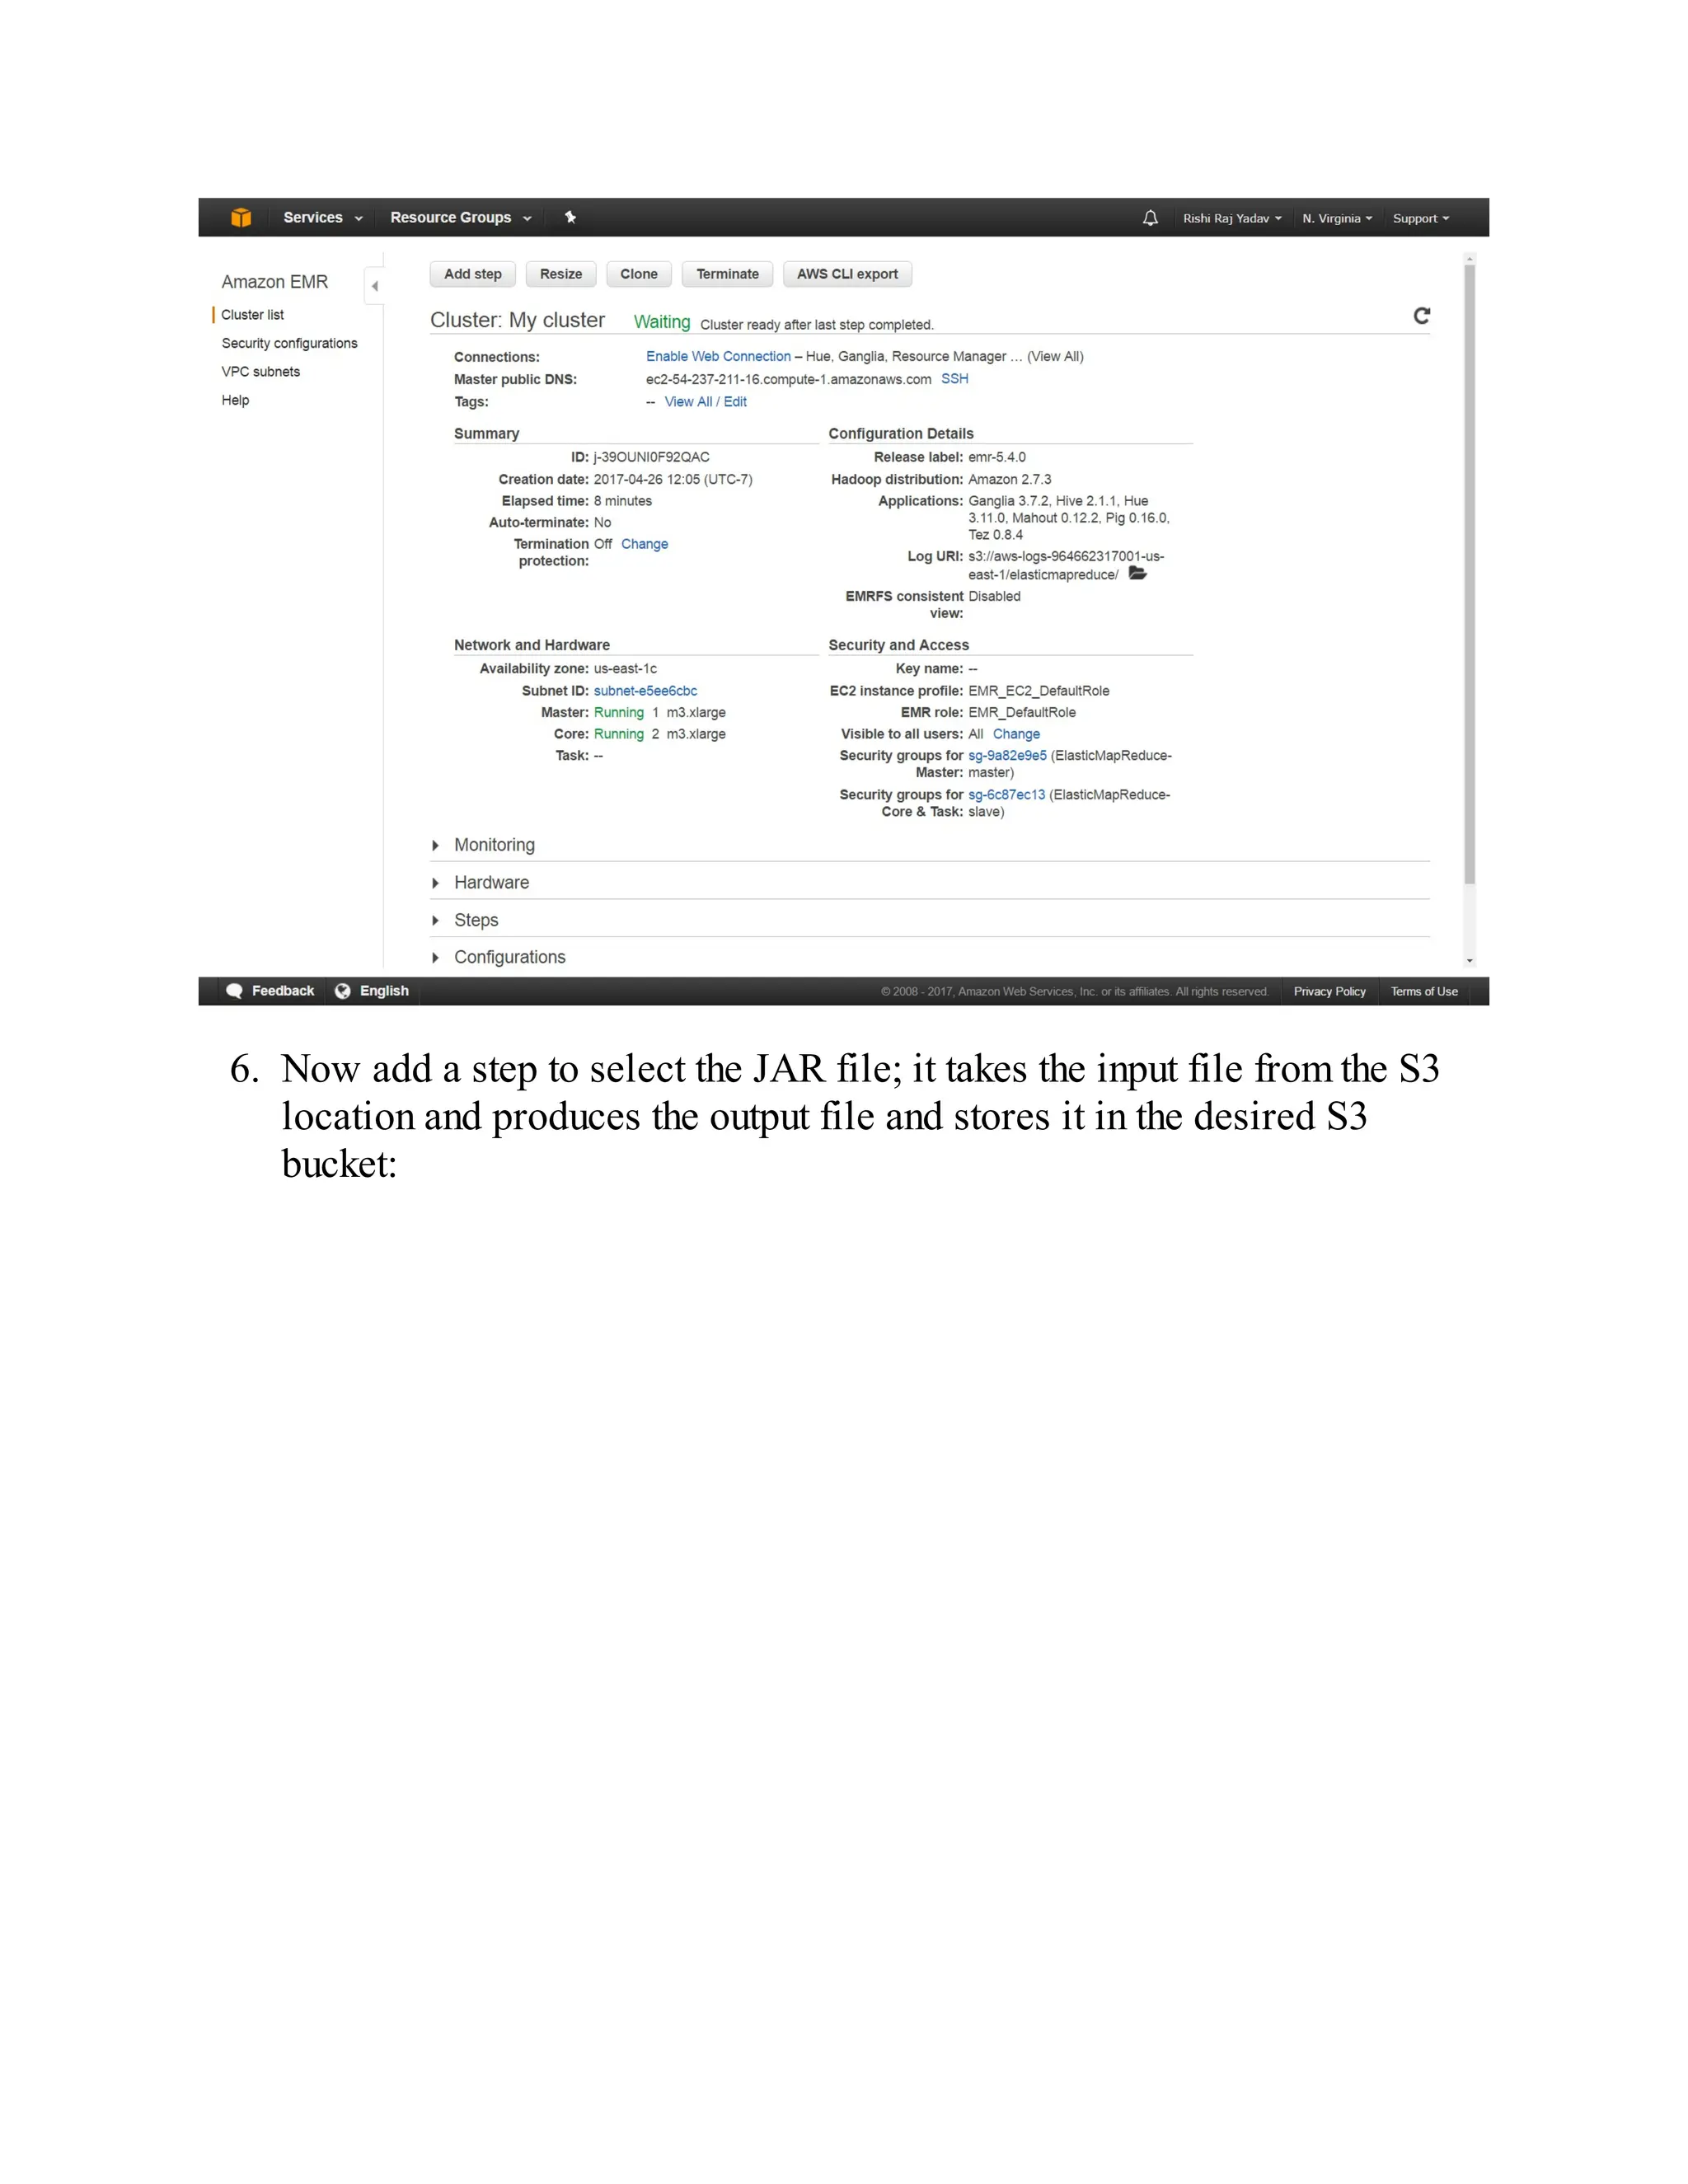
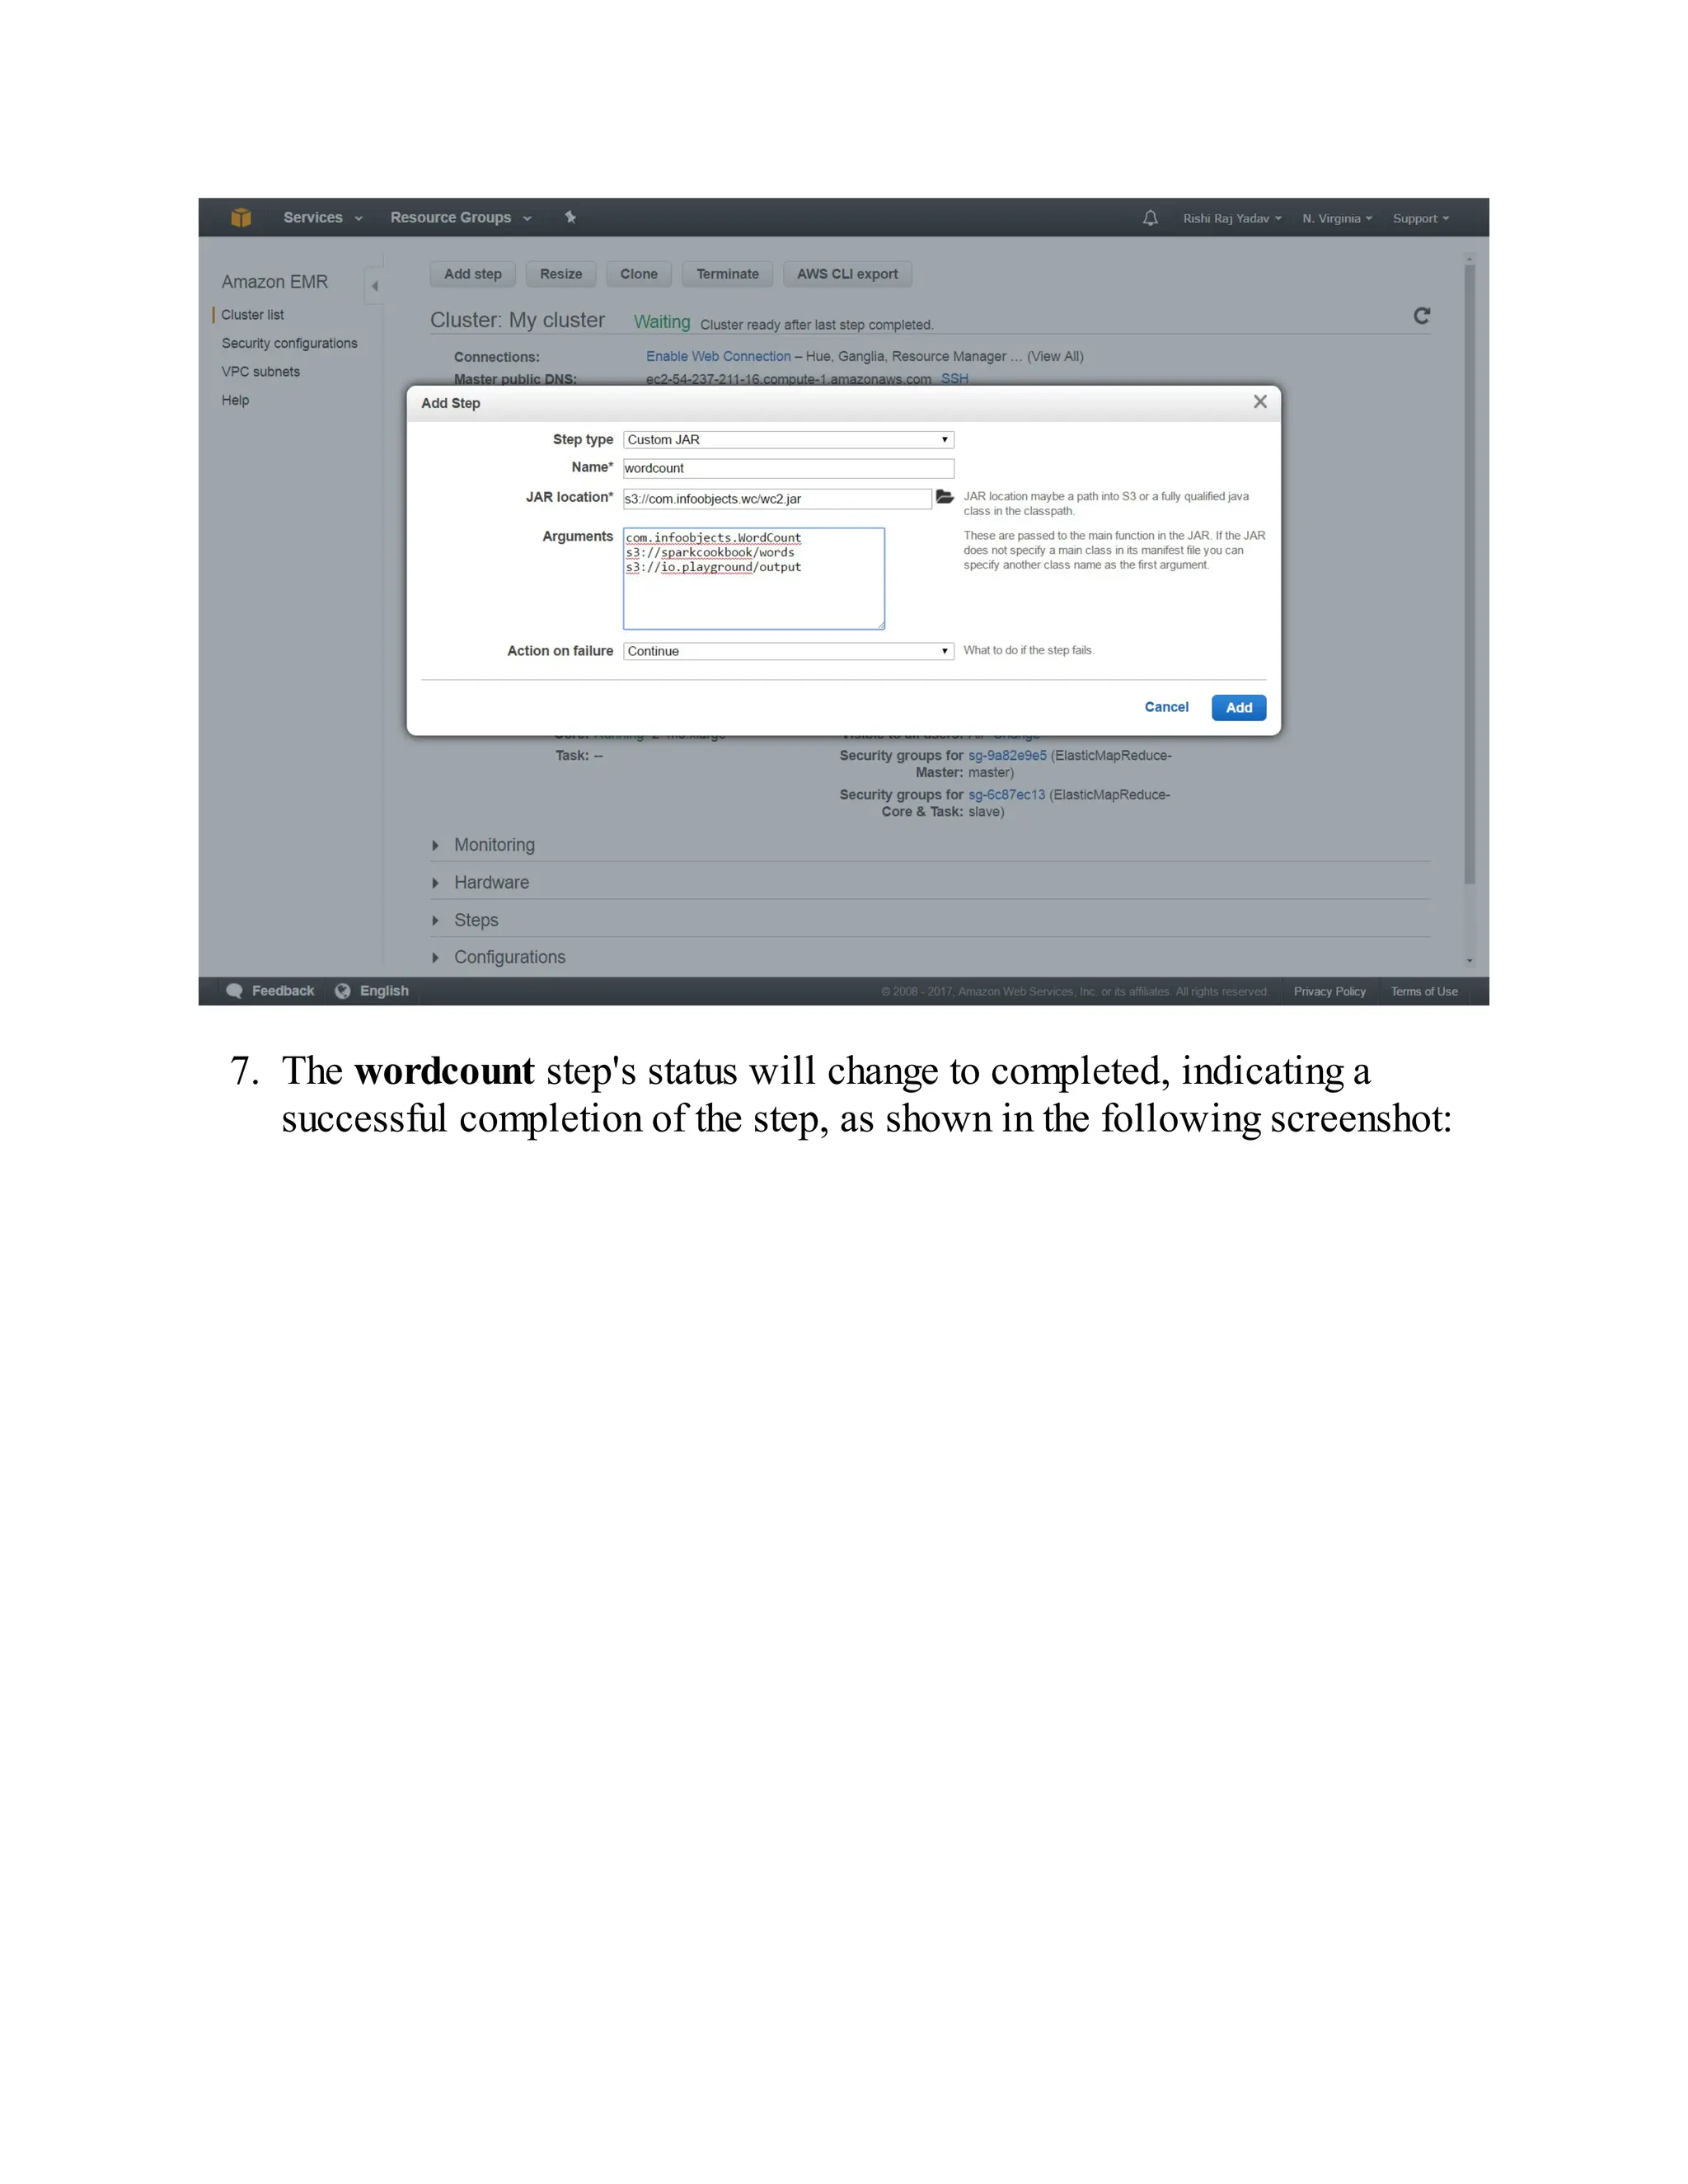
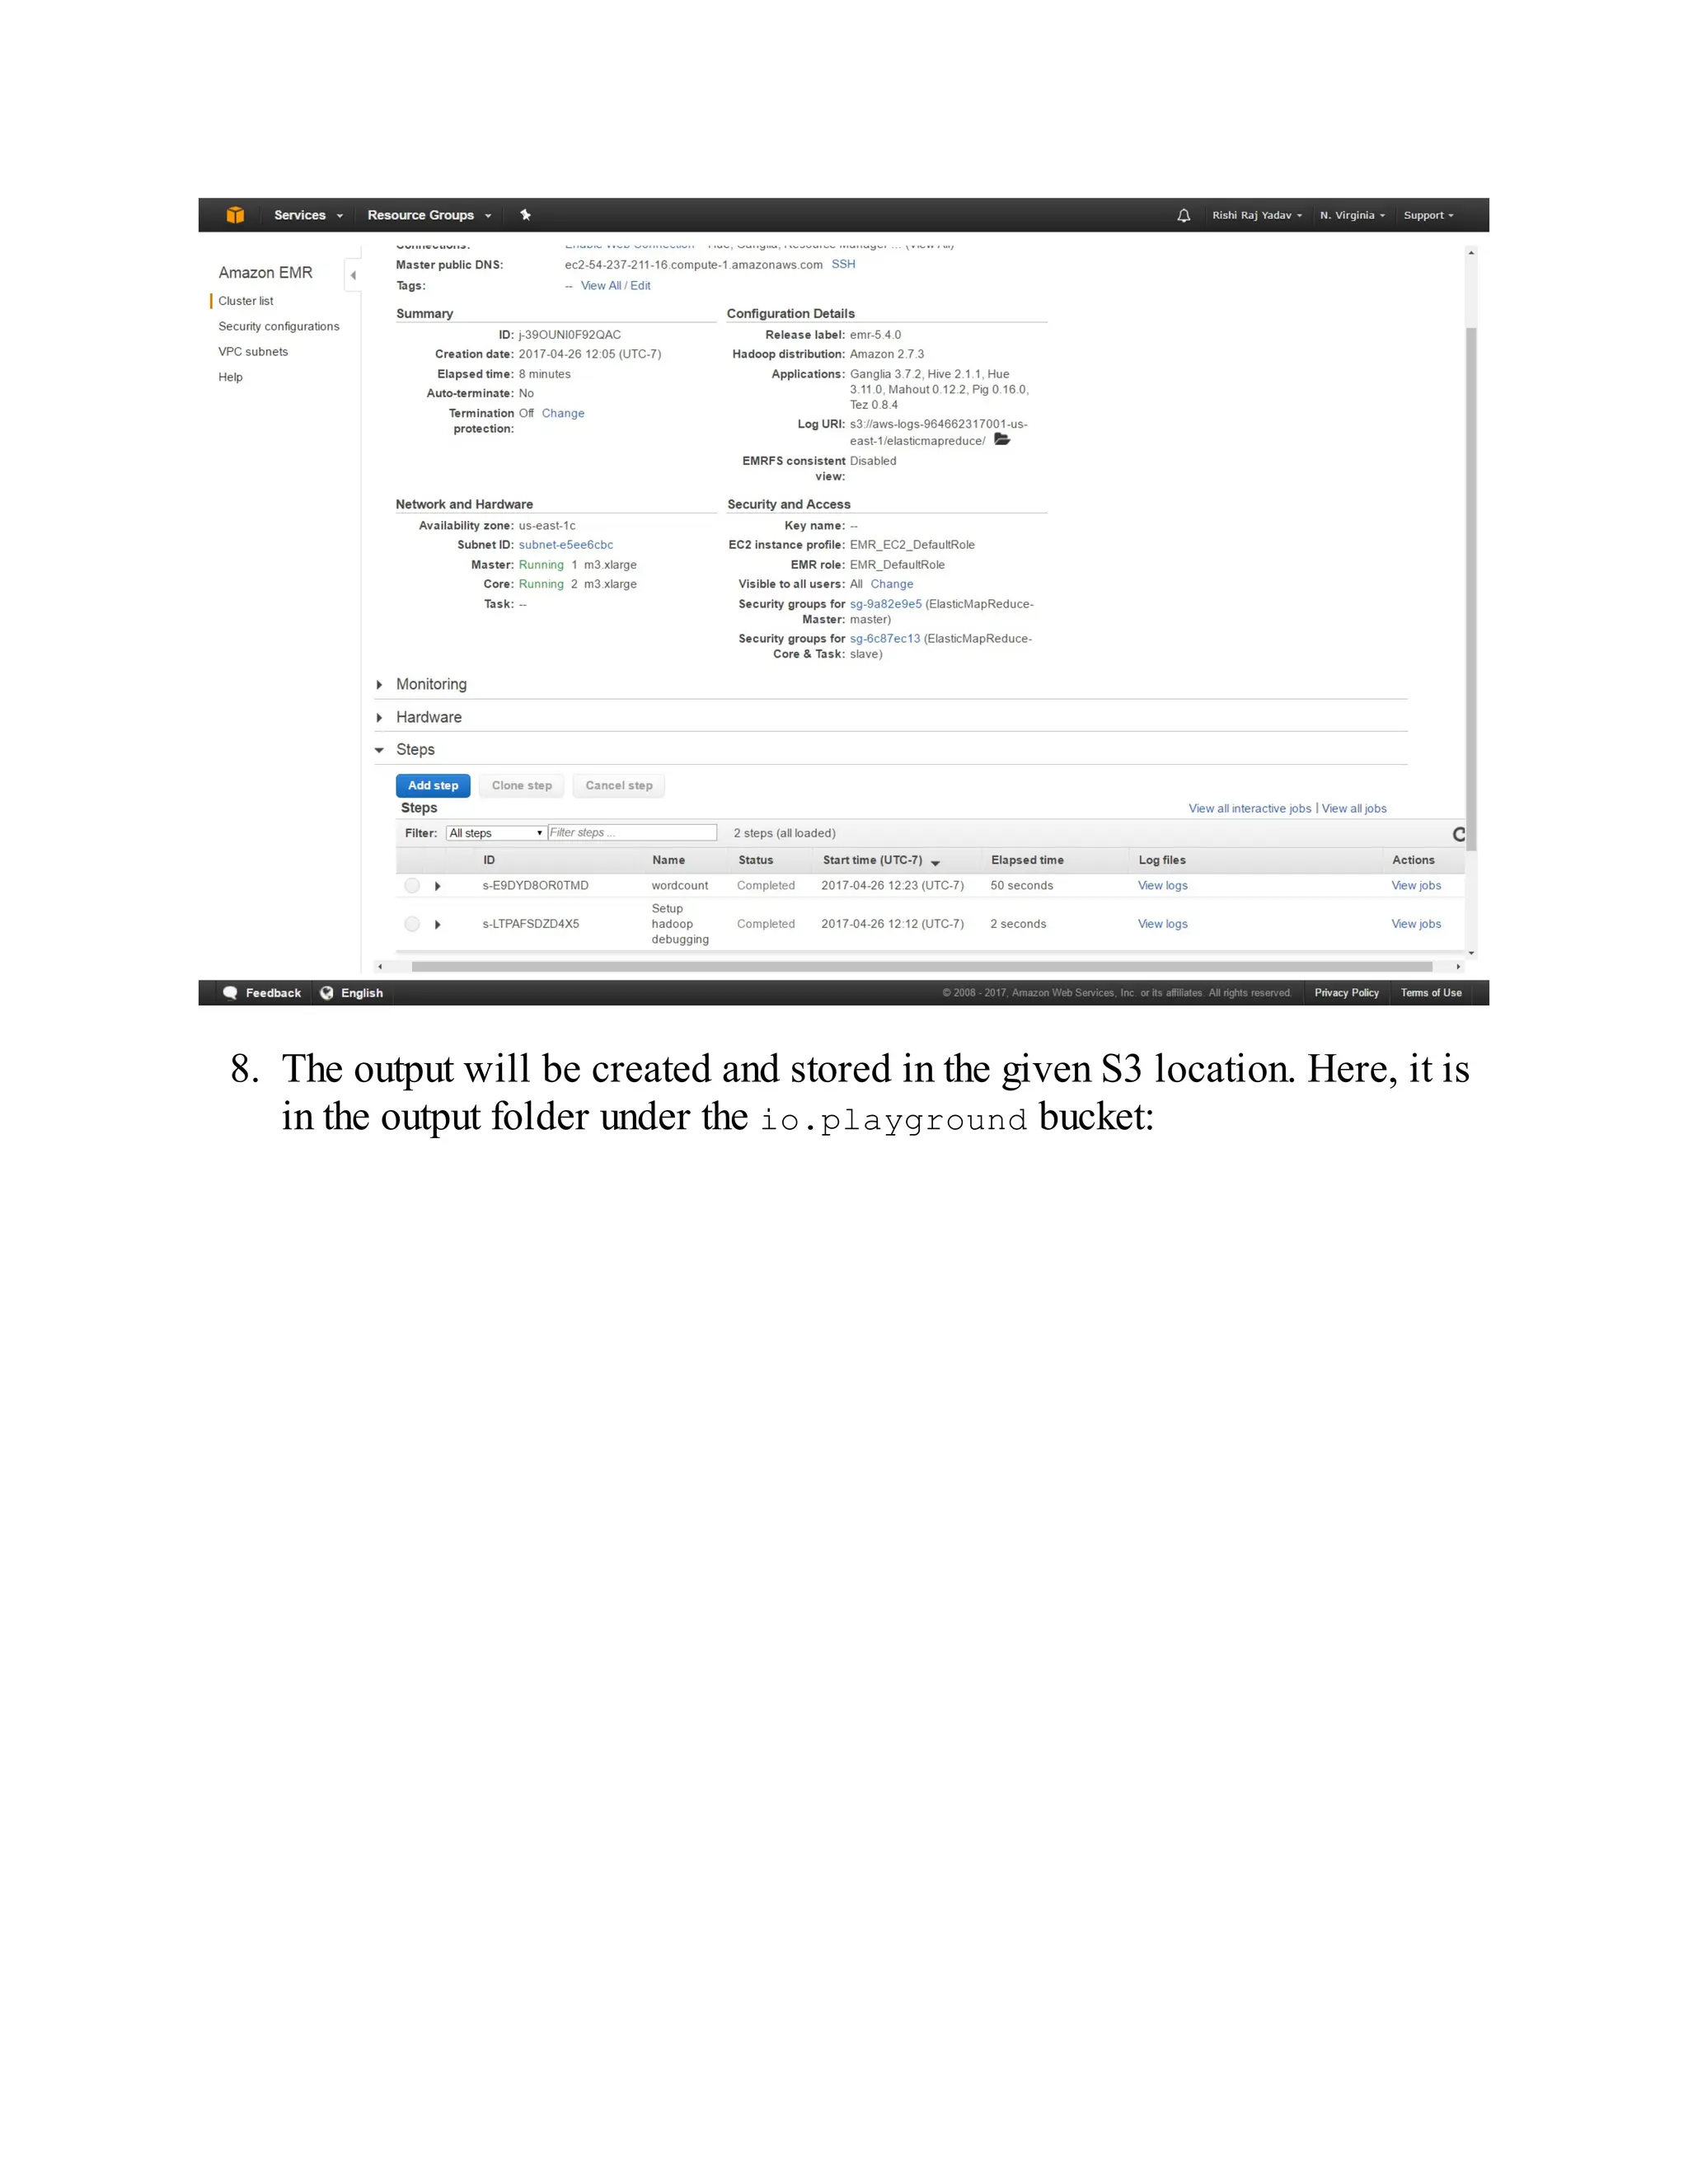
How to do it…
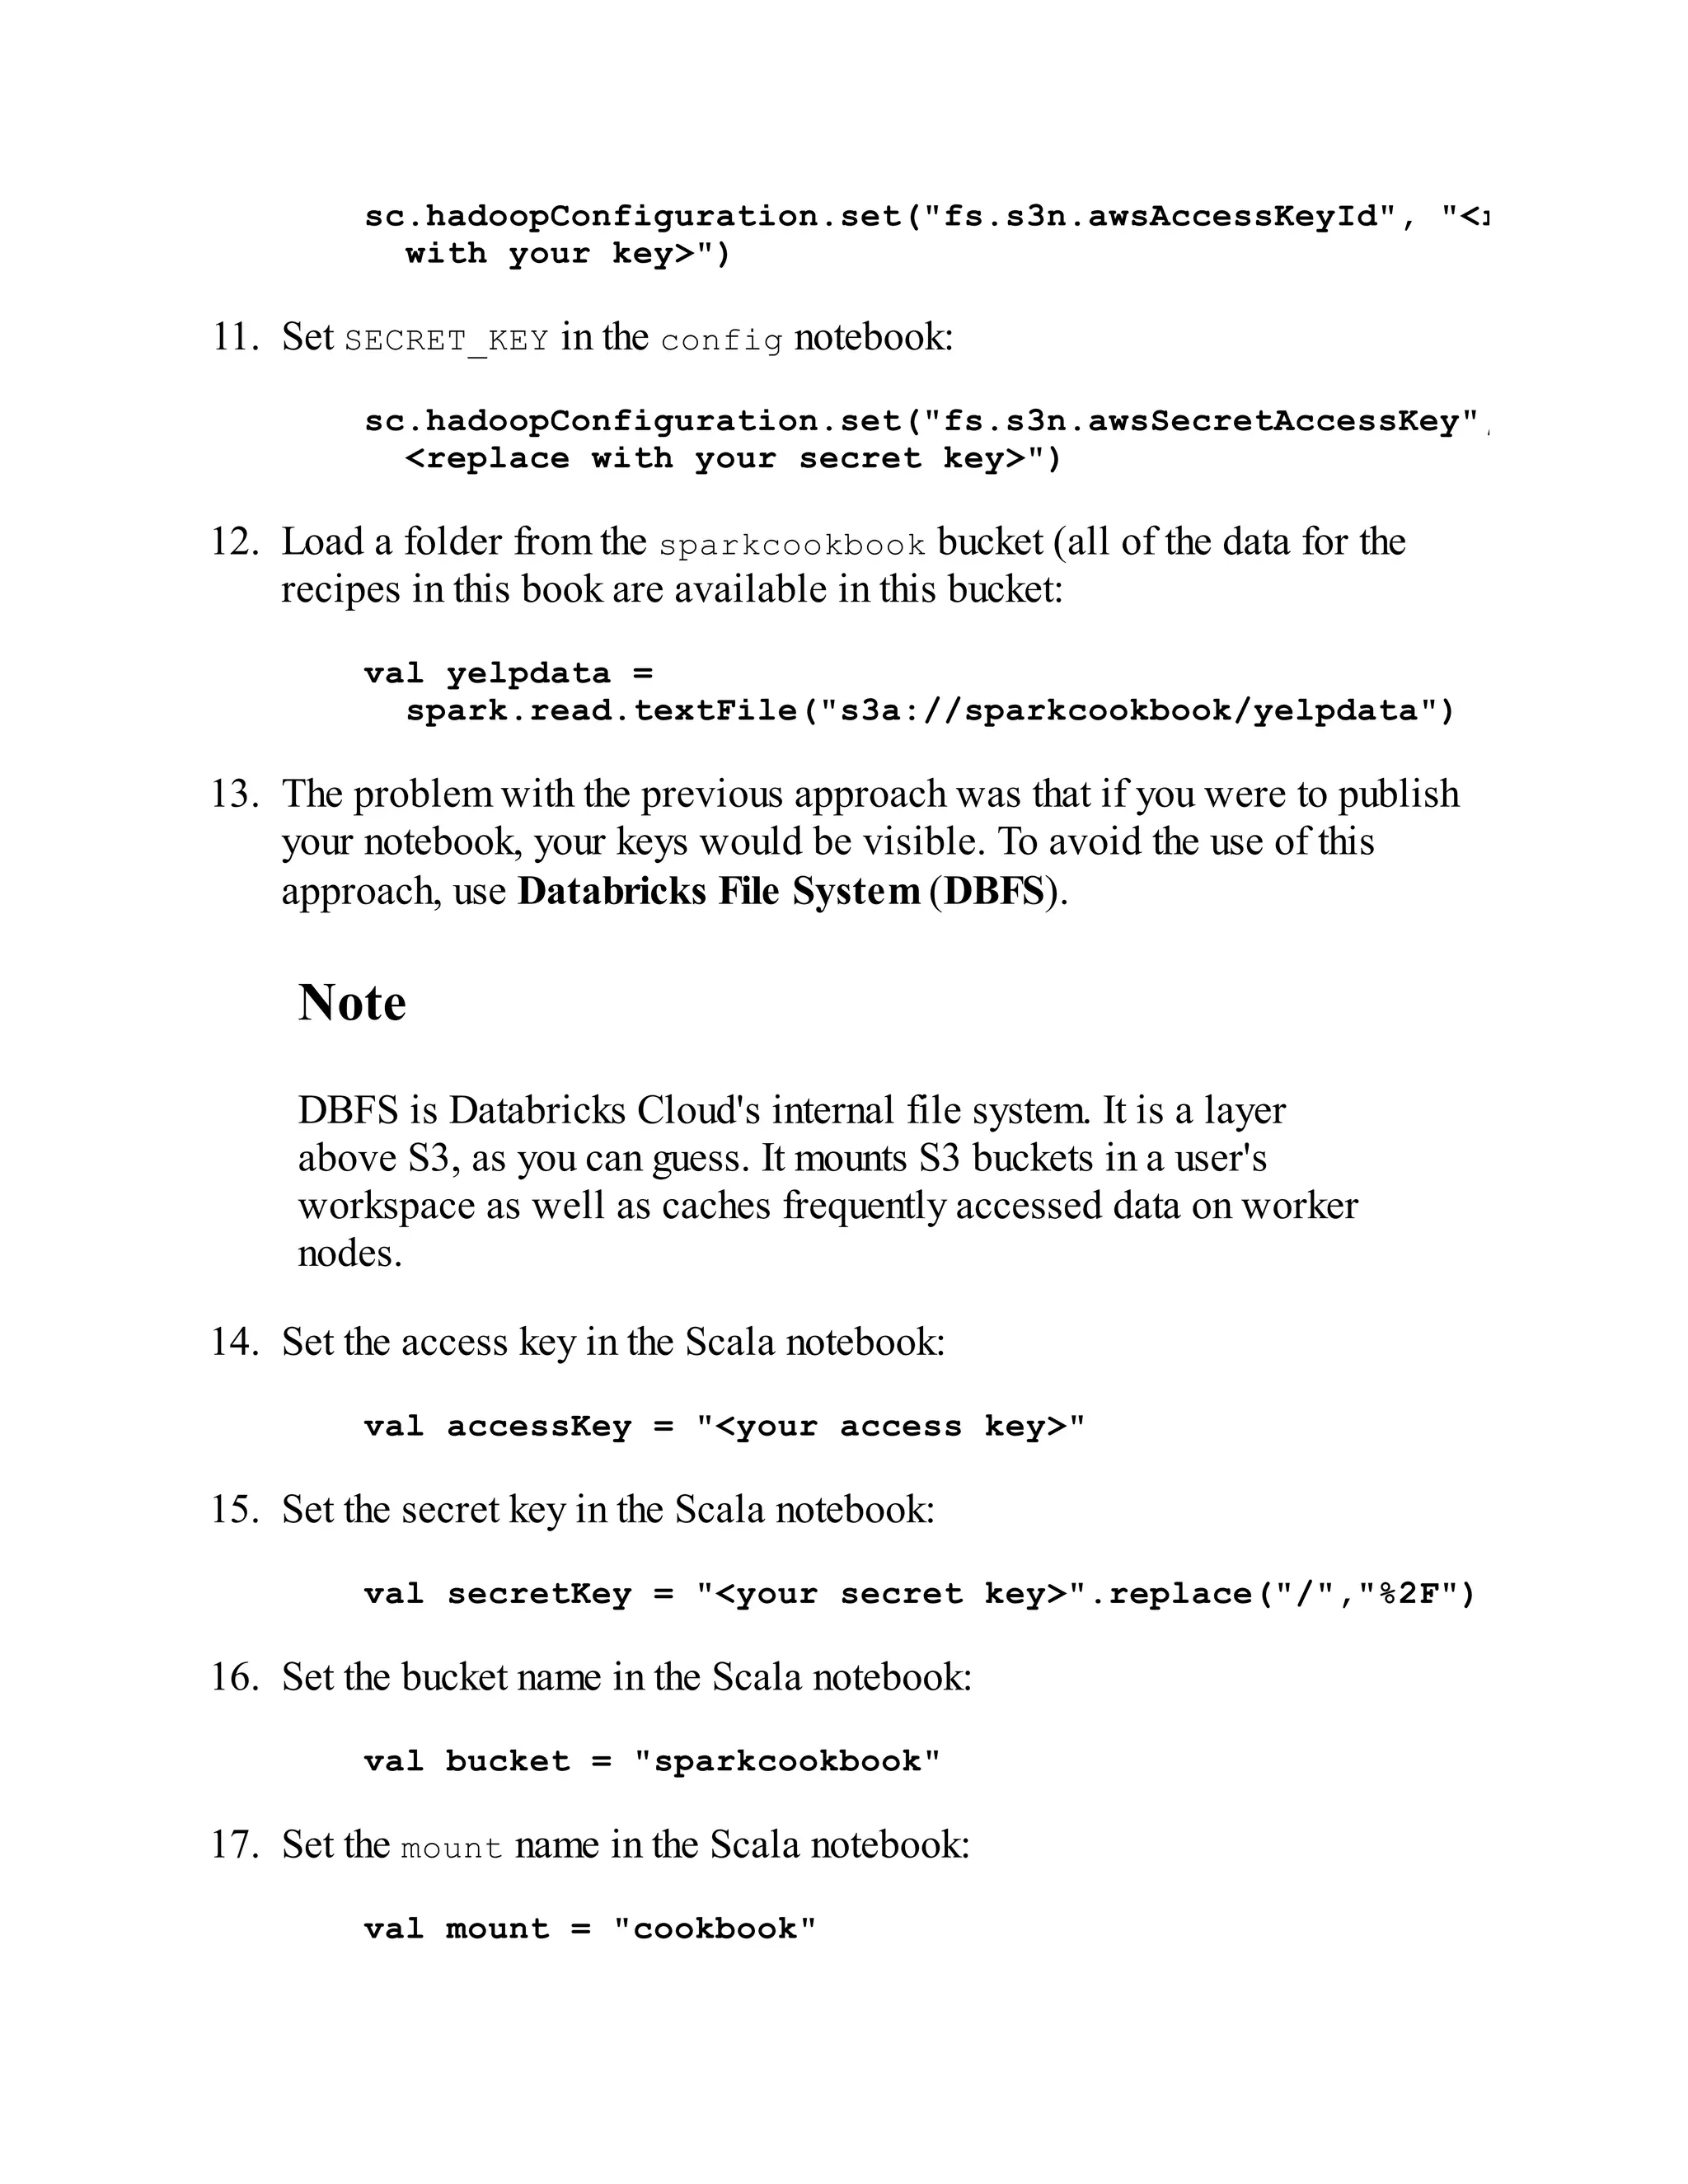
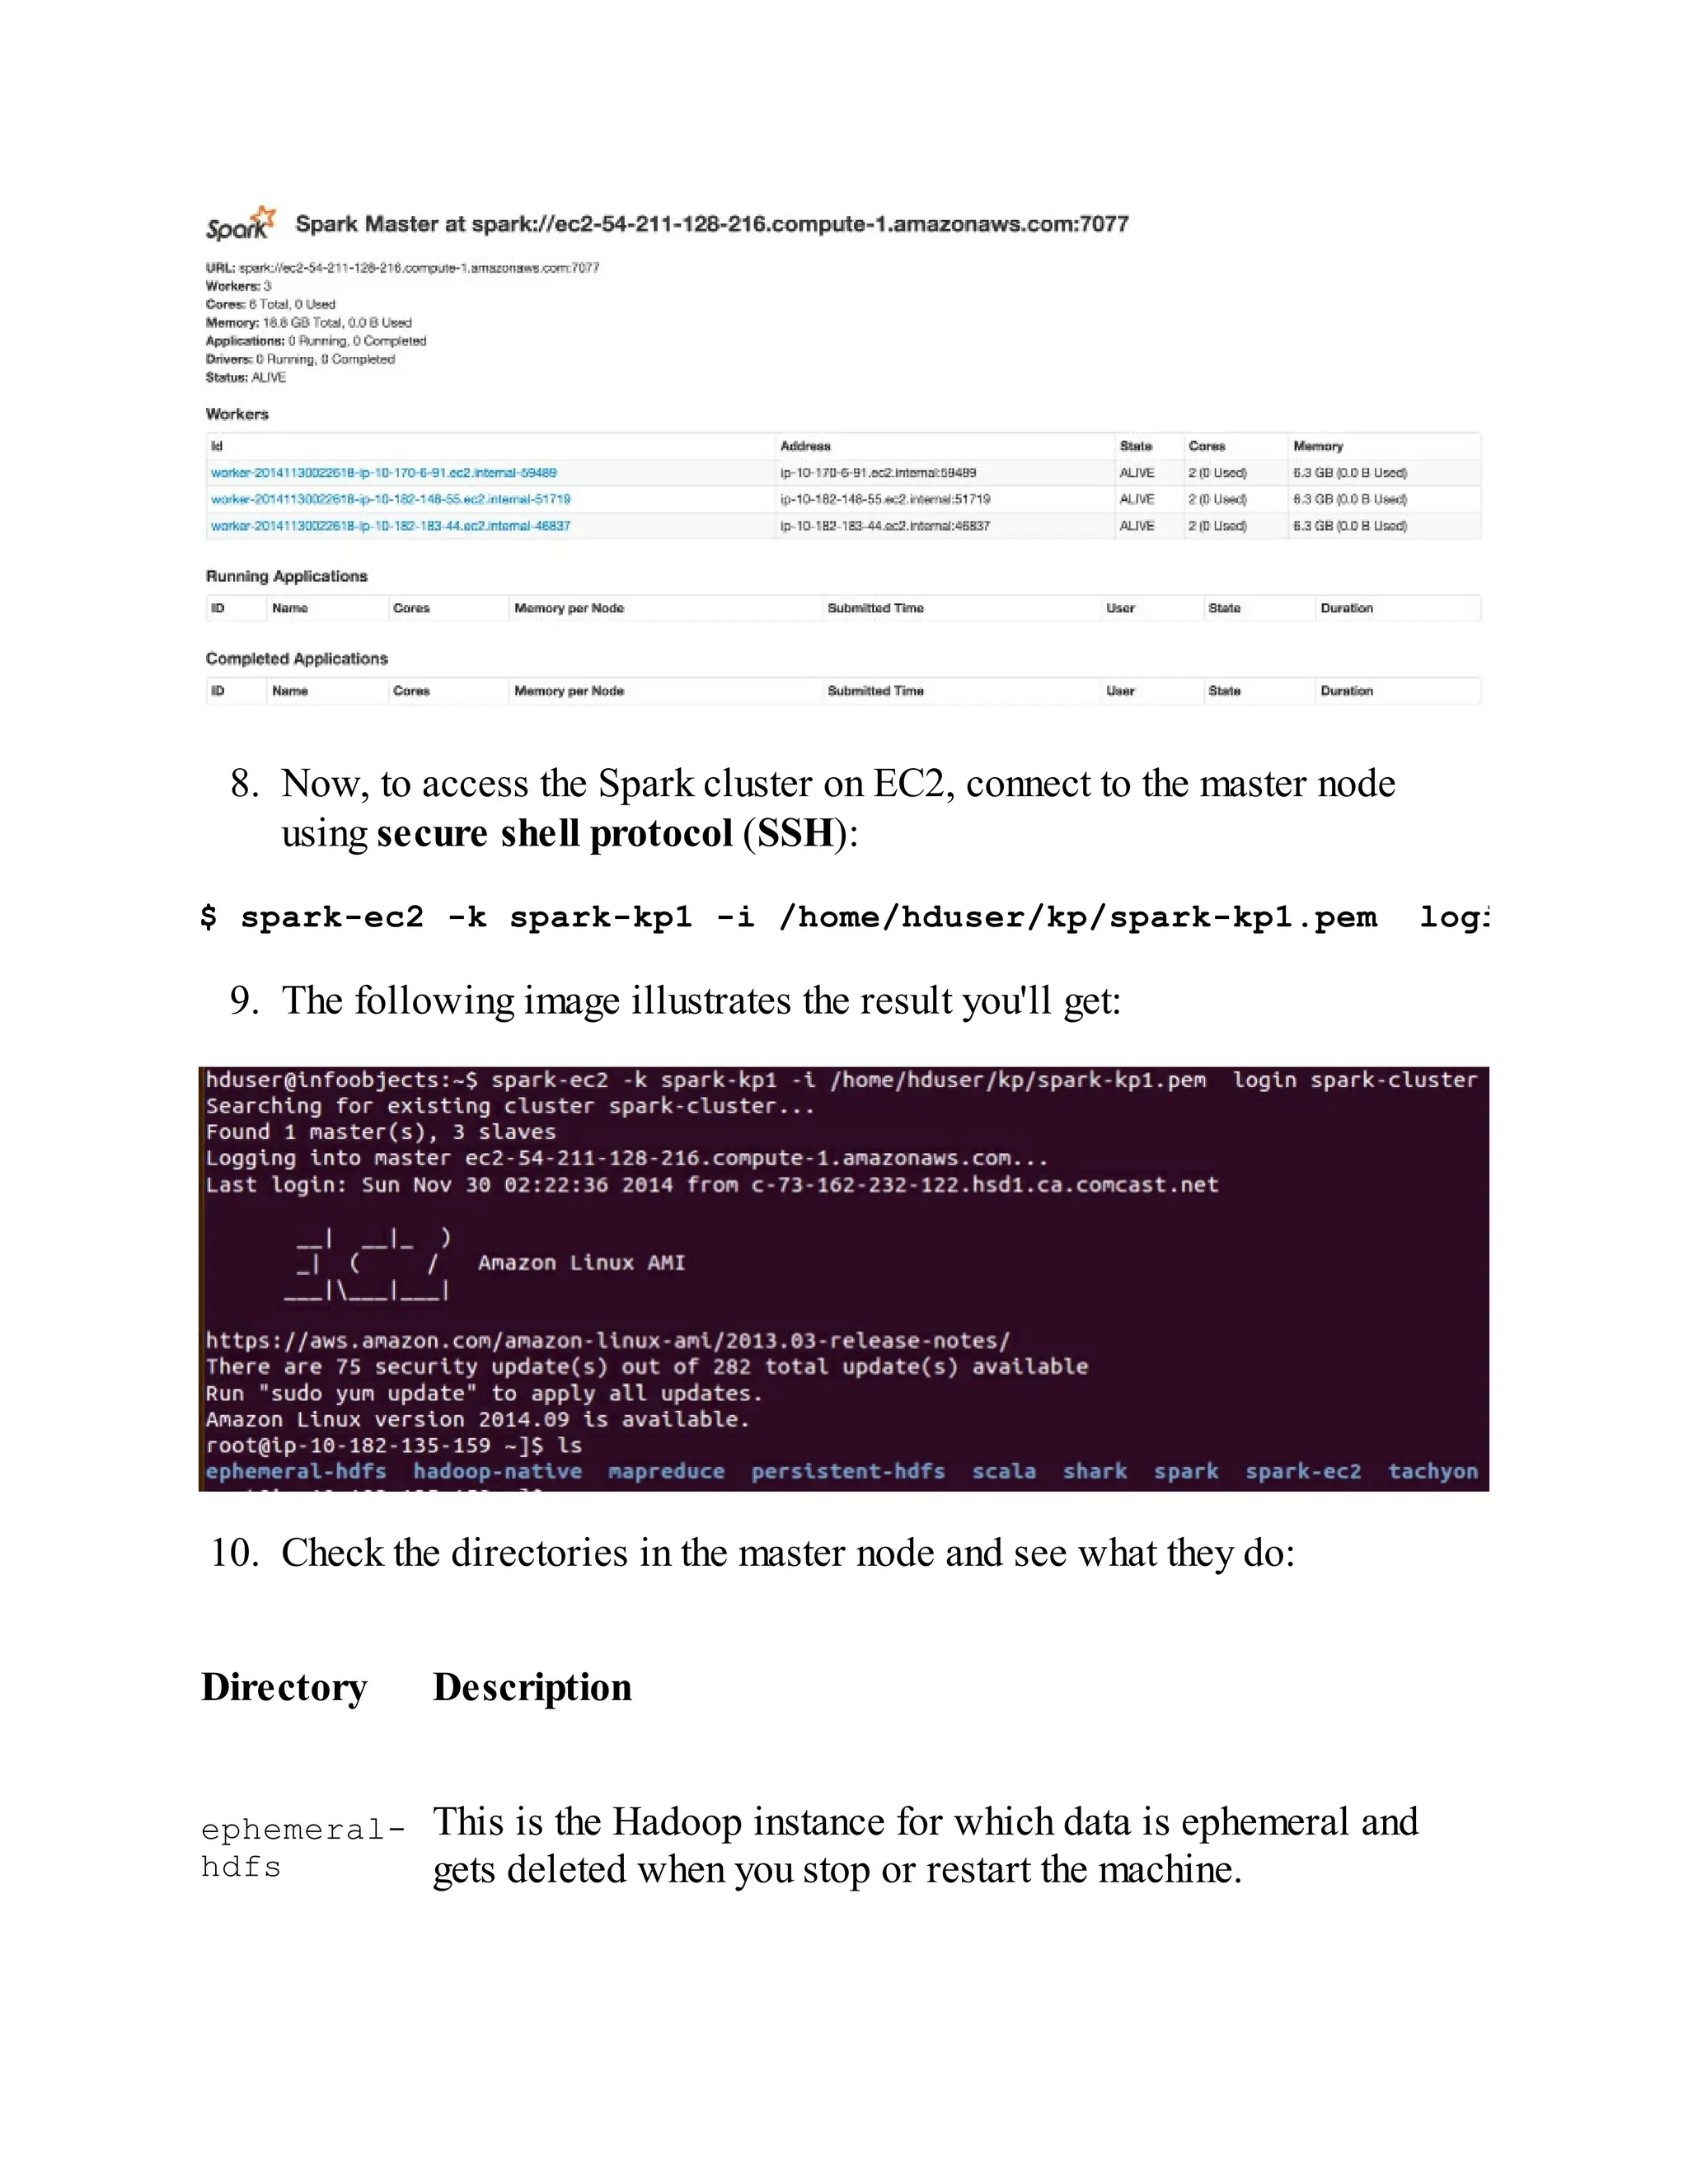
1. Since Spark's standalone mode is the default, all you need to do is have
Spark binaries installed on both master and slave machines. Put
/opt/infoobjects/spark/sbin in the path on every node:
$ echo "export PATH=$PATH:/opt/infoobjects/spark/sbin" >> /home/hduser/.b
2. Start the standalone master server (SSH to master first):
hduser@m1.zettabytes.com~] start-master.sh
Note
Master, by default, starts on port 7077, which slaves use to
connect to it. It also has a web UI at port 8088.
3. Connect to the master node using a Secure Shell (SSH) connection and
then start the slaves:
hduser@s1.zettabytes.com~] spark-class org.apache.spark.deploy.worker.Wor
spark://m1.zettabytes.com:7077
Argument Meaning
-h
<ipaddress/HOST> and--
host <ipaddress/HOST>
IP address/DNS service to listen on
-p <port> and --port
Port for the service to listen on](https://image.slidesharecdn.com/3405034-250609102002-0f6af47e/75/Apache-Spark-2x-Cookbook-Cloudready-Recipes-For-Analytics-And-Data-Science-2nd-Rishi-Yadav-51-2048.jpg)
![<port>
--webui-port <port>
This is the port for the web UI (by default, 8080
is for the master and 8081 for the worker)
-c <cores> and --cores
<cores>
These refer to the total CPU core Spark
applications that can be used on a machine
(worker only)
-m <memory> and --memory
<memory>
These refer to the total RAM Spark applications
that can be used on a machine (worker only)
-d <dir> and --work-dir
<dir>
These refer to the directory to use for scratch
space and job output logs
Note
For fine-grained configuration, the above parameters work with
both master and slaves. Rather than manually starting master and
slave daemons on each node, it can also be accomplished using
cluster launch scripts. Cluster launch scripts are outside the scope
of this book. Please refer to books about Chef or Puppet.
4. First, create the conf/slaves file on a master node and add one line per
slave hostname (using an example of five slave nodes, replace the
following slave DNS with the DNS of the slave nodes in your cluster):
hduser@m1.zettabytes.com~] echo "s1.zettabytes.com" >> conf/slaves
hduser@m1.zettabytes.com~] echo "s2.zettabytes.com" >> conf/slaves
hduser@m1.zettabytes.com~] echo "s3.zettabytes.com" >> conf/slaves
hduser@m1.zettabytes.com~] echo "s4.zettabytes.com" >> conf/slaves
hduser@m1.zettabytes.com~] echo "s5.zettabytes.com" >> conf/slaves
Once the slave machine is set up, you can call the following scripts to](https://image.slidesharecdn.com/3405034-250609102002-0f6af47e/75/Apache-Spark-2x-Cookbook-Cloudready-Recipes-For-Analytics-And-Data-Science-2nd-Rishi-Yadav-52-2048.jpg)


![[@NaukriEngineering] Apache Spark](https://cdn.slidesharecdn.com/ss_thumbnails/apachesparkppt-170105054406-thumbnail.jpg?width=640&height=640&fit=bounds)


![[Rakuten TechConf2014] [C-6] Leveraging Spark for Cluster Computing](https://cdn.slidesharecdn.com/ss_thumbnails/c6-220141025leveragingsparkforclustercomputing-141105041312-conversion-gate01-thumbnail.jpg?width=640&height=640&fit=bounds)


