Download to read offline


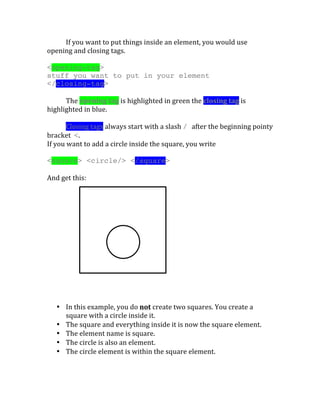


This document provides a tutorial for making a user interface for an Android app. It begins with an introduction explaining that the tutorial will teach how to make an Android app's user interface. It then outlines the steps that will be covered, which include learning user interface basics, markup language basics, and finally creating the example user interface shown. The document is written as a tutorial with multiple steps that teach key concepts for developing user interfaces using markup languages like XML that are used for Android apps.