This document provides instructions for installing and configuring IBM WebSphere MQ version 6.0 on Windows. It discusses migrating from previous versions of MQ and covers installing both the MQ server and MQ client. The document also describes verifying the installations, applying maintenance updates, uninstalling MQ, and lists the documentation available.


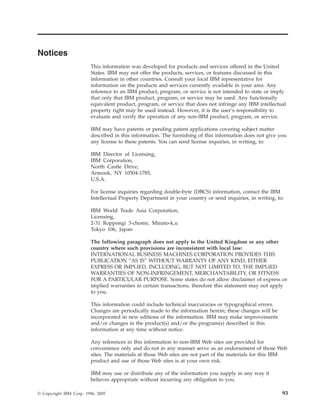
![There are several ways to invoke MSI without using the WebSphere MQ
installation launchpad. These are:
v Using the Msiexec command with command line parameters. See “Using
command line parameters with Msiexec” on page 24.
v Using the Msiexec command with a parameter that calls a response file. The
response file contains the parameters that you normally specify during an
interactive installation. See“Using a response file with Msiexec” on page 28.
v Use the MQParms command with command line parameters, a parameter file, or
both. The parameter file can contain many more parameters than a response file.
See “Using the MQParms command” on page 35.
Also, you can use Microsoft System Management Server to install WebSphere MQ.
See“Installing with Microsoft System Management Server” on page 42.
Installing using Msiexec
The Msiexec command uses parameters to give MSI some or all of the information
that would normally be specified as part of an interactive installation using
WebSphere MQ Installation Launchpad. This means a user can create a reusable
automated or semi-automated installation configuration. Parameters can be given
through the command line, a transform file, a response file, or a combination of the
three.
To install using Msiexec, follow the instructions below:
At the command line enter the Msiexec command in the following format:
Msiexec parameters USEINI="response-file" TRANSFORM="transform_file"
Where:
parameters
are either command line parameters preceded by a / character, or
property=value pairs (if using both forms of parameter always put the
command line parameters first). For further information see “Using
command line parameters with Msiexec” on page 24.
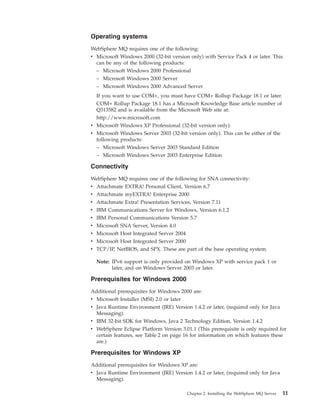
Note: You must include the /i parameter and the file location of the
WebSphere MQ installer package.
response-file
is the full path and file name of the file that contains the [Response] stanza
and the required property=value pairs, for example Response.ini. For
further information see “Using a response file with Msiexec” on page 28.
transform_file
is the full path and filename of a transform file. For further information see
“Using transforms with Msiexec” on page 32.
Once the command has been entered, the command prompt will immediately
reappear. WebSphere MQ will be installing as a background process. If you have
entered parameters to produce a log, check this file to see how the install is
progressing. If the install completes successfully you will see the message
Installation operation completed successfully.
Note: If you install WebSphere MQ using Msiexec you must first end any
applications that are using Java. This is because if a Java application is
Chapter 2. Installing the WebSphere MQ Server 23](https://image.slidesharecdn.com/amqtac05-100926122844-phpapp02/85/Amqtac05-39-320.jpg)
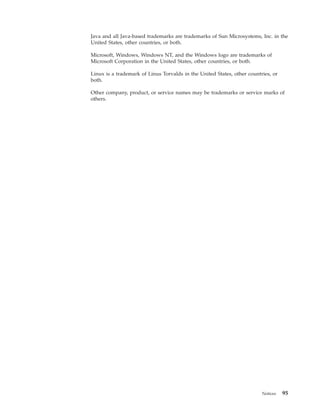
![running, WebSphere MQ will be unable to update the class path. If
WebSphere MQ is unable to update the class path, your computer will
restart to allow the update to happen.
Using command line parameters with Msiexec
You can use the Msiexec command with command line parameters to invoke
installation or uninstallation. The Msiexec command uses parameters to give MSI
some or all of the information that would normally be specified as part of an
interactive installation using the WebSphere MQ Installation Launchpad. To do
this, at a command line, enter the following command, followed by the parameters
you require:
Msiexec [parameters]
The Msiexec command can accept two types of parameters on the command line,
these are:
v Standard command line parameters, preceded by a / character.
For an unattended (silent) installation you must include the /q or /qn parameter
in the command line, and set the AGREETOLICENSE parameter to ″yes″. For
information on what an unattended installation is, see “Unattended (silent)
installation” on page 22.
For a table of the Msiexec command line parameters, see Table 4 on page 25.
v property=value pair parameters on the command line. All the parameters
available for use in a response file can be used on the command line, for a list of
these see Table 6 on page 29. In addition there are some extra property=value
pair parameters that are only for use on the command line, for details of these
see Table 5 on page 27.
When using the property=value pair parameters note that:
– Property strings must be in upper case.
– Value strings are not case sensitive, except for feature names. They can be
enclosed in double quotation marks. If a value string includes a blank, it must
be enclosed in double quotation marks.
– For a property that can take more than one value, use the format:
ADDLOCAL="Server,Client"
When using property=value pair and command line parameters with the Msiexec
command, command line parameters must be entered first.
If a parameter is specified both on the command line and in a response file, the
setting on the command line takes precedence.
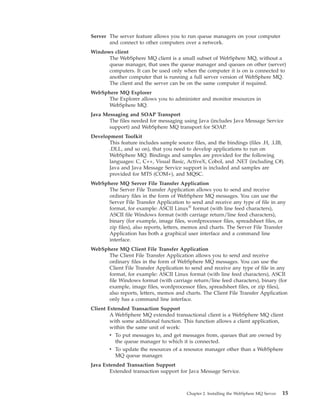
A typical example of an Msiexec command is:
Msiexec /i “pathMSIIBM WebSphere MQ.msi” /l*v c:install.log /m mif_file
TRANSFORMS=“:1033” AGREETOLICENSE=“yes” ADDLOCAL=“Server”
Where:
/i “pathMSIIBM WebSphere MQ.msi”
Install the product using the .msi specified.
/l*v c:install.log
Produce a log file called install.log, containing all information in verbose
format.
24 Quick Beginnings](https://image.slidesharecdn.com/amqtac05-100926122844-phpapp02/85/Amqtac05-40-320.jpg)
![/m mif_file
Generate a Microsoft System Management Server (SMS) status .mif file
called mif_file.
TRANSFORMS=“:1033”
Specifies that the installation is in U.S. English. For further information
about installing in different national languages, see “Using transforms with
Msiexec” on page 32.
AGREETOLICENSE=“yes”
Accept the terms of the license.
ADDLOCAL=“Server”
Install the server feature locally.
Parameters
The Msiexec command can take further parameters that are not supported or listed
here. If you need details of these, refer to the help file for the Windows Installer
that is supplied with the MSI software development kit. See the Microsoft Web site
at:
http://www.microsoft.com
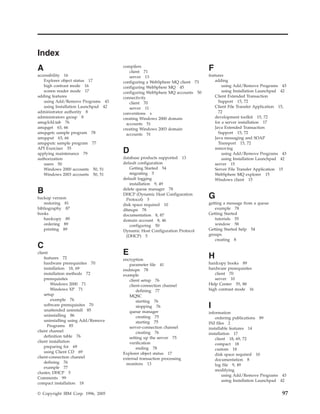
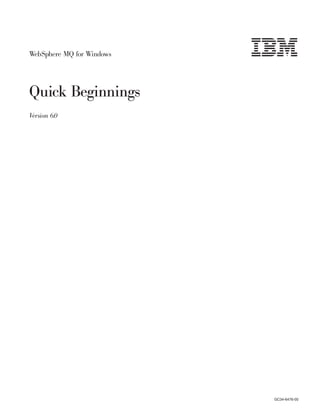
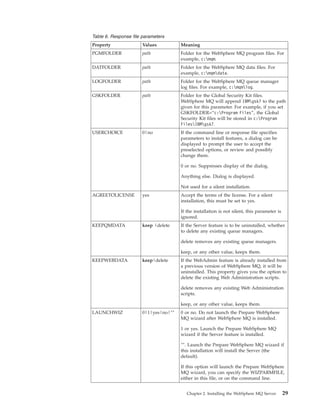
Table 4. Msiexec command line parameters
Parameter Options Description
/a Package Installs a product on the network using
administrative installation, that is,
installs a source image of the application
onto the network that is similar to a
source image on a CD.
/i Package|ProductCode Installs or configures a product using the
specified .msi file.
The WebSphere MQ Windows Installer
package is IBM WebSphere MQ.msi.
/j Advertises the product.
[u|m]Package|
[u|m]Package /t TransformList| This option ignores any property values
[u|m]Package /g LanguageID entered on the command line.
u Advertise to the current user
m Advertise to all users of this
machine
g Language ID
t Applies transform to advertised
package
Chapter 2. Installing the WebSphere MQ Server 25](https://image.slidesharecdn.com/amqtac05-100926122844-phpapp02/85/Amqtac05-41-320.jpg)
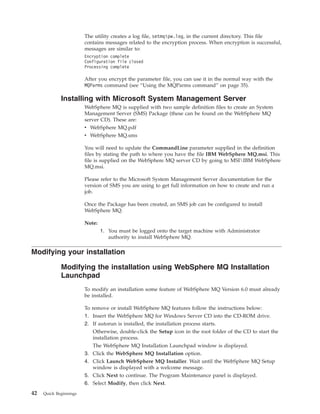
![Table 4. Msiexec command line parameters (continued)
Parameter Options Description
/l Specifies path to log file, with flags to
[i|w|e|a|r|u|c|m|o|p set which information to log.
|v|+|!]Logfile i Status messages
w Non-fatal warnings
e All error messages
a Start up of actions
r Action-specific records
u User requests
c Initial user interface parameters
m Out-of-memory or fatal exit
information
o Out-of-disk-space messages
p Terminal properties
v Verbose output
+ Append to existing file
! Flush each line to the log
* Log all information except for
the v option. To log all
information including the v
option, specify ″/l*v″
microwaveup″<path><Logfile.log>″
Create a verbose log file in the
directory specifeid by path with
the name specified by Logfile.log
/m filename Generates a Microsoft System
Management Server (SMS) status .mif
file.
Must be used with either the install (/i),
remove (/x), administrative installation
(/a), or reinstall (/f) options. The
ISMIF32.DLL is installed as part of SMS
and must be on the path.
The fields of the status .mif file are filled
with the following information:
v Manufacturer - Author
v Product - Revision Number
v Version - Subject
v Locale - Template
v Serial Number - not set
v Installation - set by ISMIF32.DLL to
DateTime
v InstallStatus - Success or Failed
v Description - Error messages in the
following order:
1. Error messages generated by
installer.
2. Resource from msi.dll if install
could not commence or user exit
3. System error message file.
4. Formatted message: Installer
error %i, where %i is the error
returned from msi.dll.
26 Quick Beginnings](https://image.slidesharecdn.com/amqtac05-100926122844-phpapp02/85/Amqtac05-42-320.jpg)
![Table 4. Msiexec command line parameters (continued)
Parameter Options Description
/q n|b|r|f Sets the level of user interface displayed
during the install.
q, qn No user interface. A silent
installation that displays no
user interface.
qb Basic user interface. Displays
the built-in dialog boxes that
show progress messages
qr Reduced user interface with a
modal dialog box displayed at
the end of the installation.
qf Full user interface with a modal
dialog box displayed at the end.
qn+ No user interface except for a
modal dialog box displayed at
the end of installation.
qb+ Basic user interface with a
modal dialog box displayed at
the end. The modal box is not
displayed if the user cancels the
installation.
qb- Basic user interface with no
modal dialog boxes. Note that
/qb+- is not a supported UI
level.
/x Package|ProductCode Uninstalls the product.
Note:
1. Do not use the options /i, /x, /j[u|m], and /a together.
2. Use the options /t and /g only with /j.
3. Use the options /l and /q with /i, /x, /j[u|m], and /a.
Table 6 on page 29 and Table 5 show the parameters that you can enter as
property=value pairs on the Msiexec command line (defaults are shown in bold).
The parameters given in Table 5 can only be used on the command line, and not in
a response file.
Table 5. Msiexec PROPERTY= value parameters
Property Values Meaning
USEINI pathfile_name Use the specified response file. See “Using a
response file with Msiexec” on page 28.
SAVEINI pathfile_name Generate a response file during installation. The
file will contain those parameters selected for this
installation that a user could make during an
interactive installation.
ONLYINI 1|yes|″″ 1, yes or any value other than null. End the
installation before updating the target system, but
after generating a response file, if this is
specified.
″″. Continue the installation and update the
target machine (the default).
Chapter 2. Installing the WebSphere MQ Server 27](https://image.slidesharecdn.com/amqtac05-100926122844-phpapp02/85/Amqtac05-43-320.jpg)
![Using a response file with Msiexec
You can use the Msiexec command with a parameter call that calls a response file.
The response file contains the parameters that you normally specify during an
interactive installation. You can combine the Msiexec command line parameters
described in “Using command line parameters with Msiexec” on page 24 with a
response file to invoke a complex installation or uninstallation. This could be silent
or interactive. For a silent installation, this must include the /q or /qn parameter.
A response file is an ASCII text file, with a format similar to a Windows .ini file,
that contains the stanza [Response]. The [Response] stanza contains some or all of
the parameters that would normally be specified as part of an interactive
installation using the WebSphere MQ Installation Launchpad. The parameters are
given in a property=value pair format. Any other stanzas in the response file are
ignored by Msiexec. An example response file, Response.ini, is supplied with
WebSphere MQ. It contains the default installation parameters.
Using the Msiexec command
To invoke the Msiexec command using a response file, enter the following
command at a command line:
Msiexec [parameters] USEINI=“reponse_file”
Where:
parameters
are any of the command line parameters listed in table Table 4 on page 25,
or property=value pairs listed in tables Table 5 on page 27 and Table 6 on
page 29 on the command line. Command line parameters should always be
entered before property=value pairs.
response_file
is the full path and file name of the file that contains the [Response] stanza
and the required property=value pairs, for example Response.ini.
If a parameter is specified both on the command line and in a response file, the
setting on the command line takes precedence.
In the response file, all text is in English, and comments begin with a ; character.
For information on creating a response file see “Creating a response file” on page
31.
Parameters
Table 6 on page 29 shows the parameters that you can enter in the response file
(defaults are shown in bold). Some properties or values are related to
uninstallation, rather than installation. Note that:
v Property strings must be in upper case.
v Value strings are not case sensitive, except for feature names. They can be
enclosed in double quotation marks. If a value string includes a blank or a
comma, it must be enclosed in double quotation marks.
v For a property that can take more than one value, use the format:
ADDLOCAL="Server,Client"
28 Quick Beginnings](https://image.slidesharecdn.com/amqtac05-100926122844-phpapp02/85/Amqtac05-44-320.jpg)
![Table 6. Response file parameters (continued)
Property Values Meaning
WIZPARMFILE pathfile_name When specified, the file that contains the
parameters to pass to the Prepare WebSphere MQ
wizard when it is launched. These are in the
[Services], [DefaultConfiguration] and
[SSLMigration] stanzas. See Table 9 on page 33.
ADDLOCAL feature, feature, A comma-separated list of features to install
|All|″″ locally. For a list of valid feature names, see
Table 7 on page 31.
All installs all features
″″ installs the typical features. If you do not want
a feature use REMOVE=″feature″
REMOVE feature, feature, A comma-separated list of features to remove.
|All|″″ For a list of valid feature names, see Table 7 on
page 31.
All uninstalls all features
″″ uninstalls no features (the default).
REMOVEFEATURES 1|yes Must be set to 1 or yes for a silent installation if
Internet Gateway, Web Administration Server, or
SupportPac MA88 are installed, or the installation
fails.
STARTSERVICE 0|no|″″ 0 or no. Do not start the WebSphere MQ Service
at the end of installation.
″″. (The default) Start the WebSphere MQ Service
at the end of installation if it was running at the
start, or if this is a new installation.
Anything else. Start the Service at the end of the
installation.
Ignored if the server feature is not installed.
STARTTASKBAR 0|no|″″ 0 or no. Do not start the WebSphere MQ taskbar
application at the end of installation.
″″. (The default) Start the WebSphere MQ taskbar
application at the end of installation if it was
running at the start, or if this is a new
installation.
Anything else. Start the taskbar application at the
end of the installation.
Ignored if the server feature is not installed.
HIGHCONTRAST 0|no|″″ 0 or no. Do not set high-contrast mode for the
installation.
″″ (The default). Set high-contrast mode for the
installation if Windows 2000, Windows 2003, or
Windows XP high-contrast mode is set or if
WebSphere MQ high-contrast mode is set.
Anything else. Set high-contrast mode for the
installation.
30 Quick Beginnings](https://image.slidesharecdn.com/amqtac05-100926122844-phpapp02/85/Amqtac05-46-320.jpg)
![Table 7 shows the features that can be values for the ADDLOCAL and REMOVE
properties.
Table 7. Valid feature names
Feature Name Description
Server The WebSphere MQ for Windows server. This will install the files
needed to create and run queue managers.
FTA_Server The file transfer application for the server. This is a graphical
application used to send and receive files.
Explorer The WebSphere MQ Explorer.
This feature is installed automatically if the server feature is
installed. You can select to remove it.
Client The WebSphere MQ for Windows client.
XA_Client Extended transaction support for the Windows client.
FTA_Client The file transfer application for the client. This is a graphical
application used to send and receive files.
JavaMsg The files needed for messaging using Java (includes Java Message
Service and SOAP transport support).
XA_Java Extended transaction support for Java Message Service.
Toolkit Sample WebSphere MQ program source, sample executable code,
headers, and bindings.
An example of a typical response file:
[Response]
PGMFOLDER="c:mqm"
DATFOLDER="c:mqmdata"
LOGFOLDER="c:mqmlog"
GSKFOLDER="c:mqm"
AGREETOLICENSE="yes"
LAUNCHWIZ=""
WIZPARMFILE="d:MQParms.ini"
ADDLOCAL="Server,Client"
REMOVE="Toolkit"
Creating a response file:
A response file is used with the Msiexec command, for further information see
“Using a response file with Msiexec” on page 28.
There are three ways to create a response file for installation:
v Copy and edit the file Response.ini that is supplied on the WebSphere MQ
Server CD, using an ASCII file editor.
v Create your own response file using an ASCII file editor.
v Use Msiexec with the SAVEINI (and optionally, the ONLYINI) command line
parameters to generate a response file that contains the same installation
options. See Table 5 on page 27.
A typical example of using Msiexec with the SAVEINI parameter is here:
Msiexec /i "pathMSI WebSphere MQ.msi" /q SAVEINI="response_file"
TRANSFORMS=:1033 AGREETOLICENSE="yes"
Chapter 2. Installing the WebSphere MQ Server 31](https://image.slidesharecdn.com/amqtac05-100926122844-phpapp02/85/Amqtac05-47-320.jpg)
![Installing silently using Msiexec with a response file
For an unattended (silent) installation you must include the /q or /qn parameter
when entering Msiexec at the command line. You must also set the
AGREETOLICENSE parameter to ″yes″ for a silent install. To install silently using
Msiexec, do the following:
At the command line enter the Msiexec command in the following format:
Msiexec /i "pathMSI WebSphere MQ.msi" /q USEINI="response_file" TRANSFORMS=:1033
Where:
/q Specifies a silent installation.
response_file
Is the full path name of the file that contains the [Response] stanza and the
required property=value pairs, for example Response.ini.
TRANSFORMS=:1033
Specifies that the installation is in U.S. English. For further information
about installing in different national languages, see “Using transforms with
Msiexec.”
You can also specify property=value pairs on the command line (the property must
be in upper case), for example:
Msiexec /i "pathMSI WebSphere MQ.msi" /q USEINI="response_file" TRANSFORMS=:1033
AGREETOLICENSE="yes"
If a parameter is specified both on the command line and in the response file, the
setting on the command line takes precedence.
Using transforms with Msiexec
MSI can use transforms to modify an installation. During WebSphere MQ
installation, transforms can be used to support different national languages.
WebSphere MQ is supplied with transform files in the MSI folder of the Server
CD. These files are also embedded in the WebSphere MQ Windows installer
package, IBM WebSphere MQ.msi.
On the Msiexec command line, you can specify the required language by using the
TRANSFORMS property in a property=value pair, for example:
TRANSFORMS=:1033
The : character means use the embedded transform. Otherwise, you must specify
the full path and file name of the transform file, for example:
TRANSFORMS="D:Msi1033.mst"
Table Table 8 on page 33 shows the transform files, the resulting language, and the
numerical value to use in the Msiexec command line.
Note: When using property=value pair and command line parameters with the
Msiexec command, command line parameters must be entered first.
You can also specify the required language by using the MQLANGUAGE property
with the MQParms command. See Table 10 on page 37.
32 Quick Beginnings](https://image.slidesharecdn.com/amqtac05-100926122844-phpapp02/85/Amqtac05-48-320.jpg)

![Table 9. Startup Parameters for Prepare WebSphere MQ Wizard (continued)
Default action if parameter
Parameter Name Description not supplied
–r Reset When the Prepare WebSphere User account not reset.
MQSeriesService MQ wizard is first run it
user account creates a local user account
MUSR_MQADMIN, with
specific settings and
permissions. The
MQSeriesService component is
configured to run under this
account. Depending on the
LAN configuration, the wizard
might reconfigure the
MQSeriesService component to
run under a domain user
account instead.
When this parameter is
specified, the local user
account MUSR_MQADMIN is
re-created with all the default
settings and permissions. The
MQSeriesService component is
configured to run under this
account.
–s silent install Process silently. Nothing is Not silent mode.
mode displayed and there is no user
input.
–p <file> User parameters Load and use parameters from When in silent mode, the
from file the parameter file. If the path parameter file
is not provided, the WebSphere AMQJPSE.INI is loaded
MQ Data directory is assumed. from WebSphere MQ Data
If the filename is not provided, directory.
AMQMJPSE.INI is assumed.
When not in silent mode, a
For more information about parameter file is not used.
the format of this file see
“Parameter file” on page 36.
The following stanzas are
loaded:
[Services]
[DefaultConfiguration]
[SSLMigration]
34 Quick Beginnings](https://image.slidesharecdn.com/amqtac05-100926122844-phpapp02/85/Amqtac05-50-320.jpg)
![Table 9. Startup Parameters for Prepare WebSphere MQ Wizard (continued)
Default action if parameter
Parameter Name Description not supplied
–m <file> Generate a When the Prepare WebSphere .MIF file not created.
Microsoft MQ wizard closes, generate a
System status .MIF file with the
Management specified name. If the path is
Server (SMS) not provided, the WebSphere
status .MIF file. MQ Data directory is assumed.
If the filename is not provided,
AMQMJPSE.MIF is assumed.
The file ISMIF32.DLL (installed
as part of SMS) must be in the
path.
The InstallStatus field in the
file will contain either Success
or Failed.
Using the MQParms command
You can use the MQParms command to invoke installation or uninstallation. This
command can use parameters on a command line, or those specified in a
parameter file. The parameter file is an ASCII text file that contains the parameter
values that you want to set for the installation. The MQParms command takes the
specified parameters and generates the corresponding Msiexec command line.
This means that you can save all the parameters that you want to use with the
Msiexec command in a single file.
For a silent installation, this must include the /q or /qn parameter, either on the
command line, or in the [MSI] stanza of the parameter file. You must also set the
AGREETOLICENSE parameter to ″yes″.
You can specify many more parameters in the parameter file that you use with the
MQParms command than you can in the response file that you use directly with the
Msiexec command. Also, as well as parameters that the WebSphere MQ installation
uses, you can specify parameters that can be used by the Prepare WebSphere MQ
wizard.
An example of the file MQParms.ini is supplied with WebSphere MQ. This file
contains default installation parameters.
There are two ways to create a parameter file for installation:
v Copy and edit the file MQParms.ini that is supplied in the root folder of the
WebSphere MQ Server CD, using an ASCII file editor.
v Create your own parameter file using an ASCII file editor.
To invoke installation using the MQParms command:
1. From a command line, change to the root folder of the WebSphere MQ Server
CD (that is, the location of the file MQParms.exe).
2. Enter the following command:
MQParms [parameter_file] [parameters]
where:
Chapter 2. Installing the WebSphere MQ Server 35](https://image.slidesharecdn.com/amqtac05-100926122844-phpapp02/85/Amqtac05-51-320.jpg)
![parameter_file
is the file that contains the required parameter values. If this file is not
in the same folder as MQParms.exe, specify the full path and file name.
If you do not specify a parameter file, the default is MQParms.ini. For
further details, see “Parameter file.”
parameters
are one or more command line parameters, as listed in Table 4 on page
25.
A typical example of an MQParms command is:
MQParms MyParams.ini /l*v c:install.log
If you specify a parameter both on the command line and in the parameter file, the
setting on the command line takes precedence.
If you specify a parameter file, you might want to run the encryption utility before
you use the MQParms command (see “Encrypting a parameter file” on page 41).
If you do not specify /i, /x, /a, or /j, MQParms defaults to standard installation
using the WebSphere MQ Windows Installer package, IBM WebSphere MQ.msi.
That is, it generates the following part of the command line:
/i "current_folderMSIIBM WebSphere MQ.msi"
If you do not specify a WIZPARMFILE parameter, MQParms defaults to the
current parameter file. That is, it generates the following part of the command:
WIZPARMFILE="current_foldercurrent_parameter_file"
Parameter file: A parameter file is an ASCII text file that contains sections
(stanzas) with parameters that can be used by the MQParms command. Typically,
this is an initialization file such as MQParms.ini.
The MQParms command takes parameters from the following stanzas in the file:
[MSI] Contains general properties related to how the MQParms command runs and
to the installation of WebSphere MQ.
The properties that you can set in this stanza are listed in Table 4 on page
25, Table 5 on page 27,Table 6 on page 29, and Table 10 on page 37.
[Services]
Contains properties related to WebSphere MQ account configuration, in
particular, the user account required for WebSphere MQ Services. If you
are installing WebSphere MQ on a network where the domain controller is
on a Windows 2000 or Windows 2003 server, you probably need details of
a special domain account. For further information, see “Configuring
WebSphere MQ accounts” on page 50 and “Configuring WebSphere MQ
with the Prepare WebSphere MQ wizard” on page 45.
The properties that you can set in this stanza are listed in Table 12 on page
38.
[Default Configuration]
Contains properties related to the default configuration, that is, adding or
configuring a default queue manager. For further information, see “Using
the Default Configuration wizard” on page 53.
The properties that you can set in this stanza are listed in Table 13 on page
39.
36 Quick Beginnings](https://image.slidesharecdn.com/amqtac05-100926122844-phpapp02/85/Amqtac05-52-320.jpg)
![[SSLMigration]
Contains properties relating to the scheduling of SSL resource migration.
The properties that you can set in this stanza are listed in Table 14 on page
40.
MQParms ignores any other stanzas in the file.
In the [MSI] stanza, the properties can be in command line format (for example,
/q) or property=value format.
In all other stanzas, the parameters are in the form property=value, where property
is always interpreted as upper case, but value is case sensitive. If a value string
includes a blank, it must be enclosed in double quotation marks. Most other values
can be enclosed in double quotation marks. Some properties can take more than
one value, for example:
ADDLOCAL="Server,Client"
To clear a property, set its value to an empty string, for example:
REINSTALL=""
The following tables show the properties that you can set. The default is shown in
bold.
For the [MSI] stanza, you can enter parameters in command line format (for
example, /q) and parameters in property=value format (for example,
ADDLOCAL="Server"). Refer to Table 6 on page 29, Table 4 on page 25, and Table 5 on
page 27 for the properties used to install WebSphere MQ. Table 10 shows
additional properties in the stanza that affect how the MQParms command runs, but
that do not affect the installation.
Table 10. Properties used by MQParms in the MSI stanza
Property Values Description
MQPLOG path|file_name MQParms generates a text log file with
the specified name and location.
MQPLANGUAGE The installation language.
system|user|
transform_value system. Install using the language of
the default system locale (the default).
user. Install using the language of the
default locale of the user.
transform_value. Install using the
language specified by this value. See
Table 11 on page 38.
MQPSMS 0|no 0 or no. MQParms does not wait for the
Msiexec command to end (the default).
Any other value. MQParms waits for
the Msiexec command to end.
MQPINUSE 0|1 If MQPINUSE is set to 1, MQParams
continues installing even if WebSphere
MQ files are in use. If this option is
used a reboot will be required to
complete the installation.
Chapter 2. Installing the WebSphere MQ Server 37](https://image.slidesharecdn.com/amqtac05-100926122844-phpapp02/85/Amqtac05-53-320.jpg)
![Table 10. Properties used by MQParms in the MSI stanza (continued)
Property Values Description
MQPNOREBOOT 0|1 If MQPNOREBOOT is set to 1, the
reboot that is required if installation
takes place while WebSphere MQ files
are still in use will be suppressed.
Table 11. Valid values for the MQPLANGUAGE property
Language Valid values
U.S. English English en_us 1033
German German de_de 1031
French French fr_fr 1036
Spanish Spanish es_es 1034
Italian Italian it_it 1040
Brazilian Portuguese Brazilian Portuguese pt_br 1046
Japanese Japanese ja_jp 1041
Korean Korean ko_kr 1042
Simplified Chinese Simplified Chinese zh_cn 2052
Traditional Chinese Traditional Chinese zh_tw 1028
For the [Services] stanza, you can enter parameters in property=value format. You
might want to encrypt the values in this stanza. See “Encrypting a parameter file”
on page 41.
Table 12. Properties in the Services stanza
Property Values Description
USERTYPE local | domain | The type of user account to use:
onlydomain
local Creates a local user account.
domain
Creates a local user account. If
this does not have the required
security authorities, it uses the
domain user account specified
by DOMAINNAME,
USERNAME, and PASSWORD.
onlydomain
Does not create a local user
account, but immediately uses
the domain user account
specified by DOMAINNAME,
USERNAME and PASSWORD.
If any of these three properties
are missing, a USERTYPE of
local is assumed.
The properties DOMAINNAME,
USERNAME, and PASSWORD are
required if USERTYPE is set to
onlydomain.
38 Quick Beginnings](https://image.slidesharecdn.com/amqtac05-100926122844-phpapp02/85/Amqtac05-54-320.jpg)
![Table 12. Properties in the Services stanza (continued)
Property Values Description
1
DOMAINNAME domain_name The domain for the domain user
account.
Required if USERTYPE is set to domain.
1
USERNAME user_name The user name for the domain user
account.
Required if USERTYPE is set to domain.
1
PASSWORD password The password for the domain user
account.
Required if USERTYPE is set to domain.
1. Do not enclose this value in double quotation marks.
For the [DefaultConfiguration] stanza, you can enter parameters in property=value
format.
Table 13. Properties in the DefaultConfiguration stanza
Property Values Description
CREATE yes|no Whether to create the default
configuration.
If this is set to yes and a default
configuration already exists, there is no
action.
If this is set to yes and the default
configuration cannot be created because
other queue managers already exist, an
error is raised.
MIGRATE yes|no Whether to migrate an existing default
configuration from a previous version of
WebSphere MQ.
If this is set to yes and a default
configuration does not already exist, there
is no action.
ALLOWREMOTEADMIN yes|no Whether to enable remote administration
of the queue manager that is created as
part of the default configuration.
JOINDEFAULTCLUSTER yes|no Whether the default queue manager joins
the default cluster.
REPOSITORY The location of the default configuration
local| cluster repository.
computer_name|
ip_address Use computer_name or ip_address if the
repository is not on the local machine.
If it is not possible to ping the remote
machine, the default configuration is not
joined to the cluster, and an error is raised.
Chapter 2. Installing the WebSphere MQ Server 39](https://image.slidesharecdn.com/amqtac05-100926122844-phpapp02/85/Amqtac05-55-320.jpg)
![For the [SSLMigration] stanza, you can enter parameters in property=value format.
Table 14. Properties in the SSLMigration stanza
Property Values Description
SCHEDULE yes|no This property specifies whether SSL
migration is to be scheduled. If this
property is omitted or set to no, all
other properties in this stanza are
ignored and no error is raised.
QMGRS qmgr_name, qmgr_name, A comma separated list of queue
... managers for which certificate transfer
to GSKit key database files is
scheduled.
QMGRPASSWORD password|password, Passwords to use for the GSKit key
password, ... database files. This property is required
if QMGRS is present. If this contains
only one password that password will
be used for all the queue managers. If it
contains more than one password there
must be the same number of passwords
as there are queue managers specified
in QMGRS.
QMGREXPIRY interval|interval, interval, Expiry intervals to set for the
... passwords used. If nothing is specified,
the default value of 60 days is used. If
this contains only one value, that value
will be used for all queue managers. If
it contains more than one value, there
must be the same number of expiry
intervals as there are queue managers
specified in QMGRS..
CLIENTSTORES file_name, file_name, ... A comma separated list of the client
SSL certificate stores to schedule for
transfer to GSKit key database files.
CLIENTPASSWORD password|password, Passwords to use for GSKit key
password, ... database files. This property is
rerquired if CLIENTSTORES is present.
If this contains only one password, the
password will be used for all client
stores. If it contains more than one
password, there must be the same
number of passwords as files given in
CLIENTSTORES.
CLIENTEXPIRY interval|interval, interval, Expiry intervals to set for the
... passwords used. If nothing is specified,
the default value of 60 days is used. If
this contains only one value, that value
will be used for all queue managers. If
it contains more than one value, there
must be the same number of expiry
intervals as there are queue managers
specified in CLIENTSTORES.
IGNOREERRORS yes|no Whether to continue processing if an
error is detected when scheduling the
transfer of certificate stores to GSKit
key database files.
40 Quick Beginnings](https://image.slidesharecdn.com/amqtac05-100926122844-phpapp02/85/Amqtac05-56-320.jpg)
![A typical example of a parameter file is:
[MSI]
MQPLANGUAGE=1033
MQPLOG=%temp%MQParms.log
MQPSMS=no
ADDLOCAL=Server
/m miffile
REMOVE=""
/l*v c:install.log
[Services]
USERTYPE=domain
DOMAINNAME=mqm*df349edfcab12
USERNAME=mqm*a087ed4b9e9c
PASSWORD=mqm*d7eba3463bd0a3
[DefaultConfiguration]
CREATE=yes
MIGRATE=""
ALLOWREMOTEADMIN=yes
JONDEFAULTCLUSTER=yes
REPOSITORY=machine1.server.company.com
[SSLMigration]
SCHEDULE=yes
QMGRS="qmgr1,qmgr2"
QMGRPASSWORD="password1,password2"
Encrypting a parameter file:
Use the setmqipw utility to encrypt the DOMAINNAME, USERNAME, and
PASSWORD values in the [Services] stanza of a parameter file, if they are not
already encrypted. (These values might be encrypted if you have run the utility
before.) setmqipw will also encrypt the QMGRPASSWORD and
CLIENTPASSWORD values in the [SSLMigration] stanza of a parameter file.
This encryption means that, if you need a special domain account to configure
WebSphere MQ (see “Configuring WebSphere MQ accounts” on page 50), or you
need to keep key database passwords secret, details are kept secure. Otherwise,
these values, including the domain account password, flow across the network as
clear text. You do not have to use this utility, but it is useful if security in your
network is an issue.
To run the script:
1. From a command line, change to the folder that contains your parameter file.
2. Enter the following command:
CD_drive:setmqipw
Note: You can run the command from a different folder, by entering the
following command, where parameter_file is the full path and file name of
the parameter file:
CD_drive:setmqipw parameter_file
If you view the resulting parameter file, the encrypted values start with the string
mqm*. Do not use this prefix for any other values; passwords or names that begin
with this prefix are not supported.
Chapter 2. Installing the WebSphere MQ Server 41](https://image.slidesharecdn.com/amqtac05-100926122844-phpapp02/85/Amqtac05-57-320.jpg)


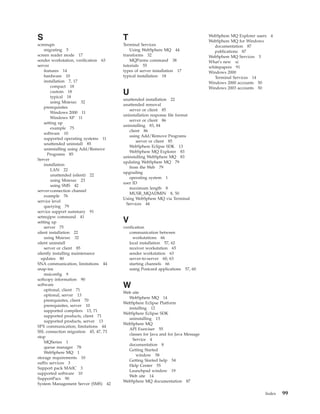
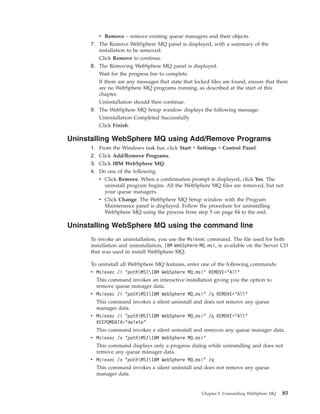
![2. When the file has been downloaded, change to the destination folder and either
run the executable file or see “Silently installing maintenance updates” for
information on silently installing a maintenance pack.
3. Running this file presents you with a dialog screen on which you can choose to
temporarily unpack or save the executable file. Select the appropriate option
(and if saving select the default folder, or change it if required) and Click
Install
4. Click Finish when the file has been unpacked into the temporary folder to end
the dialog.
The installation program AMQICSDN.EXE file now runs and presents you with a
dialog screen on which you can choose a folder in which to back up any files that
are to be changed by the maintenance process.
Note: Use the default folder for the backup operation.
Silently installing maintenance updates
To apply maintenance updates to WebSphere MQ:
1. Ensure that all WebSphere MQ function is stopped. You must:
a. Stop execution of all queue managers
b. Stop execution of all channels
c. Stop execution of all listeners
d. Ensure the WebSphere MQ service has stopped
2. Exit all Windows programs before applying maintenance to WebSphere MQ.
3. Change to the directory into which you downloaded the refresh pack or fix
pack file.
4. In Windows Explorer, right-click the fix pack file and select Open.
Alternatively, enter the following command at a command prompt:
MaintenanceLauncher [-s] -a install_arguments
where:
MaintenanceLauncher
is the full path to the fix pack or refresh pack executable file, for example
WebSphereMQMU6.0.1.0EnUs.exe.
-s is optional and means that the maintenance launcher extracts silently. If
you omit this, a progress of extraction panel is displayed.
-a means ’read in the following install arguments’
install_arguments
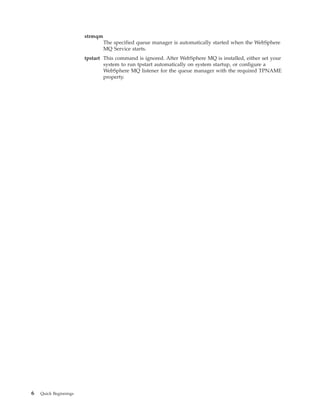
are the arguments that determine how the installer runs. These are
specified in PROPERTY=value pairs. Table 16 shows the properties that can
be used as install_arguments.
Table 16. Properties used to install a maintenance update
Property Values Description
MQPLOG pathfile_name Specifies the log to be used during
install/uninstall, for example
MQPLOG="C:TEMPUPDATEINSTALL.LOG"
MQPBACKUPPATH path Specifies the directory to backup into during
install, for example MQPBACKUPPATH="C:BACKUP"
80 Quick Beginnings](https://image.slidesharecdn.com/amqtac05-100926122844-phpapp02/85/Amqtac05-96-320.jpg)


![Note: path refers to the path to the file IBM WebSphere MQ.msi. This file can be
found on the Server CD.
Alternatively, you can use the Msiexec command with a parameter that calls a
response file. A response file is an ASCII text file that contains the parameter
values that you want to set for the uninstallation. The response file has a format
similar to a Windows .ini file, and contains the stanza [Response]. This stanza
contains parameters that the Msiexec command can use, in the form of
property=value pairs. The Msiexec command ignores any other stanzas in the file.
You can set which features to uninstall, and set whether to keep existing queue
managers.
Note: The response file you use to uninstall WebSphere MQ for Windows, Version
6.0 when it was installed using the WebSphere MQ Server CD is not the
same as the one used with earlier non-MSI versions of MQSeries. For details
about the response file you use with the WebSphere MQ Client CD, see
WebSphere MQ Clients.
To silently uninstall WebSphere MQ using a response file, enter the following
command:
Msiexec /i "pathMSIIBM WebSphere MQ.msi" /q USEINI="response_file"
where response_file is the file that contains the [Response] stanza and the required
property=value pairs. For details about how to create a response file, see
“Unattended (silent) installation” on page 22. For details of the parameters you can
specify in a response file, see Table 6 on page 29.
An example of a typical uninstallation response file is:
[Response]
KEEPQMDATA="delete"
REMOVE="Server,Client"
Uninstalling WebSphere MQ Client
This section describes how to uninstall (remove) WebSphere MQ client. There are
two cases for this:
v If you installed it using the WebSphere MQ Client CD, use one of the methods
described in the WebSphere MQ Clients book.
v If you installed the WebSphere MQ client using the WebSphere MQ Server CD,
use one of the methods described in “Uninstalling WebSphere MQ Server” on
page 83.
86 Quick Beginnings](https://image.slidesharecdn.com/amqtac05-100926122844-phpapp02/85/Amqtac05-102-320.jpg)