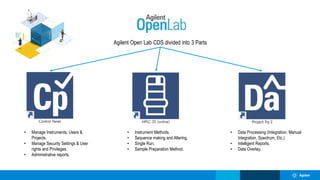
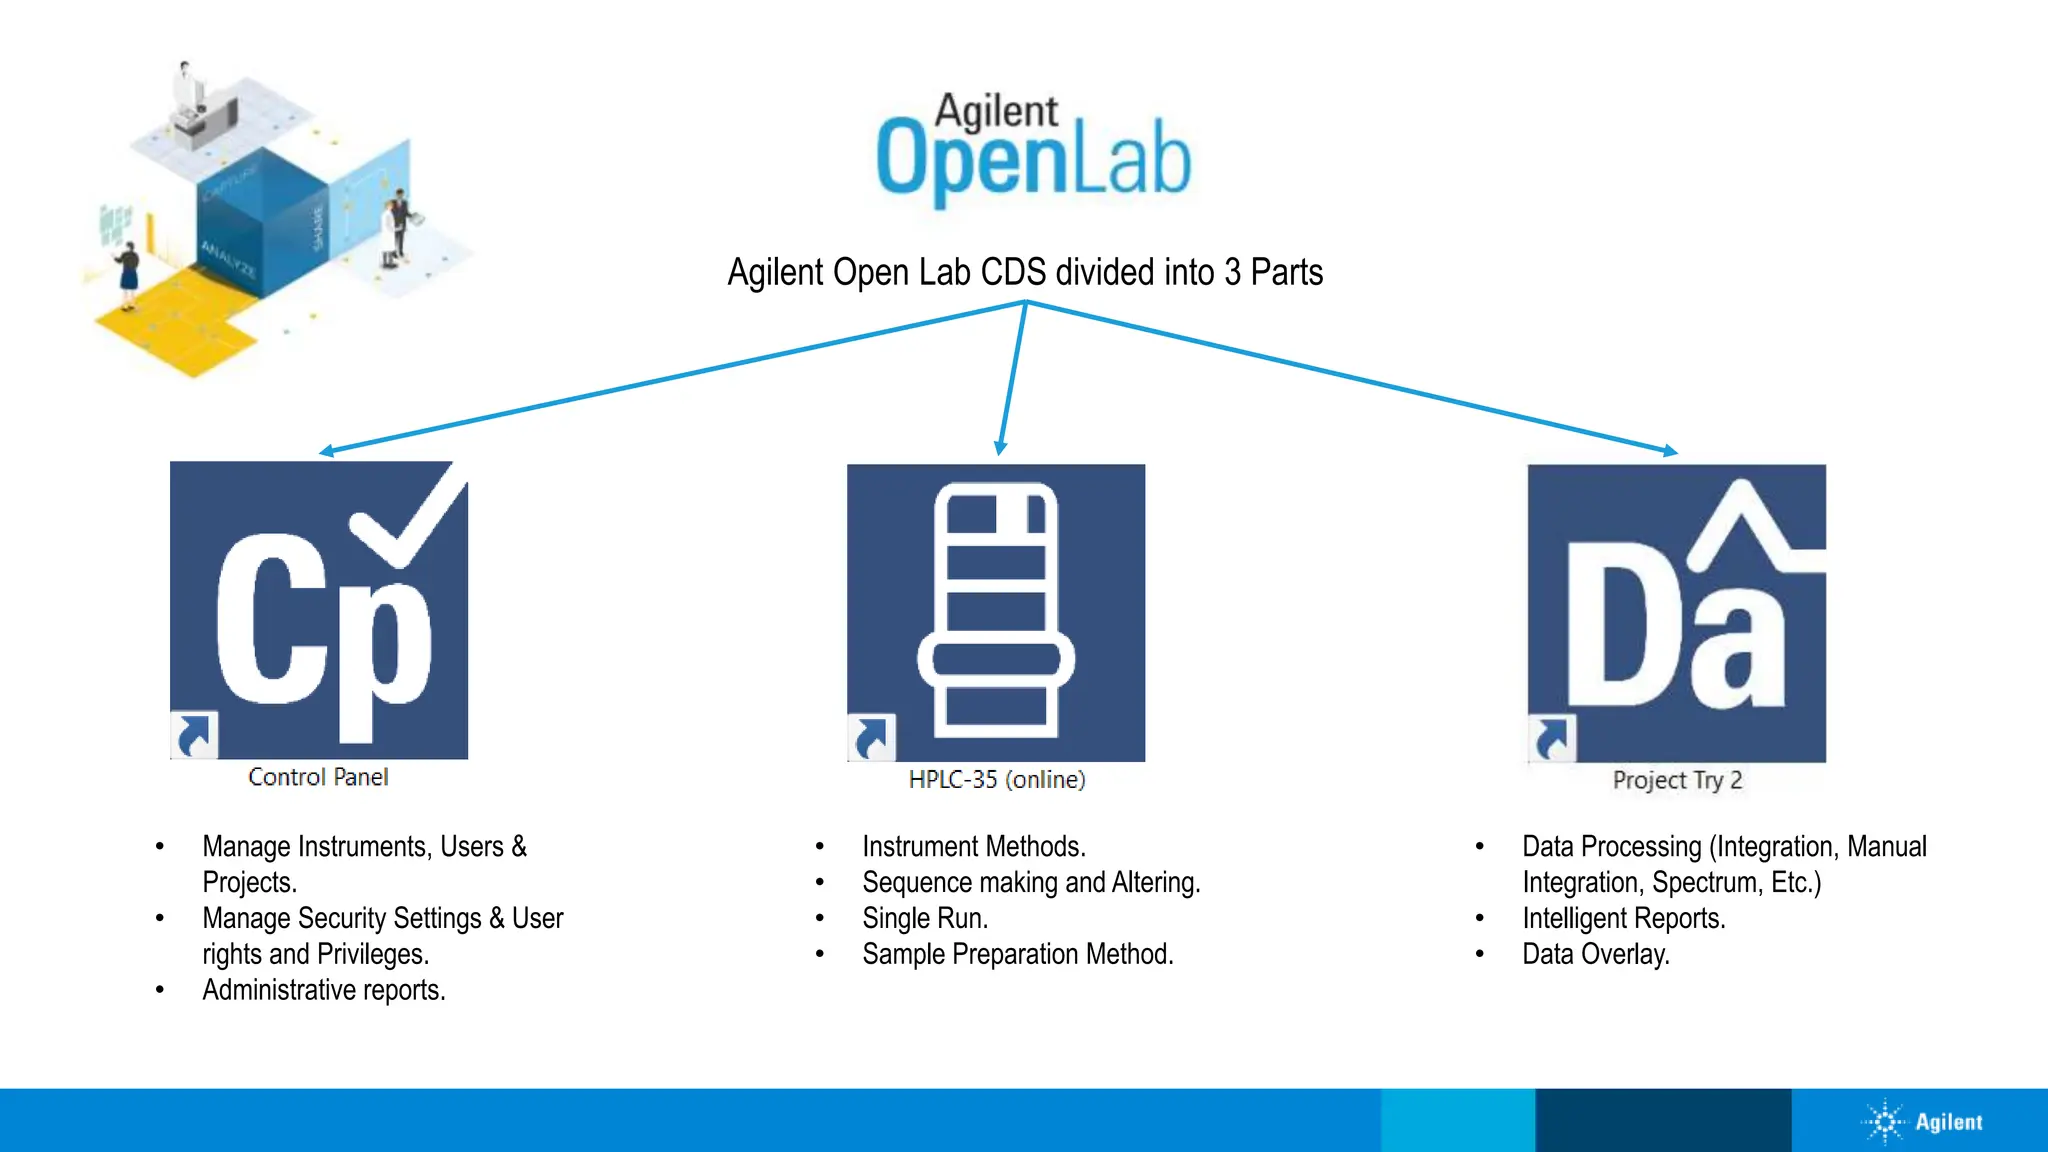
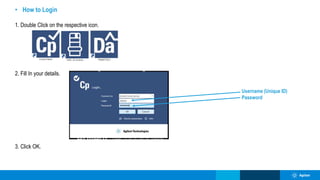
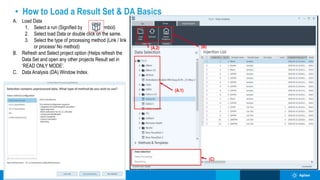
The document provides a comprehensive guide to using Agilent OpenLab CDS, detailing functionalities related to instrument management, project creation, and data processing. It covers processes such as logging in, instrument configuration, creating and launching projects, as well as performing data analysis and generating reports. Step-by-step instructions with clear options are provided for various tasks including method creation, sample analysis, and calibration curves.

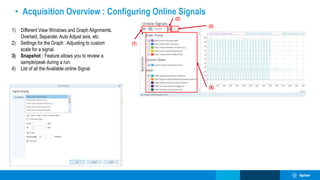

![(2)
(1)
(3)
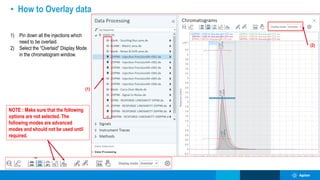
• How to add peaks as compound
(4)
1) Select the Chromatogram Window from the Home Tab.
2) Right Click on the peak.
3) Select “Add peak as compound to method“.
4) The compound is added to the Method with the default
format as ‘peak@RT’ – Can Be renamed to a
compound.
NOTE : To select multiple peaks, hold the [Ctrl] key while
clicking the peaks. To select a range of peaks, hold the [Shift]
key while clicking the peaks.](https://image.slidesharecdn.com/sopbase1-240710093652-63a1c6b3/85/AgilentHPLC_SOP_Base_1_InfinitySeries-pptx-25-320.jpg)


![[Deck] What's New in Spark-Iceberg Integration via DSV2.pptx](https://cdn.slidesharecdn.com/ss_thumbnails/deckwhatsnewinspark-icebergintegrationviadsv2-260210005337-25955b12-thumbnail.jpg?width=640&height=640&fit=bounds)


