Download to read offline
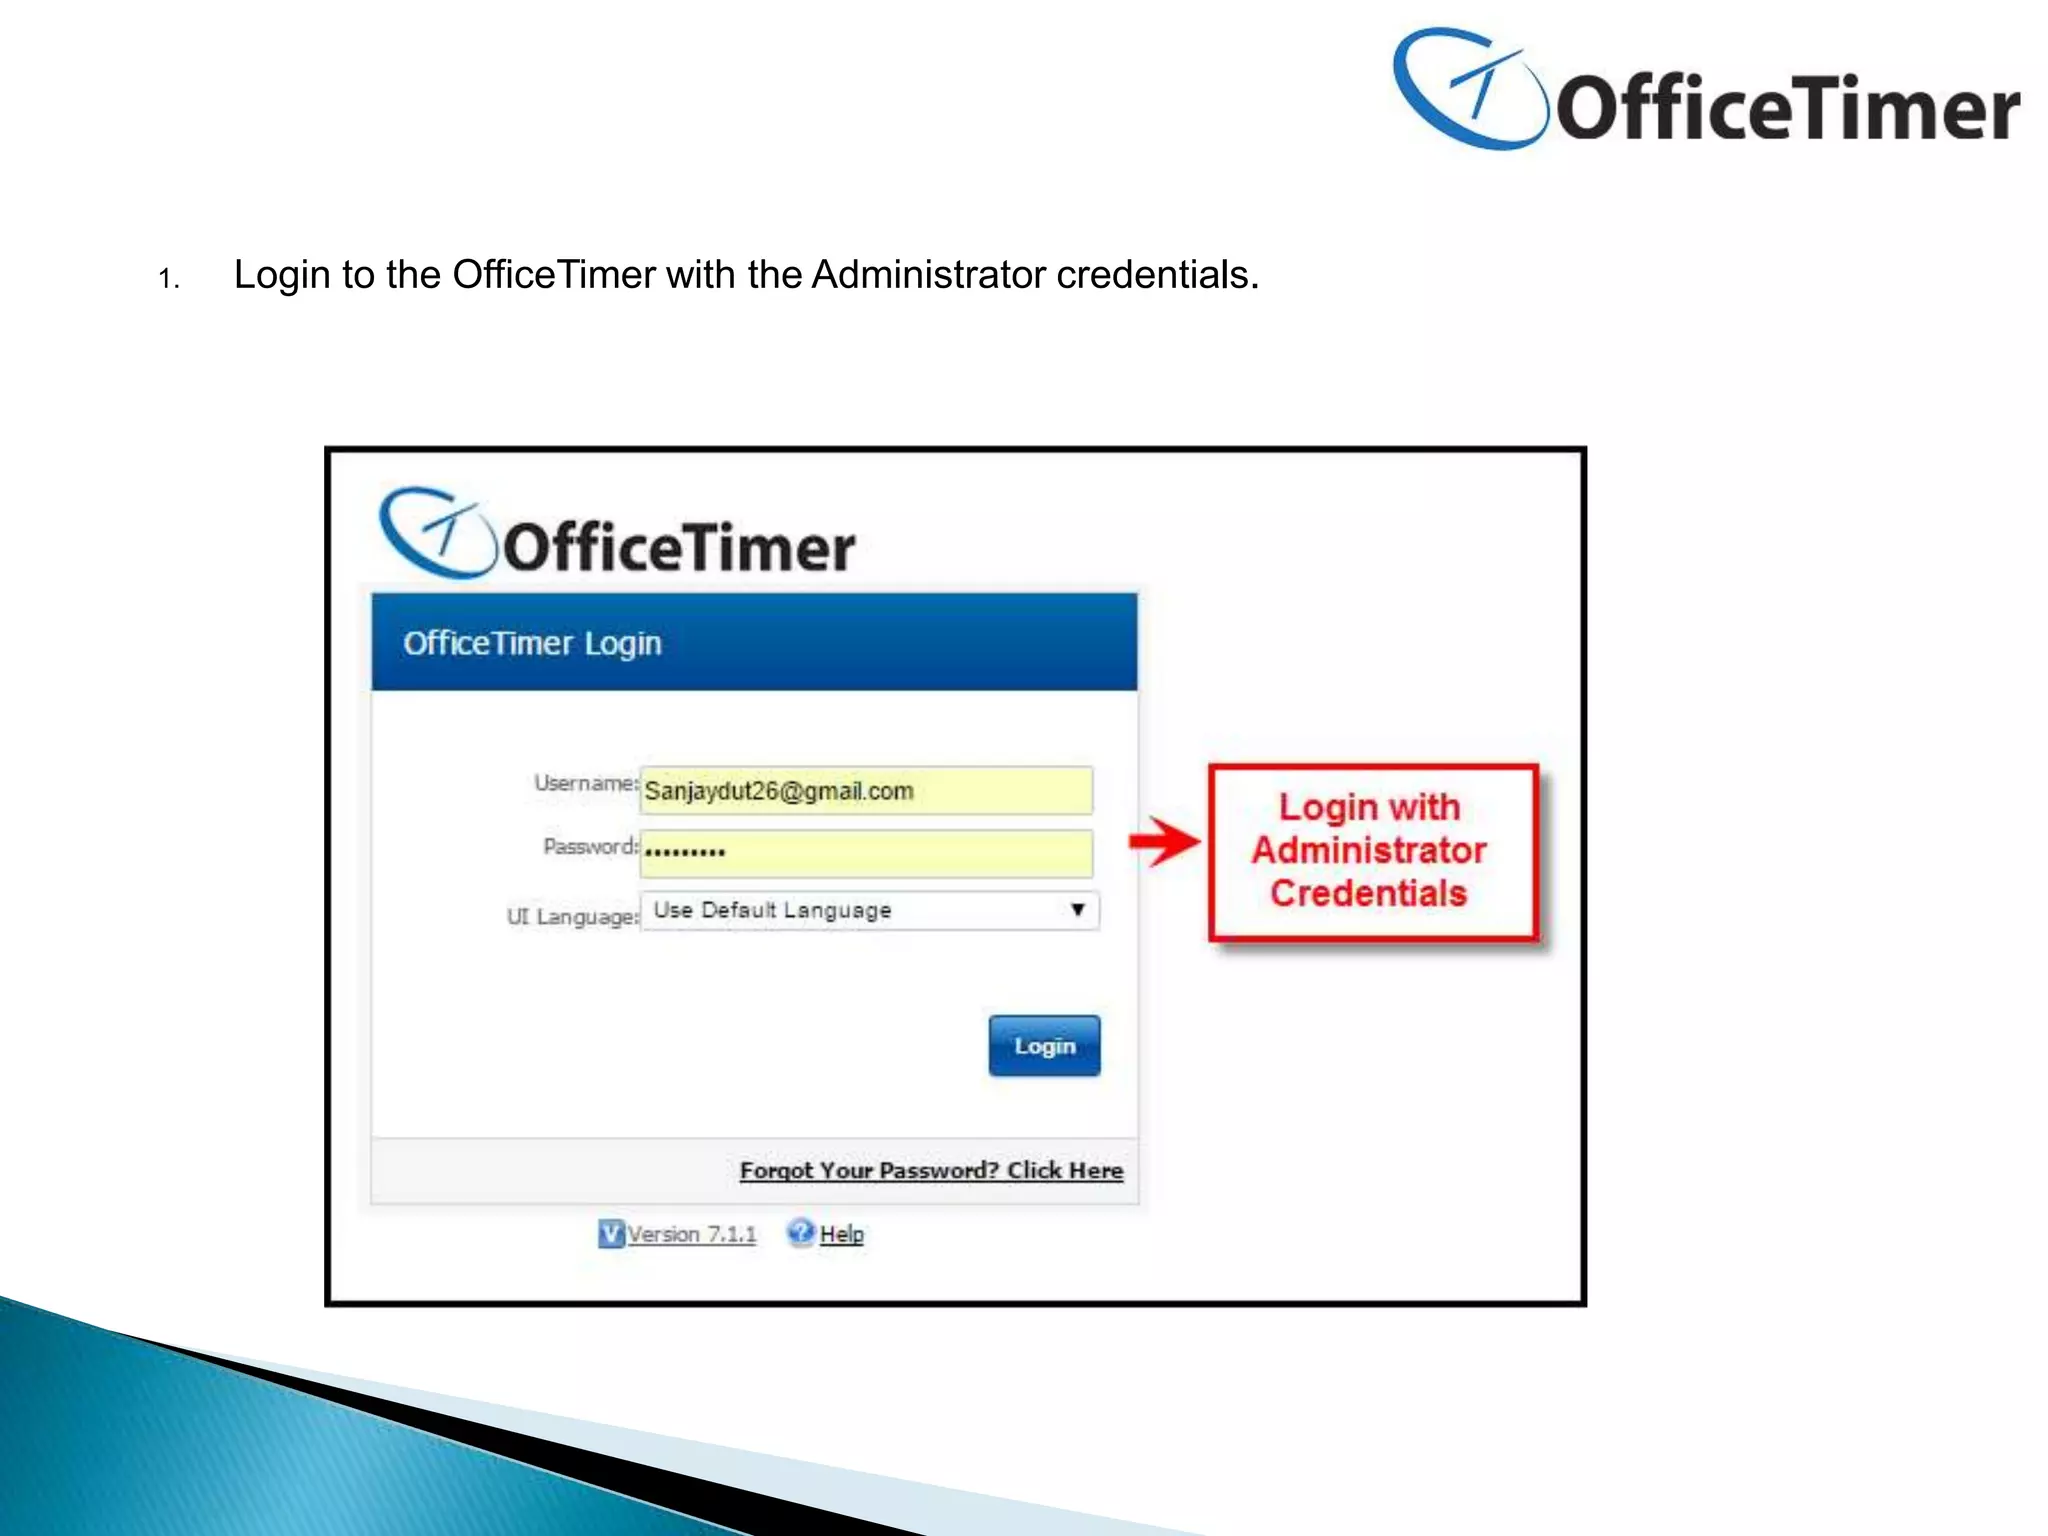
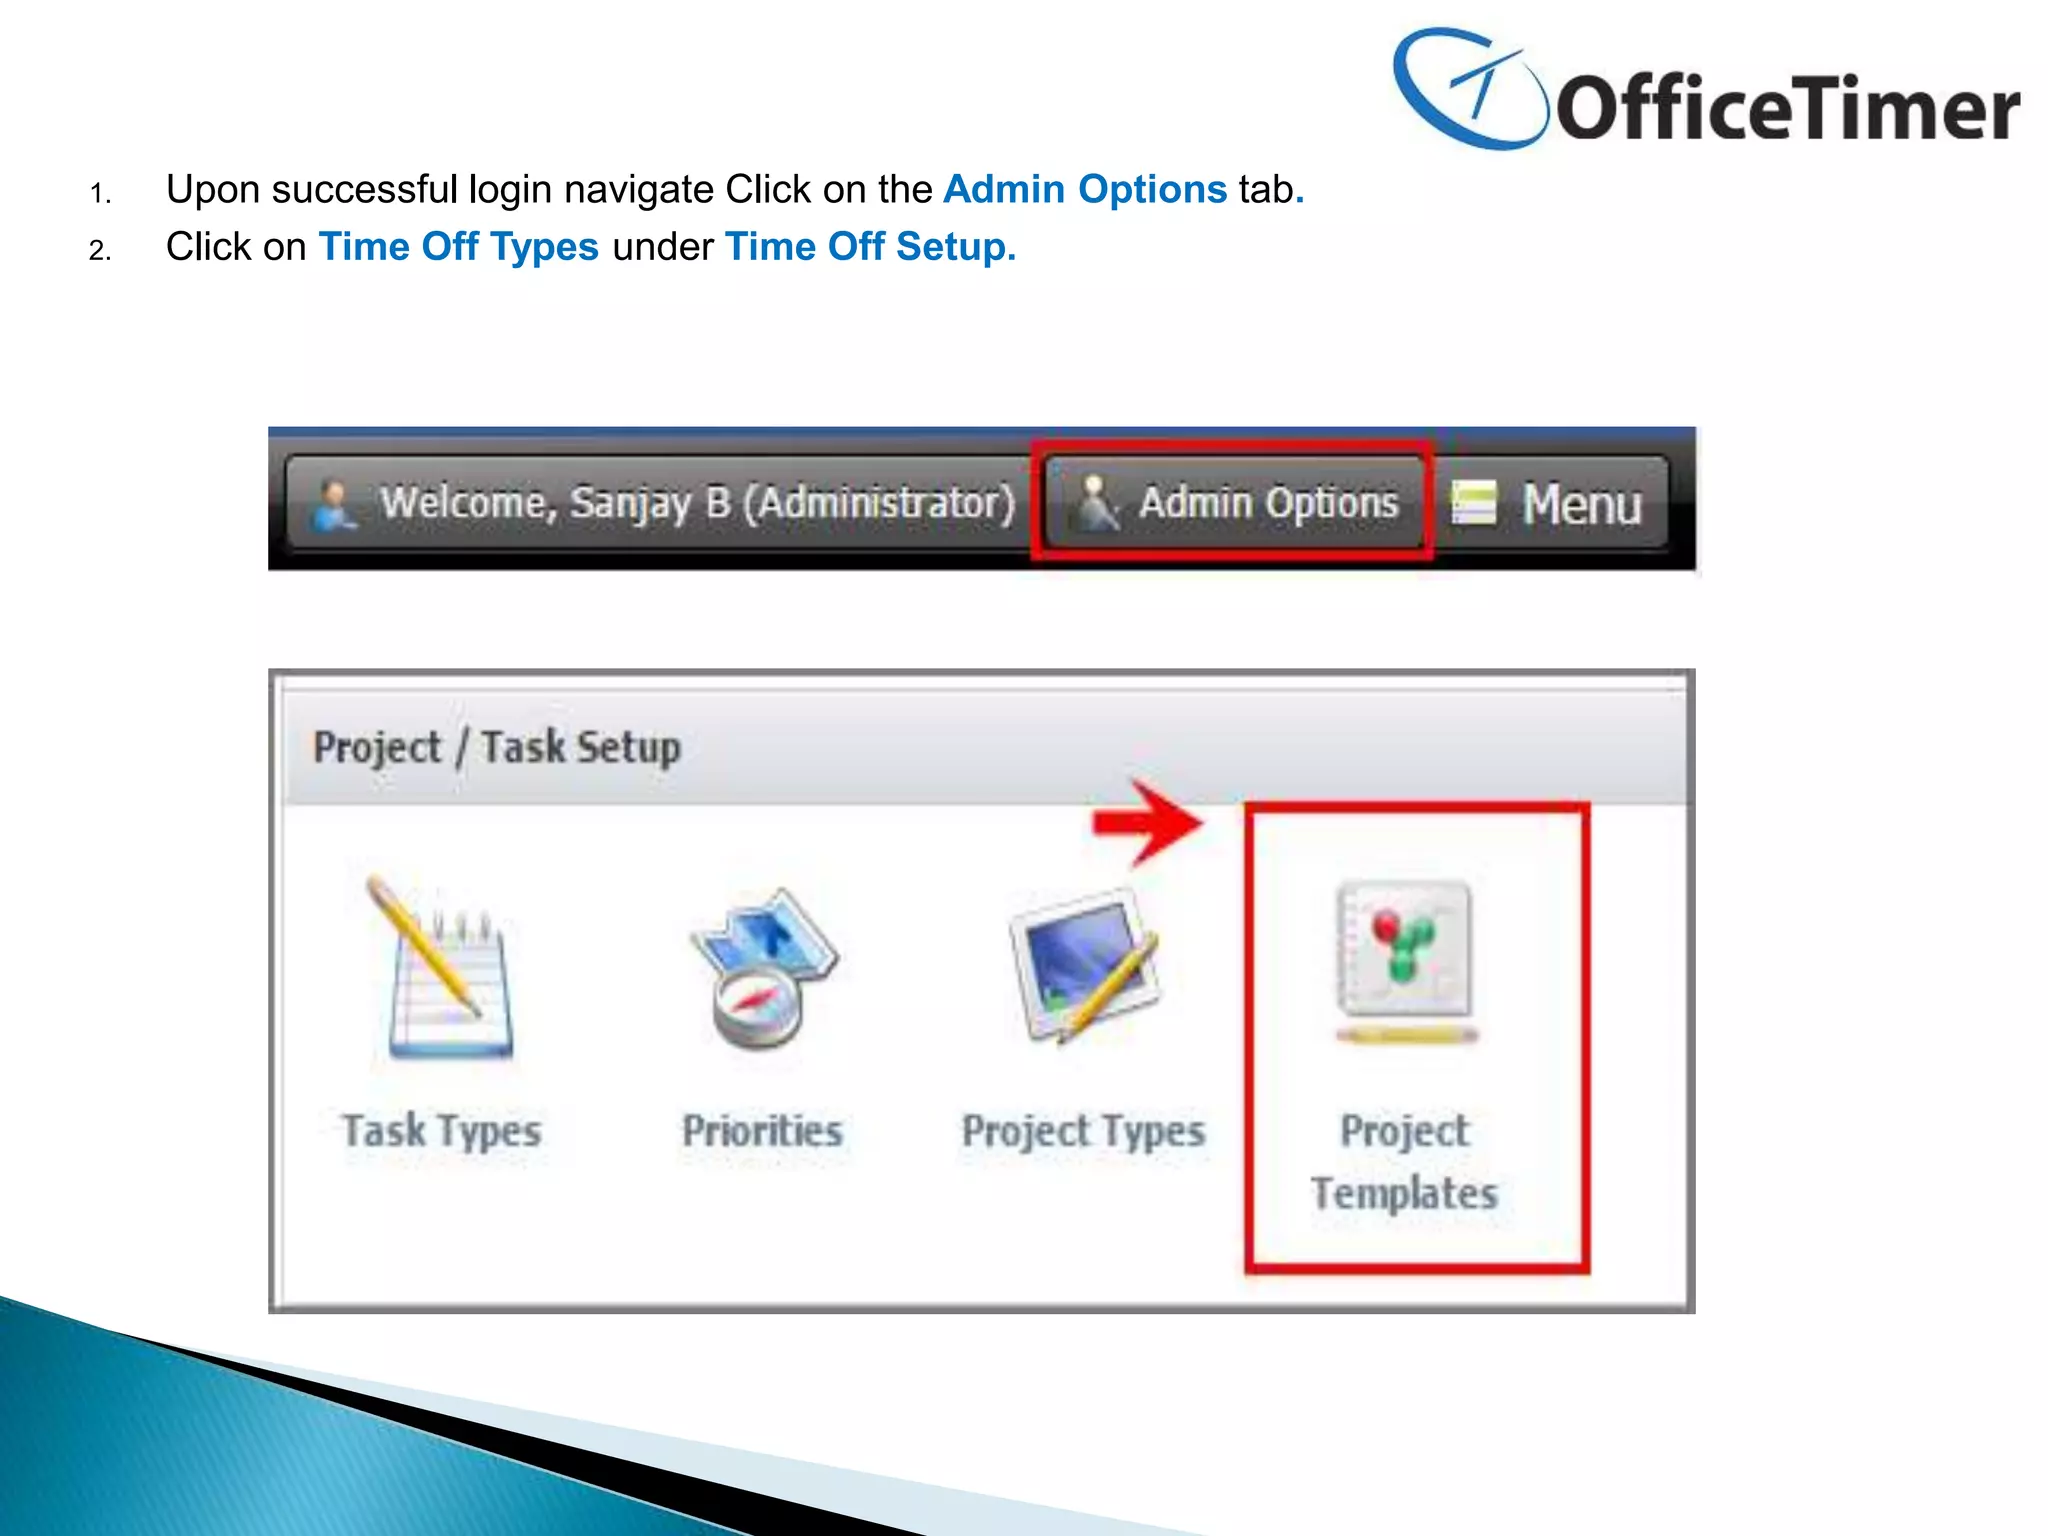
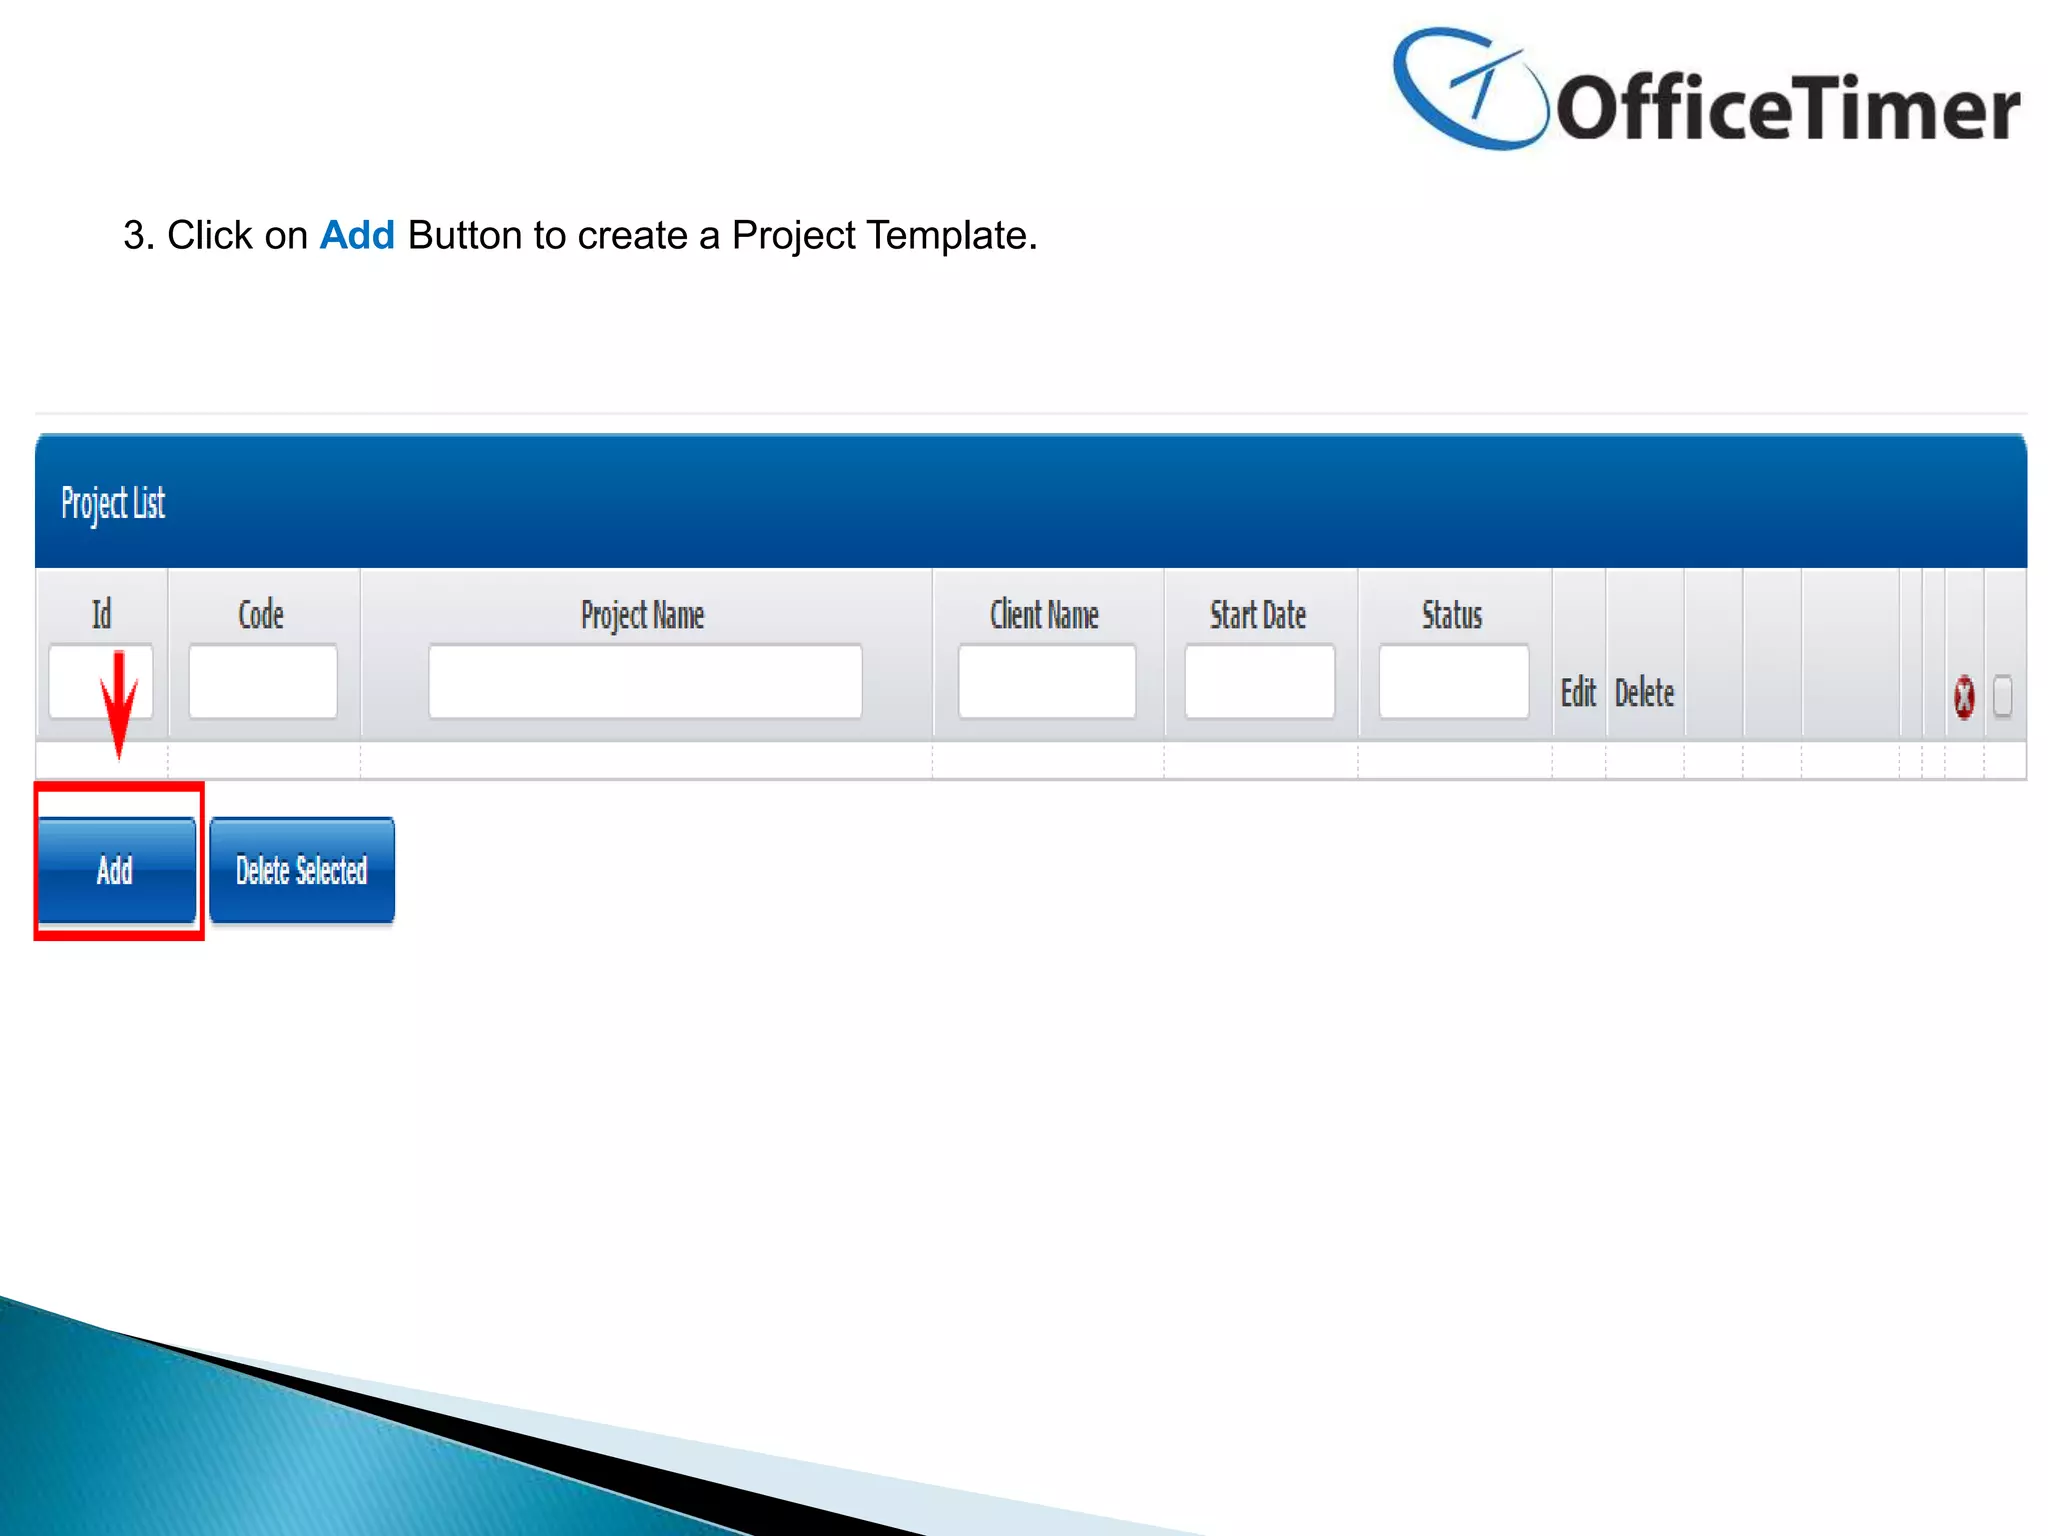
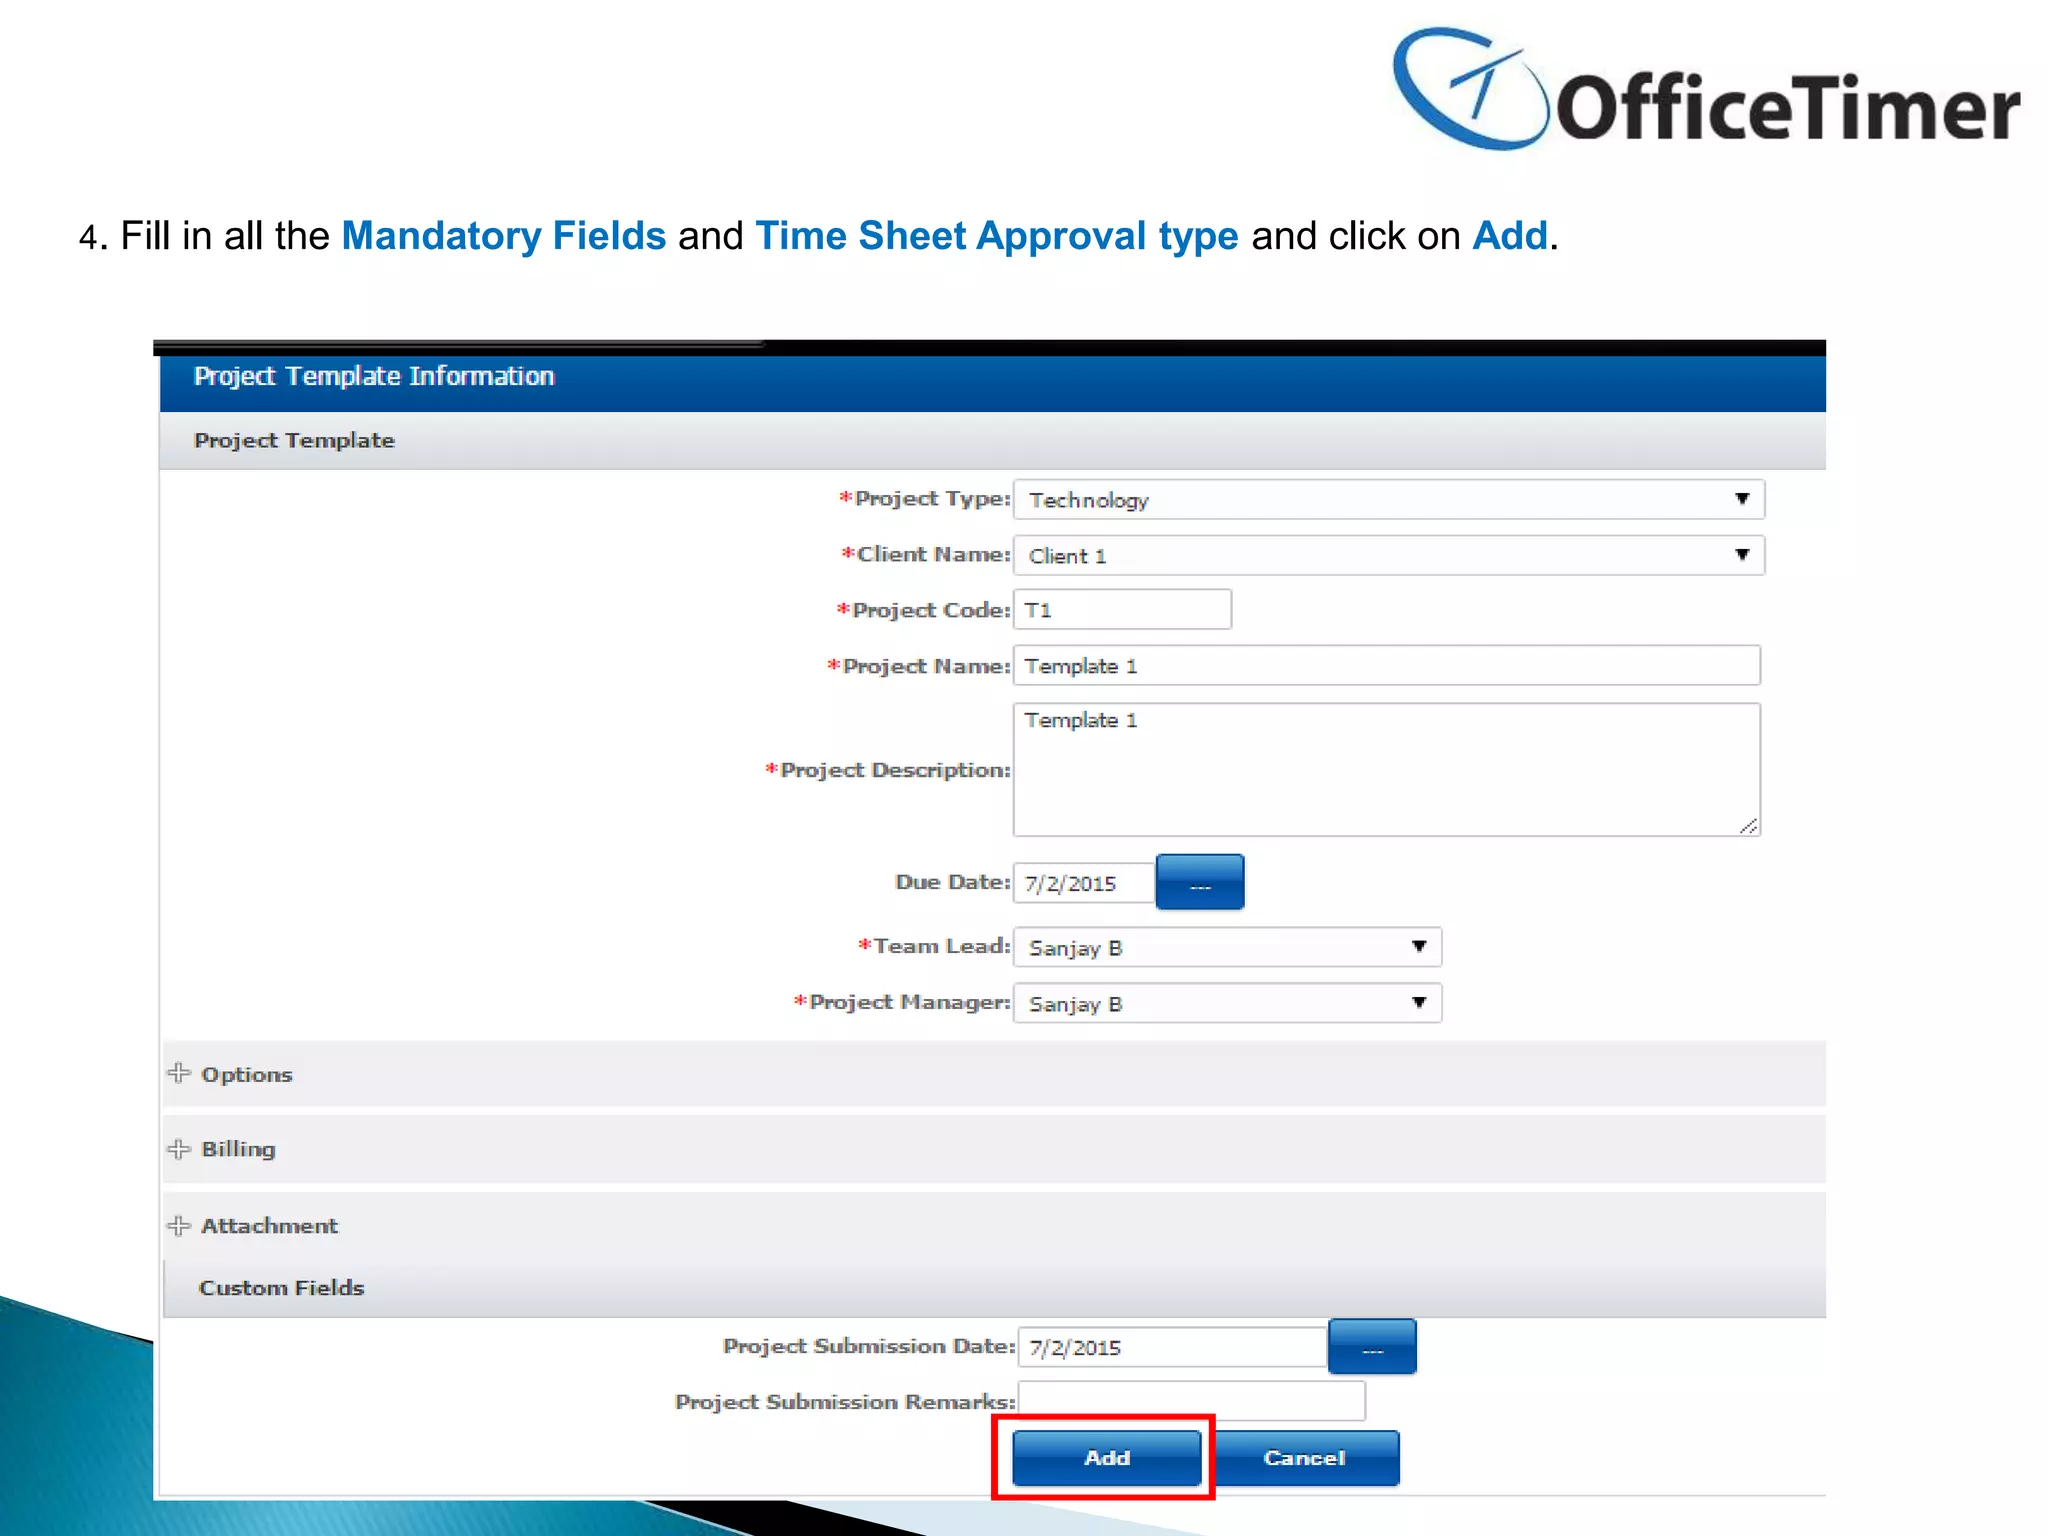
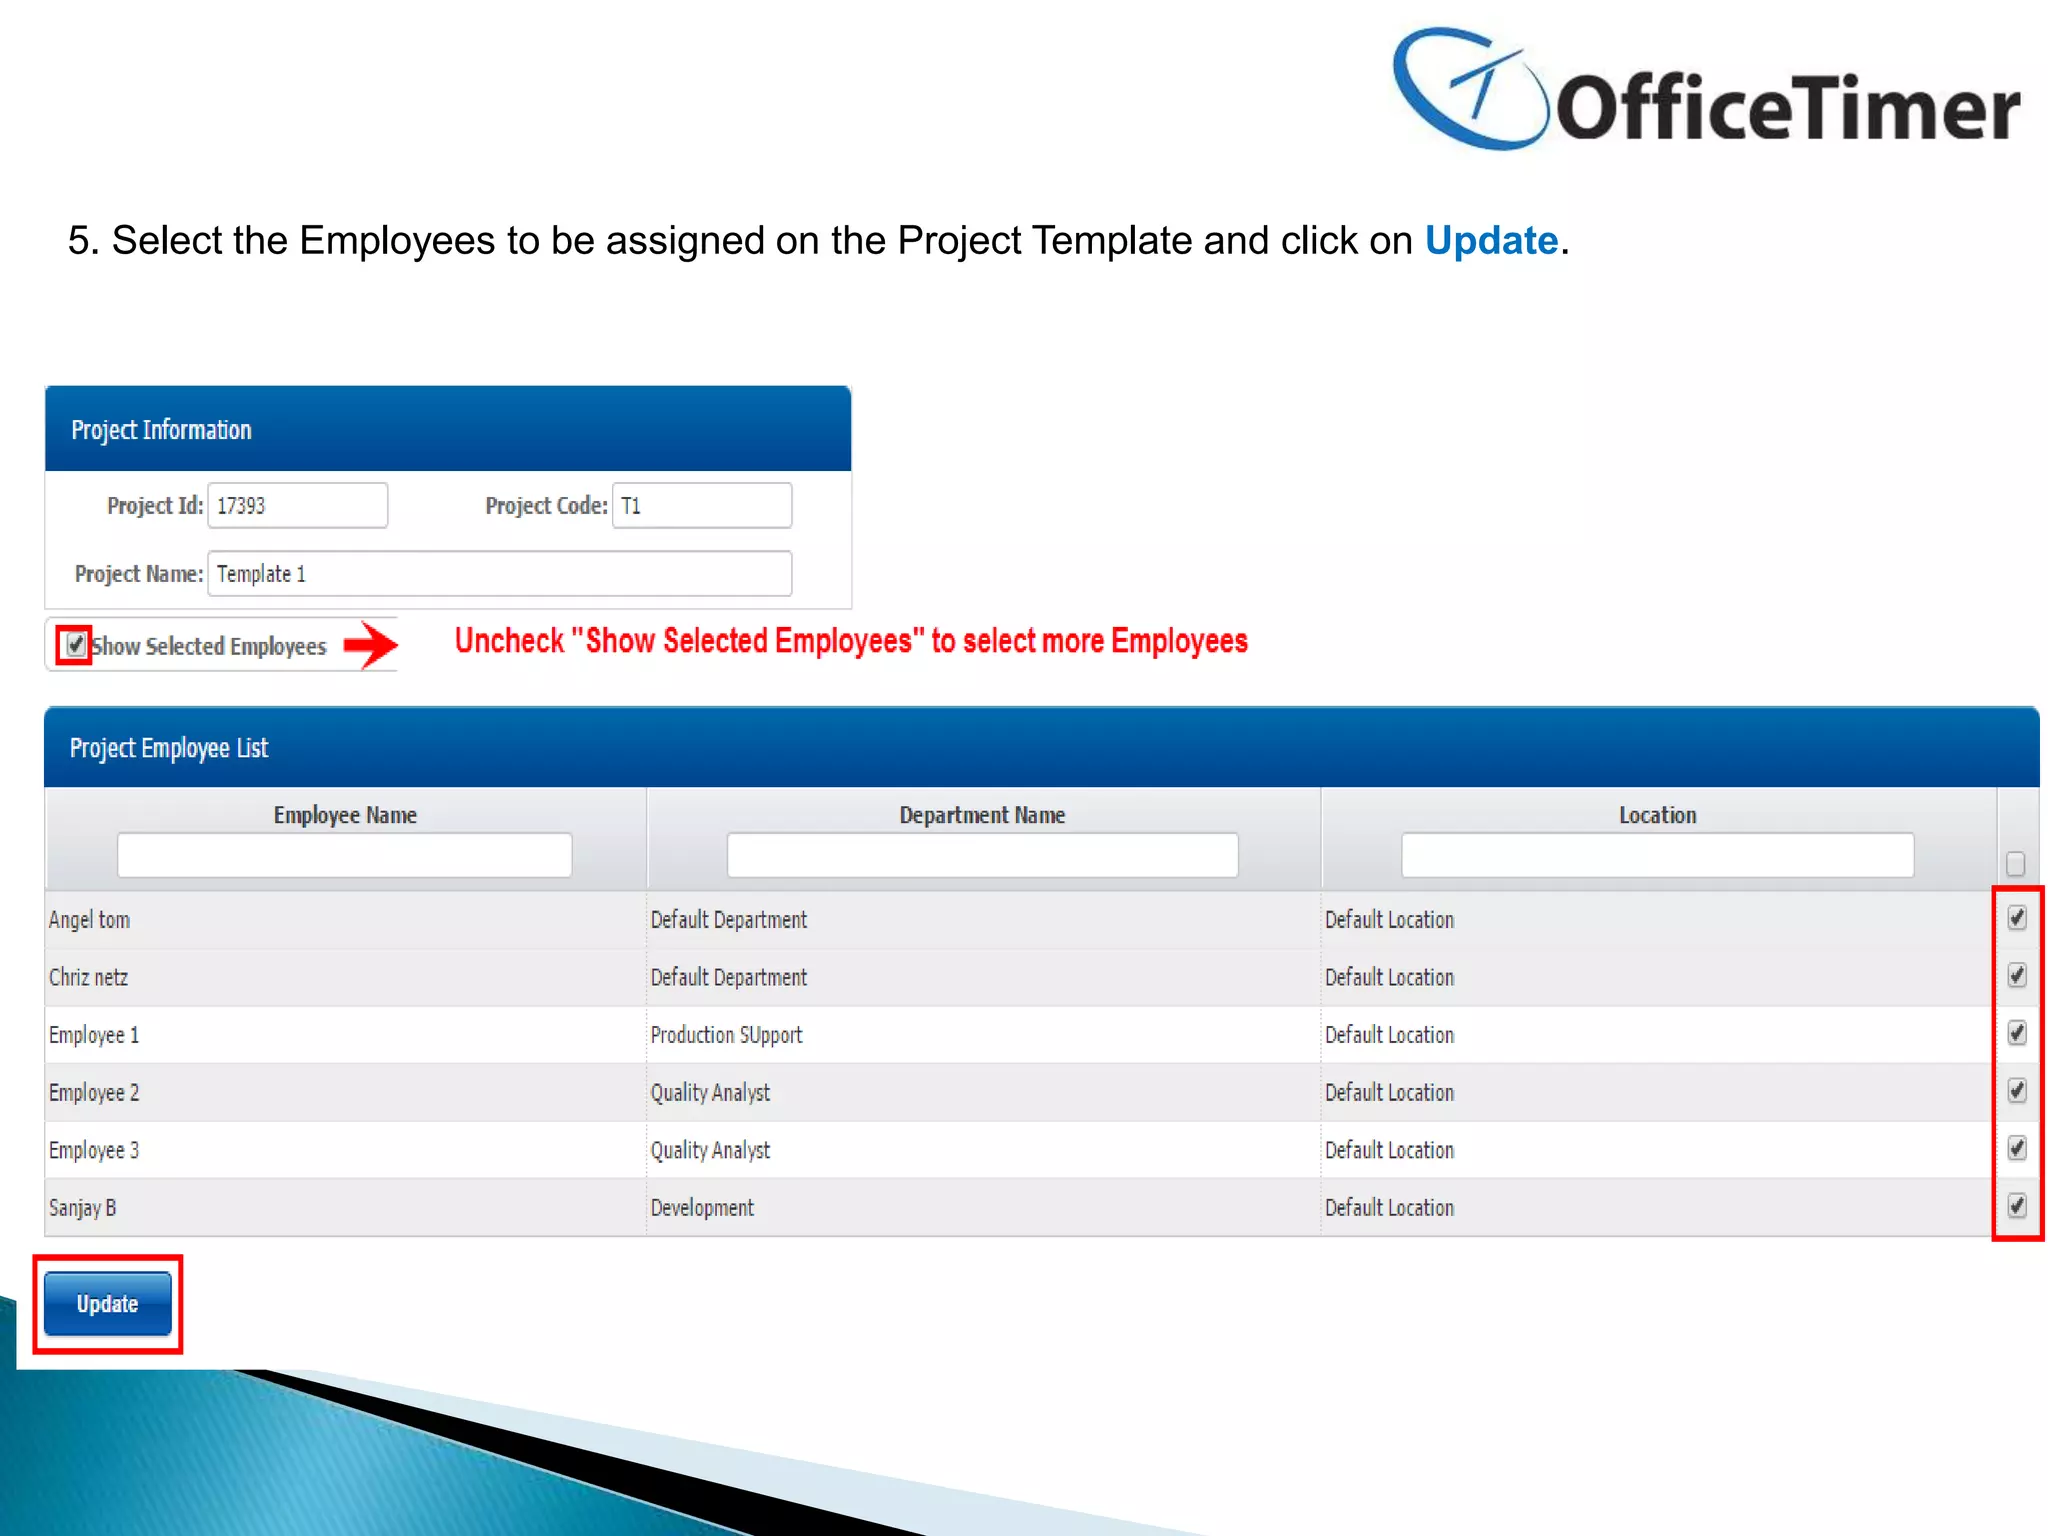
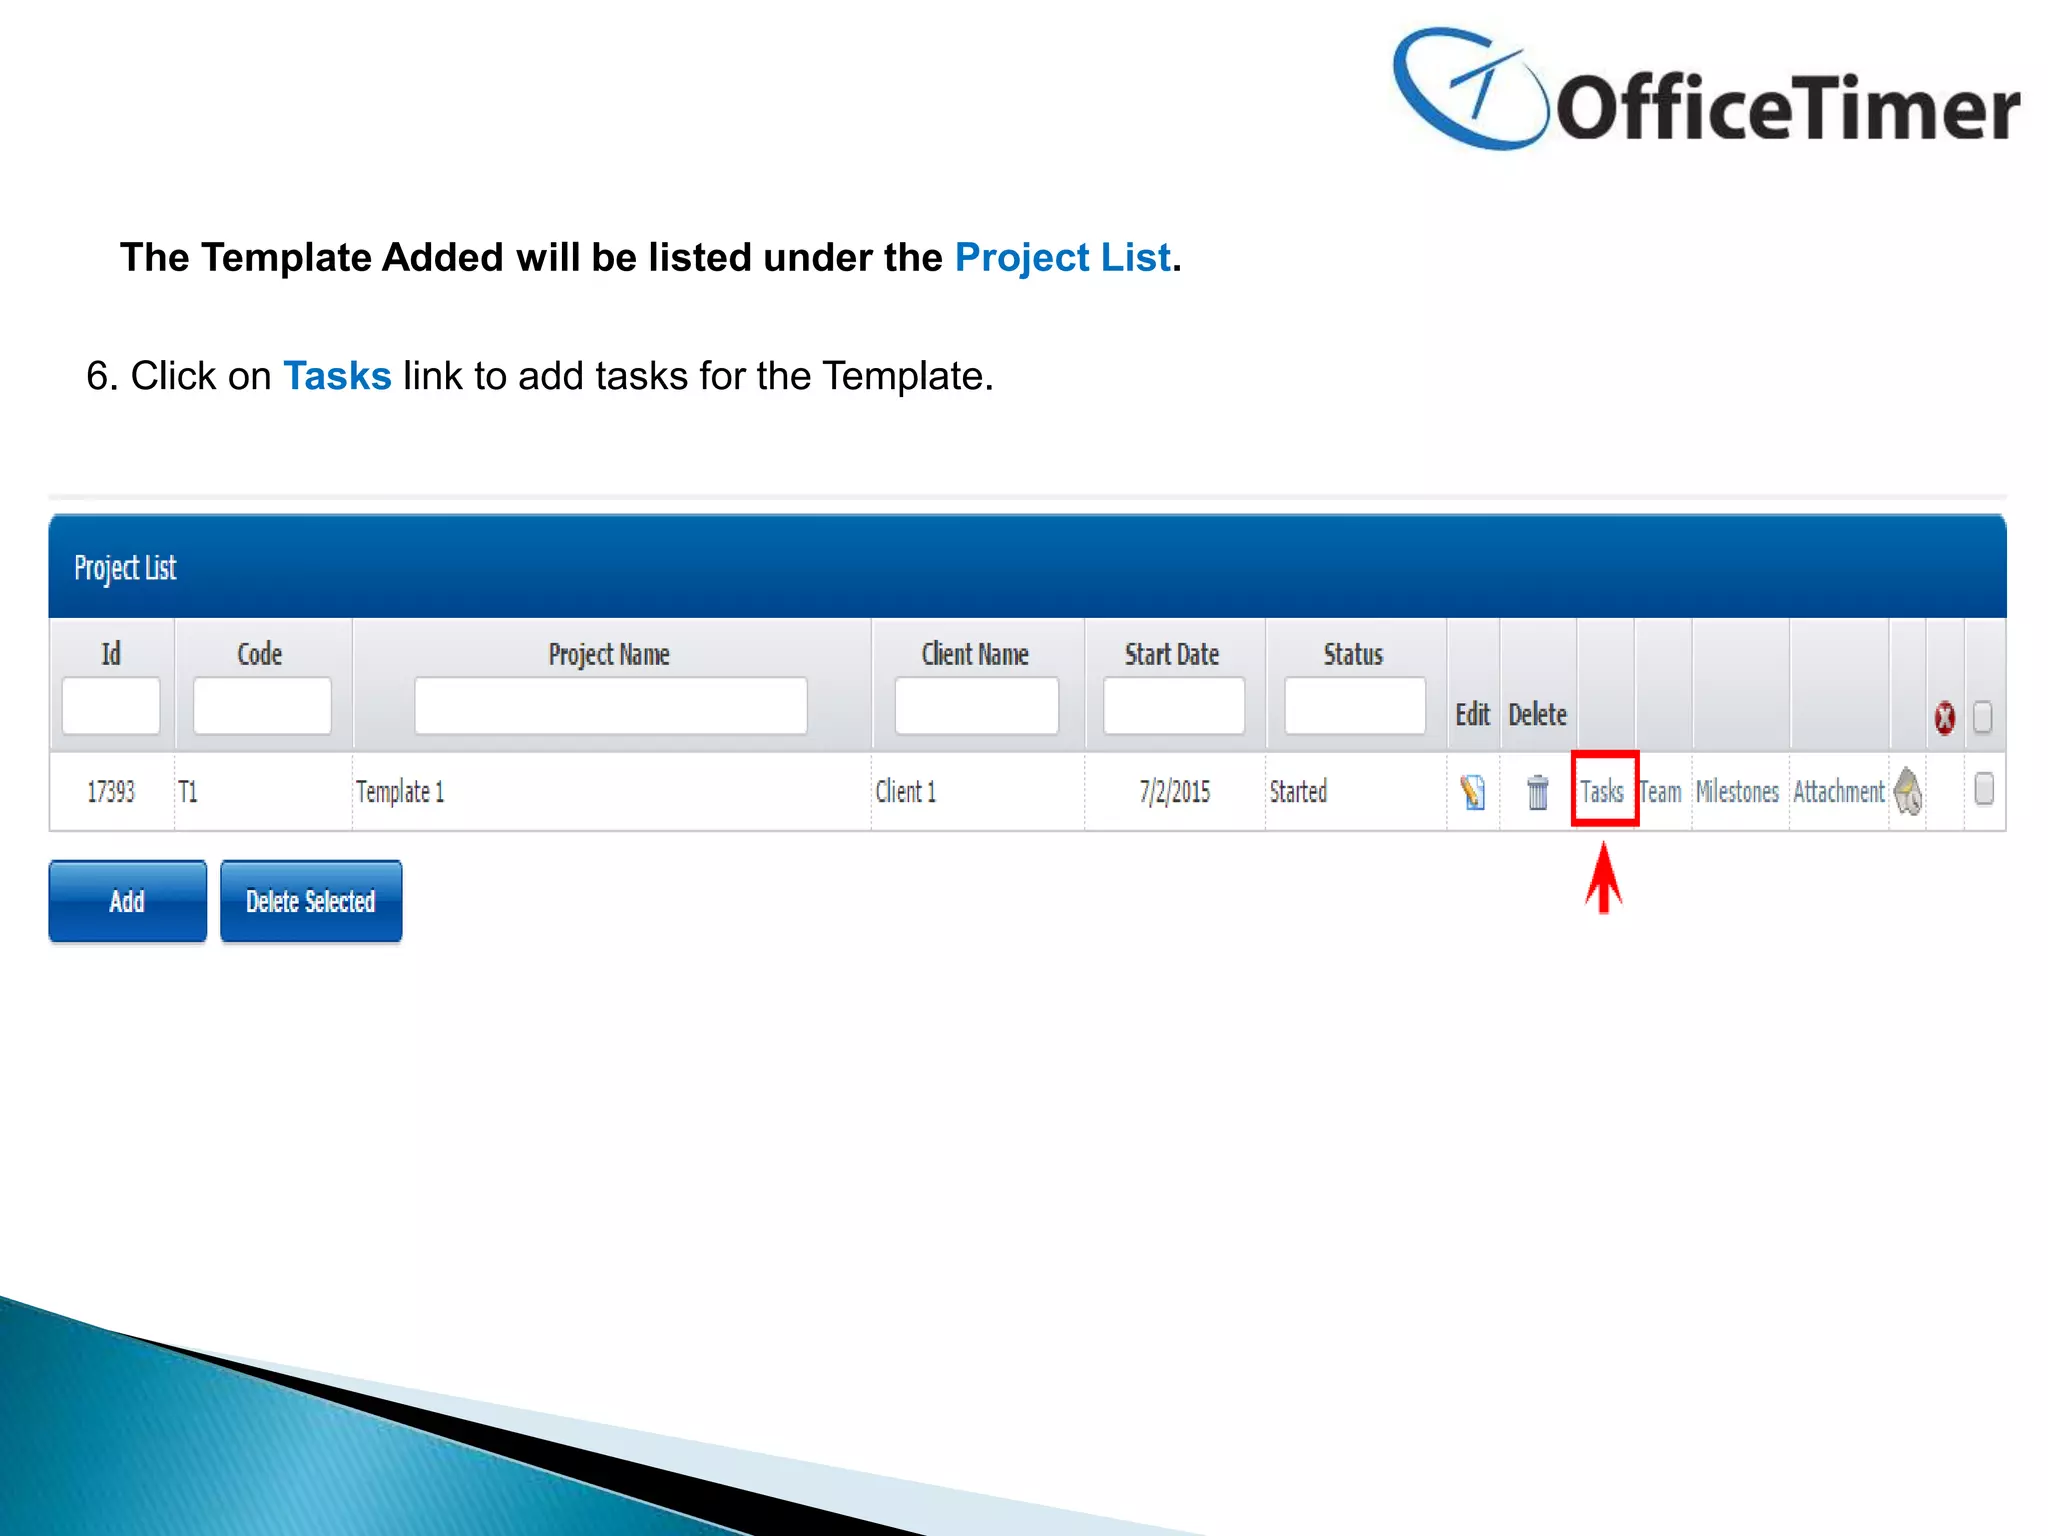
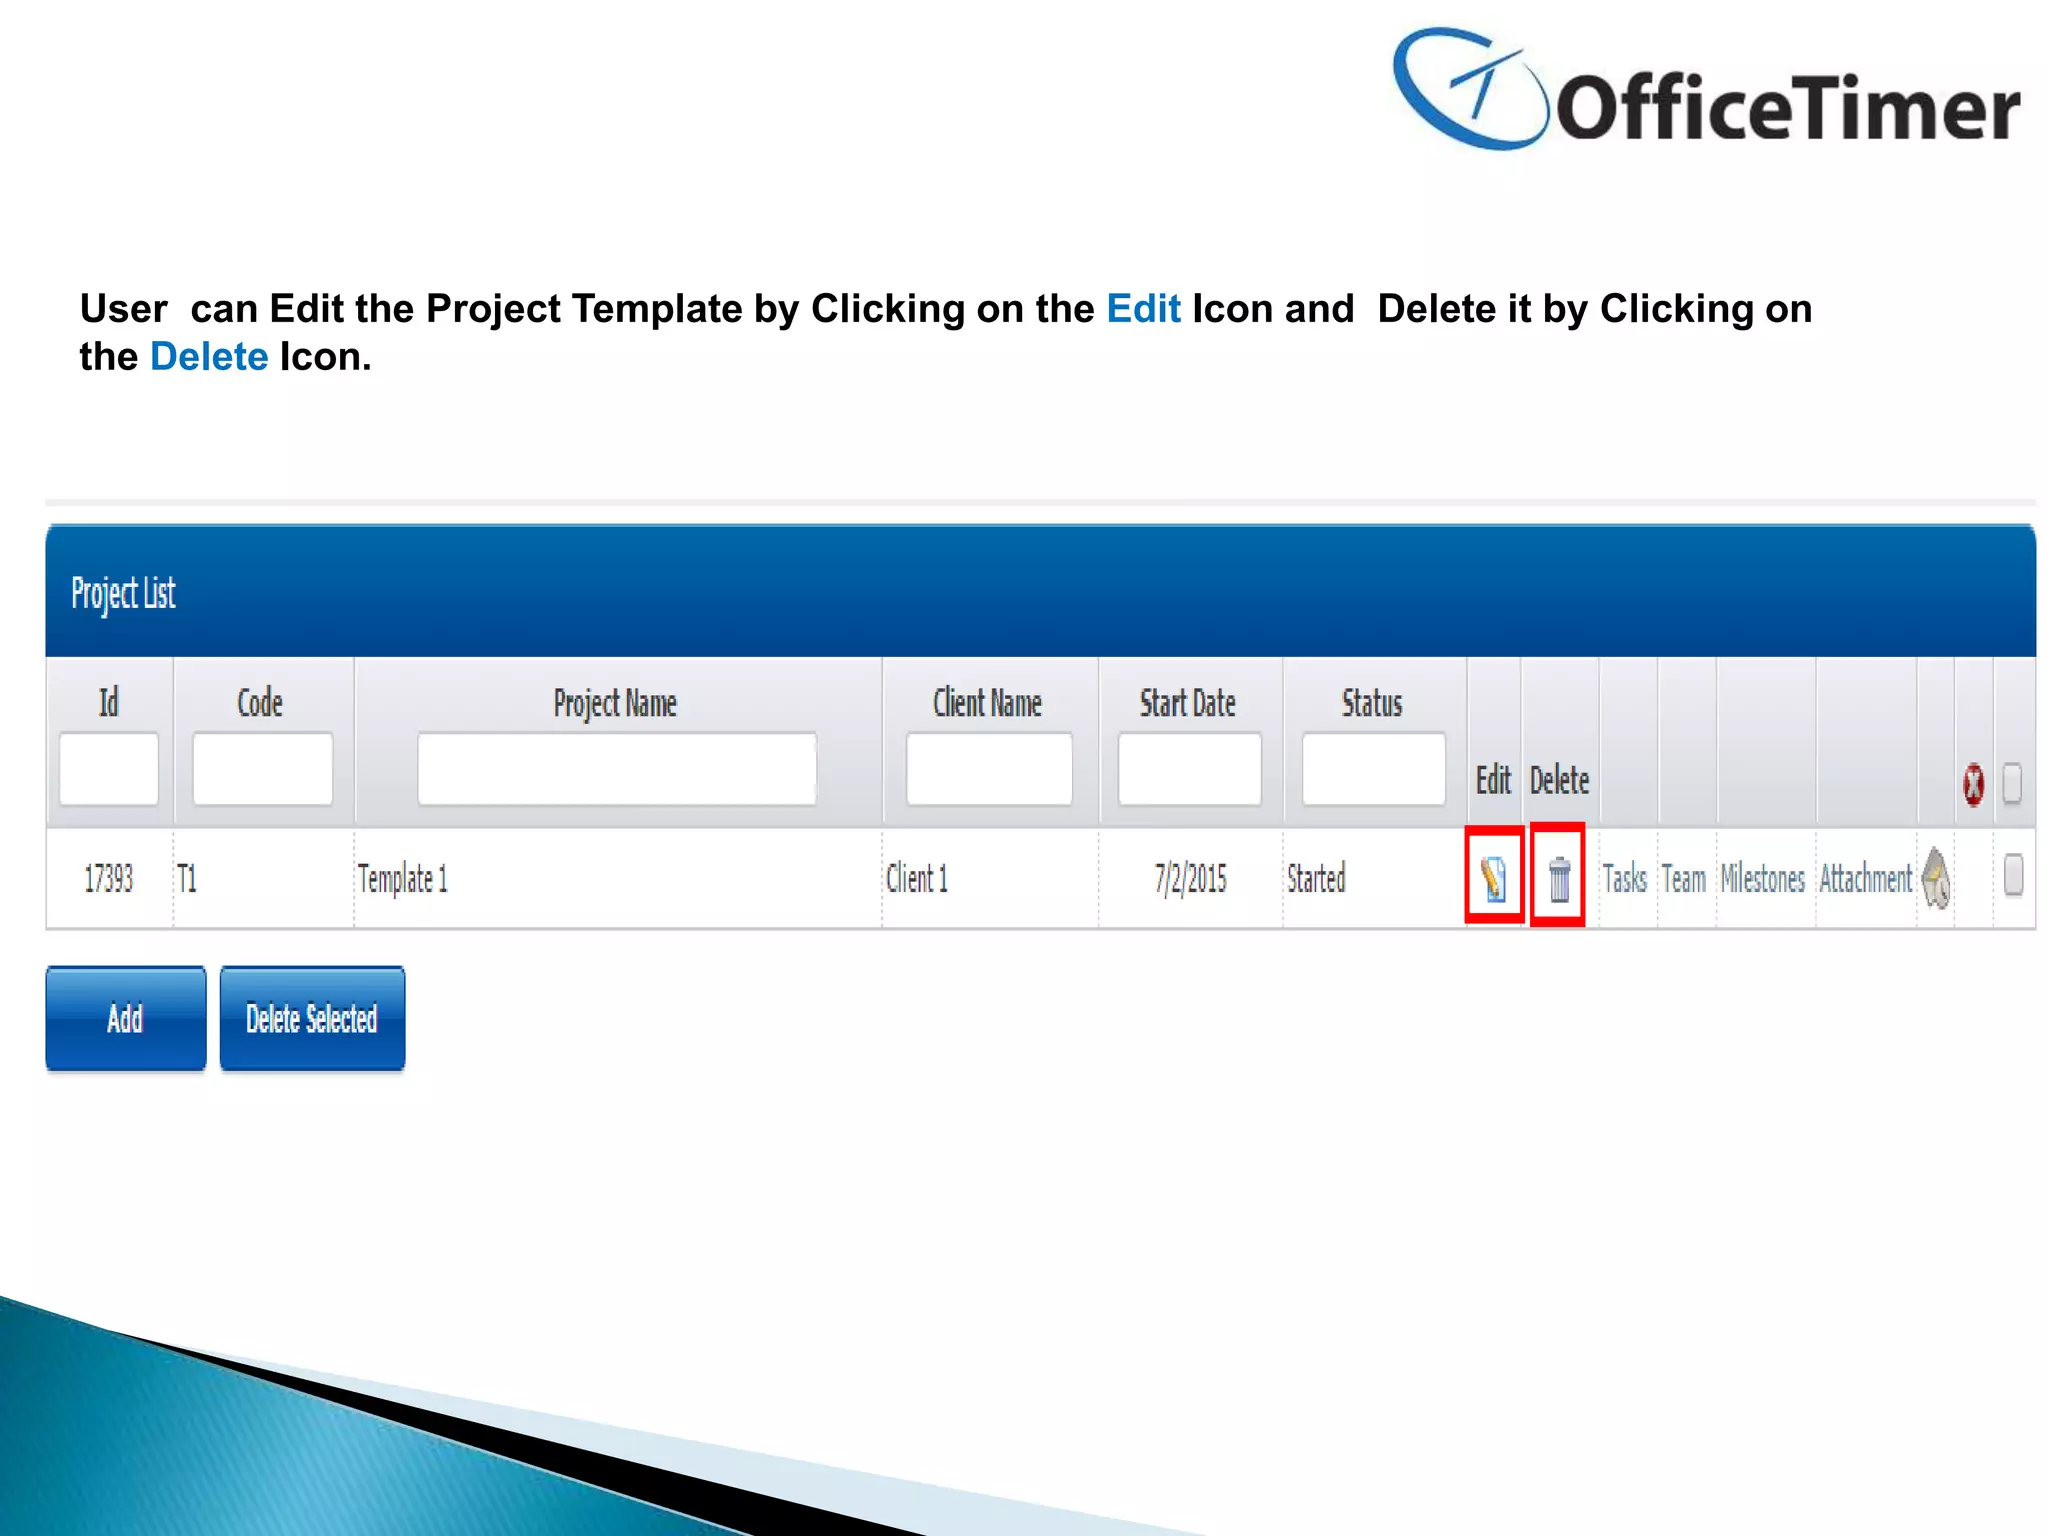


1. Administrators can add, edit, and delete project templates and tasks in OfficeTimer. They login and navigate to the Admin Options tab before clicking on Time Off Types to access project templates. 2. To add a template, administrators click Add and fill in mandatory fields like the time sheet approval type before assigning employees and clicking Update. 3. Templates can then be edited and deleted by clicking the corresponding icons, and tasks can be added, edited, and deleted for each template in a similar process.