Airius suspended-series-models-10-15-25-data-sheet-2019Airius Europe Ltd
Up to 50% Saving on Energy Costs by Airius Suspended Series Destratification Fans, Designed for installations into suspended, false or dropped ceilings.
Airius suspended-series-models-10-15-25-data-sheet-2019Airius Europe Ltd
Up to 50% Saving on Energy Costs by Airius Suspended Series Destratification Fans, Designed for installations into suspended, false or dropped ceilings.
(www.indiamart.com/aircareducting) Reckoned as a noteworthy name, we are indulged in providing a wide spectrum of Ventilation Exhaust Fans, Air Grills, Industrial Dampers, Centrifugal Fan, Ducting Louvers, GI Sheet Ducting for Theatre, GI Sheet Ducting for Office, Air Handling Units, Aluminium Dampers, Centrifugal Blower etc. Due to their reasonable pricing structure and on time execution, these are highly acclaimed and valued.
Only for Knowledge purpose, doesn't contains any confidential data's.
Content:
1. What is Duct & Duct design
> Typical illustration of duct work
2.
Ducting Materials
> Galvanized steel
> Aluminium (Al)
> Polyurethane and phenolic insulation
panels (pre insulated air ducts)
> Fiberglass duct board (preinsulated
non metallic ductwork)
> Flexible ducting
> Fabric ducting
> PVC low
profile ducting
> Waterproofing
3. Components of Duct System
> Vibration isolators
> Take
offs
> Stack boots and heads
> Volume control dampers
> Smoke and fire dampers
> Turning vanes
> Plenums
> Terminal units
> Air terminals & Louvers
> Duct joints
4. Air leakage in duct
> Why duct leak test required
> Where Does Duct Leakage Occurs
> Methods to test Duct Leakage
5. Duct sealing
> Duct sealing methods
Duct tape,
Water based sealant, Mastic resin
based sealant, Metallic tapes
6. Duct maintenance
> Methods
Contact vacuuming, Air
sweeping, Power brushing, Sealing of
air leak.
The Titan Outlet is the engineered solution of wall sealing refrigerant line penetrations featuring a weather & air leakage resistant, vibration control, rodent proofing, wall enclosure system. Air Leakage Wall Seal, Protect Indoor Air Quality! @NAHB #HVAC http://www.airexmfg.com/titan
Titan Out Engineering Solution of Wall Sealing Refrigerant Line Penetrations ...Airex Manufacturing Inc
The Titan Outlet is the engineered solution of wall sealing refrigerant line penetrations featuring a weather & air leakage resistant, vibration control, rodent proofing, wall enclosure system. Air Leakage Wall Seal, Protect Indoor Air Quality! @NAHB #HVAC http://www.airexmfg.com/titan
We manufacture component products for the outdoor #HVAC equipment piping area,designed & engineered to support #sustainable #energy efficient system performance
The Titan Outlet is the engineered solution of wall sealing refrigerant line penetrations featuring a weather and air leakage resistant, vibration control, rodent proofing, wall enclosure system, and has become the preferred industry leader. http://airexmfg.com/titan/
Scottish Home Improvements provides the highest quality windows and siding to clients in Denver and all across Colorado. We feature James Hardie fiber cement siding as well as Milgard windows and doors. We can also help you with your other fiber cement, vinyl, wood, cedar, and steel siding commercial and residential projects. Contact us today to schedule your consultation.
Isokern Celsius stove system installation instructionsSchiedel UK
Brochure from Schiedel. This forms part of our flue and chimney range and can be used with acknowledgement to Schiedel Chimney Systems Ltd. as well as a link to the original source at www.schiedel.com/uk
Schiedel's chimney flue range includes flue systems for residential and commercial applications. A typical flue installation includes steel chimney pipe or mineral pipe or module components from the heat source appliance (a stove, biomass or gas appliance for example) to it's termination point above the roof. Support is required for internal and external chimney systems.
Schiedel specialise in wood burning appliances and flues, which are a renewable way of avoiding constant gas or electricity usage when looking at a secondary heat source. Even heat pumps are problematic with severe temperature drops, so a secondary source is always needed.
2011 CTM Session 2: Terminology for Productsnovacsi
Focus on Division 07 to understand what happens when specifications terminology requires significant interpretation by the contractor or mixes up terminology, and the potential impact to prices, contracts, and project success.
Long Form Specification For Structural Glazed TileElgin Butler
Structural Glazed Tile: SGT, extruded and manufactured clay masonry unit with a ceramic glazed face that is a structural unit which can be load bearing masonry. Work described in this section covers requirements for Structural Glazed Tile Unit Masonry and its installation and maintenance.
Scottish Home Improvements provides the highest quality windows and siding to clients in Denver and all across Colorado. We feature James Hardie fiber cement siding as well as Milgard windows and doors. We can also help you with your other fiber cement, vinyl, wood, cedar, and steel siding commercial and residential projects. Contact us today to schedule your consultation.
ICS 5000 commercial flue system instructionsSchiedel UK
Brochure from Schiedel. This forms part of our flue and chimney range and can be used with acknowledgement to Schiedel Chimney Systems Ltd. as well as a link to the original source at www.schiedel.com/uk
Schiedel's chimney flue range includes flue systems for residential and commercial applications. A typical flue installation includes steel chimney pipe or mineral pipe or module components from the heat source appliance (a stove, biomass or gas appliance for example) to it's termination point above the roof. Support is required for internal and external chimney systems.
Schiedel specialise in wood burning appliances and flues, which are a renewable way of avoiding constant gas or electricity usage when looking at a secondary heat source. Even heat pumps are problematic with severe temperature drops, so a secondary source is always needed.
Similar to 8.0 Installation of Ceiling Batts.pdf (20)
2024.06.01 Introducing a competency framework for languag learning materials ...Sandy Millin
http://sandymillin.wordpress.com/iateflwebinar2024
Published classroom materials form the basis of syllabuses, drive teacher professional development, and have a potentially huge influence on learners, teachers and education systems. All teachers also create their own materials, whether a few sentences on a blackboard, a highly-structured fully-realised online course, or anything in between. Despite this, the knowledge and skills needed to create effective language learning materials are rarely part of teacher training, and are mostly learnt by trial and error.
Knowledge and skills frameworks, generally called competency frameworks, for ELT teachers, trainers and managers have existed for a few years now. However, until I created one for my MA dissertation, there wasn’t one drawing together what we need to know and do to be able to effectively produce language learning materials.
This webinar will introduce you to my framework, highlighting the key competencies I identified from my research. It will also show how anybody involved in language teaching (any language, not just English!), teacher training, managing schools or developing language learning materials can benefit from using the framework.
The French Revolution, which began in 1789, was a period of radical social and political upheaval in France. It marked the decline of absolute monarchies, the rise of secular and democratic republics, and the eventual rise of Napoleon Bonaparte. This revolutionary period is crucial in understanding the transition from feudalism to modernity in Europe.
For more information, visit-www.vavaclasses.com
Read| The latest issue of The Challenger is here! We are thrilled to announce that our school paper has qualified for the NATIONAL SCHOOLS PRESS CONFERENCE (NSPC) 2024. Thank you for your unwavering support and trust. Dive into the stories that made us stand out!
The Art Pastor's Guide to Sabbath | Steve ThomasonSteve Thomason
What is the purpose of the Sabbath Law in the Torah. It is interesting to compare how the context of the law shifts from Exodus to Deuteronomy. Who gets to rest, and why?
Operation “Blue Star” is the only event in the history of Independent India where the state went into war with its own people. Even after about 40 years it is not clear if it was culmination of states anger over people of the region, a political game of power or start of dictatorial chapter in the democratic setup.
The people of Punjab felt alienated from main stream due to denial of their just demands during a long democratic struggle since independence. As it happen all over the word, it led to militant struggle with great loss of lives of military, police and civilian personnel. Killing of Indira Gandhi and massacre of innocent Sikhs in Delhi and other India cities was also associated with this movement.
Synthetic Fiber Construction in lab .pptxPavel ( NSTU)
Synthetic fiber production is a fascinating and complex field that blends chemistry, engineering, and environmental science. By understanding these aspects, students can gain a comprehensive view of synthetic fiber production, its impact on society and the environment, and the potential for future innovations. Synthetic fibers play a crucial role in modern society, impacting various aspects of daily life, industry, and the environment. ynthetic fibers are integral to modern life, offering a range of benefits from cost-effectiveness and versatility to innovative applications and performance characteristics. While they pose environmental challenges, ongoing research and development aim to create more sustainable and eco-friendly alternatives. Understanding the importance of synthetic fibers helps in appreciating their role in the economy, industry, and daily life, while also emphasizing the need for sustainable practices and innovation.
Palestine last event orientationfvgnh .pptxRaedMohamed3
An EFL lesson about the current events in Palestine. It is intended to be for intermediate students who wish to increase their listening skills through a short lesson in power point.
1. 60
SUPPORTING LOCAL PRODUCTS & JOBS
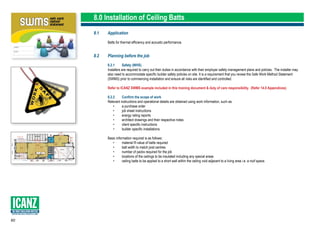
8.0 Installation of Ceiling Batts
8.1 Application
Batts for thermal efficiency and acoustic performance.
8.2 Planning before the job
8.2.1 Safety (WHS)
Installers are required to carry out their duties in accordance with their employer safety management plans and policies. The installer may
also need to accommodate specific builder safety policies on site. It is a requirement that you review the Safe Work Method Statement
(SWMS) prior to commencing installation and ensure all risks are identified and controlled.
Refer to ICANZ SWMS example included in this training document & duty of care responsibility. (Refer 14.0 Appendices).
8.2.2 Confirm the scope of work
Relevant instructions and operational details are obtained using work information, such as:
• a purchase order
• job sheet instructions
• energy rating reports
• architect drawings and their respective notes
• client specific instructions
• builder specific installations.
Basic information required is as follows:
• material R-value of batts required
• batt width to match joist centres
• number of packs required for the job
• locations of the ceilings to be insulated including any special areas
• ceiling batts to be applied to a short wall within the ceiling void adjacent to a living area i.e. a roof space.
2. 61
SUPPORTING LOCAL PRODUCTS & JOBS
8.2.3 Material type and quantity required
Material selection is based on the scope of work. The installer needs to confirm that the material R-value (Rm
) of the batts
on hand, are those that meet the material R-value target set by the scope of work. The quantity of batts required is based
on the project’s ceiling surface area in m2
(inclusive of the wall top plate dimension) divided by the manufacturers nominal
coverage quoted on the batt packaging. The manufacturer’s advice normally allows for ceiling timbers. This is a rough
calculation and an allowance of surplus stock should also be on hand.
EXAMPLE ONLY: CEILING and FLOOR area calculations and requirements
1. Using the house design plans take off the total ceiling area from top plate to top plate. Do not include eaves. This
calculation can be used for both ceiling and floor insulation requirements OR where no plans are available
2. a) Sketch the outline of the house perimeter
b) measure and plot perimeter dimensions
c) calculate the total area inside the perimeter (see example)
3. Check the ceiling joist spacings. This will determine the correct batt width required.
4. Check the R value on the packaging to ensure the correct thermal value is being installed
5. Refer to the labelling on the insulation packaging for ‘nominal pack coverage’
6. To determine the number of packs needed, divide the total ceiling area by the nominal pack coverage.
7. Where this calculation results in a whole and part pack requirement, round up to the next whole pack.
Example Calculation of ceiling or floor area
Area A: 3.0 X 4.5 = 13.5 m2
Area B: 10.5 X 6.0 = 63.0 m2
Area C: 8.5 X 9.0 = 76.5 m2
Area D: 6.0 X 5.5 = 33.0 m2
Total 186 m2
Joist Spacing - 600mm: batt width 580mm
Required R Value – R3.5
Nominal pack coverage – 7.6 m2
Packs - 186 m2/7.6 m2
= 24.5 packs.
Require 25 packs of R3.5 (580mm)
PLEASE NOTE: Insulation manufacturers may also provide a Ready Reckoner as a guide to assist installers
calculate packs required. For steel frame applications with one open side, refer to the manufacturer’s advice for
available insulation sizes.
A
B
C
D
4.5
3.0
6.0
6.0
2.0
9.0
3.0
6.0
5.5
24.0
* All measurements are in metres.
Example of calculation for ceiling and floor insulation
3. 62
SUPPORTING LOCAL PRODUCTS & JOBS
8.2.4 Batt Width Requirements
Measure the joist spacing and check that the supplied batt width (430mm or 580mm) is suited to the joist spacing.
This will minimise the cutting of batts. For the examples below, it is assumed that the timber frame joist is 45mm thick*.
Timber frame joist centres Batt width
450mm 430mm
600mm 580mm
900mm* 2x430mm side by side
1200mm* 2x580mm side by side
Steel frame joist centres Batt width
450mm 450mm
600mm 600mm
900mm 2x450mm side by side
• Check any areas in the ceiling that may restrict the ceiling batt from recovering to its nominal thickness. If this is the case,
a lower profile batt may need to be used.
• Insulation batts must not be in direct contact with roofing material (clearance ≥ 20mm).
• Check to see whether there is an internal wall surface in the ceiling space that creates a separation between a roof space and any
conditioned living space. The wall separating these two zones must be insulated using the same R-Value batts as the ceiling.
The roof space wall insulation may require: stringing-in to hold the insulation vertically in place.
• Check that the R-value on the material delivered corresponds with the work order instructions.
• Discuss with the customer any particular requirements they may have with the work order prior to commencing
installation.
• Confirm the suitability of the roof access point.
Hint: When attending an older home, check if the house has undergone an extension. There may be different joist centres in
different parts of the house.
4. 63
SUPPORTING LOCAL PRODUCTS & JOBS
8.3 Access to the Ceiling Space from within the home
8.3.1 Preload of Insulation
Pitched roofs with flat ceilings provide suitable crawl access for the installer. However, some ceilings have obstructions that limit movement
of the packs in the ceiling space. In new construction, a preload is undertaken during the wall batt installation. In new construction it is
recommended that a preload of insulation is undertaken during the wall installation and prior the ceiling being installed.
Hint: For homes that are not secure (e.g. from theft), cut the external plastic packaging at either end. This will cause the batts to fan
out making it difficult to move out of the ceiling space.
8.3.2 Stringing-in Insulation
Stringing-in is used on pitched roofs with raked ceilings and/or where complex obstructions are present such as:
• air-conditioning ducting
• truss timber work
• cabling for TV aerials
• plumbing and electrical services
• platforms for service equipment located in ceilings
These can limit the access of transferring batt packs and installer crawl space across the ceiling area. In these cases, stringing-in the ceiling
area using strapping may be required. The stringing-in method requires a staple gun to fix the strap onto the base of the timber frame. Any
staple fixed onto the joist surface that is in contact with the plaster must be fully embedded into the frame. Any miss-fired staple must
be flattened using a hammer or removed to provide a flat surface to fix the plaster lining. It is recommended to secure the strapping at every
450mm spacing. Complex timber framing may require odd shaped batts to be cut and additional straps to support the batt.
Electrician checking power board.
Installing ceiling batts from underneath before
ceiling linings are fitted.
5. 64
SUPPORTING LOCAL PRODUCTS & JOBS
8.3.3 Inaccessible areas
Low pitch corners inaccessible
The floor plan below illustrates grey areas highlighting tight access zones. These zones are best treated at the time of installing the
wall batts.String in ceiling batts during the wall batt installation. External access will require the roof capping and repairs to the capping when
finished, and is not typically an option.
8.3.4 Part of a roof space is inaccessible
The floor plan below presents an 18˚ pitched roof that is 5 metres wide having an apex of about 800mm from the ceiling
material. It could be further complicated due to services and/or structural members. Assessment of access to the ceiling
void should be conducted at the wall installation stage of the project (if applicable). For existing homes, external access will be required.
8.3.5 External roof entry
External access into the roof may be required for various reasons including but not limited to:
• the inability to transfer insulation material through the internal access point into the ceiling
• when an internal access point is located near the external wall of the home thus restricting access
• obstruction near the internal access point
• restrictive internal access point dimensions
• if using roof as access point, recommend using roof edge protection
• refer Working at Heights Risks – see 5.4.8.
Perimeter (edge) batts
New build - Installing ceiling insulation prior to
ceiling installation.
New build - Installing ceiling insulation with
limited access due to ducting.
New build - perimeter batts installed. Roof edge fall protection.
6. 65
SUPPORTING LOCAL PRODUCTS & JOBS
8.4 Access to the Ceiling Space via the Roof
8.4.1 Tiled roofs
Each operator should be aware of and comply with the safety requirements in their State. This will involve having a Safe Work Method
Statement (SWMS) for the activities to be undertaken.
WARNING: Never attempt an external roof entry when tiles are wet.
• Open up one or more access points.
• The opening in the tiles should be approximately 1200mm above ceiling height where possible.
• For a roof with a 22˚ pitch with no eaves, measure an approximate distance of 3400mm from the gutter fascia towards the ridge.
The first and second row of tiles from the ridge should not be disturbed. The third row of tiles can be removed if required with a
careful approach not to damage ridge capping.
• Some roofs have every second row of tiles fixed onto the batten or a group of tiles are fixed. Where possible, avoid these tiles by
moving up one row or attempt the neighbouring tile.If a fixed down tile is held in position by a nail method, remove the nail using a
claw hammer and timber block.
• To create the required access, it may be required to cut one tile batten. If possible find a join in the tile battens and cut the batten on
a 45˚ angle. Cut the batten over the adjoining truss/rafter. Refer to Method to, Cutting Tile Batten diagram.* At the end of the job,
make sure you nail the tile batten using a flat head nail with a length twice the thickness of the timber batten.
• Some roofs will have sarking beneath roof tiles. Installers are required to cut the sarking on three edges only and peel back the
sarking. Repair using suitable foil tape and additional sarking material.
• Only support your weight on a ceiling rafter or roof truss. Never support your weight on a plasterboard batten or plaster
surface.
Hint: Whether gaining access through the tiles or loading the roof through the internal access point, it is recommended that you
install approximately half a dozen packs at a time. This gives an installer a break from the heat and cramped conditions of
the roof as the installer is then required to come down and reload the next batch of packs.
8.4.2 Metal clad roofs
Access is gained by removing a length of steel sheet cladding. This may include disconnecting part of the ridge capping to allow
the sheet cladding to be removed. An installer will be required to refer to local state plumbing codes as some state authorities
require a licensed roof plumber to carry out work pertaining to roof sheeting removal/replacement.
Batten spacing and truss/rafter spacing on metal roofs are typically generous and will not require cutting of the batten. However, if
required, follow the procedure outlined above in 8.4.1 Tiled Roofs.
Tiled roof
Metal roof
7. 66
SUPPORTING LOCAL PRODUCTS & JOBS
8.5 Tools and Equipment required
Ensure the tools and equipment selected to carry out the tasks are consistent with the requirements of the job. Check for tool defects,
rectifying any faults and report findings to your supervisor prior to commencement.
May Require:
• wear High Vis clothing
• industrial box cutter with retractable blade and non-conductive handle.
• industrial strength ladder
• non-conductive batt poker: a batt poker is an essential item of equipment. This allows you to position batts into inaccessible ceiling
locations. Ensure that the batt poker handle is made from non-conductive material such as wood or plastic.
• claw hammer
• P2 dust mask
• hammer Tacker
• knee pads
• hand saw
• tape measure
• safety eye wear
• standard duty gloves
• independent lighting – e.g. torch and spare batteries, LED head lamp
• suitable safety shoes (walking across joists etc)
• sufficient drinking water
• accessible first aid kit
• mobile phone (fully charged, programmed contact numbers)
• portable fire extinguisher.
8. 67
SUPPORTING LOCAL PRODUCTS & JOBS
Snug fit
Measure - right sized batts
Install batts under services
Safety: use joists for footing support
Fitting insulation snugly around ducting
Preload packs and distribute in ceiling
space
8.6 Before you commence work:
• identify yourself to the client if present
• review your safe work method statement (SWMS)
• plan the install route and access, ensure it is unobstructed
• before entering the ceiling, map the position of downlights and other appliances
on a sketch plan of the building as they may be difficult to see when in the ceiling
• isolate and tag power. Refer to steps outlined 6.2 - Performing Electrical
Isolation.
8.7 Installation of Ceiling Batts
WARNING: If the electrical wiring is connected to the meter box, before entering the
roof, ensure the power is isolated and tagged.
Refer to WHS – Electrical Safety Wiring
8.7.1 Installing Batts in pitched roof – flat ceiling
WARNING: Never walk on a plasterboard ceilings. When required to be in a kneeling
position the use of a kneeling board will allow you to keep balance whilst in the ceiling.
• check to ensure you have correct batts (correct R value and fit for proposed
application)
• Load and distribute the packs into the ceiling space.
• Cut the bags open along the seam.
• Place the ladder so that you can safely climb and install the batts in the ceiling .
• Start installing insulation at the far corners and work back towards the roof exit.
• Measure the batts against the ceiling to find the best fit around ceiling penetrations.
• Cut the batts against a firm straight surface where no electrical or services exist.
• Gently push the cut batts between the joists. Butt batts closely together to ensure
there are no gaps left at joints. Continue cutting and fitting the batts working along
the ceiling until all of the ceiling area is covered and extending a minimum
50mm onto the external wall top plate.
• Batts must maintain a minimum of 20mm air gap between the insulation and
sarking membranes or underside of the tiles, metal, other roof sheets or battens.
• Cut a label from the batt installed in the ceiling and fix it to a joist near the internal
access point in the ceiling. This is to provide information in the future to anyone
wishing to know which product has been installed.
• Ensure the access point is completely covered with a cut to size batt.
• When you have fitted all of the ceiling, tidy away all of the empty bags and any
remaining off cuts.
• When you have completed the installation, all materials should be removed and the
job should be inspected to ensure it is complete and correct.
Hint: Do not load all the packs of batts
into the ceiling. As you get towards
the end of the job, estimate how many
more packs are needed and only load
these into the ceiling.
Hint: At the end of the job it is easier
to load another pack into the ceiling
than it is to take a full pack out of the
ceiling.
9. 68
SUPPORTING LOCAL PRODUCTS & JOBS
Installing perimeter batts over top plate
Schematic - keep space between insulation
and roofing
Racked ceiling - maintain 20mm air gap
between insulation and roofing
8.7.2 Perimeter Batts (edge batts)
• For bulk insulation to deliver its stated R-value it must not be compressed (e.g. at eaves).
• The thickness of many specified ceiling batts will not fit freely out to the eaves and over the top plate unless forced and
compressed between the ceiling and roofing material. This is bad installation practice and could lead to issues such as restricted
ventilation and moisture build-up.
• Where the roofing structure will not accommodate the thickness of the batt at the eaves, it is recommended a thinner batt
(perimeter batt) be used where necessary
• The overall ceiling R value can still be maintained by using a higher R-value batt across the majority of the ceiling.
Refer AS 3999 2015 Appendix F – Edge Batts
8.7.3 Installing batts in raked ceilings with a tiled roof
WARNING: For installing batts in raked ceilings with a metal roof, an installer will be required to refer to local state plumbing codes
as some state authorities require a licensed roof plumber to carry out work pertaining to roof sheeting removal/replacement.
Before commencing work advise client and all on site power is to be deactivated.
Raked Ceilings with enclosed rafters
• Install batts prior to plaster being installed
• Refer to 5.4.8 – working at heights. Consider the need for a mobile scaffold to install insulation at apex of the roof apex
• Confirm the depth of the ceiling void and what R-rating batt is to be installed. The batts’ nominal thickness must be less than the
clearance measured at the base of the roof batten and above ceiling lining or ceiling batten; which ever is the lesser of the two.
• If the ceiling lining is below the rafters, there will generally only be a shallow depth to install an insulation batt between the tile
batten and the ceiling lining. In this instance, the insulation is to be installed by pushing back every third row of tiles and sliding half
a batt up and half a batt down between the rafters. It is recommended to select a batt product having a density of 14kg/m3 or
greater so to provide adequate stiffness.
• If sarking is present beneath the tiles, the sarking will need to be slit at these rows parallel to the batten at mid span.
• Start and finish the slit at the mid point of a rafter. Presence of dust can make it difficult to tape sarking unless it is cleaned.
• The installer will need to insert a piece of sarking to seal the opening. The installer must place the repair piece of sarking so that its
top runs under the existing sarking and above and over the sarking below.
• Slide a 300mm wide trimmer piece of sarking within the slit to create the cascading effect.
• Tape the upper original sarking onto the trimmer piece surface.
• Ensure the start and end points of the slit are taped to form a water tight seal.
• Inform the customer that the sarking repaired continues to work as a radiant barrier and water proof barrier.
• If the sarking is laid down after installation without taping of the slit opening, it will not be an effective water barrier and
will act as a radiation barrier only.
WARNING: If the roof pitch is 15° or less, the sarking also acts as a waterproof barrier. Unless the water barrier of
the roof can be guaranteed using the cascading lap joint principle and the application of sarking tape (72mm wide)
onto clean surfaces, DO NOT slit the sarking and install insulation in this instance.
10. 69
SUPPORTING LOCAL PRODUCTS & JOBS
8.7.4 Bulkheads or split ceiling levels
If the ceiling is split in any way, this will generally result in a bulkhead. A bulkhead is a vertical section of wall in the ceiling void that is a
division between the internal living space and the ceiling void. It is important that this surface be installed in conjunction with the ceiling.
This can be installed with batts with the same R-value as used in the ceiling. Ensure install batts prior to installation of plaster linings. These
batts will generally need to be held in place using the stringing-in method.
8.7.5 Electrical cabling and equipment
When in operation, the flow of electricity through cabling generates heat. Unobstructed, this heat is released. However in some
circumstances where insulation and electric cabling are in contact, the heat generated cannot be dissipated quickly enough and can cause
cables to overheat and exceed its rated specification. For the purposes of installing insulation, there are three categories to consider:
1. Cabling installed after AS/NZS 2018 – can only be fully surrounded by bulk insulation for up to 400mm.
Cable
Cable
Cable
Cable running across the of
insulation
Cable running along the side of
ceiling joist with the top of joist nor
covered in insulation
Cable running across the top of
a plasterboard ceiling which is
covered with thermal insulation
2. Partially surrounded electrical cable.
Cable
2. Completely surrounded by insualtion on all sides. Electrical cable running between layers of thermal insulation
1. unsurrounded electical cable.
Cable running across
plaster board ceiling
Cable running along the
inside of a joist
Electrical cable passing through
thermal insulation
400mm or less
11. 70
SUPPORTING LOCAL PRODUCTS & JOBS
• No marking on light
• Not classified
• Do not abut or cover with insulation
• Use default clearances
• Light fitting is CA-90 rated
• Abut insulation but do not cover
• Light fitting is IC rated (IC, IC-4, IC-F)
• Insulation can abut and cover light fitting
MARKINGS AND CLASSISICATIONS OF RECESSED LUMINAIRES
12. 71
SUPPORTING LOCAL PRODUCTS & JOBS
If in any doubt regarding classification of light fittings - use defult clearances.
DEFAULT MINIMUM CLEARANCES FOR RECESSED LUMINAIRES
*These diagrams have been
reproduced from pages 231
and 232 of AS/NZS 3000
(2018) with the permission
of Standards Australia.
13. 72
SUPPORTING LOCAL PRODUCTS & JOBS
8.7.6 Recessed luminaires (Downlights)
Downlights and their equipment can only be installed by licenced electricians. This does not include
barriers and restraints that can also be installed by insulation contractors.
The application of these rd to be considered in the context that insulation may already be (or may not
be) present when downlights are installed.
Downlights and their accompanying equipment (e.g. transformers) must be installed in a manner to
prevent:
• excessive operating temperature
• risk of fire from ignition of combustible materials.
This requirement will be met if:
• the downlight and installation is certified to meet the intended location by the downlight
manufacturer as suited to be
a. in contact with combustible materials
b. in contact with or enclosed by thermal insulation
• the installed clearances from combustible materails and thermal insulation are as specified
by the downlight manufacturer
• insulation is fixed in place as determined by AS 3999 appendix B
• insulation is installed to the default clearances for combustible materials and thermal
insulation - as set out in Appendix A of AS 3999.
8.7.7 Luminaire (down light) Barriers Standard (AS/NZS 5110)
This standard sets out specific performance criteria required by barriers. Barriers must
be installed to the instructions as tested by AS/NZS 5110 and deemed specifically
suitable for:
• covering the particular model of luminaire
• being in the presence of a particular type and thickness of insulation.
Combustible materials need to be prevented from contacting hot surfaces of the luminaires. This
includes structural timber which may be affected by pyrolysis which over a long exposure can
result in increased susceptibility to ignition.
Where extraneous material, such as leaves, vermin debris, or combustible materials stored in a
roof space, is present in proximity to the downlight, the precautions should comprise the use of
a suitably designed and certified luminaire (Refer AS/NZS 5110).
Installation of recessed luminaires (downlights)
Warning Sign
Where recessed luminaires are installed in an accessible roof space, a permanent
and legible warning sign shall be installed in the roof space adjacent to the access
panel in a position that is visible to a person entering the space. The sign shall
contain words shown in AS/NZS 3000: 2018, 4.5.2.3.2 – figure 4.10’ with minimum
sized lettering of 10mm.
A warning sign is required where the installed recessed luminaires are not
classified as CA-90 or IC fittings
*This diagram has been reproduced from pages 231 and 232 of AS/NZS
3000 (2018) with the permission of Standards Australia.
14. 73
SUPPORTING LOCAL PRODUCTS & JOBS
8.7.8 Insulating around downlights or where recessed ceiling fixtures are present
When using glasswool and rockwool ceiling batts:
• if the light fitting is not classified as IC or CA-90, leave default clearance of 100mm from the body of heat emitting fixtures such as
downlights and flues
• cut a hole in the batt to suit the location of the fixture
• resistance to movement – do not use small pieces of batts to form part of the barrier around a fixture as these pieces could dislodge and
cover the fixture potentially overheating/faulting the device (as determined by AS 3999 appendix C)
• locate transformers on the ceiling plaster with a minimum gap of 50mm around the device; alternatively place the transformer onto the
glasswool or rockwool batt
• exhaust fans typically vent vertically to the roof space. Insulate around the perimeter of the fixture and ensure a piece of insulation
batt does not stop a fan blade from turning as this can overheat and burn out the device
• exhaust fans with a closed body housing and outlet port can have the insulation in contact with the body of the fan casing
Ensure the outlet port has an adequate clearance from insulation to the exhaust air (i.e. ≥ 150mm).
Hint: Downlights or fans near the external wall can be difficult to see and it is easy to foul the
blade of a fan with a piece of batt. These devices may be best finished from an external roof
access approach.
8.7.9 Installing insulation in tight areas
• Tight areas include over top pate, bulkheads, underneath piping and services, underneath appliance platforms in the ceiling space,
underneath ductwork.
• Where possible install insulation in these areas before ceiling are applied
• Start installing insulation at the far corners of the home and work back towards the tile opening or internal access point.
• Lay batts from the perimeter towards the centre of the ceiling from either side of the external walls.
• Ensure the insulation does not touch the underside of the roofing material and a nominal gap of 20mm should be maintained to allow
ventilation. This may require: the use of lower Rm
-value batts around the perimeter (see perimiter batts page 62).
No less than Rm
2.0 should be used. This strip of lower Rm
-value batts may be no longer than 600mm or the minimum required
to achieve a clearance of equal or greater than 20mm from the underside of the roofing material, for the original batt to be used.
• If there is a central catwalk, insulate beneath the catwalk using a wall batt minimum of Rm
2.0 or equal of less than the clearance of
beneath the walk way (typical 90mm). Tuck a batt under the catwalk.
• Using a non conductive batt poker, (usually wooden handle) stab a batt about a quarter from its length, pushing it out to the
external wall plat
Ensure electrical cables
are left on top of
insulation along the roof
edge. If the tension in the
cable does not permit the
cable to rest on the top of
the ceiling joist if needed
use a lesser R-value batt
for edge trim.
Using non
conductive
Batt Poker for
inaccessible areas.
Check table minimum clearances for
recessed lumen.
15. 74
SUPPORTING LOCAL PRODUCTS & JOBS
• If there is no insulation material in or on the wall studs, make sure the batt extends at least 50mm onto the top wall plate. If there is
insulation material in or on the stud, push the batt to cover the top plate.
Hint: If possible, it is a good idea every now and then to push back a tile over the external wall plate to check if the batts are 50mm
onto the wall plate.
Hint: If insulation is being installed into an old roof ceiling it is necessary to quite forcefully push the batt out past the sloping
rafter to ensure that it reaches the outer wall plate. Ensure 20mm clearance above tha batt is maintained.
• Ceiling voids can occur over stairwells, atriums, ducting channels and wardrobes. String-in is used to install insulation
• Falls through these areas could be fatal. When covered with insulation these areas are not visible from above.
8.7.10 Topping-up ceiling insulation
• Assess that the condition of roof space and the pre-existing insulation are in adequate condition and have suitable space to receive
additional insulation
• If there is evidence of moisture damage or wood rot – do not proceed.
• Notify home owner of initial inspection concerns and recommend they arrange to have the ceiling condition inspected by a building
engineer.
• Only proceed with work if the ceiling is assessed by the building engineer as suitable to do so
• Some of what needs to be determined for current insulation
* Condition of insulation
* Is there any leaves, dust debris needing to be removed
* Thickness and evenness of spread across the ceiling
* Is the insulation in contact with downlights, ceiling exhaust fans, vents, hot flues etc.
* Will topping up cover electrical cabling
* Will the ceiling cope with the weight of topping up.
Although it costs more, we advise consumers to vacuum out the ceiling space and install batts in accordance to Australian Standard AS 3999
to current energy efficiency levels.
• Before proceeding with adding new insulation to old insulation, assess if old insulation is in a sutable condition. In many
cases completly replacing the existing insulation may prove the better option.
• The method of installing top-up insulation is the same as that for installing original ceiling insulation as described throughout
Section 8.0. There are however additional issues to be addressed when installing top-up batts.
- acheiving ‘R’ values: it is not possible to guarantee a total ‘R’ value when combining new insulation with old insulation.
For example
by adding R 3.0 batts to an original layer of R 2.5 Batts is more likely to acheive a total ‘R’ value of between
R 4.5 to R 5.0 depending on the condition of the original insulation.
- existing loose-fill: if the orignial insulation is loose-fill it is recommended to entirely remove the loose-fill insulation and
re-insulate with batts.
- additional weight: check that the additional weight of top-up insulation does not exceed the recommended ceiling load for
ceiling linings.
- electrical wiring: electrical wiring must not be sandwiched between old and new insulation (refer to 8.7.5). Electrical wiring
must run either on top of the new insulation, below the original insulation and along the ceiling sheeting or fastened to the
side of the joists.
- downlights: old insulation immediatley around downlights should be replaced completely with one full batt of thicker
insulation.
- eave-edge insulation: ensure insulation has a least 20mm clearance from overhead roofing material. Insulation of a lower ‘R’
value may be required at the eaves (see AS 3999).
• Where top-up insulation is used, it is recommended installers should work closely with their materials supplier and obtain specific
installation instructions and warranties before proceeding.
16. 75
SUPPORTING LOCAL PRODUCTS & JOBS
8.8 After Completion
Finishing off.
• Ensuring there are no gaps between the batts, or between the batts and rafters.
• Confirm batts extend to at least 50mm over external top wall plate.
• Ensure Batts are kept 50mm away from exhaust fans and hot gas flues.
• Recessed downlights – check classification of downlights. If no classification instructions are printed on downlights, the default
clearance of 100mm must apply (refer 8.7.8).
• Ensuring batts are cut to fit snugly where there are no ceiling penetrations.
• Confirming no insulation has been installed over the oven or refrigerator ceiling vent voids.
• Where there is a drop ceiling or a cavity in the ceiling, ensure batts are placed such that the vertical walls and the dropped flat.
ceiling are insulated. Alternatively, place the insulation continuously over the top of the cavity. This method is only suitable if there
are no open sides to the cavity and may need to be supported.
• Ensuring insulation on top of the internal access point is added and does not restrict future access.
• Ensuring insulation batts installed before the plasterboard is installed will need to be supported and held in place by stringing-in.
• Ensuring the work area is cleaned and off-cut materials are placed back into the original package (when possible) and taped
closed. Dispose of in accordance with local authority guidelines.
• Ensuring tools and equipment are cleaned, checked, maintained and stored in accordance with the manufacturer’s
recommendations and standard work practices.
• Advise client and all on site power is about to be reactivated.
• Confirming power is reactivated and isolation tags are removed.
• Notifying relevant people that the installation is finalised (i.e. supervisors, the client etc).
• Completing necessary documents and forms.
• Evaluating your work quality and process to identify improvements.
• Following up, reporting and resolving any outstanding issues or problems such as non-conformances, client complaints, damage to
property, faulty materials etc.
Typical Installer working kit
Check insulation installed over attic acess
cover
Fully installed ceiling insulation batts - no gaps
17. 76
Examples of Installed Ceiling Insulation
Good Installs Bad Installs
• Neatly fitted
• Strung into position
• No gaps
• Recommend 3 strings per batt
• Poorly fitted between ceiling joists
• Hanging below and incorrectly fitted above
ceiling joists
• Inadequate stringing to hold insulation in place
• No insulation above windows and gaps above
ceiling batts
• Neatly fitted between joists
• No protrusions between joists or stubs
• Fitted over top plate
• No gaps in stud or joist spacings
• Inadequate number of batts for ceiling insulation
• Batts in very poor condition - uneven thickness -
inconsistent or no R-value
• Would appear insulation has been displaced to
install wiring and insulation not reinstalled
correctly
• Cut neatly to fit around flexible ducting
• No gaps
• Poorly fitted batts - compressed and bulging
below joists
• Batts incorrectly installed above joists leaving
gaps
• Would impede the installation of ceiling linings