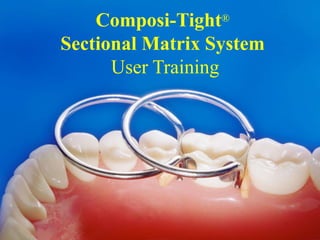
2. • Composi-Tight® solves one of the most
common and frustrating problems for
dentists placing posterior Class II
composite restorations:
Achieving tight, anatomical contacts
5. Instructional Video
• Covers basic
technique, MODs,
wide embrasures and
back-to-back
restorations.
• Duration: 12 minutes
6. GDS Ring Placement Forceps
• GDS forceps open wide enough for all applications and
hold the rings stable for easy placement and removal.
• Ivory-style rubber dam forceps may also be used to place
G-Rings, however, some styles do not open the rings wide
enough to place them on larger teeth.
15. Matrix Bands
Key Features & Benefits
• Feature: 5 band sizes
• Benefits:
– Sizes for every application
• PEDO for primary molars
• SMALL for bicuspids
• EXTENDED SMALL for bicuspids & molars with sub-
gingival extensions (NEW PRODUCT)
• STANDARD for permanent molars & bicuspids
• LARGE for deep cervical/sub-gingival extensions
– Places contact at the height of contour
– Small bands reduce over-filling, which reduces
finishing time.
16. Matrix Bands
Key Features & Benefits
• Feature: 3-Dimensional Contour
• Benefits:
– Contact is at the height of contour
– No loss of contact during occlusal adjustment
– Broader area of contact
– Reduces gap below the contact area
17. Matrix Bands
Key Features & Benefits
• Feature: 30 Microns Thick (.0012”)
• Benefits:
– Less separation of teeth required
– Easier to slide band into place (don’t need to
cut as much tooth structure when breaking
contact)
– Easier to burnish and broaden contact area
18. Matrix Bands
Key Features & Benefits
• Feature: Sectional Piece
• Benefits:
– Easier to burnish - slides over easily
– Easier to place band on Class 2 filling (it is very
difficult to get a contoured Tofflemire-type
matrix between the contact opposite the side
being restored)
20. G-Rings®
Key Features & Benefits
• Feature: 2 Lengths of Tines
• Benefits:
– Overlap of rings for MODs or multiples in a
quadrant
– Long ring often helpful for restorations on taller
teeth or tooth with periodontal disease
21. G-Rings®
Key Features & Benefits
• Feature: Converging Tine Angle
• Benefit:
– Helps ensure ring retention (compare to parallel
tines of Palodent BiTine ® ring)
22. G-Rings®
Key Features & Benefits
• Feature: Burnished Ends of Tines
• Benefit:
– Helps ensure ring retention (compare to tines of
Palodent and Danville Rings)
23. G-Rings®
Key Features & Benefits
• Feature: Round (versus flat) Wire
• Benefit:
– Allows placement alongside wedge
• Wedge must be trimmed with competing rings
• Reduces time (no trimming or difficulty removing)
• Restores wide lingual or buccal embrasures
– Adapts well to interproximal space for either mesial or
distal condition
• Competing rings require turning the ring around for distal
restorations
24. Answers to Commonly
Asked Questions
• How do I handle wide embrasures?
– Option 1: Place ring opposite the wedge
– Option 2: Fill and cure all but interproximal
contact area, then place matrix
• My rings have lost their tension.
– Open rings only as far as necessary
– Re-set tension with 3-prong pliers or
orthodontic headgear pliers
25. Answers to Commonly
Asked Questions (continued)
• My forceps don’t open rings far enough
for some applications
– Use GDS Ring Placement Forceps
– Grasp ring higher up on an ivory-style rubber
dam forceps
26. Answers to Commonly
Asked Questions (continued)
• The matrix bands are difficult to place.
– Break contact with very thin diamond
– Pre-curl matrix and slide in laterally
– Place ring during cavity preparation, then remove and
place matrix
• My contacts are sometimes too tight.
– Lighter wedging ( especially w/ new rings)
– Remove band with hemostats or dressing forceps
(Miltex 6-8) with interlocking teeth
27. Answers to Commonly
Asked Questions (continued)
• Sometimes I still don’t get a contact.
– Don’t forget to burnish.
– Wedge a little more firmly if needed
• How do I restore a back-to-back MO/DO.
– Fill and cure one side first using only wedge
and band. Then, finish other side using wedge,
band and ring. Be sure to burnish band against
the already restored tooth
28. Answers to Commonly
Asked Questions (continued)
• Do you offer clear bands?
– No clear bands offered at this time
– Incremental filling, and increased bond
strengths eliminate the need for a clear matrix.
– Clear bands are typically 2 or 3x as thick, non-
contoured, and lack resilience of stainless steel,
making them more difficult to use.
29. Answers to Commonly
Asked Questions (continued)
• Can it be used for amalgam?
– The system was designed and developed for
composites.
– Contacts very good, but if amalgam is not fully
set it can fracture when removing the matrix
band.
– Recommend lubricating matrix first.
37. Bands and wedges are removed
and the proximal surfaces are finished.
38. Bands are placed first, then wedges, then rings.
The rings serve to create separation and ensure excellent
contacts. The rings hold the band tightly to the proximal
cavosurface margins, greatly reducing flash.
39. Anatomy is roughed in before removal
of rubber dam, significantly reducing
occlusal adjustment time.