Matrices, retainers, wedges and separators
•
27 likes•7,054 views

given topic describes matrix systems, wedges and retainers in short along with recent advances in them.

Recommended
More Related Content
What's hot
What's hot (20)
Similar to Matrices, retainers, wedges and separators
Similar to Matrices, retainers, wedges and separators (20)
Recently uploaded
Recently uploaded (20)
Matrices, retainers, wedges and separators
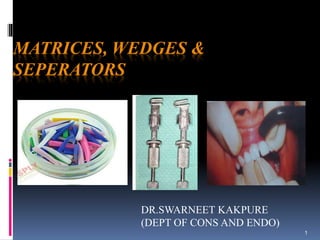
- 1. 1 MATRICES, WEDGES & SEPERATORS DR.SWARNEET KAKPURE (DEPT OF CONS AND ENDO)
- 2. CONTENTS Introduction Ideal requirements of a Matrix Objectives Classification Types of Matrices Recent Advancements Automatrix Matrices for class III Direct tooth colored Restorations Matrices for class IV Direct tooth colored restoration. Matrices for Class V amalgam restorations Separators Types of Wedges Wedging techniques 2
- 3. Introduction The word matrix is derived from the Latin word 'Mater' which means 'Mother'. It was introduced in the year 1871 by Dr. Louis Jack. A dental matrix may be defined as a properly shaped piece of metal, or other material, used to support and give form to the restoration during its introduction and hardening. Matrix band which forms the temporary walls is held in place by means of a matrix band retainer which may be a mechanical device, floss, wire, thread or impression materials 3
- 4. Matricing is the procedure, whereby a temporary wall is created opposite to axial walls and surrounding areas of tooth structure that were lost during preparation. Parts of Matrix Retainer- It holds a band in desired position and shape. Band- It is a piece of metal or polymeric material, intended to give support and form to the restoration during its insertion and setting. 4
- 5. Ideal Requirements Of A Matrix Band 1. Rigidity: The matrix band should be rigid enough to withstand the condensation pressure applied during introducing of restoration and maintain its shape during hardening. 2. Adaptability: The matrix band should be able to match to almost any size and shape of tooth . 3. Height and contour: Matrix band should not extend more than 2mm beyond the occluso-gingival height of crown of tooth. 4. Nonreactive: It should be inert to tissues and the restorative material . 5. The band should not cause any difficulty to patient or hindrance to the operator. 6. Application: The matrix band should be such that it can be applied and removed easily . 7. Sterilization: It should be easy to sterilize . 5
- 6. Objectives It must act as a temporary wall of resistance during introduction of the restorative material. It should provide shape to the restoration. It should confine the restoration. It must assist in isolating the gingiva and rubber dam during introduction of restorative material. It must help in maintaining the dry operative field thereby preventing contamination of the restoration. 6
- 8. Types of Matrices and Retainers Ivory Matrix Holder No.1 • Most commonly used matrix band holder for MO and DO cavities. • Retainer holds the band to provide missing portion of the wall for the proximal surface. • It consist of two semicircular arms with claws at there tip, facing each other. 8
- 9. • Other end of the retainer has a nut over a fine thread rod, when nut is tightened both the claws having pointed projections come closer to each other. • The band has a slight projection in the middle, which is kept towards the gingiva on the cavity side, while matrix band is fitted around the tooth. 9
- 10. • Two sharp points of the claw are engaged in the two holes of the matrix band. • The screw of the retainer is kept on the non-cavity side of the tooth, screw is then gradually tightened till matrix band perfectly fits around the tooth. • Proximal cavity side of matrix band is further tightly adapted to outer surface of tooth with the help of wedge. 10 Ivory no.1 Retainer and Matrix band (A) Premolar (B) Molars
- 11. Ivory Matrix Band Retainer No.8 • This type of retainers is used to hold the matrix band to provide missing part of the walls on both proximal side (MOD cavity) and class II compound cavities on the posterior teeth. • Ivory matrix retainer no.8 provides missing walls by encircling entire crown of the tooth. • Matrix band is made of thin sheet of metal so it can pass through the contact areas of the tooth. 11 Ivory Matrix band retainer no.8
- 12. • Introduce by Dr. BF Tofflemire, and can be used in all types of cavities of posterior teeth. • Beside being very stable and of sturdy construction, it permits easy removal of the holder from the band, facilitate carving and final removal of the band. 12 Tofflemire universal Matrix band Retainer
- 13. 13
- 14. 14
- 15. 15
- 16. 16
- 17. Video showing...How tofflemire is applied? 17
- 18. Recent advances in Sectional matrix systems Palodent Garrison Bioclear 18
- 20. Automatrix • Retainerless matrix system • Matrix come in different size, are pre-formed. ADVANTAGES- • Convenience • Improved visibility because of absence of retainer 20
- 21. Matrices for class III Direct tooth colored Restorations. 1. Plastic matrix strip: • Transparent matrix strips • Celluloid (cellulose nitrate) strip are used for silicate cement • Cellophane ( cellulose acetate) strips are used for resins. 2. Mylar strip: • Matrix strip is burnished over the end of a steel instrument, to produce a ‘belly’ in the strip. • This forms a curvature which reproduce the natural proximal contour of tooth. 21
- 22. 22
- 23. Matrices for two small proximal preparations in contact with each other • A loop of ½” in diameter is formed in matrix strip. • Loop is flattened, forming a T shape and is placed between the teeth. • From the labial approach cavity is filled and from the lingual aspect the strip is held. • After the insertion of the material each wing of the strip is folded over the setting material and held with the thumb. 23
- 24. 24
- 25. Matrices for class IV Direct tooth colored restoration. Plastic strip : For inciso-proximal cavities, strip is folded in ‘L-Shape’. Procedure : a. Celluloid matrix (measured and cut) b. Matrix is folded at 90˚ to form L shaped matrix. c. Cavity is filled to slight excess and one end of the strip is brought across the proximal surface of filled tooth. The other end of the strip is folded over the incisal edge. d. Matrix is held with the thumb of the left hand till the initial setting takes place. 25
- 26. Matrices for ClassV amalgam restorations a. Window Matrix • This matrix is formed using tofflemire or copper band matrix. Procedure: Tofflemire • Contrangle retainer is applied, a window is cut in the band slightly smaller than the outline of the cavity. • Wedges are placed mesially and distally to stabilize the band. 26
- 28. SEPARATORS For immediate separation of teeth prior to restoration, wedges or separators are used. Also to stabilize matrix band and retainer. Tooth separation done by- Slow or delayed separation Rapid or Immediate separation 28
- 29. Slow separation • Severely tilted or drifted teeth may be moved by means of slow separation. • Repositioning occurs physiologically without any chance of injury to the periodontal ligament fibers. Materials used for slow separation: 1. Separating wires tightened around teeth. 2. Gutta percha softened and packed between the teeth to separated. 3. Seperating rubber ring/band 4. Orthodontic appliances. 29
- 30. Methods: Separation wire: • Thin pieces of wire are introduced gingival to the contact, then wrapped around the contact area. • The two ends are twisted together to create separation not more than 0.5mm. • The twisted ends are then bend into the buccal embrasure to prevent impingement upon soft tissue. • The wire are then tightened periodically to increase the separation. • . 30
- 31. Orthodontic appliance: • Fixed orthodontic appliance are most effective. • Removable appliance may achieve the results but require longer treatment 31
- 32. Seperating rubber band Separating rubber band is usually used in orthodontic cases. It is stretched and placed interproximally between the two teeth to achieve separation. It may take 2 to 3 days to 1 week. 32
- 33. Rapid or Immediate separation Its is a quick and useful method but if excessively used may produce pain due to rupture of the periodontal ligament. Based on two Principles: 1. Traction principle 2. Wedge principle 33
- 34. 1. Traction principle • Non interfering true separator • Ferrier single or double bow separator • Ivory adjustable separator • Wood ward separator • Perry separator • Nystrom separator • Parr’s universal separator 34
- 35. Ferrier double bow Separator Separator is stabilized throughout the operation. • Advantage is that separation is shared by contact teeth, and not at the expense of one teeth. Procedure: • The four arms are adjusted so that each will hold a corner of the proximal surface of contacting teeth. • Arms will be gingival to the contact area. • Desired separation is made with the wrench, compound is applied to the mesial and distal bow for stabilization. 35 Ferrier double bow separator
- 36. Wedge principle Separators It is accomplished by inserting a pointed wedge shape device between teeth in order to create a space at the contact area. 1. Elliot wedge or separator: • It’s a mechanical separator used examining, contouring or final polishing of a proximal restoration. • Also known as crab-claw separator • It is less forceful and requires impression compound for stabilization. • Tightening screw can be removed and inserted from other side if it is to be used on the other side of arch. 36
- 37. Procedure: • Adjust the two wedges of the separator interproximally so that they are positioned gingival to contact area, not impinging the interdental papillae. • Knob is then move clockwise so that the wedges move toward one other establishing the desired separation. 37
- 38. Wedges • Wedges is used to stabilize matrix band and retainer. • They may be made of wood , plastic or metal. • Correct shape and their placement is very important for correct proximal contour of the filling. Types:- Wooden wedge Metal wedge Celluloid or plastic wedges 38
- 39. Functions of Wedges- 1. Wedges separate the teeth 2. They depress the interproximal soft tissue thus minimizing trauma. 3. Assure close adaptability and stabilization of matrix band to the tooth. 4. Allow space for the thickness of the matrix band. 39
- 40. Wooden wedges: These are most commonly used and preferred as they can be easily trimmed and can be fitted in gingival embrasure. Adapt well in the gingival embrasure Easy to use Wooden wedges absorb water, thus increase the interproximal retention Provide stabilization to matrix band Available in two shapes- 1. Triangular 2. Round 40
- 41. Plastic wedges: Though commercially available but they are not much preferred because: - • Trimming is difficult • Adaptability is difficult in some cases. Types of Plastic Wedge Normal wedges:- They are similar to the wooden wedges in shape and use. Wave shaped wedges:- Their curved shape helps in easy placement and proper seal of buccal and lingual embrasures without impinging gingiva. 41
- 42. Light transmitting wedges As the name indicates, these types of wedges transmit 90 to 95 percent of incident light. They are a type of plastic wedges 1. Transparent in nature 2. Designed for use in cervical area of class II composite resin restoration. Advantages of light transmitting wedges over other wedges in composite restorations: • Help in reducing the polymerization shrinkage because of light transmission • Better adaptability 42
- 44. 44
- 45. Modified Wedging Techniques 1. Double wedging 2. Wedge wedging 3. Piggyback wedging. 45
- 46. Double wedging Two wedges are used:– One is inserted from buccal embrasure and another is inserted from lingual embrasure. This technique is indicated in the following cases: Spacing between adjacent teeth where single wedge is not sufficient Widening of proximal box in buccolingual dimension. 46 Double wedging technique
- 47. Wedge wedging In this technique, two wedges are used Onewedge is inserted from lingual embrasure area while another is inserted between the wedge and matrix band at right angle to first wedge These are primarily indicated while treating mesial aspect of maxillary first premolar because of presence of flutes in root near the gingival area 47
- 48. Piggyback wedging In this technique two wedges are used One(larger) wedge is inserted as used normally, while the other smaller wedge (Piggyback) is inserted above the larger one It is indicated in cases of shallow proximal box with gingival recession This technique provides closer adaptation and contour of the matrix band. 48 Piggyback wedging
- 49. REFERENCE 1) Operative Dentistry modern theory and practice-by M.A MARZOUK 2) The Art and Science of Operative Dentistry-by CLIFFORD M.STURDEVANT 3) Textbook of Operative Dentistry-by SATISH CHANDRA 4) Operative Dentistry –by Vimal k Sikri 49
- 50. 50