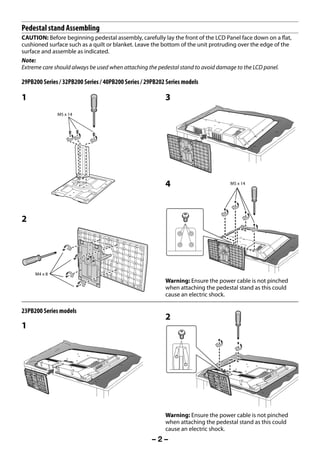
This document provides instructions for setting up and using a Toshiba LED TV, including:
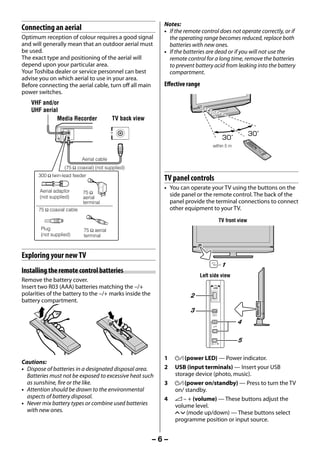
- Connecting an outdoor aerial for optimal reception.
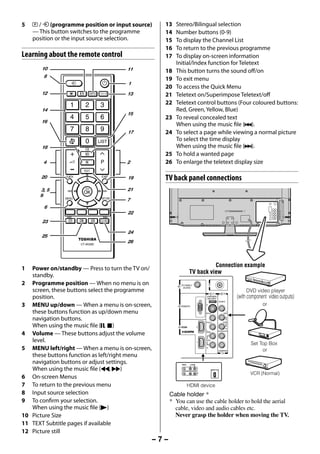
- An overview of the remote control buttons and TV panel controls.
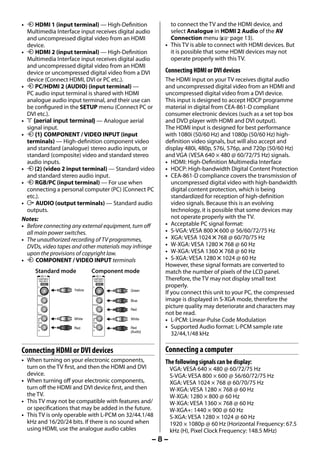
- Instructions for connecting external devices like computers and HDMI devices to the TV.
- Safety guidelines for installing and using the TV.


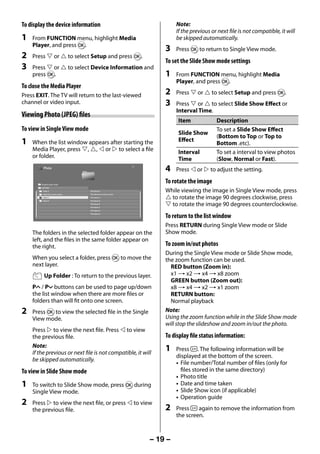
![Notes: appropriate Colour System (For the system of each
• Some PC models cannot be connected to this TV. country or region, refer to pages 10, 22).
• If connecting a certain PC model that signal is
particular, the PC signal may not be detected Switching off the TV
correctly.
• There is no need to use an adapter for computers 1 Press on the remote control or ! on the
with DOS/V compatible mini D-sub 15 pin terminal. TV left side panel to switch to the standby
• A bar may appear in the upper, lower, right or left mode.
side of the screen, or parts of the picture may be Notes:
obscured depending on some signals. This is not the • When the TV will not be used for a long period of
malfunction. time, such as during vacation or travel, remove the
• If the edges of the picture are stretched, readjust the power plug from the wall outlet.
picture position adjustments in the PC Settings • The TV will automatically turn itself off after
menu. approximately 15 minutes if it is tuned to a vacant
• Depending on the specification of the PC you are channel or a station that completes its broadcast
playing the DVD-Video on, and the DVD’s title, some for the day. This function does not work in external
scenes may be skipped, or you may not be able to input or Blue screen Off mode.
pause during multi-angle scenes. The TV will automatically turn itself off after
approximately 2 hours if you do not operate the TV
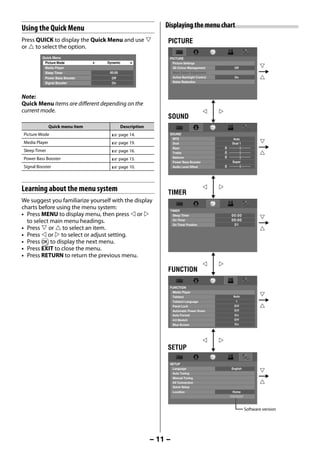
Signal names for mini D-sub 15 pin connector after turned on by on timer function.
• If power is cut off while you are viewing the TV,
Pin assignment for RGB/PC terminal
the Last Mode Memory function turns on the TV
automatically when power is applied again. If power
is going to be off for a long time and you are going
to be away from your TV, unplug the power cord to
prevent the TV from turning on in your absence.
Pin No. Signal name Pin No. Signal name
1 R 9 NC Tuning the TV for the first time
2 G 10 Ground Before switching on the TV, put your decoder and
3 B 11 NC media recorder to standby, if they are connected,
and ensure that the aerial is connected. To setup
4 NC (not 12 DDC Data the TV, use the buttons on the remote control as
connected) detailed on page 7.
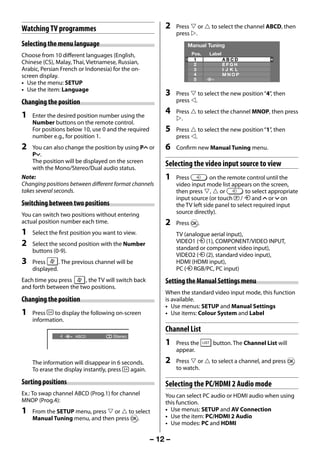
5 NC 13 H-sync 1 Press the button. The Quick Setup screen
will appear. This screen will appear the first time
6 Ground 14 V-sync
that the TV is switched on.
7 Ground 15 DDC Clock
Quick Setup
8 Ground Language English
• Most of the picture/sound controls and functions
are available. However features not available will 2 Press or to select the menu language
be greyed out. (English, Chinese (CS), Malay, Thai, Vietnamese,
Russian, Arabic, Persian, French or Indonesia).
Turning the TV on 3 Press Q, to display the Location menu.
Press or to select Store or Home. For
Switching on the TV normal home use, select Home.
You can select either Home or Store mode.
Connect the power cord to a wall outlet, the Home is recommended for normal home use.
! power indicator lights in red (standby mode). Select Store when using a TV for displaying in
a shop, etc.
1 Press on the remote control or ! on the TV
left side panel, the ! power indicator lights in Location
To use the TV for displaying in
green. a store showroom, please select [Store].
[Home] mode is recommended
Note: for normal use.
If you watch black and white programmes when the Home
Colour System mode is set to Auto, colour noise
may appear on the screen. In this case select the
–9–
23293240PB200Series_En.indd 9 2012/10/04 14:55:48](https://image.slidesharecdn.com/32-40pb200seriesen-130311144449-phpapp01/85/32-40-pb200series-en-9-320.jpg)
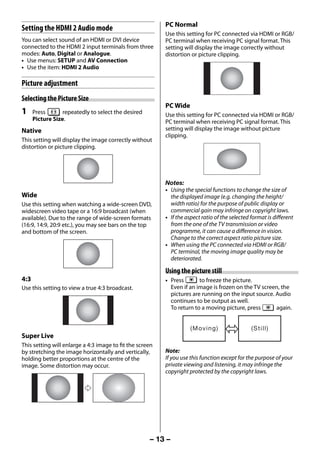
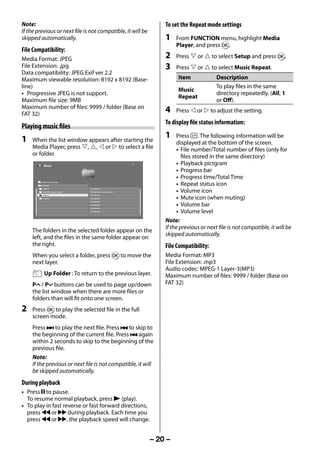
![4 Press Q to display the Auto Signal Booster D. Position skip selection
menu, and then or to select Yes or No. Press or to turn the position skip option
on “8” or off “(”. The position will then be
Auto Signal Booster skipped when you select channels with PU
Signal Booster boosts weak analogue broadcast signals.
If you select [Yes], the TV will automatically set this or Pu. The “8” mark will appear beside a
feature to [On] or [Off] according to signal strength.
Do you wish to enable automatic control? position number when you use the Number
button on the remote control.
Yes
E. Channel search operation
Press to search up the band or to search
Yes mode : down the band.
This function performs automatic distinction of Press or repeatedly until your desired
On or Off. channel is displayed.
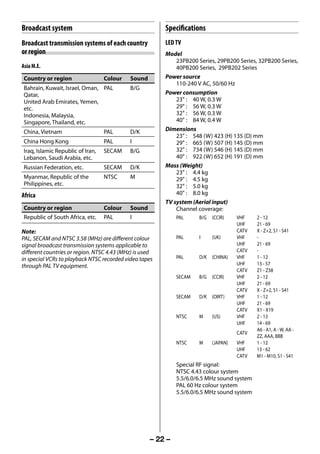
5 Press Q to display the Auto Tuning startup When a station is found, it will be displayed.
screen. Press Q to start the automatic search. NEVER PRESS ANY OTHER BUTTONS WHILE
THE SET IS TUNING.
Auto Tuning
Progress Found F. Manual Fine Tuning
1% 0 Press or until better picture and sound
are obtained.
G. Signal Booster
When the automatic search is completed, If the receiving signal is weak/strong and the
the TV will automatically appear the Manual picture is noisy, the picture may be improved
Tuning menu. when using this function.
Use the Manual Tuning operation if desired Press the or to turn the Signal Booster
channels cannot be preset with the Auto On or Off.
Tuning or if you would like to preset channels
to specific position numbers one by one. H. Label
Station labels appear on the right of the
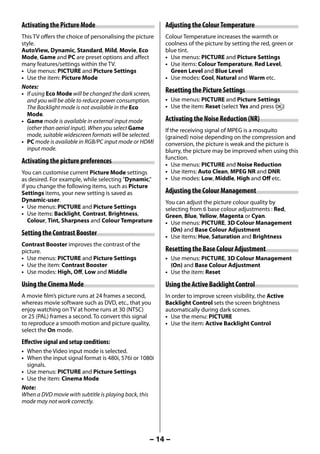
Manual Tuning programme position display each time you
Pos. Label turn on the TV, select a channel, or press .
1 To change or create station labels:
2
3 1) Press or repeatedly to select a
4 character for the first space, then press
or .
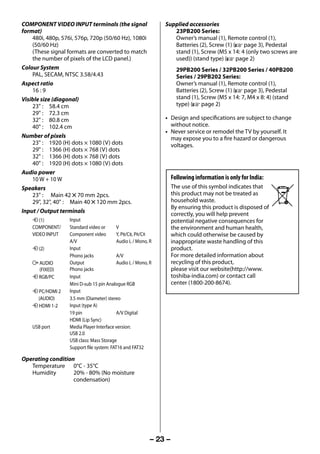
6 Press or to select the programme position
you want to arrange and press Q to display the
(blank space)
breakdown menu.
Press or to select an item, then press or
2) Repeat step 1) to enter the rest of the
to select the item as shown below.
characters. If you would like a blank space
Manual Tuning in the label name, you must choose a
Position
blank space from the list of characters.
0 1 B/G A 0 On
Press Q to store your settings.
Notes:
A C E G • The Quick Setup, Location, Auto Tuning, Manual
B D F H Tuning menu can also be display at any time from
the SETUP menu.
• When you preset the channel which sound of
A. Position selection broadcast transmission system adopts “M” system
B. System (Sound) (- page 22) (- page 22), the sound system may not be tuned
C. Colour System (- page 22) correctly if the radio waves transmit badly. At that
time, preset the channel by Manual Tuning.
A : Automatic (factory set), P : PAL,
S : SECAM, N4 : NTSC 4.43 (MHz),
N3 : NTSC 3.58 (MHz)
If the colour of a certain channel is abnormal,
the automatic colour system selection (A)
may have malfunctioned, or sound system
selection is wrong. In such a case, select
another colour and/or sound system (-
page 22).
– 10 –
23293240PB200Series_En.indd 10 2012/10/04 14:55:49](https://image.slidesharecdn.com/32-40pb200seriesen-130311144449-phpapp01/85/32-40-pb200series-en-10-320.jpg)