This document provides guidance on using various features in Microsoft PowerPoint 2010, including:
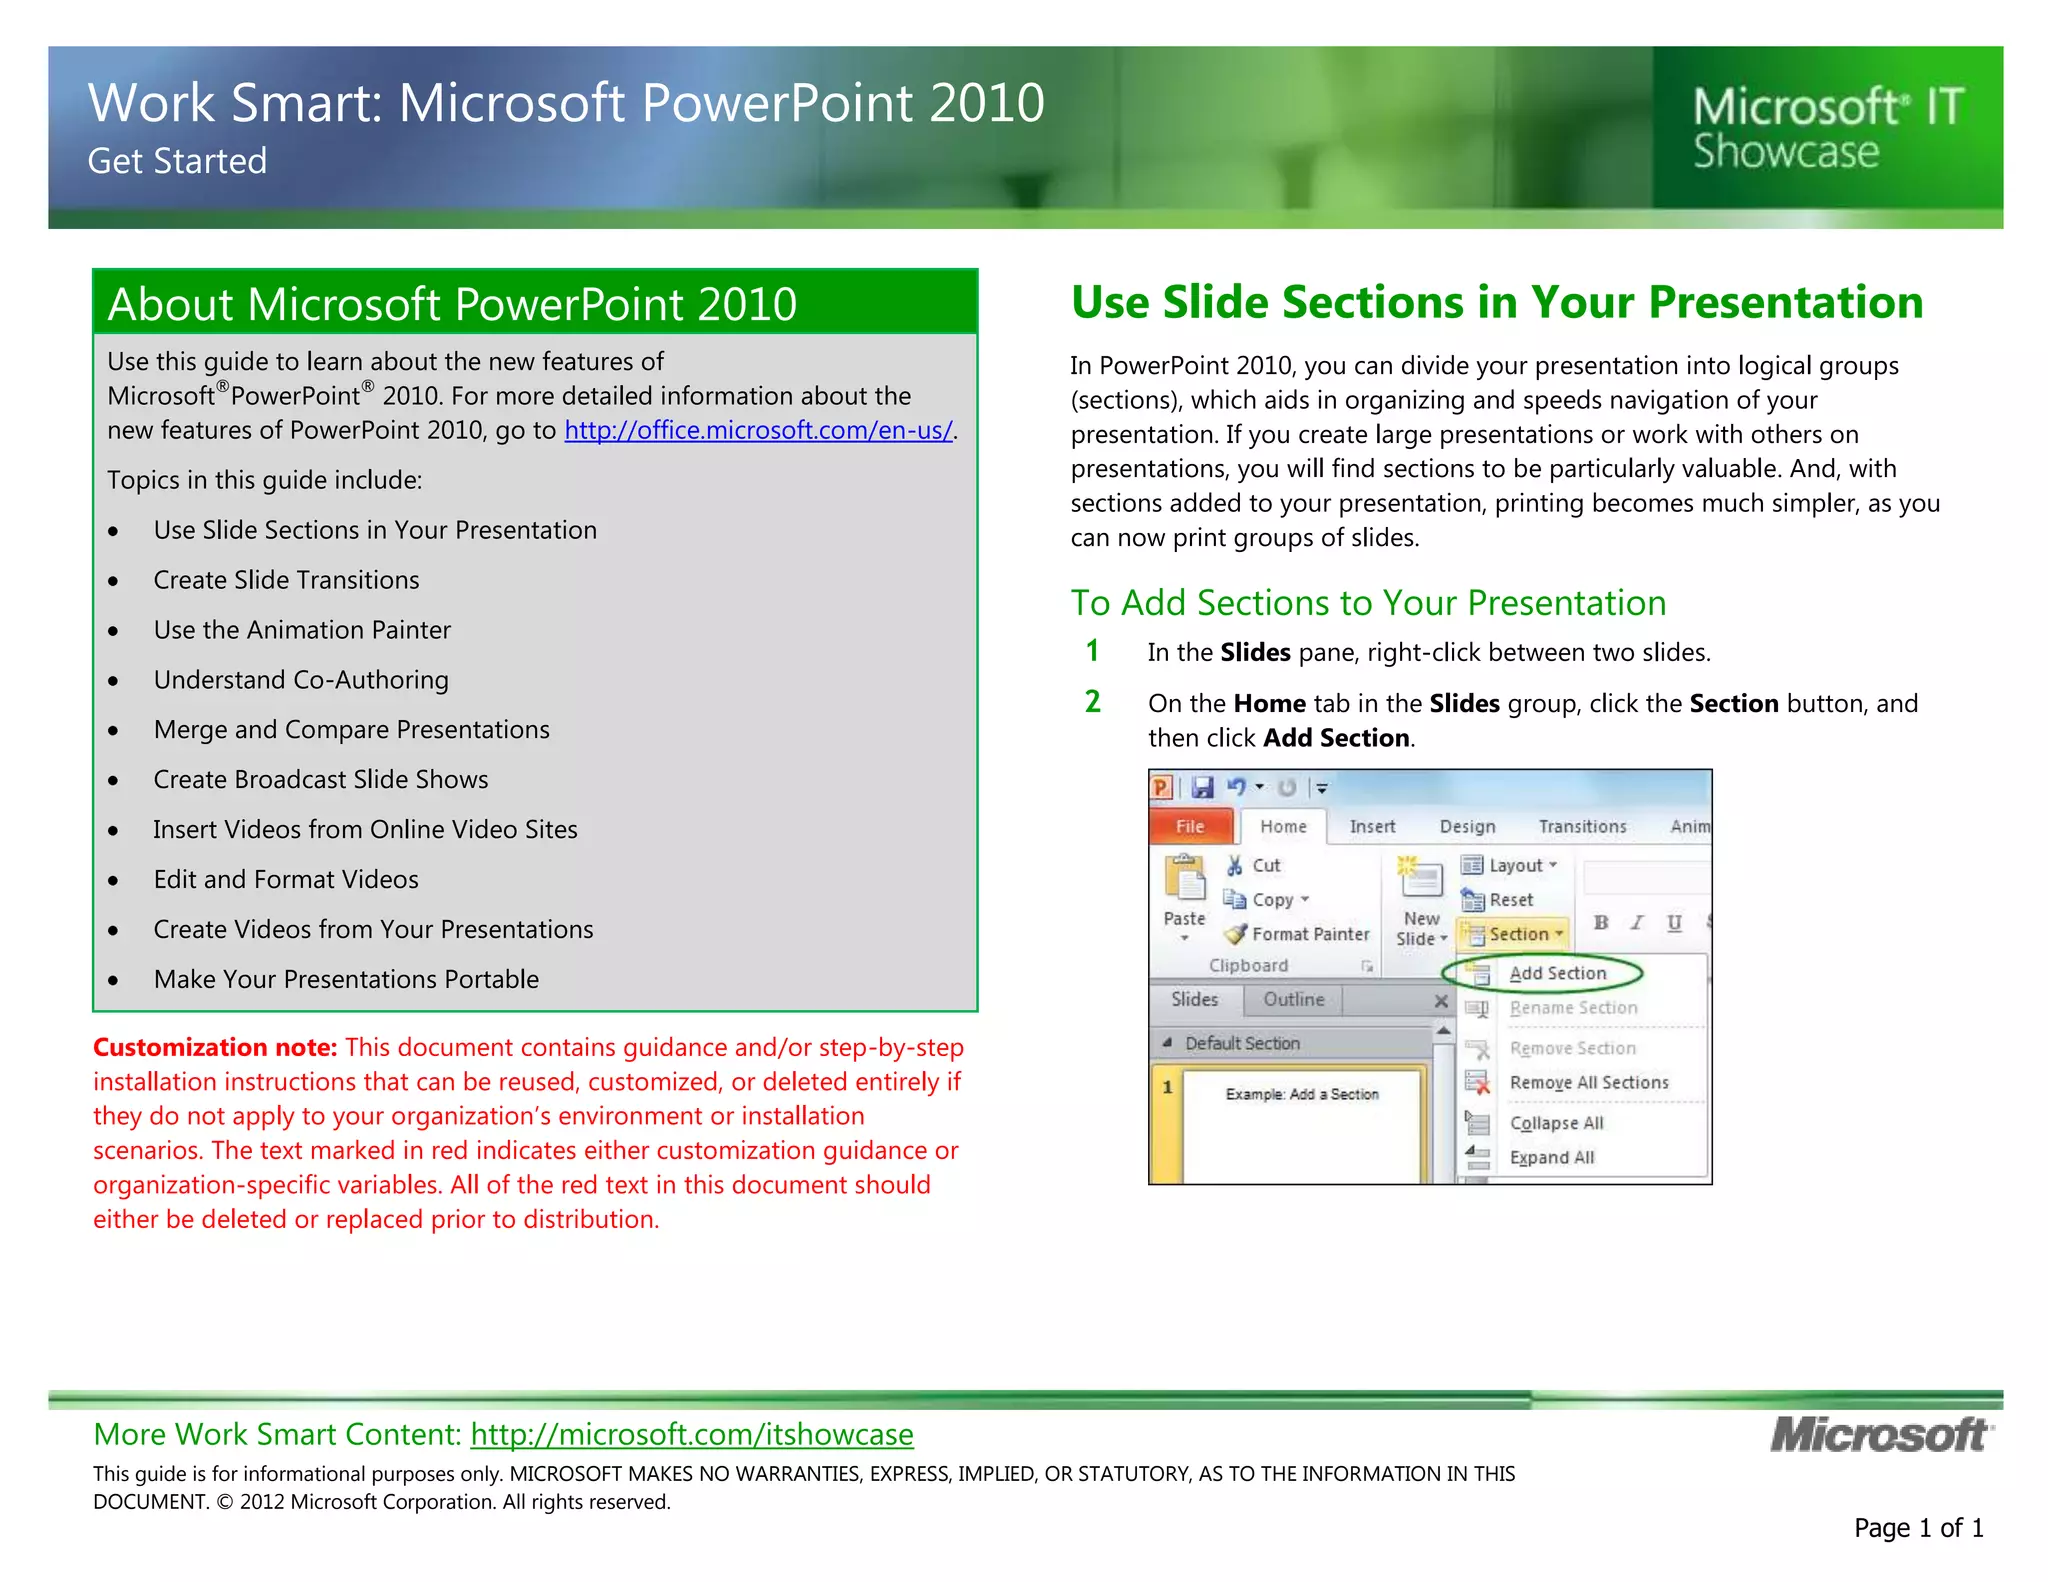
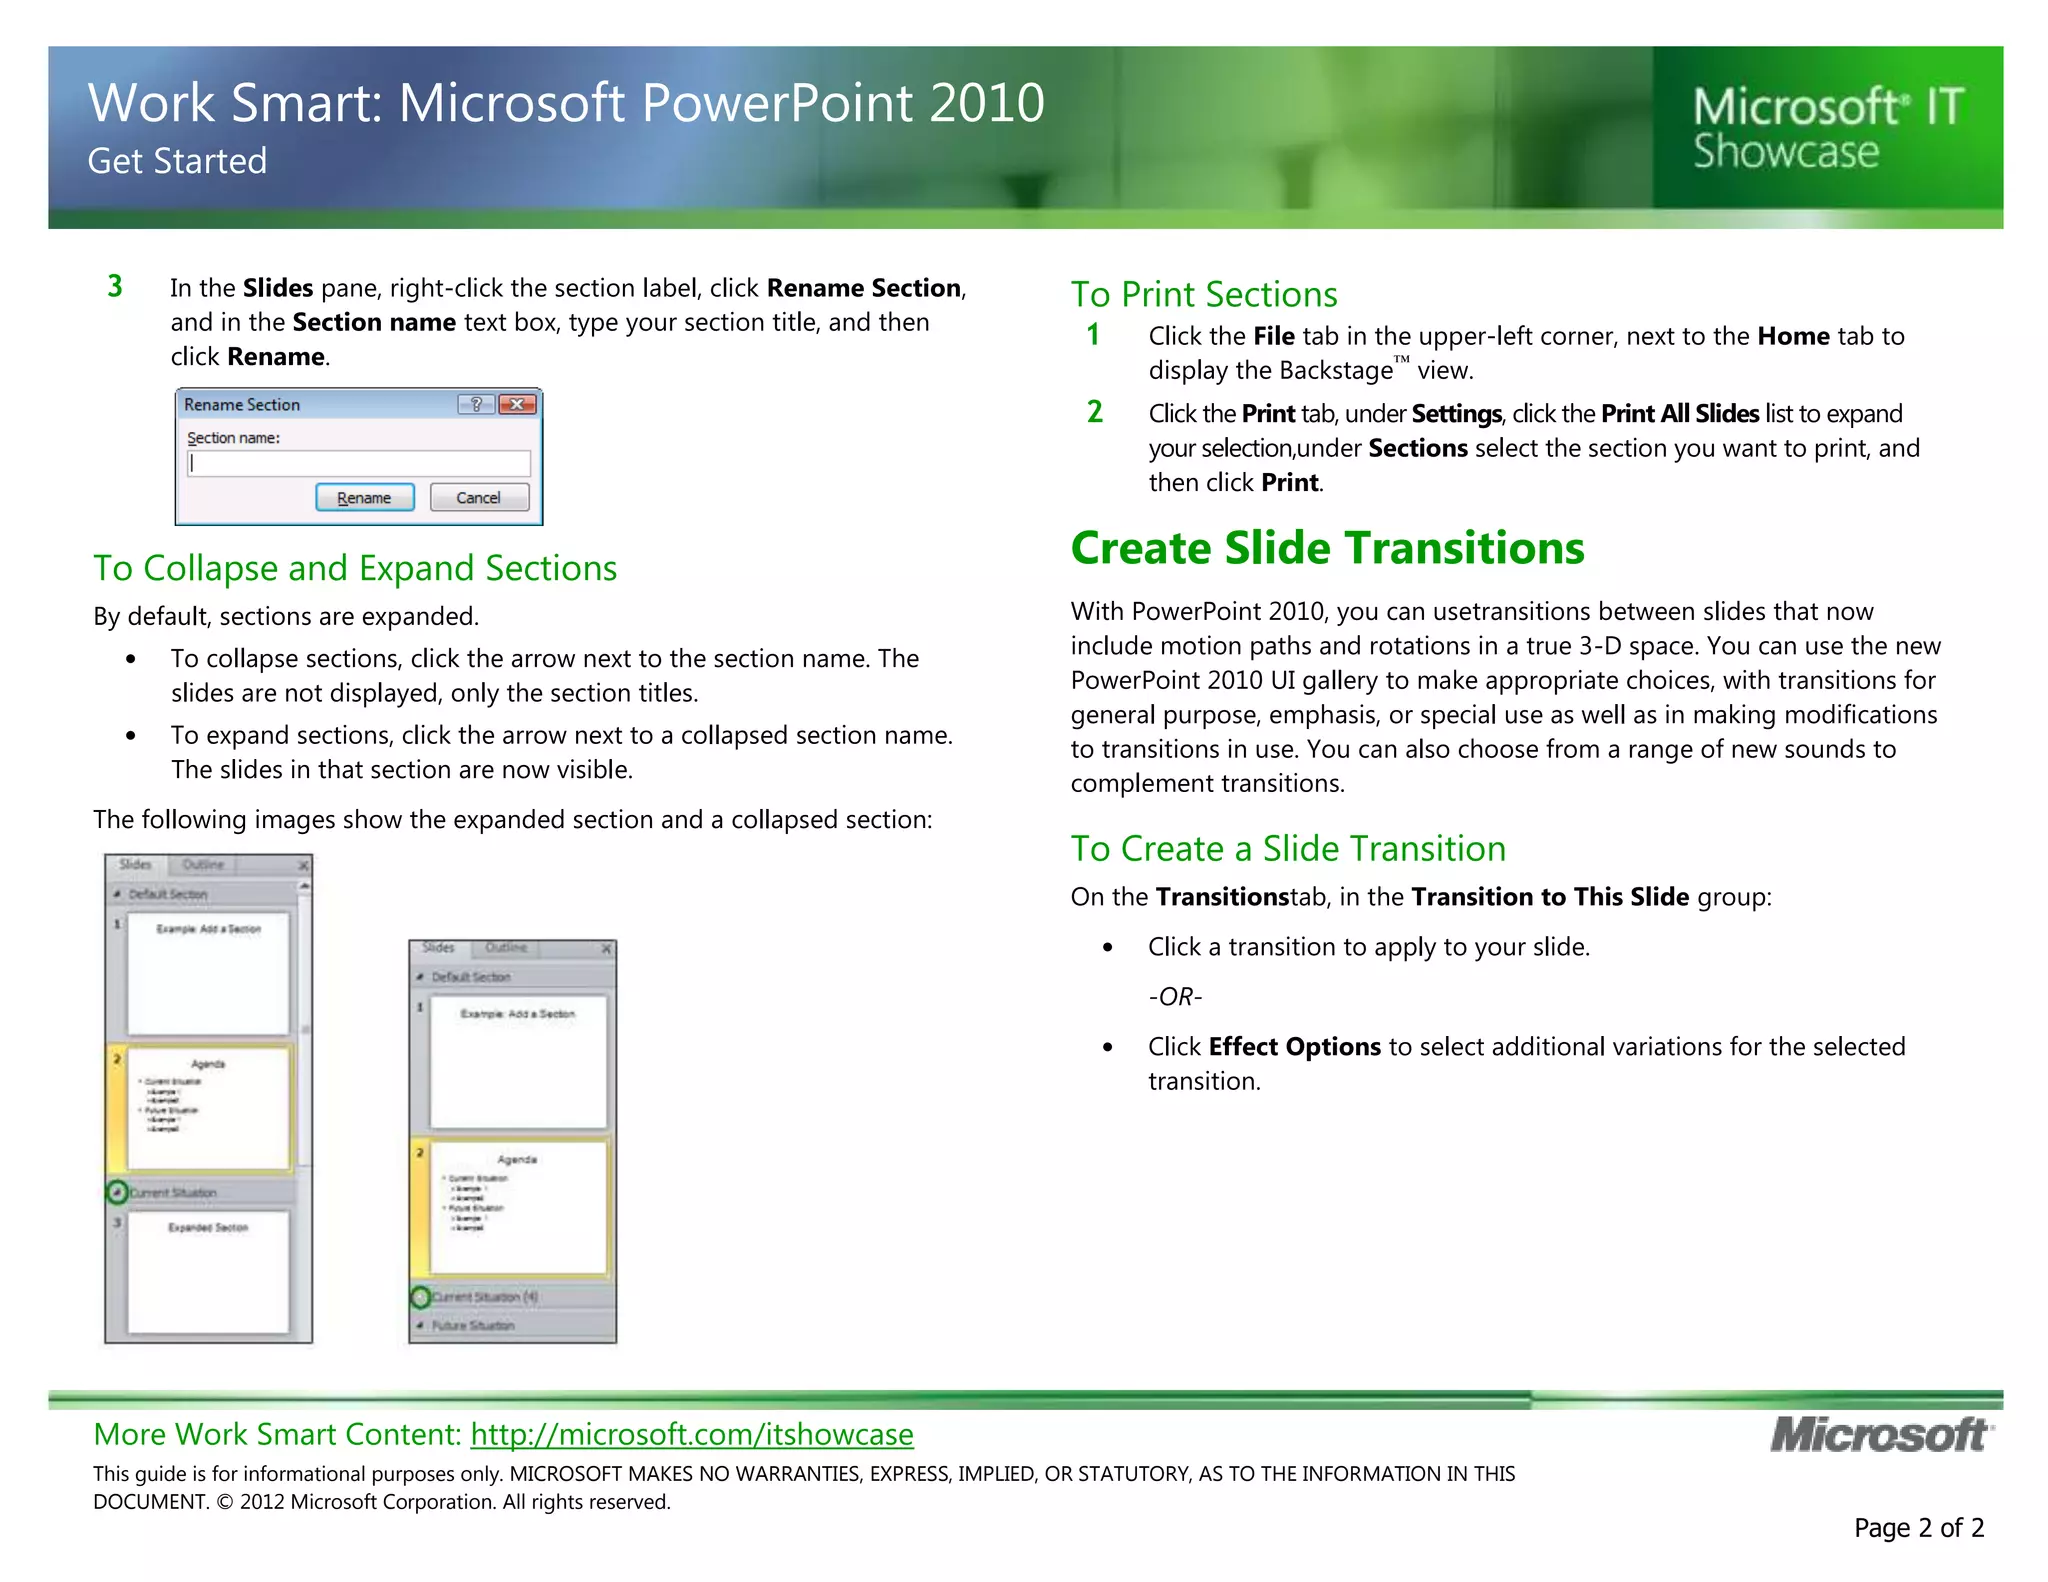
- Dividing presentations into logical sections to aid organization and navigation. Sections can be printed individually.
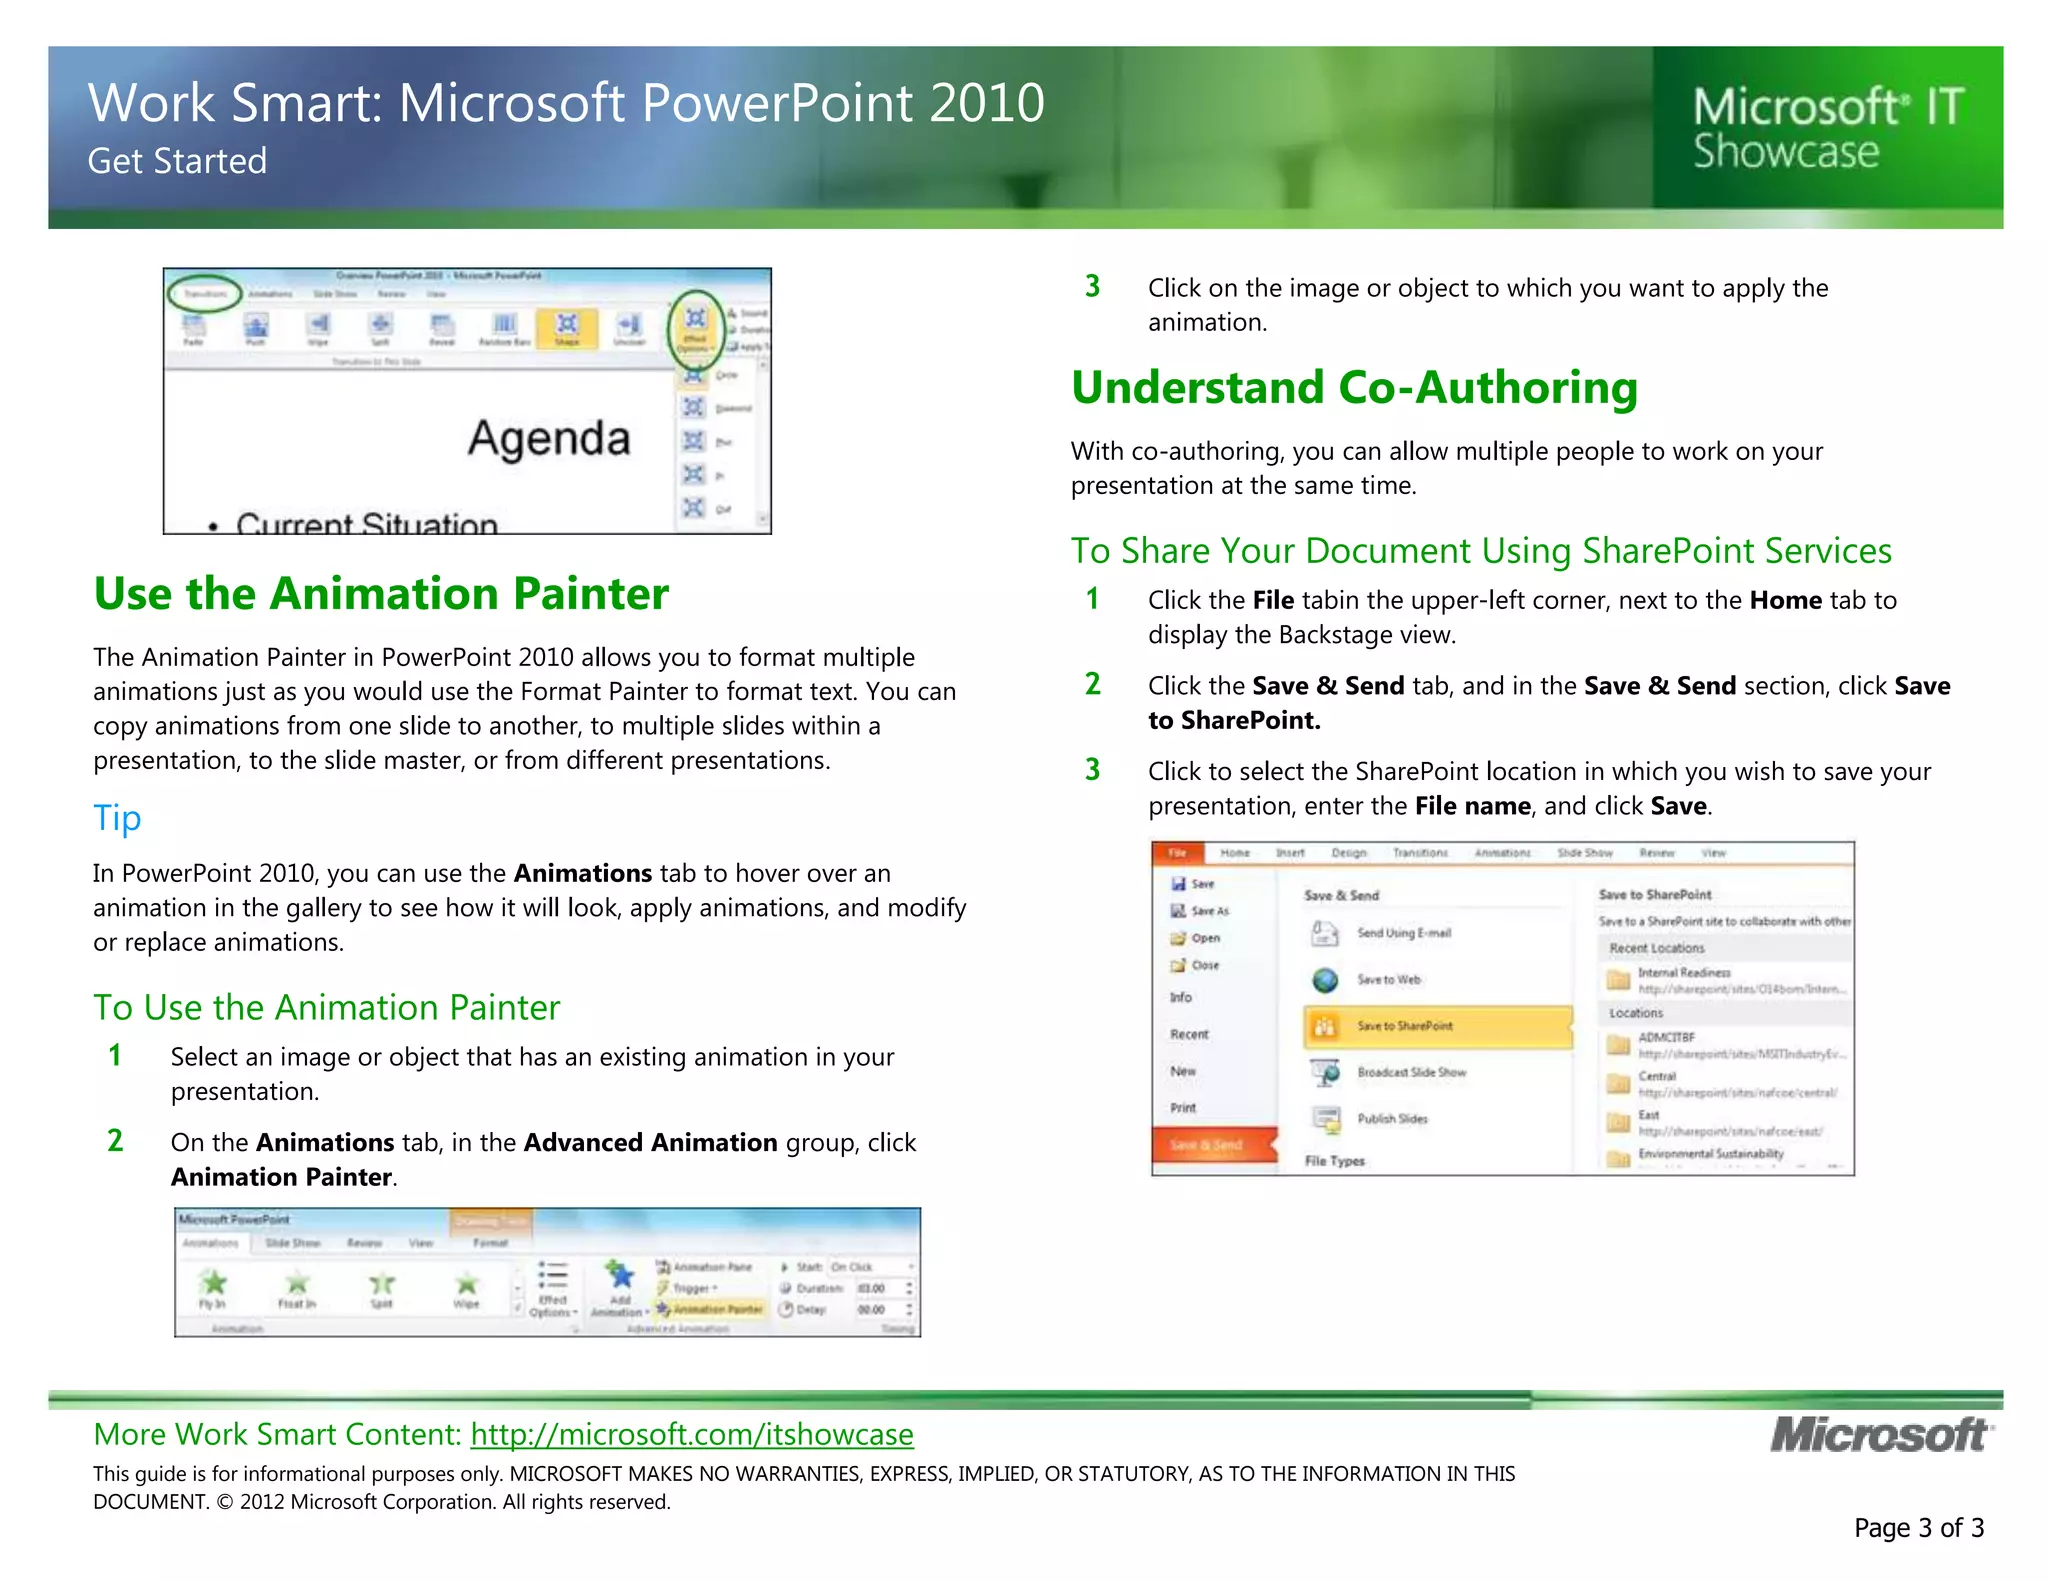
- Applying transitions between slides, including motion paths and rotations.
- Copying animations between slides using the Animation Painter.
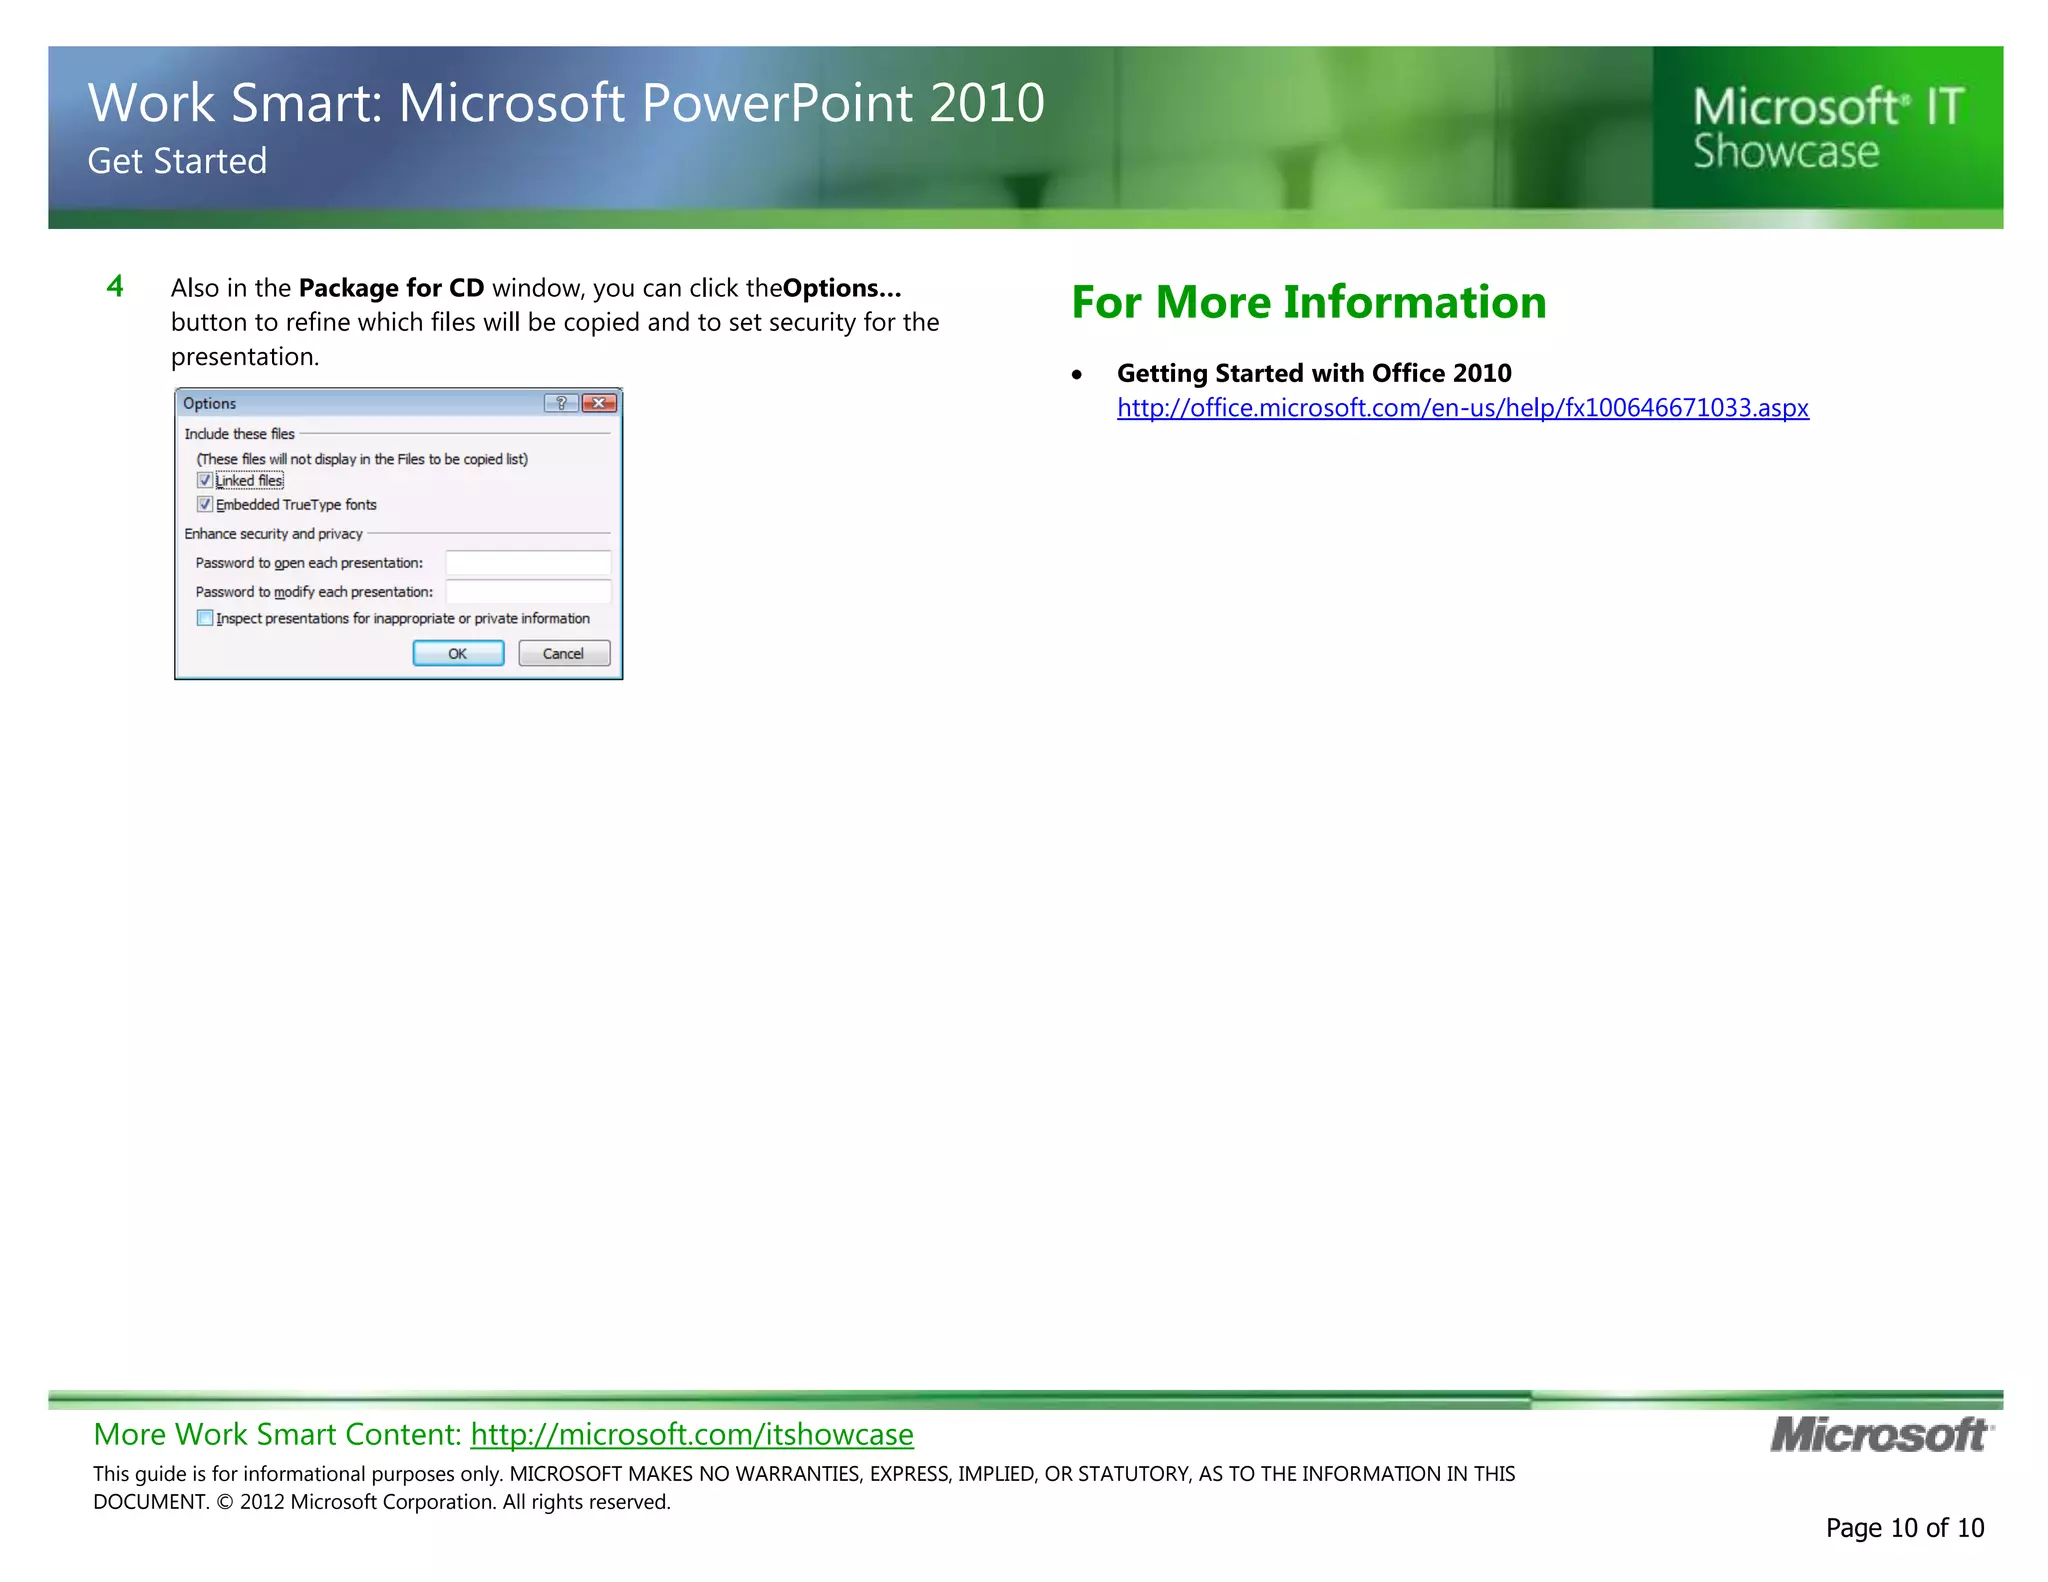
- Enabling co-authoring to allow multiple people to work on a presentation simultaneously.
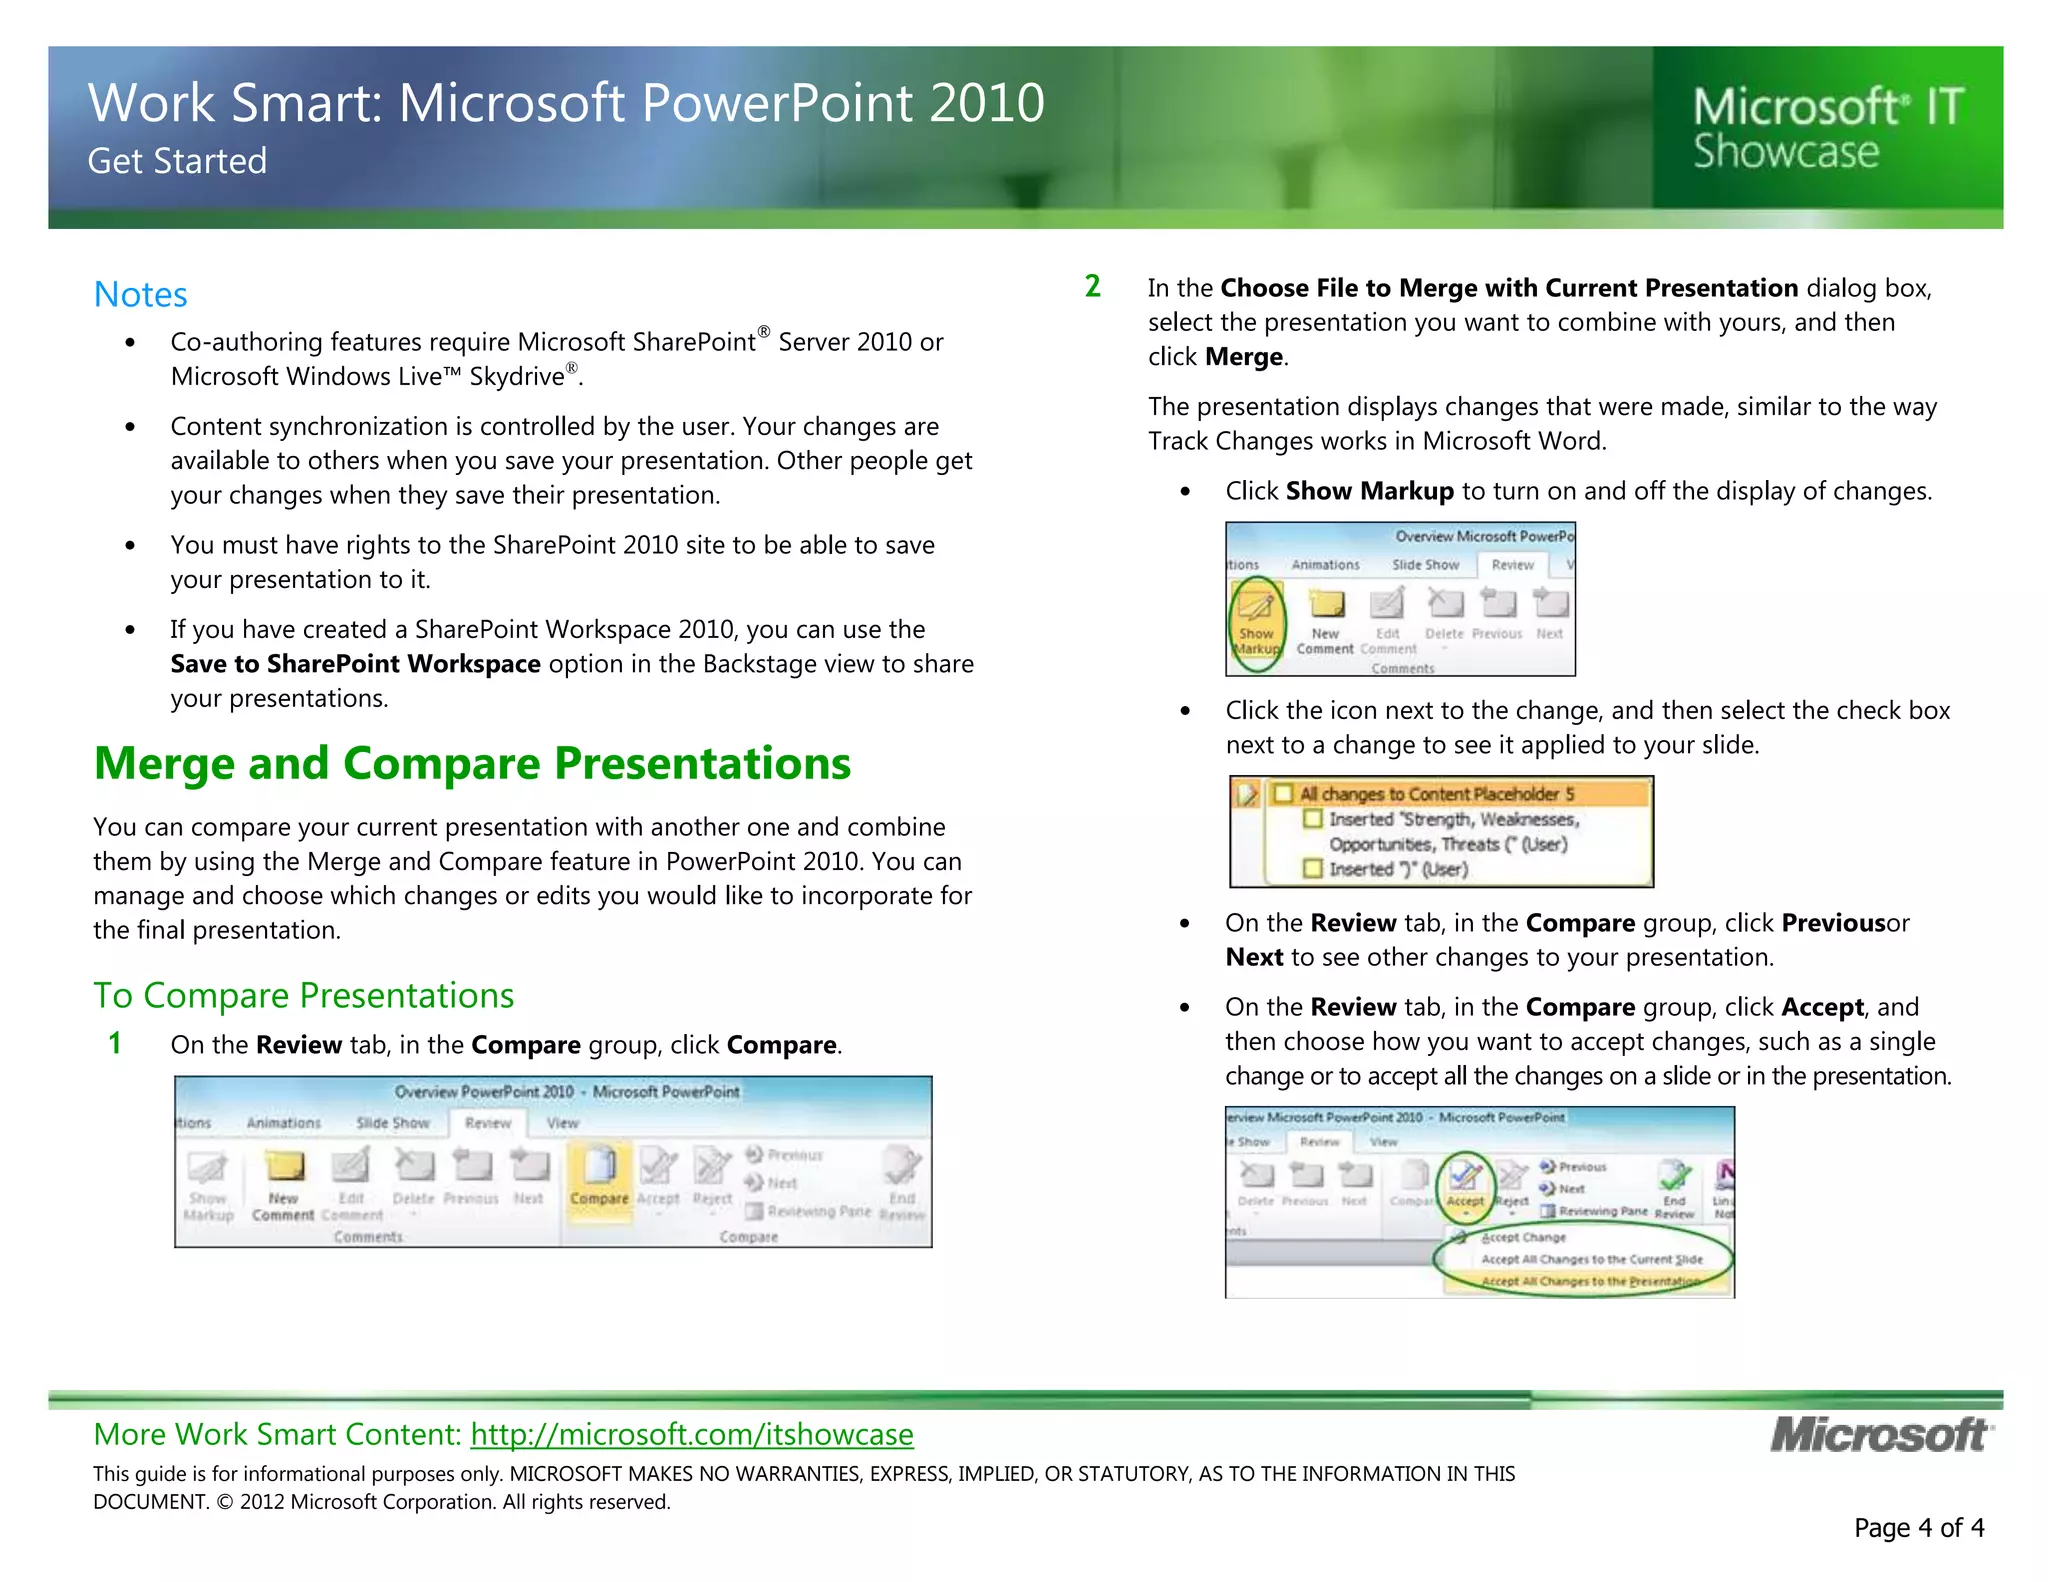
- Merging and comparing presentations to combine changes.
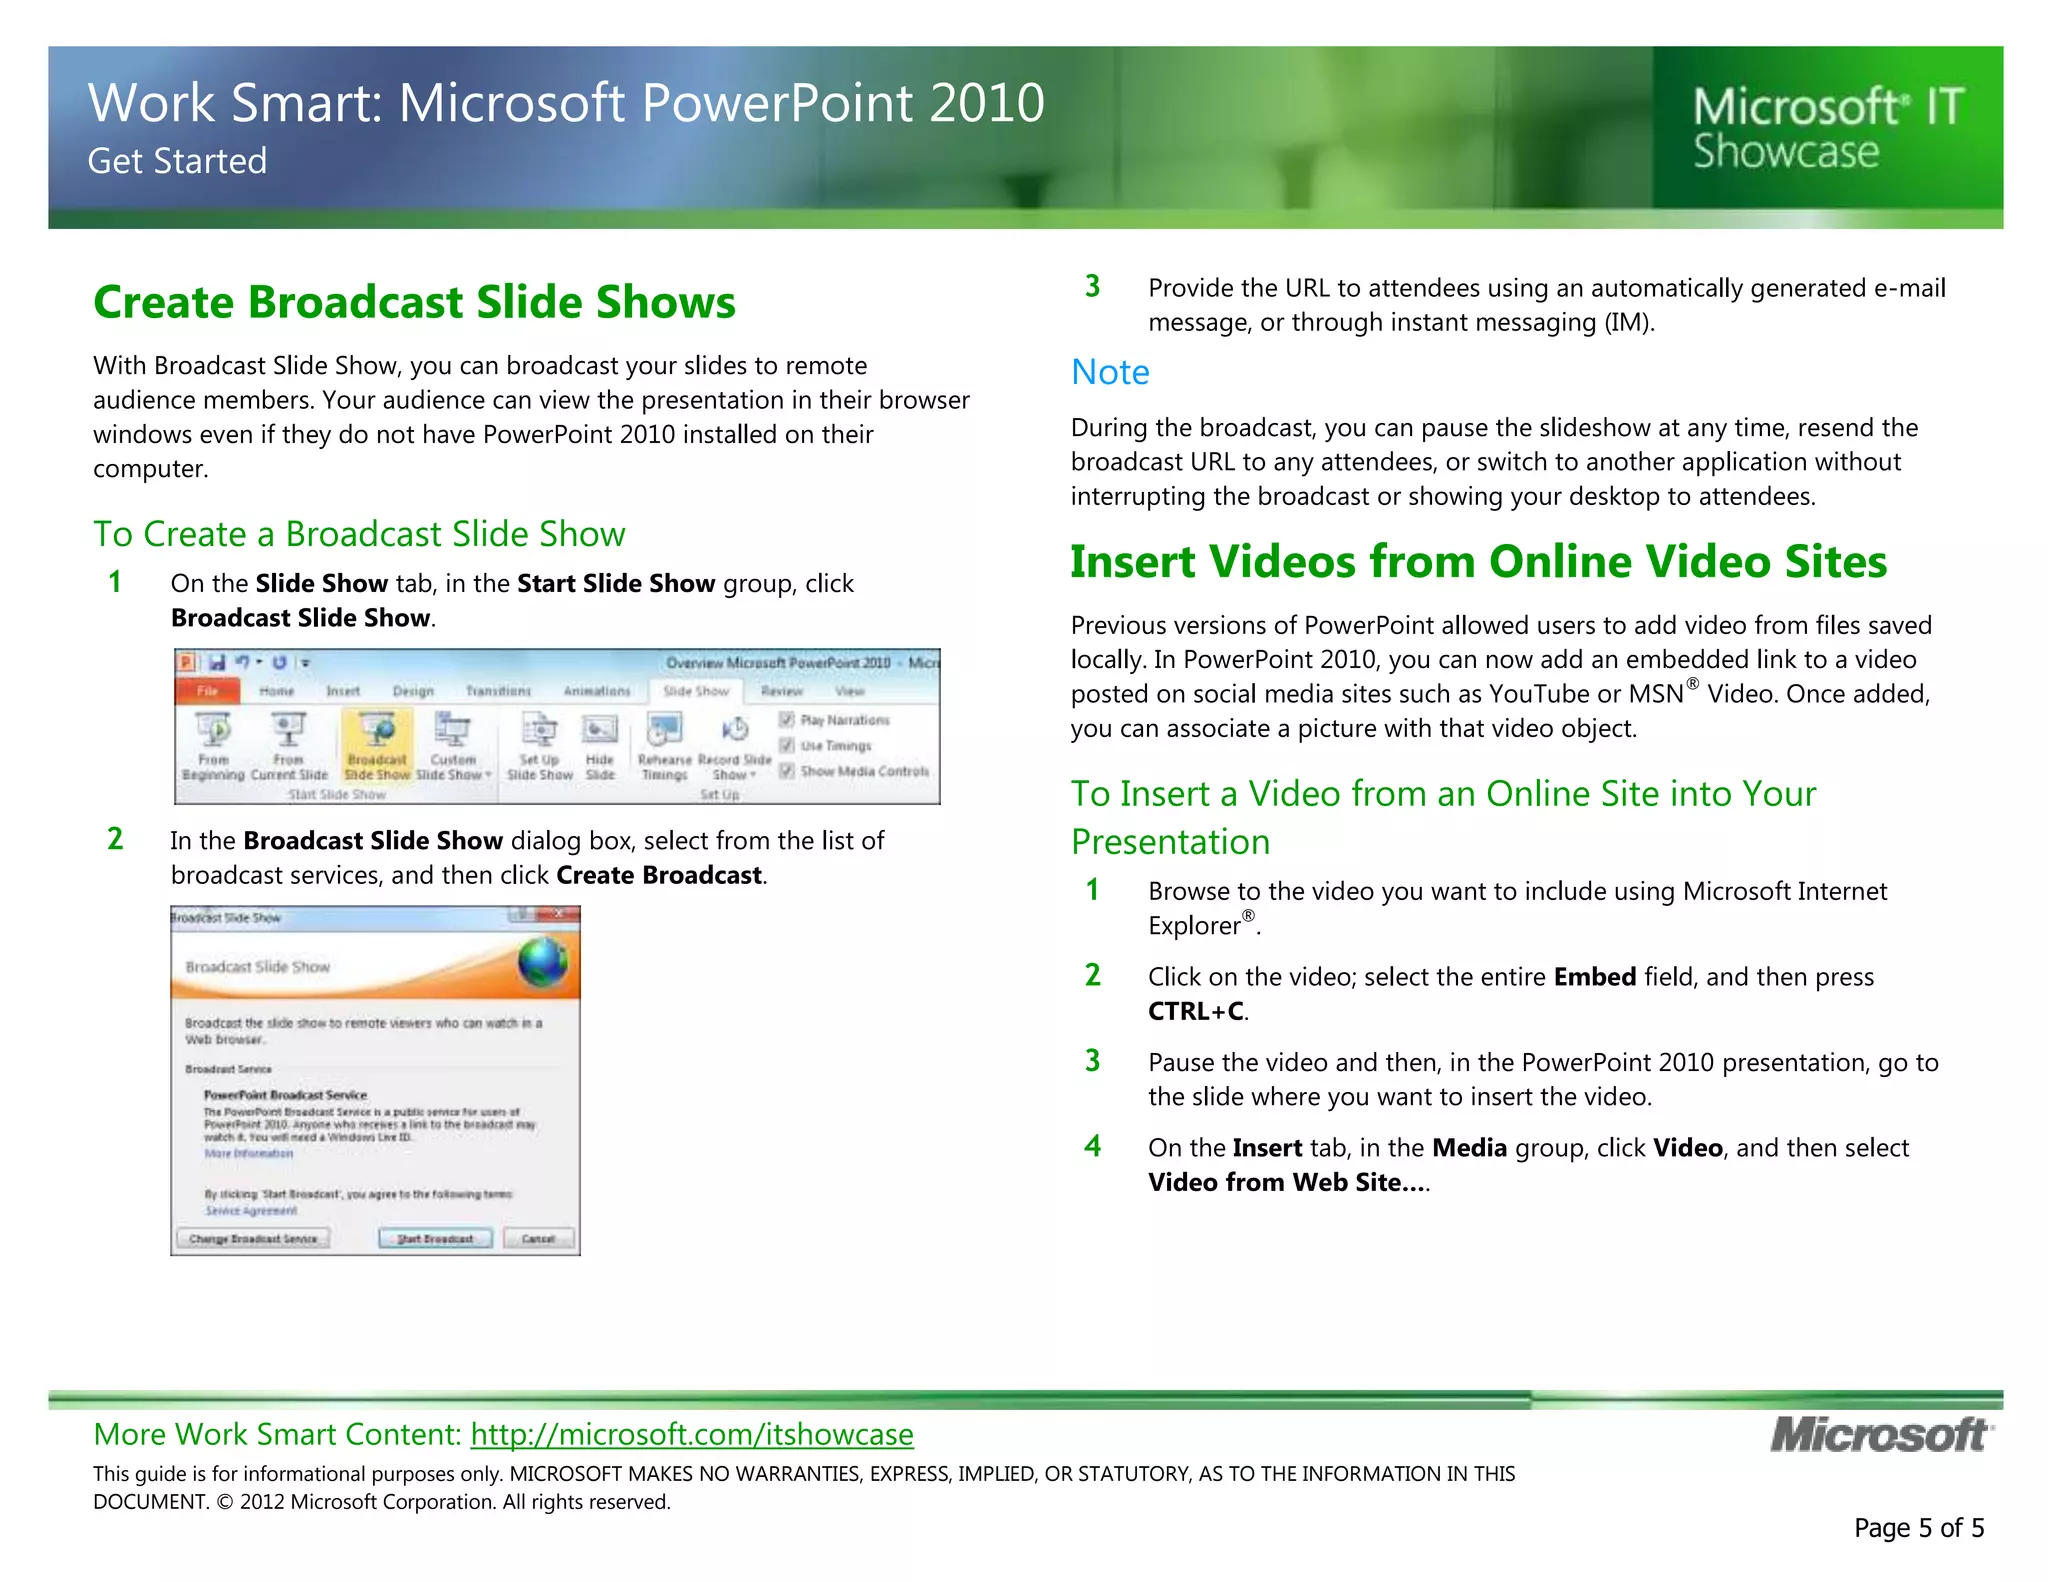
- Broadcasting slideshows to remote audiences who can view them in a browser.
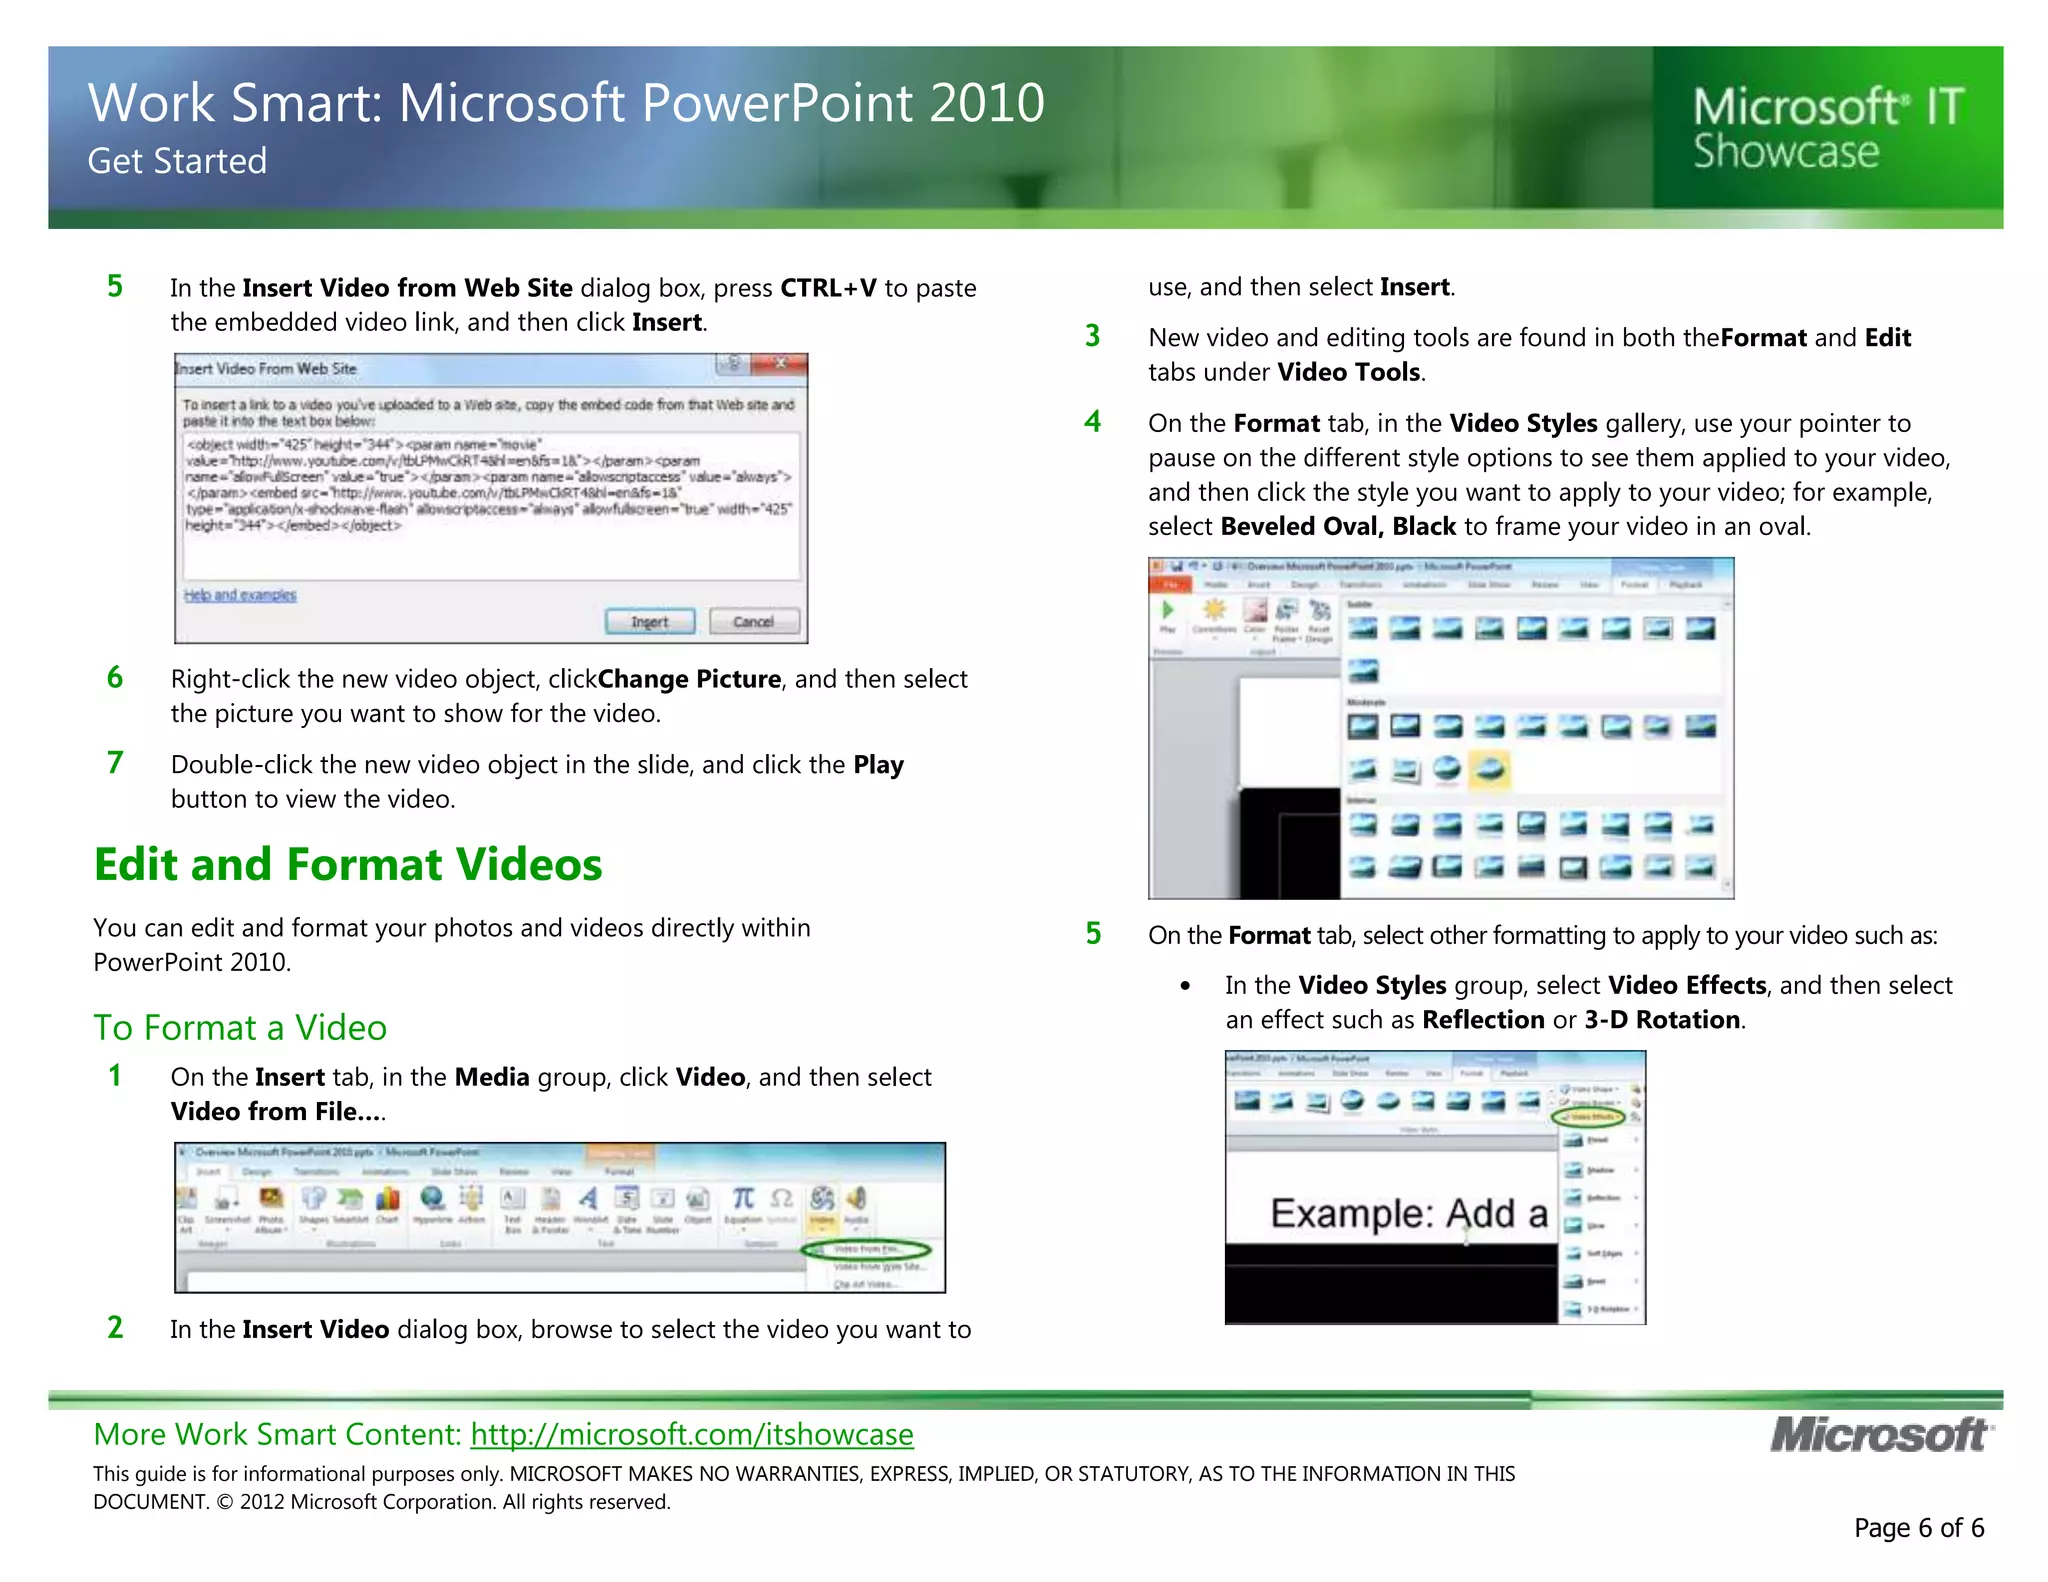
- Embedding videos from online sites like YouTube directly into presentations.
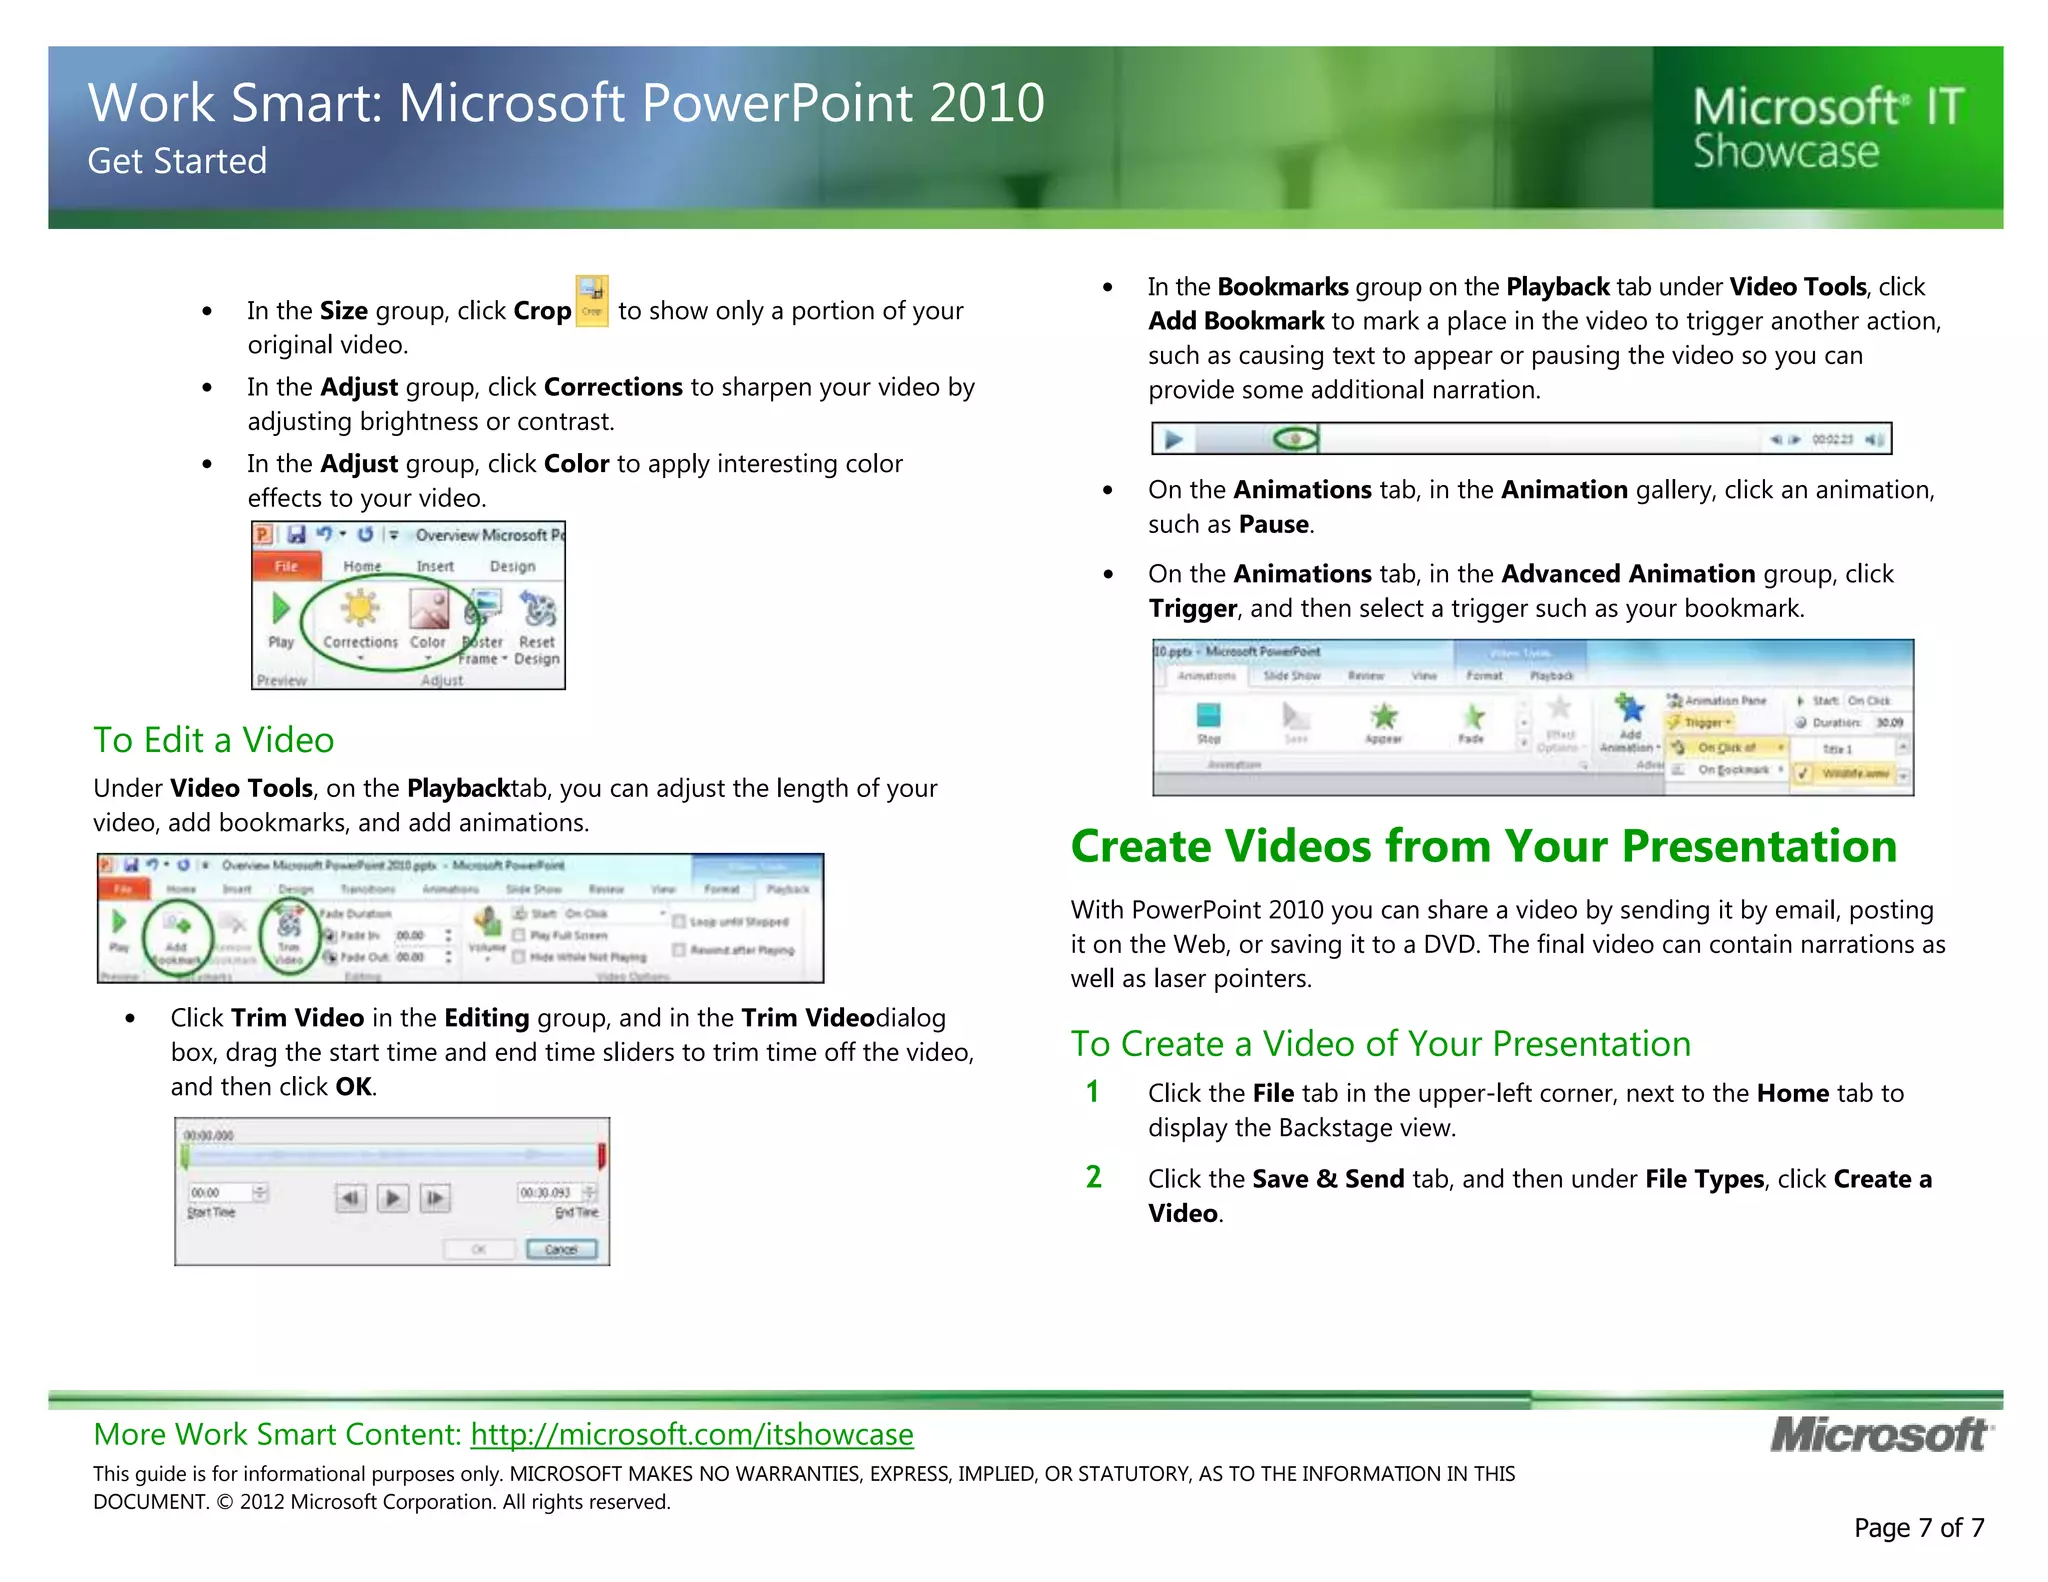
- Editing and formatting videos within PowerPoint, including trimming and adding effects.
- Creating videos of


![Coded Agents – with UiPath SDK + LangGraph [Virtual Hands-on Workshop]](https://cdn.slidesharecdn.com/ss_thumbnails/codedagentsdeck-251215155422-5497c599-thumbnail.jpg?width=640&height=640&fit=bounds)


