Download to read offline
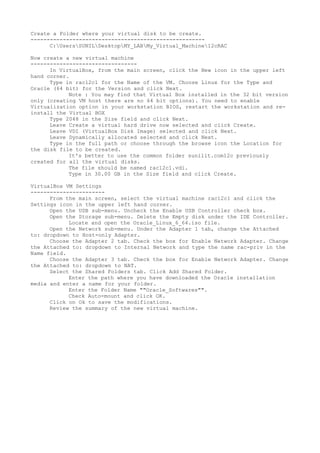
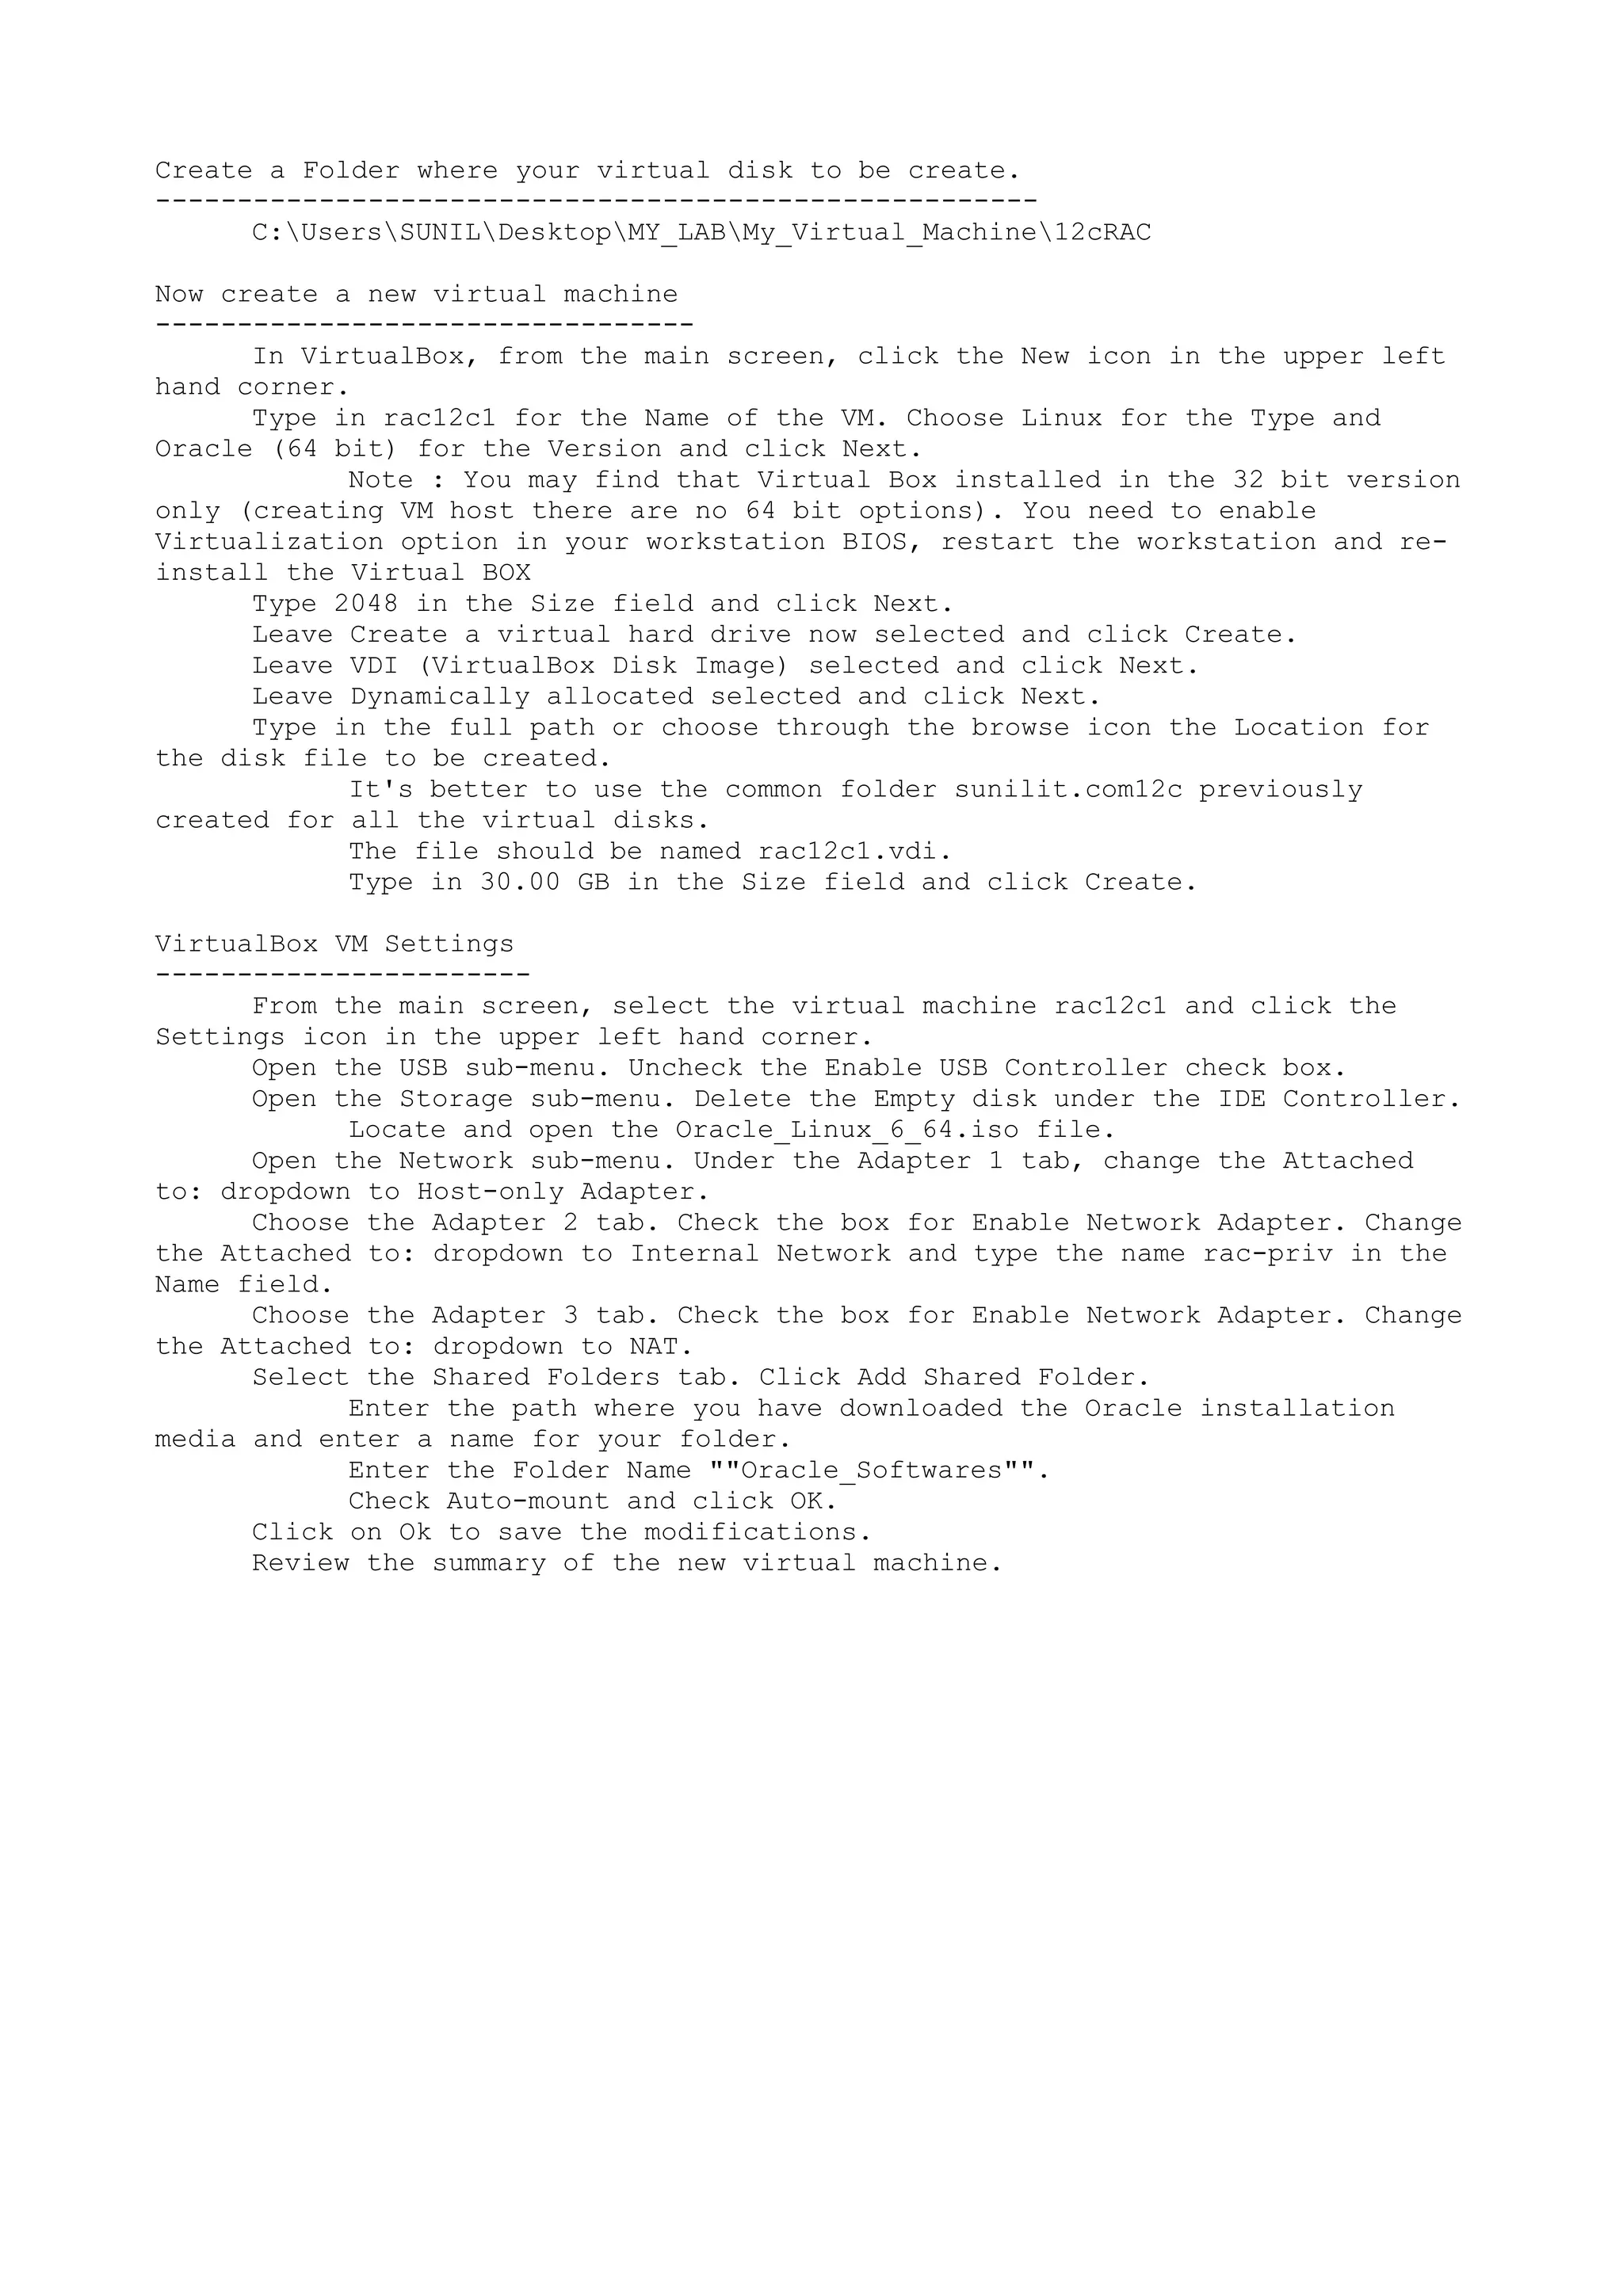

The document provides instructions for creating a new virtual machine in VirtualBox: 1. Create a folder to store the virtual disk, such as "C:\Users\SUNIL\Desktop\MY_LAB\My_Virtual_Machine\12cRAC". Then in VirtualBox, click "New" to create a new virtual machine called "rac12c1" of type "Linux" and version "Oracle (64 bit)". 2. Allocate 2048 MB of RAM and create a virtual hard disk that is 30GB in size and named "rac12c1.vdi". 3. Configure the virtual machine settings by disabling the USB controller, deleting the empty disk, adding the Oracle Linux