Downloaded 12 times

![K0032
06 Laboratory Exercise 1 *Property of STI
Page 3 of 8
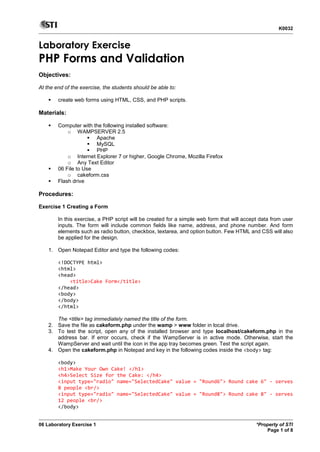
11. Add a checkbox element which will hold the fillings for the cake. Use the codes below.
<h4>Select Fillings:</h4>
<label><input type="checkbox" value="Cream" name='Filling[]' />Cream</label>
<label><input type="checkbox" value="Fudge" name='Filling[]' />Fudge</label>
<label><input type="checkbox" value="Ganache" name='Filling[]'
/>Ganache</label>
<label><input type="checkbox" value="Hazelnut" name='Filling[]'
/>Hazelnut</label>
<label><input type="checkbox" value="Mousse" name='Filling[]' />Mousse</label>
<label><input type="checkbox" value="Pudding" name='Filling[]'
/>Pudding</label>
12. Save and test your script.
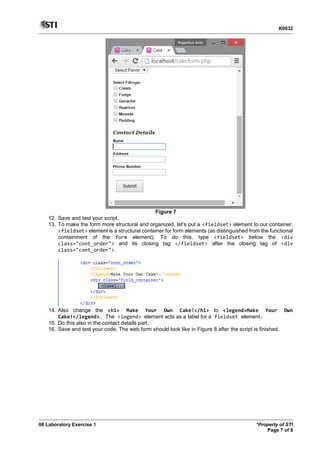
13. Try to fix your script to achieve the result in Figure 3. The form should look like this:
Figure 3
14. Save your file.
15. Add the following contact details to complete the form.
a. Name
b. Address
c. Phone number
16. Use this code:
Name: <input type="text" name="name">
17. Then add a submit button to the form. Use the following code:
<input type='submit' name='submitted' id='submit' value='Submit' />](https://image.slidesharecdn.com/06laboratoryexercise1-150817175151-lva1-app6892/85/06-laboratory-exercise-1-3-320.jpg)


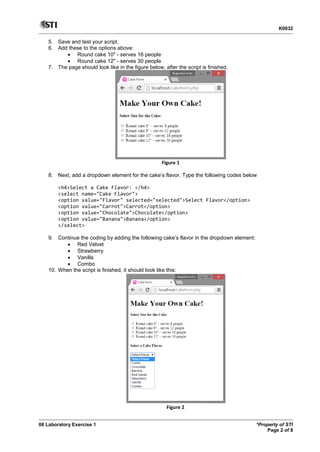
This document provides instructions for a laboratory exercise to create a web form using HTML, CSS, and PHP. The objectives are to create forms and implement validation. Students will make a cake order form with elements like radio buttons, dropdowns, checkboxes and text fields. CSS is then applied to structure the form using divs, labels, fieldsets and other tags. The finished form allows the user to select cake size, flavor, fillings and provide contact details.