Analysis 4
•Download as PPTX, PDF•
0 likes•435 views

The document discusses various visual effects used in video and image editing software to achieve specific artistic goals. It describes using a black and white effect in Windows Vegas to illustrate an underperforming character. It also discusses using camera flashes in Photoshop backgrounds to make a character seem famous, applying a sepia tone effect to make boxing shots appear old, and creating a flashing screen effect in clips by applying a brighter effect to clip sectors. Other effects mentioned include adding an outer glow to create silhouettes, applying grain to make images seem old, and using a thin white glow on images to make them stand out on a black background.

Recommended
More Related Content
What's hot
What's hot (20)
Viewers also liked
Viewers also liked (17)
Similar to Analysis 4
Similar to Analysis 4 (20)
Analysis 4
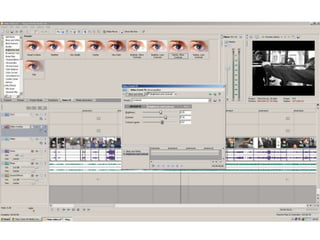
- 2. The black and white effect We wanted to create the feeling that the character, at the start, was failing and underperforming. After studying many other similar texts, we decided to use a black and white effect to illustrate this. We used Windows Vegas in our editing stage of our video, this also allowed us to get the desired effect we wanted on our clips. We played around with the effects available and made slight adjustments to the contrast, brightness, and contrast centre We wanted a very specific effect for our video, so once we found the commination we wanted, we made a note of it and applied the same effect to each of the shots we wanted to use.
- 4. The camera flash effect When designing my digi-pack, I wanted the character on the front cover to stand out and appear famous and powerful. Therefore I decided to have camera flashes in the background to make it seem like the character is a famous boxer. In order to achieve this effect I used Photoshop. This allowed me to use the drag/smudge tool which allowed me to create the flash as well as blend it into the black background. The smudge tool has options which allow me to change the thickness of the brush. This meant I could create a unique style for each of the flashes as well as putting much more detail in certain parts of it.
- 6. Sepia effect On my inside cover, I wanted a sequence of boxing shots in order and simonised; like a flipbook. However I still wanted to have the ‘Rocky’ like effect to the shots. After playing around with many different effects on Photoshop, I decided a sepia type effect will make the picture appear old and worn. However, there wasn’t a specific set ‘sepia’ effect, so I had to create the effect my self. I did this by adjusting the pictures and making them all slightly more yellow. I then added more saturation to the picture. I applied the same process to each of the pictures so they all linked up.
- 8. The flash effect for the last scene of our video, we wanted to create a screen flash on the beat of the song. In order to this, we first of all played the part of the song we wanted to apply the effect to. As the song was playing we applied a maker on the beat of the song, this was done by pressing the ‘M’ button on the beat. We then split the clip into sectors by clicking on each of the the markers and pressing ‘S’. We then applied a ‘much brighter’ effect to each of the sectors at the start of the clips. This made the clips flash momentarily at the start of the clip, on the beat.
- 10. The glow effect For my front cover of my digi-pack, I wanted to create more of a silhouette effect on the character. To do this I applied a outer glow to each of the camera flashes. This also made the camera flashes look more like camera flashes. I also applied the same effect to the character. However, the outer glow effect has many variations and alterations which I played around with. I wanted a very subtle glow effect in order to created to look I wanted. After I played around with the effects, I managed to get the effect I wanted. I then applied the same effect to the flashes which I wanted to apply them too.
- 12. The grain effect My advert is in the style of an old boxing poster. For this reason the pictures of the two boxers had to look old, like the paper of the poster. I went through all the picture filter effects to see which one worked the best. I finally decided upon the ‘grain’ effect. However, I had to play around with intensity and contrast of this effect in order to get the perfect effect. I then made note of the figures and applied it to the other picture.
- 14. white glow effect For my inside cover, I wanted the images to stand out on the black background. To do this, I decided to use a thin white glow to each of the pictures. I played around with the spread, capacity, range and size until I got the desired effect. After I got it, I made not of the figures and applied it to each of the pictures.
- 15. 1 2 4 5 3 9 8 6 7
- 16. 1. I used YouTube in my mainly in my planning stage. I researched and viewed music videos of the same genre as well as a variety in order to get an idea of typical conventions. I also used YouTube to upload any videos which I made, such as my main video and analysis videos. 2. I used Windows Sony Vegas for the construction of my main video. This is a massive section of the course and I spent a lot of time on it. I also used it for a couple digi-pack analysis. 3. Photoshop played a massive part in the construction of the digi-pack and advert. This is also a big sector of the course and I became very skilled in the use of Photoshop by the end of it. 4. Bubbl.us is a website which allows you to brain storm ideas in an visually easy and interactive way. i used this when I was deciding which album cover to use, as I had two drafts. 5. Microsoft word and PowerPoint played a massive role in the analysis and planning sector of the course. I used it to plan out analysis questions as well as designing questionnaires. 6. I used Wordle in my analysis sector. I used it to visually show which words most frequently came up in my audience feed back for my main video, digi-pack and advert. 7. Prezi is a great visual and interactive way to hold a slideshow. I used it many times during my analysis sector of the course. 8. Slide share allowed me to put my PowerPoint into an easy and friendly format. I used this throughout my course; in the planning and analysis. 9. I also used blogger throughout my whole course to monitor and register every bit of information I gathered; I used it as a diary for my coursework.
- 18. During the filming process of the course, we used a HD canon camera to film all our shots. This camera was easily to use, and had a big enough memory to store all our shots. Another reason we used this camera was because it was light and hand held, this worked perfectly as many of our shots were in the gym or out side where the camera man had to run along side the character. We also used a tripod on many of our still shots so then the camera was completely still. Lighting was also a big factor which we had to consider. We used a lighting lamp regularly during our filming in order to create the correct shot and eliminate dark patches or shadow. We also used the lamp to create a silhouette effect which worked very well.