Alternatives to Removing a Lawn without Herbicides
•
0 likes•381 views

Removing a Lawn without Herbicides

Recommended
Recommended
More Related Content
What's hot
What's hot (19)
Viewers also liked
Viewers also liked (17)
Similar to Alternatives to Removing a Lawn without Herbicides
Similar to Alternatives to Removing a Lawn without Herbicides (20)
More from School Vegetable Gardening - Victory Gardens
More from School Vegetable Gardening - Victory Gardens (20)
Recently uploaded
Recently uploaded (20)
Alternatives to Removing a Lawn without Herbicides
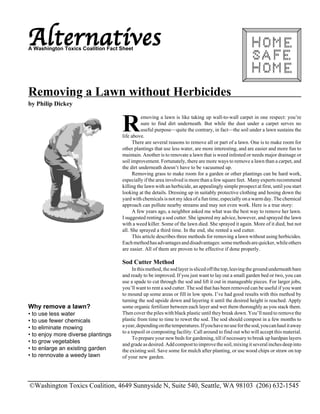
- 1. Alternatives A Washington Toxics Coalition Fact Sheet Removing a Lawn without Herbicides by Philip Dickey xx x xxxxx xxxxx x x x x x xxxx xxx xx x x xxxxx xxxxx xxxxx x x x x x xxxx xxx xxxx xxx Removing a lawn is like taking up wall-to-wall carpet in one respect: you’re sure to find dirt underneath. But while the dust under a carpet serves no useful purpose—quite the contrary, in fact—the soil under a lawn sustains the life above. There are several reasons to remove all or part of a lawn. One is to make room for other plantings that use less water, are more interesting, and are easier and more fun to maintain. Another is to renovate a lawn that is weed infested or needs major drainage or soil improvement. Fortunately, there are more ways to remove a lawn than a carpet, and the dirt underneath doesn’t have to be vacuumed up. Removing grass to make room for a garden or other plantings can be hard work, especially if the area involved is more than a few square feet. Many experts recommend killing the lawn with an herbicide, an appealingly simple prospect at first, until you start looking at the details. Dressing up in suitably protective clothing and hosing down the yard with chemicals is not my idea of a fun time, especially on a warm day. The chemical approach can pollute nearby streams and may not even work. Here is a true story: A few years ago, a neighbor asked me what was the best way to remove her lawn. I suggested renting a sod cutter. She ignored my advice, however, and sprayed the lawn with a weed killer. Some of the lawn died. She sprayed it again. More of it died, but not all. She sprayed a third time. In the end, she rented a sod cutter. This article describes three methods for removing a lawn without using herbicides. Each method has advantages and disadvantages: some methods are quicker, while others are easier. All of them are proven to be effective if done properly. Sod Cutter Method In this method, the sod layer is sliced off the top, leaving the ground underneath bare and ready to be improved. If you just want to lay out a small garden bed or two, you can use a spade to cut through the sod and lift it out in manageable pieces. For larger jobs, you’ll want to rent a sod cutter. The sod that has been removed can be useful if you want to mound up some areas or fill in low spots. I’ve had good results with this method by turning the sod upside down and layering it until the desired height is reached. Apply some organic fertilizer between each layer and wet them thoroughly as you stack them. Then cover the piles with black plastic until they break down. You’ll need to remove the plastic from time to time to rewet the sod. The sod should compost in a few months to a year, depending on the temperatures. If you have no use for the sod, you can haul it away to a topsoil or composting facility. Call around to find out who will accept this material. To prepare your new beds for gardening, till if necessary to break up hardpan layers and grade as desired. Add compost to improve the soil, mixing it several inches deep into the existing soil. Save some for mulch after planting, or use wood chips or straw on top of your new garden. Why remove a lawn? • to use less water • to use fewer chemicals • to eliminate mowing • to enjoy more diverse plantings • to grow vegetables • to enlarge an existing garden • to rennovate a weedy lawn x x x x x xxxx xxx x xx xx x x x x x x xx x x x x xx xxxx xxx x xx xx x x x x x x xx x x x x xx xxxxxx xx x xx x x x x xx xx x xx x x x x xx ©Washington Toxics Coalition, 4649 Sunnyside N, Suite 540, Seattle, WA 98103 (206) 632-1545
- 2. Using the sod-cutter method in author's yard: a scrapbook Right: Ready to spade up the sod in the front yard. Sod was carried around to the back yard and placed upside down on top of the existing lawn to build up berms. Photo on opposite page shows piles of sod under black plastic. Above: Sod removed, drought-tolerant plantings installed, and top covered with thin layer of wood chips. Bricks are reused from parking strip. (Note: I now realize that I should have added a lot more compost at this point.) Below: Same view two years later. Lithodora is cascading over wall, woolly thyme has filled in. Soaker hoses have been installed since this photo was taken. Weeding has been minimal. FRONT YARD Goal: Remove small front lawn and replace it with ornamental beds on either side of front walk.
- 3. Left: In the back yard, black plastic covers sod piled up to increase height for ornamental beds. Pile in lower right is unfinished. Uncovered areas will be dug out for paths. Below: After removing sod, vegetable beds were dug down two feet to prepare soil for a new vegetable garden. Soil was strained and recovered rocks were used for pathways between and around the beds. BACK YARD Goal: Remove lawn around deck, build vegetable & herb beds on one side, ornamental garden on the other. Above: Vegetable and herb beds being planted. Pathway around right side is still unfinished. Right: Our back yard today. Foreground area is where black plastic was. Former deck in center of yard has been removed. Vegetable garden is to the right of the pea fence at the top right of the photo. Favorite plantings include Sisyrinchium striatum, Caryopteris, Crocosmia 'Lucifer,' Astrantia, and a host of perennial geraniums.
- 4. References and Resources 1. McDonald, David (1999). Ecologically Sound Lawn Care for the Pacific Northwest. Findings from the Scientific Literature and Recommendations from Turf Professionals. Seattle Public Utilities, Community Services Division, Resource Conservation Section. Available on the Internet at http:// www.seattle.gov/util/stellent/ groups/public/@spu/@rmb/@csd/ @rescons/documents/ spu_informative/ ecological_200312021255394.pdf 2. Seattle Public Utilities and Seattle Tilth Association. Sheet Mulching: Soil Building on a Budget. Natural Soilbuilding Resource Manual, 2002. Avail-able from the Natural Lawn and Garden Hotline: 206-633-0224. 3. Craig Elevitch and Kim Wilkinson. Sheet Mulching: Greater Plant and Soil Health for Less Work. AgroForester, PO Box 428, Holualoa, HI 96725 http:// www.agroforestry.net Multiple-Till and Irrigation Method In this method, the sod is covered with soil amendments and then rototilled. The area is watered to stimulate the growth of any weed seeds present, then tilled more shallowly to destroy the sprouted weeds. The process is repeated several times to deplete the seed reserve. Be warned that while this method is pretty effective at killing weeds, it may not completely kill invasive grasses, which get chopped up but can resprout from small pieces. So if you have lots of crabgrass or quackgrass, you may want to use one of the other methods instead. Another drawback for me is having to use machinery, but many guys see that as an advantage. If you are using a rented rototiller, you’ll have to rent it more than once. Here’s how natural lawncare expert David McDonald describes the method:1 “The method requires moist but not soggy soil (a saturated soil’s structure can be damaged by tilling, especially in clay soils), a powerful 8-hp walk-behind tiller or tractor-mounted tiller, and three to six weeks of time. First add the soil amendments: 2 inches of compost, plus lime or other minerals as indicated by a soil test (uncomposted manure might be used too, since most sprouting weeds will be killed in this process). On an existing lawn, adding some quick-release nitrogen fertilizer at this point will cause any roots that survive the first tilling to grow quickly and exhaust their reserves, and so be easier to kill on the second tilling. Then till deeply to incorporate the amendments, and to completely chop up the existing sod, if it has not already been removed. Irrigate to moisten the upper 2 inches of soil. After one to two weeks, when weed seeds and the remaining live grass roots have sprouted, till shallowly (1 inch deep) to kill them (hot sun will help). Irrigate again and repeat the shallow tilling when more seeds sprout – don’t till deeply because that will bring more seed to the surface. Three tillings will deal with most weed seeds; more may be needed to kill resprouting grass roots. After the initial deep tilling, an alternative to re-tilling is to kill sprouting weeds with a flame-weeder” Sheet-Composting The sheet-composting method that some call “lawn lasagne” is great if you have access to large amounts of compostable material and/or compost. Basically, you are going to cover the existing lawn with layers of organic material that will break down and, in the process, soften and kill the grass itself. Some writers suggest breaking up the sod layer first but others do not. There are four basic layers to the lasagne, although numerous variations are possible. This recipe comes from “Sheet Mulching: Soil Building on a Budget.”2 The first layer is basically a nitrogen fertilizer. You can use one to three inches of fresh grass clippings or manure, or alternatively apply a nitrogen-rich organic fertilizer. The next layer is the weed barrier, typically up to eight overlapping layers of newspaper or a sheet of cardboard. Be sure that no gaps exist in this layer. Then cover the area with weed-free material such as fall leaves, sawdust, manure, compost, shredded garden trimmings, or whatever you happen to have. One to three inches depth is great, but you can go higher if you have more material. Finally, top it all off with a layer of weed-free mulch such as wood chips, finished compost, or straw. This is partly for appearance and partly to keep leaves or other loose material in the layer below from blowing around. Be sure to keep the whole thing moist while it breaks down. If you put wood chips on top, don’t till these in because they will use up valuable nitrogen. It probably doesn’t matter too much exactly how you build your lasagne as long as you put the nitrogen-rich materials on the bottom and everything on top of the barrier is free of weeds. Since this thin, horizontal compost pile doesn’t get hot enough to kill weed seeds or plant diseases, be sure not to use diseased plants, seed heads, or aggressive weed material. People have recommended all kinds of strange things for the weed barrier, including burlap, old wool carpeting, and even discarded blue jeans.3 ■ The Washington Toxics Coalition is a non-profit organization dedicated to protecting public health and the envi-ronment by preventing pollution. Please write or phone for information: WTC, 4649 Sunnyside Ave N, Suite 540, Seattle, WA 98103. Phone: 206- 632-1545. Visit our Internet Web site at www.watoxics.org.