Theoretical Framework- Explanation with Flow Chart.docx
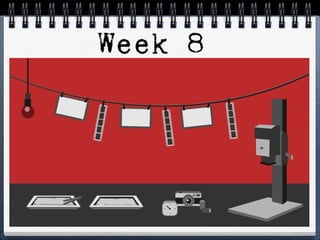
Week 9 and 10 photo
1.
2.
3.
4. Take your time when
processing your film. It will
take a bit of practice but it is
really worth it!
5. Your Negatives… Examine your negatives. What does the
exposure look like?
If your negatives don’t look correct please
refer to the…Black and White Film… when
is goes wrong.. sheet.
6. Negative Sleeves
Your negatives are
very delicate and can
be easily scratched.
Take care when
handling and keep
them safe in your file
7. The Enlarger
CHECK FILTER NUMBER
CLEAN NEG
SET APERTURE ON THE
LENS
DECIDE ON PRINT SIZE
USE MASKING FRAME TO
CREATE PROPER
BORDERS
FINE FOCUS IMAGE
CHECK BORDERS OF
IMAGE
SET TIMER
MAKE TEST STRIPS FOR
EVERY PRINT
MINIMUM EXPOSURE – 16
SECS
ALTER
FILTER/TIMING/APERTUR
E APPROPRIATELY
‘BURN IN’ WHERE
NECESSARY
‘HOLD BACK AREAS’
WHERE NECESSARY
8. Enlarger lenses have Apertures that also affect
how much light is hitting the paper, however, it's
best to stop down to achieve a sharp image and
leave it (start with going 2 stops down to f8).
9. Contrast Grades
-Contrast grades 0 – 1 |
lower contrast
-Contrast grade 2 |
medium or normal
contrast
-Contrast grades 3 – 5 |
higher contrast
You should use filters to
change the contrast of your
photograph. Make sure you
write down which one you have
used when creating test strips
13. The Chemicals…
-USE TONGS - ALWAYS
-USE ‘DRIP/DROP’ METHOD
-MINIMUM 1.5 MINUTES IN DEV
-KEEP DEV MOVING
-DON’T LEAVE TEST STRIPS IN
DEV
-CHECK ALL PRINTS OUTSIDE
IN LIGHT
-DON’T PILE UP PRINTS IN FIX
-WASH PRINTS PROPERLY
-KEEP WET PRINTS AWAY
FROM ENLARGER
-WASH & DRY HANDS BEFORE
HANDLING NEGS & PAPER
-TAKE ALL PRINTS OUT TO DRY
-CHECK NEGS ARE NOT LEFT IN
ENLARGER
-CLEAR UP BEFORE LEAVING
14. This week ……
-Create a double page explaining
how to ‘Process a Film’ and how
to create a ‘Contact Sheet’
-Print test strips and a contact
sheet. Stick in your sketchbook
and annotate. Explain how you
created them!
-Print digital contact sheet +
enlargements (don’t stick these
in your book yet)
Deadline: Tuesday 7th
November
(Don’t forget to bring your negatives and folder)
15.
16. Once you have
successfully produced
your contact sheet you
should choose an
image to create an
enlargement of. Make
sure you take your time
and produce a number
of test strips to help
you establish the
correct exposure you
need.
17. You will need to focus your
image. You can do this
manually on the enlarger.
To ensure a really sharpe
image you can also use a
focus finder. This is a
simple optical tool used to
examine a virtual image to
achieve a precise point of
focus when enlarging your
images
18. This week……
Deadline: Tuesday 14th
November
(Don’t forget your digital shoot on your memory stick for next week)
-Create a page on how to create an
enlargement (this should include
test strips and a final enlargement)
-In comparison to your film shoot
create a page on your digital
contact sheets and produce
enlargements of these in your
book. Annotate and compare and
contrast to your traditional film
shoot.