1. How to Setup an Email Opt-In Plugin for Storefront a WordPress
eCommerce Theme!
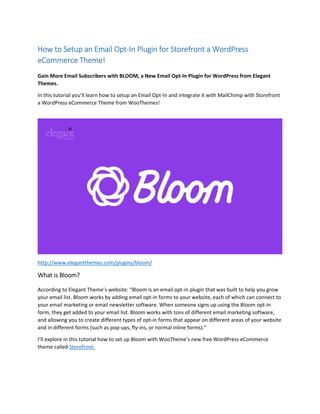
Gain More Email Subscribers with BLOOM, a New Email Opt-In Plugin for WordPress from Elegant
Themes.
In this tutorial you'll learn how to setup an Email Opt-In and integrate it with MailChimp with Storefront
a WordPress eCommerce Theme from WooThemes!
http://www.elegantthemes.com/plugins/bloom/
What is Bloom?
According to Elegant Theme’s website: “Bloom is an email opt-in plugin that was built to help you grow
your email list. Bloom works by adding email opt-in forms to your website, each of which can connect to
your email marketing or email newsletter software. When someone signs up using the Bloom opt-in
form, they get added to your email list. Bloom works with tons of different email marketing software,
and allowing you to create different types of opt-in forms that appear on different areas of your website
and in different forms (such as pop-ups, fly-ins, or normal inline forms).”
I’ll explore in this tutorial how to set up Bloom with WooTheme’s new free WordPress eCommerce
theme called Storefront.
2. I will install the plugin on a demo site. You can see the final version here: http://mercdrainplug.com.
Scroll down or wait 20 seconds to see the plugin slide up! It’s a very simple plugin to use with many
templates to choose from. Follow me along as I test this plug with Storefront!
As noted from Elegant Themes, this comprehensive email opt-in plugin for WordPress has:
• Multiple highly-effective opt-in types,
• A plethora of design settings and pre-made templates,
• Amazing stats that give you actionable insights into your campaign performance,
• And advanced targeting options that afford you full control over where and when your opt-in
forms appear.
3. Also, if you’re looking for an effective way to generate and convert leads, I’ll also show you how to setup
Bloom with an email provider.
In this tutorial I’ll create an account with MailChimp:
• MailChimp is free to setup,
• You will be able to integrate MailChimp’s API with the Bloom optin-plugin,
• You will learn how to create a list,
• Even if you don’t use MailChimp Bloom integrates seamlessly with all of the most popular email
marketing systems.
• Bloom comes with 12 e-mail marketing integrations to choose from.
I’ll set Bloom to integrate with MailChimp. If you're just starting out with email marketing, MailChimp is
a good choice because it's free.
You can purchase the plugin with Elegant Themes.
Please Note: Students enrolled in my WordPress Storefront eCommerce course can download the plugin
and try it out on their WordPress site without purchasing the plugin.
LOGIN TO WORDPRESS
Login to your WordPress dashboard. After downloading the plugin you can install it by navigating to
Plugins > Add New.
4. UPLOAD YOUR PLUGIN
Click on Upload Plugin. The plugin file is bloom.zip.
ACTIVATE THE PLUGIN
After activating the plugin, click on the Bloom settings tab.
5. NEW OPTIN
Click on the New Optin button to get started.
DISPLAY SETTINGS
You have a few options to choose from such as Pop-Up, Fly-In, Below Post, etc. To start I selected the
Fly-In. Later you can choose to display on certain areas of your site.
6. SETUP YOUR OPTIN FORM
For the Optin Name field I simply wrote MyFlyInOptin. You can name it whatever you like.
EMAIL PROVIDER
Next we select an email provider. Lucky for you if you already have an email provider as there are 12
options to choose from the list. If you don’t have one, I’ll show you how to set one up with MailChimp.
MAILCHIMP
Mailchimp is free: http://mailchimp.com. Before I head over to MailChimp, let me show you the form
integration settings.
7. FROM INTEGRATION
In the select Email Provider drop down menu select MailChimp and then click on Add Account.
API KEY
After adding an account again if you haven’t created a MailChimp account now’s a good time to do so.
We need to enter an Account Name and an API key.
8. MAILCHIMP API KEY
You can now head over to MailChimp to create a free account if you don’t have an account.
MAILCHIMP FREE ACCOUNT
Fill in all of the required fields. When I created an email account with MailChimp I used the same email
as my website domain. For example my demo website is: http://www.mercdrainplug.com, so I’ll use an
email such as info@mercdraingplug.com.
9. ACTIVATE YOUR MAILCHIMP ACCOUNT
Continue filling out the forms and activate your account.
CREATE A LIST IN MAILCHIMP
When you arrive at the next screen, you can create a list.
10. USE YOUR WEBSITE DOMAIN NAME IN THE EMAIL ADDRESS
Create your list and fill in the necessary fields. You’ll note that my from email address uses the same
name as my domain name.
SAVE YOUR NEW LIST
I selected all the options. You can change that later.
11. HOW TO ENTER YOUR API KEY IN BLOOM
Now head back to your WordPress site to the Bloom settings section. If you click on the more
information link you can go directly to the Bloom documentation. For the Account Name I entered
Mercdrainplug or it can be anything you like. Remember you still have to locate your API key in
MailChimp. You’ll get to that in moment.
HOW TO FIND YOUR API KEY
When I clicked on the more information link, it explains how you can obtain your API key from the
Bloom documentation. It’s really simple as you’ll do that next.
12. OBTAIN YOUR MAILCHIMP API KEY
Now you’ll go back to MailChimp to obtain our API key. Click next to your account name.
GO TO YOUR ACCOUNT LINK
A drop down menu will appear. Next click on the Account link.
13. GET YOUR API KEY
When you arrive on this page, click on Extras > API keys.
CREATE YOUR API KEY
Then click on the create a key button.
14. COPY YOUR API KEY
Enter a name in the label. Copy the API key.
PASTE YOUR API KEY IN BLOOM
Head back to your Bloom settings page. Paste your API key in the appropriate field.
15. AUTHORIZE YOUR API KEY
Then click on the Authorize button.
FIND YOUR EMAIL LIST
The next screen to appear will be your form integration. Select your account and the email list you just
created.
16. DESIGN YOUR OPTIN
The next step is to click on the Design Your Optin button.
CHOOSE YOUR TEMPLATE
You’ll be taken to a screen with all of your available optin templates to choose from.
17. I selected a blue template. There are options available to customize it in the next step.
CUSTOMIZE YOUR TEMPLATE
Scroll down and click on the next button to customize your template.
18. DESIGN YOUR OPTIN FORM
You’ll arrive at this screen where you can make some additional changes to your template.
CHANGE THE TEXT OR IMAGE
I added some new text to the first section and the second section. You can also change Image
Orientation and replace the image. I left it as is for now.
19. OPTIN STYING
The remaining settings I left at the default.
FORM SETUP
I left the default settings for the form setup and form styling. You can see how easy it is to make
additional customized changes. For the Name Field, I left that out. For now I would like to simply collect
email addresses.
20. OPTIONAL: CHANGE THE FOOTER TEXT AND SUCCESS MESSAGE TEXT
You can change the footer text. I kept the success message text the same.
DISPLAY SETTINGS
When you’re done, click on the Display Settings button.
21. DISPLAY SETTINGS SCREEN
You’ll arrive at this screen for the display settings page.
I kept the load-in settings at their default. There are many options to select. You can pick and choose
which fits your requirements.
22. WOOCOMMERCE
I also selected the option to Trigger After Purchasing. It will display on the “Thank you” page of
WooCommerce after purchase.
SELECT WHAT PAGES TO DISPLAY ON
I selected the pages where I would like the optin to display.
23. SELECT CATEGORIES TO DISPLAY ON
You can choose which categories to display on.
FINISHED: SAVE AND EXIT
When done click on the Save & Exit button.
24. TESTING MY DEMO STOREFRONT SITE
I took a look at my demo site and the new optin appeared exactly where it was supposed to.
GENERATE YOUR LEADS
Now you’re ready to generate some leads.
If you haven’t started building your email list yet, then today’s the day to take action.