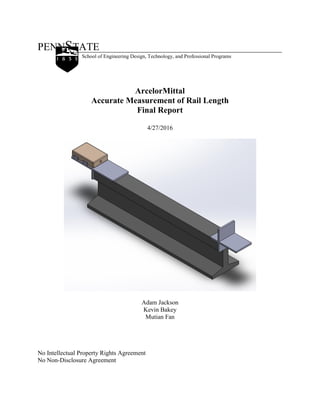
Accurately Measuring Rail Length with a Laser Device
1. PENNSTATE
School of Engineering Design, Technology, and Professional Programs
ArcelorMittal
Accurate Measurement of Rail Length
Final Report
4/27/2016
Adam Jackson
Kevin Bakey
Mutian Fan
No Intellectual Property Rights Agreement
No Non-Disclosure Agreement
2. Executive Summary
ArcelorMittal has a need to accurately measure and track the steel rails produced in their mill.
The company has received complaints from customers about rails being shipped out of
specification. It is costly to both retrieve the out of spec rail and send a new rail to the customer;
it is better to catch the problem at the mill before the product is shipped. The objective of this
project is to replace the current method of measurement with a digital device capable of
recording the length of each rail that goes through the mill inspection phase. Currently the rails
are being hand measured by inspectors with a tape measure to determine if the rail falls within
the specified tolerance. There is no procedure in place to record the measurement, meaning
there is no way to track a rail with its exact measurement. The device needs to measure 30’ to
80’ rails accurate within 1/16”, be easy to use and portable for the inspectors, and output data
to a computer spreadsheet for tracking.
Several options were evaluated to determine the best design. Customer needs were obtained
and evaluated after a site visit to determine the most important characteristics of the design. A
patent search and benchmarking survey were conducted to determine available design concepts.
Considering customer needs, current products on the market, and the large length of the rails, a
laser measuring device is most practical as it can measure long distances accurately and is small
and portable for mill inspectors.
3. Table of Contents
1.0 Introduction .............................................................................................................................................................4
1.1 Initial Problem Statement.............................................................................................................................4
1.2 Objectives.....................................................................................................................................................4
2.0 Customer Needs Assessment...................................................................................................................................5
2.1 Gathering Customer Input ...................................................................................................................................5
2.2 Weighting of Customer Needs.............................................................................................................................5
3.0 External Search........................................................................................................................................................6
3.1 Patents..................................................................................................................................................................6
3.2 Existing Products.................................................................................................................................................7
4.0 Engineering Specifications ......................................................................................................................................8
4.1 Establishing Target Specifications.......................................................................................................................8
4.2 Relating Specifications to Customer Needs.........................................................................................................8
5.0 Concept Generation and Selection.........................................................................................................................10
5.1 Problem Clarification.........................................................................................................................................10
5.2 Concept Generation ...........................................................................................................................................10
5.3 Concept Selection..............................................................................................................................................13
6.0 System Level Design .............................................................................................................................................16
7.0 Special Topics........................................................................................................................................................19
7.1 Preliminary Economic Analyses – Budget and Vendor Purchase Information Error! Bookmark not defined.
7.2 Project Management ..........................................................................................................................................19
7.3 Risk Plan and Safety..........................................................................................................................................19
7.4 Ethics Statement ................................................................................................................................................20
7.5 Environmental Statement...................................................................................................................................20
7.6 Communication and Coordination with Sponsor...............................................................................................21
8.0 Detailed Design .....................................................................................................................................................22
8.1 Manufacturing Process Plan ..............................................................................................................................22
8.2 Analysis .............................................................................................................................................................22
8.3 Material and Material Selection Process............................................................................................................25
8.4 Component and Component Selection Process .................................................................................................25
8.5 CAD Drawings ..................................................................................................................................................25
8.6 Test Procedure ...................................................................................................................................................26
8.7 Economic Analyses - Budget and Vendor Purchase Information......................................................................26
9.0 Final Discussion ....................................................................................................................................................28
9.1 Construction Process .........................................................................................................................................28
9.2 Test Results and Discussion ..............................................................................................................................30
10.0 Conclusions and Recommendations ....................................................................................................................32
11.0 Self-Assessment (Design Criteria Satisfaction)...................................................................................................33
11.1 Customer Needs Assessment...........................................................................................................................33
11.2 Global and Societal Needs Assessment ...........................................................................................................34
Appendices ..................................................................................................................................................................35
Appendix A: Gantt Chart.........................................................................................................................................35
Appendix B: Team Member Resumes.....................................................................................................................36
Appendix C: Stress, Strain, and Displacement Simulation Results for Bracket and Reflector................................39
Appendix D: Bracket and Reflector Simulation Reports.........................................................................................42
Appendix E: Measurement System Analysis – Attempt #2.....................................................................................50
4. 1.0 Introduction
ArcelorMittal has requested a team to design a process for accurately measuring the length of rails
in their facility. ArcelorMittal has identified issues in the past where rails do not fit the tolerance
requested by the purchaser. For example, a 40’ rail with holes for a joining bracket can have a
tolerance as small as 1/16”. If a rail does not fit the required specification, it must be rejected and
either recut or recycled.
Currently, ArcelorMittal uses a tape measure to determine the length of their rails. While this is
quick, durable, and cheap, it does not provide the accuracy required. Even with a tape measure
with 1/16” markings, the workers must “eye ball” the measurement. For the smallest tolerances,
this may lead to shipping rails that the customer will reject.
The team has developed some ideas, which are discussed in more detail later in this report. These
concepts were analysed using a Pugh scoring matrix, with inputs from the AHP chart for
weighting, to arrive at a laser measurement system for use in the Steelton plant. While accurate
within the tolerance, the durability of the design will be of utmost importance. This report walks
through the system level design with the laser measurement system.
Finally, special topics are discussed, including economic analysis, risk plan, safety, ethics
statement, and others. This report is a comprehensive document of the design process used for the
statement of work for the ArcelorMittal project, “Accurate Measurement of Rail Length.”
1.1 Initial Problem Statement
ArcelorMittal is the world's largest steel manufacturer; its highest volume product is rail for
railroads in North America. Customer specifications include a length tolerance to ensure the rail
fits correctly. Currently a tape measure is being used to record the length of the rails, but this
method is not consistent enough to meet the required tolerances. A new, more accurate method of
measurement will be developed to ensure accuracy to the 1/16” and to integrate the length
measurement with rail identity information into a database.
1.2 Objectives
The objective for this project is to research existing measurement methods and determine which
is suitable for ArcelorMittal rail measurement which has requirement of up to 40’ with accuracy
of 1/16”. In addition, the project team will focus on combination of measurement methods and
existing ArcelorMittal bar code scanner and database system. The final project product will be an
integrated system which incorporates both improved measurement methods and existing company
bar code scanner and database system for easier management.
5. 2.0 Customer Needs Assessment
2.1 Gathering Customer Input
Customer needs were gathered by speaking to the customer during a site visit to the ArcelorMittal
steel plant in Steelton, PA. As this product will be used daily on the mill floor, it is important that
all customer needs are evaluated and completely met.
Accuracy is very important as this is the main function of the device. The goal is to produce a
measurement with 1/16inch accuracy. Failure to meet this could lead to the shipment of rails which
do not meet the specified tolerances. The device must be robust and durable. Mill inspectors may
use this device hundreds of times a day. If the product were to break or malfunction, the entire
process would be slowed down or halted. The device must also be easy to use. The inspectors may
see up to 160 rails per hour; the measurement must be fast in order to keep up with that rate. A
small, handheld, wireless device is preferred to increase portability.
2.2 Weighting of Customer Needs
Using the customer needs discussed during our meeting with Rachel at the plant tour in Steelton,
the team compiled the following AHP (analytic hierarchy process) chart. From this, the customer
needs, in order of importance, are: accuracy (.283), durability (.251), portability (.204), ease of use
(.189), and cost (0.73).
The AHP compares the relative importance of each customer need. Weights are determined by
total number of points in a category over the total points for all categories combined. This allowed
the team to focus efforts on making a solution that best works for ArcelorMittal.
Table 1: AHP Pairwise Comparison Chart to Determine Weighting for Main Objective Categories
Ease of
Use
Accuracy Cost Portability Durability Total Weight
Ease of Use 1 2 0.33 1 2 6 0.189
Accuracy 0.5 1 0.33 0.5 1 9 0.282
Cost 3 3 1 3 3 2.32 0.073
Portability 1 2 0.33 1 1 6.5 0.204
Durability 0.5 1 0.33 1 1 8 0.251
6. 3.0 External Search
To design the best product for ArcelorMittal, an external search was performed to compile patents,
existing products, and similar applications in use today. The external search was performed on
laser measuring devices to determine if any patents exist in the project area and to benchmark
competitor information.
Laser ranging devices are commonplace in many fields today. Anything from golf to land
surveying uses laser rangefinders to determine distances between objects. For some applications,
these do not need to be very accurate. For the project, accuracy within 1/16” is required. To obtain
accurate results, both the device used and the implementation must be repeatable and simple.
Patents and existing products were searched for ranging devices. A common method of measuring
distances is time of flight of a light signal. Many patents and existing products utilize this concept
with a high degree of accuracy. An important caveat is the large value of the speed of light, making
small distance measurements more difficult.
The product needs to repeat accurate measurements in the field. A holding device that provides
easy use and high durability is important. Many laser targets employ a small magnet for easy and
quick movement between measurements without the need for human interaction to hold the piece.
Applying this to both the target and the measuring device ensures accurate, repeatable
measurements.
Tracking the measurement is vital. Making use of today’s technology allows seamless integration
of devices anywhere with a wireless connection. A more robust method is hardwiring devices.
Both possibilities are explored.
3.1 Patents
Patent search is a useful tool performed to aid in the design process. Previous patents can lead to
innovative new ideas, provide valuable information on the state-of-the-art, and ensure the design
is not infringing on previous patents. A patent search was performed for the basic functions of the
laser range finding device.
The three main functions searched were ranging devices, holders, and data transfer. Patents were
found for all functions. The intent is buying a laser rangefinder that is already on the market.
However, finding the patent for the rangefinder also provided information on how the device could
be mounted within the holder. The laser ranging device combined with the magnetic backing
allows for efficient use of a laser measurement device. Lastly, the data must be transferred to an
external source. The patent listed in Table 2 shows both wired and wireless transmittal for specific
software. While the software may change, the robustness of different types of data transfer to
multiple devices is relevant and important.
7. Table 2: Art-Function Matrix
Function Art
Laser Magnetic Backing Wired/Wireless
Ranging Device US7030969B2
Holder US2414653A
Data Transfer US20050091007A1
3.2 Existing Products
The existing products can be mainly categorized two different types. First is the laser measurement
device itself has built in data output capabilities through Bluetooth technology. They all have very
good accuracy which is 1/16”. Most of them have maximum range of 100’ some can even reach
up to 300’. Weight and size vary from different models but in general they are hand-held size or
smaller and weigh up to 1 lb. They are all cordless and use batteries as power source with average
battery life of 5 hours of consecutive use. The built in Bluetooth function has to work with a
smartphone or device which support manufacturer's app. Second is the external device has to be
physically connected to a smartphone which requires batteries as its own power source. Price
ranges from $150 to $600. Details are in Table 3.
Table 3: Current Tool Benchmarking
Need
Number
Metric Importance Units Lecia
Disto
E7100i
Lecia
Disto
E7500i
Ryobi
ES1000*
Bosch
GLM
50C
Bosch
GLM
100C
2 Accuracy 1 inches 1/16 1/16 1/16 1/16 1/16
4 Weight 6 pounds 0.70 .45 .35 .70 1.0
4 Size 5 inches 4.1 L
0.5 W
0.9 T
5.8 L
2.2 W
1.1 T
5.3 L
5.5 W
2.3 T
4.2 L
1.8 W
0.9 T
7.8 L
2.0 W
7.2 T
1, 4 Cordless 4 yes/no yes yes yes yes yes
3 Price 7 USD $149 $569 $50 $133 $228
1 Data out
capabilities
3 yes/no yes yes yes yes yes
5 Durability 2 warranty
years
3** 3** N/A 2 1
* This device requires mobile device for use, which is not included in the size, weight, or price
** Device has warranty extension (listed number) if device is registered
8. 4.0 Engineering Specifications
4.1 Establishing Target Specifications
Once the objective of the project was clarified, customer needs and product specifications were
gathered for various models of rangefinders. Using these values as a benchmark along with the
sponsor’s requests, target engineering specifications with metrics were derived. A successful
product will meet the requirements listed in Table 4.
Table 4: Target Engineering Specifications
Number Metric Units Value
1 Accuracy inches < 1/16
2 Weight pound < 3
3 Length inches < 10
4 Height inches < 5
5 Width inches < 4
6 Cordless - Yes
7 Price USD < 700
8 Wireless data output capabilities - Yes
9 Lifespan years > 3
10 Measurement time seconds < 10
4.2 Relating Specifications to Customer Needs
During design, it is vital to ensure the final product meets the customer's needs. A quality function
deployment matrix allows the design team to associate certain needs with metrics to measure the
success of the design. The matrix shows customer needs along the vertical axis and metrics along
the horizontal. Each need may require multiple specifications to ensure the need is met. In these
instances, an X marks the correlation. As an example from Table 5, portability requires a
lightweight, small, cordless device.
Table 5 shows the Needs-Metrics matrix developed from customer needs and associated metrics
that allows the team to reach a final product that satisfies the customer. This matrix helps focus
the design concepts in the next phase of the project while targeting the customer’s needs.
9. Table 5: Needs Matrix
Metric
Accuracy
Weight
Length
Height
Width
Cordless
Price
Wirelessdataoutputcapabilities
Lifespan
MeasurementTime
Need
Easy to Use x x x x x x x
Accurate Measurements x x
Cost x x x x x
Portability x x x x x x
Durability x x
10. 5.0 Concept Generation and Selection
5.1 Problem Clarification
A black box model was created to track the flow of signals, energy, and applied force needed to
achieve the desired output. The method was kept broad to avoid any bias during concept generation
and selection.
Figure 1 shows how all three inputs interact with each other. First a signal must be established
between the measuring device and a spreadsheet. This is needed to integrate the system for a digital
output. Manual force may be needed to keep the apparatus at the correct position to measure the
rail accurately. This is important for tight tolerances; any gap or angle could affect the
measurement. Electric energy is used to power the device, enabling it to take the measurement.
This measurement is then transmitted from the measuring device back to a computer, ultimately
outputting the data into an organized spreadsheet.
Figure 1: Sub-Function Black Box Model
5.2 Concept Generation
In order to effectively design the accurate measurement device, several existing ideas are
considered and used as the basic design concepts. The goal is to build the measuring device that is
durable, accurate, easy to operate, and has the ability to communicate with a computer to transmit
the data. These concepts are an attempt to use different approaches toward the measurement
requirements. The sketches help explain the operation and basic construction of the measuring
devices.
Concept A: This concept (Figure 2) is the current device being used in the Steelton plant. While
the tape measure being used in the facility has markings down to 1/16”, it relies on the user to
manually read the measurement, allowing for “eye-balling” error. While quick, easy to use, and
durable, it does not give the accuracy necessary for the plant.
11. Figure 2: Tape Measure (reference)
Concept B: This concept (Figure 3) relies on video/image processing software. A camera is
mounted in the ceiling supports, high enough to capture the entire length of the rail in a single shot.
The software takes a known distance and compares it to the distance of interest. Using interpolation
of pixels, the software can determine the length of the object being measured. In this application,
the reference distance could be the distance between the rail supports. This is constant and reliable
unless changes are made to the rail bed. An advantage of this process includes wireless processing
capabilities. However, accuracy, due to change in angle across the large bed, will not fit the
tolerance. It also requires extensive time to analyze each piece, although additional software could
be developed for automatic detection of rails.
Figure 3: Image Processing System
Concept C: This method employs an encoder (Figure 4) traveling along a guide rail, starting from
a known point to arrive at a length difference, which is then subtracted from the reference distance.
For easy use, each rail would be loaded into the area which the differential measurement device
resides. To ensure accurate measurements, the rails need to be flush against the end of the
support/stopping structure. Moving rails requires lots of force; a 40’ section weighs a little under
one ton. This would require plenty of additional work for the plant workers. Although this
measurement technique could be very accurate (<< 1/16”) if built properly, there are many
downsides which are difficult to overcome.
12. Figure 4: Differential Length Measurement
Concept D: This concept features a laser measuring device (Figure 5) mounted on a bracket, paired
with a reflecting surface at the other end of the rail. The laser must be mounted on a flat plate with
a smaller plate protruding underneath at a 90° angle. The laser must be flush with the front face of
the bottom plate to ensure that the laser is positioned exactly where the edge of the rail begins. The
front end of the plate is needed for stability, and the back end is needed to mount the laser with
clips or welding. On the opposite side of the rail, another bracket is needed to reflect the laser
beam. This will be built similarly to the bracket with the laser on it. A plate protruding upwards,
flush with the bottom plate, will serve as the reflecting wall. Advantages of laser measurement
include portability, accuracy, and the ability to output measurements with a computer. A
disadvantage is it takes two inspectors to operate the device.
Figure 5: Laser Measurement Device
Concept E: The idea of encoder (Figure 6) is to build a rail size robot car to go through the rail and
record turns of rotation by wheel through an encoder and calculate the length. The robot will have
two wheels with its own encoder. The on-board microprocessor will take the average of the reading
13. from both wheels to ensure accuracy. Then the data will transmit through a Bluetooth or Wi-Fi
module that is compatible with the microprocessor. Part 1, 2, 3, and 4 are encoders and wheels.
Part 5 is the main board as the mount for the robot and microprocessor and transmitting module.
Part 6 is a microprocessor such as Arduino. Part 7 is the breadboard for wire connection with the
motor driver and Bluetooth module. Part 8 is the battery compartment.
Figure 6: Encoder Device
5.3 Concept Selection
With only four measurement ideas (other than the reference of the tape measure), only a Pugh
concept scoring matrix was utilized. Using the weighted criteria from the AHP matrix, weighted
scores for each concept were calculated. Using a concept scoring matrix eliminates biases imposed
compared to an arbitrary decision; there is data to support the decision. From Table 6, the team
decided to move forward with the laser measurement technique.
A – Tape Measure (reference)
B – Image Processing
C – Differential Measurement via Encoder
D – Laser Measurement
E – Encoder Measurement
14. Table 6: Concept Scoring Matrix
Concepts
A (ref) B C D E
Selection
Criteria Weight Rating
Wgtd.
Score Rating
Wgtd.
Score Rating
Wgtd.
Score Rating
Wgtd.
Score Rating
Wgtd.
Score
Ease of
Use .189 3 .567 2 .378 2 .378 5 .786 2 .378
Accuracy .283 3 .849 3 .849 4 1.132 5 1.415 4 1.132
Cost .073 3 .219 1 .073 2 .146 1 .073 2 .146
Portability .204 3 .612 2 .408 1 .204 3 .612 2 .408
Durability .251 3 .753 5 1.255 4 1.004 4 1.004 4 1.004
Total
Score 3 2.963 2.864 3.890 3.068
Rank 3 4 5 1 2
Continue
Primary
Design
Alternate
Design
Relative Performance Rating
Much worse than
reference 1
Worse than reference 2
Same as reference 3
Better than reference 4
Much better than
reference 5
The pros and cons of each concept can be seen below:
Concept A – Tape Measure: This concept is quick and easy to use. The tape measure itself is
durable. Even if the spool or tape itself breaks, a replacement is cheap and can be picked up at any
hardware or home store. The biggest negative of the tape measure is the lack of accuracy.
Concept B – Image Processing: This concept is very accurate and it is built into a device that is
directly connected to a computer. This is convenient to keep track of all the data. But, there are
several significant drawbacks. First, the camera has to be installed on the ceiling surface, nearly
40’ high. Second, the software for image processing is expensive compared to other concepts.
Concept C – Differential Measurement: This concept is easy to apply with relatively lower
budget. However, this concept has been eliminated due the site condition. Moving rails just for
measurement is not practical for a steel mill plant. This process will cost significant time and effort
for the operators.
Concept D – Laser Measurement: This concept is easy to operate and apply to rails. Also, the
device itself is durable and relatively inexpensive. Another significant advantage ease of
15. replacement; another device can be ordered online. However, the device itself is only compatible
with certain apps on smartphones. So the operator has to manually send all data from the
smartphone to the computer.
Concept E – Encoder: This concept is inexpensive, easy to operate and has the ability to
communicate with a computer. The problem for this concept is that it is hard to find replacements
due to the fact this device is hand-built from scratch. This one of a kind design makes very difficult
to build replacement devices. In addition, the device takes more time to measure, which is not
practical because many rails are not placed perfectly on the ground. The possibility of the device
to fall off the rail cannot be ignored.
16. 6.0 System Level Design
The final concept is illustrated in the CAD drawings below. This design features three distinct
parts: a purchased laser measuring device with digital output capabilities, a custom built mounting
bracket, and a reflector plate for the opposite end of the rail. Together these systems are able to
measure an 80’ rail within the specified tolerance.
An example of what the laser may look like is shown in Figure 7. The laser will be bought pre-
fabricated so it may look slightly different than the model below, but its function will be the same.
It must have wireless capabilities, meaning it must be able to connect to another digital device to
output data to a spreadsheet. A battery system is preferred for portability.
Figure 7: Model of Laser
The mount, modeled in Figure 8, will be custom built for the laser purchased. The mount must
feature a plate extending downwards at a perfect 90˚ angle to fit on the corner of the rail. It will
also have a mounting mechanism compatible with the laser. This connection must be strong since
durability is a main customer need in mill operations. A front plate is needed for stability and
weight balance.
Figure 8: Model of Mount for Laser
The reflector is a simple device as its only purpose is to serve as a reflective surface for the laser
beam. It is important that all the sections meet at 90˚ angles within a tolerance of ± 0.02°. This
Laser Lens
Mounting Holes
Mounting
Brackets
90˚ Angle
Front Plate
Bottom Plate
17. tolerance allows for a shift in height of 0.45”, the distance above the rail the laser is emitted from
the rangefinder. Any curves in the rails will affect measurement accuracy. A handle is needed to
hold the device against the rail. An example of what this tool may look like is shown in Figure 9.
Figure 9: Model of Reflector
An assembly of the laser and its mount is shown in Figure 10. Note that the front face of the laser
is perfectly flush with the front face of the bottom plate. This is to guarantee that the laser lines up
with the exact edge of the rail to obtain an accurate measurement. The front plate will help balance
the extra weight added by the laser and create stability when holding the device against the rail.
Figure 10: Assembly of Laser and Mount
A model of the entire measuring mechanism placed on a 2’ rail is shown in Figure 11. Due to the
careful fabrication of the mounts, the front face of the laser and the front face of the reflecting
surface line up perfectly with the edge of the rail. The laser is sent across the rail, hitting the flat
reflecting surface, and coming back to the laser lens to record a measurement. The laser device
will then output the data to another digital device, filing the measurement in a spreadsheet.
Bottom Plate
90˚ Angle
Reflecting
Surface
Extended
Handle
Mount
Laser and Front
Face of Bottom
Plate are
Coincident with
the Rail Face
Front Plate
18. Figure 11: Assembly of Laser with Mount and Reflector on Rail Segment
Mounted
Laser
Reflecting
Tool
Customer
Rail
19. 7.0 Special Topics
7.1 Preliminary Economic Analyses - Budget and Vendor Purchase
Information
The total spending budget, which includes travel expense, poster, fabrication and essential parts,
is $1000. According to initial conference with ArcelorMittal, there will be extra budget if the final
product is successful and extra sets of the final products are required. Thus far, there is no bill of
material for the fabrication process. As the project progresses, additional cost and material will be
included and bill of material will be adjusted accordingly.
7.2 Project Management
Attached in Appendix A is a Gantt chart that includes all tasks, reports and milestones. It is all
team members’ responsibility to complete their task on time and inform other team members if
there is a reason he or she is not able to finish it. This Gantt chart will be adjusted according to the
actual progress of project and the requirement from the ArcelorMittal. In addition, all team
members’ resumes are included in this report and can be found in Appendix B.
7.3 Risk Plan and Safety
The biggest risk to the team comes from the selected concept not performing as selected in the
harsh environment that is a steel mill. The current method, using a tape measure, is durable and
cheap; even if breakage occurs, buying a replacement is quick and easy. However, with the laser
measurement design, two critical pieces could break. If the laser breaks, it is not cheap to replace.
Additionally, if the laser’s bracket breaks, another bracket would need to be made or ordered. To
mitigate this risk, the design needs to be sturdy and extras may be ordered as spares.
20. Table 7: Risk Plan
Risk Level Actions to Minimize Fall Back Strategy
Delays in order
placement or
delivery
Low - Do paperwork earlier than
required
- Make sure parts/devices are in
stock
- Order a similar product
from another vendor
Schedule
delays
Moderate - Find ways to cut down on activity
time
- Build in safety time to
schedule of activities
Change in
customer
specification
Moderate - Constant communication with
project sponsor
- Discuss changes in specifications
in relation to final task
- Revisit Gantt chart and
update as necessary
Product does
not function as
predicted
High - Test early alpha, alpha, and beta
prototypes
- Check product reviews for
already marketed products being
used
- Revisit concept generation
to potentially change to
alternative design
Customer not
satisfied
High - Discuss with sponsor what
changes need to be made to
complete the task
- Redesign as needed
7.4 Ethics Statement
The ArcelorMittal team members will follow the ASME Code of Ethics strictly to ensure the
success of the project. All team members will give full attention and recognition to anyone who is
related to this project in respectful manner. All external searches and patents in this report will be
cited to give full credit to the owner of the patent and to the source of the external information. It
is whole team’s objective to deliver an effective final product that is safe and innovative in an
ethical manner.
7.5 Environmental Statement
The laser measurement system will not have any significant impact on the environment. It is worth
mentioning that the laser measurement device requires a battery to operate, which may have a
larger environmental impact than a tape measure. It is recommended to use rechargeable batteries.
If rechargeable batteries are not available, the used batteries should be properly recycled to
minimize the impact on environment.
21. 7.6 Communication and Coordination with Sponsor
The sponsor has specified two primary means of communication; emails and texting. Rachel
prefers written communication over voicemail while working on this project. Each week on
Thursdays, the team holds a teleconference with Rachel to ensure the project is moving forward
as well as serving as an opportunity to ask questions. With that being said, Rachel welcomes emails
throughout the week with any questions or concerns we may face. The team completes a weekly
progress report around Tuesday of each week which is forwarded to Rachel. This gives her time
to prepare any questions she has about our progress. One site visit was performed which became
critical in the teams understanding of the problem statement. An additional trip may be performed
once the final product is complete, allowing for full scale testing in the plant.
22. 8.0 Detailed Design
Section 8.0.1 Modifications to Statement of Work Sections
With ArcelorMittal and professor Wallace Catanach reviewing the Statement of Work,
some errors were found. The following section highlights the changes made in each section of
the SOW. Primary changes include grammar corrections, with minor technical and wording
changes that better reflect the design.
8.0.1.1. Introduction – No changes made
8.0.1.2. Customer Needs – No changes made
8.0.1.3. External Search
A grammar mistake was made in Section 3.1. The sentence read “...wireless transmittal
for a specific software.” The ‘a’ was removed, correcting the sentence to “...wireless transmittal
for specific software.”
A grammar mistake was made in Section 3.2. The sentence read “...but in general they in
hand-held sizes and less or equal to 1 lb.” The sentence was changed to “...but in general they are
hand-held size or smaller and weigh up to 1 lb.”
8.0.1.4. Engineering Specifications – No changes made
8.0.1.5. Concept Generation and Selection
Two grammar mistakes were made in Section 5.2. The sentence read “...this process
include wireless processing capabilities.” The sentence was changed to “...this process includes
wireless processing capabilities.” Additionally, a sentence with part labeling did not include
spaces (“1,2,3 and 4”) and was correct (“1, 2, 3, and 4”).
8.0.1.6. System Level Design
Section 6.0 included an unclear statement. The requirement stated that the bracket and
reflection have 90 degree***** interface angles. A tolerance was added to the angle to better
reflect the design parameters.
8.0.1.7. Special Topics
Section 7.3 includes Table 7, which was previously broken across two pages. A page break
was added to keep the table all on one page.
8.1 Manufacturing Process Plan
A properly built mount will ensure that the laser is perfectly level and flush with the end of the
rail. The laser was purchased from a third party with no additional manufacturing needed. Due to
the high level of precision required, 3D printing is the desired method of manufacturing the
bracket and reflector. All that is needed is a high quality 3D printer and the CAD drawings of the
models, which are available to the customer. Mass production is not needed because only one
laser is required on the inspection bed of the mill. Having a few extra mounts available is useful
in case one breaks. If the customer requests a metal bracket for additional durability, a new
manufacturing plan must be created.
8.2 Analysis
The team performed a Solidworks Simulation using the CAD shown in Section 8.5. For the
bracket design, a displacement was used. Figure 12 shows the displacement being placed on the
23. edge of the clip used to hold the laser rangefinder in place. A displacement of 0.05” was used.
This is the deflection when the laser is loaded into the bracket. Additional figures showing stress,
strain, and displacement are included in Appendix C.
Figure 12: Displacement Applied to Bracket
Solidworks generates a report for the study. Some tables from this report are included below.
These tables include maximum values for stress, strain, and displacement. Evaluating the
maximum stress versus the ultimate tensile strength, the bracket should not plastically deform for
normal loading. Additional studies could be performed to check creep and cyclic loading effects.
These effects are not within the scope of this report.
Table 8: Bracket Study Results
Name Type Min Max
Stress1 VON: von Mises Stress 0.0093999 psi
Node: 9683
2644.25 psi
Node: 13115
LaserMount_Final_analysis-Static 1-Stress-Stress1
Name Type Min Max
Displacement1 URES: Resultant
Displacement
0 in
Node: 477
0.0593831 in
Node: 7657
LaserMount_Final_analysis-Static 1-Displacement-Displacement1
Name Type Min Max
Strain1 ESTRN: Equivalent Strain 3.9519e-008
Element: 1244
0.00521661
Element: 6357
LaserMount_Final_analysis-Static 1-Strain-Strain1
The second analysis was for the reflector panel. A force was used in this analysis. A force of five
pounds was applied over the top middle of the reflector panel. This force was applied to an area
24. the size of a finger. This simulates someone holding the reflector panel in the least ideal
configuration with a significant force. Additional figures showing stress, strain, and displacement
are included in Appendix C.
Figure 13: Force Applied to Reflector
In the Solidworks report for the reflector panel, the maximum stress falls below the ultimate
tensile strength given for ABS plastic. This means the reflector should not plastically deform.
The reflector panel should not deform under normal use. Again, additional studies, including
creep and cyclic loading, have not been included.
Table 9: Reflector Study Results
Both full reports can be found in Appendix D. These reports include specific data on maximum
stress, strain, and displacements as well as material properties, loading conditions, and other
information used by Solidworks to complete the analysis.
25. 8.3 Material and Material Selection Process
Three materials were considered during the initial design process. They are aluminum, wood and
ABS plastic. The design for the holder and reflector required small perpendicularity tolerance
(~0.03°) for the back wall and platform for laser device to ensure the laser device can point
straight to the reflector. 3D printed ABS plastic is preferred due to the concern of the
perpendicularity tolerance. In order to achieve a 90° angle within the 0.03° perpendicularity
tolerance, welding can be difficult and may require multiple attempts. Wood can be difficult due
to the human error during the manufacturing process. 3D printed ABS plastic is chosen because
it is easy to build and can achieve the required small perpendicularity tolerance.
8.4 Component and Component Selection Process
The laser measurement device requires a reflective panel and holder to ensure the accurate
measurement of rail length. The holder has to keep the laser measurement device flush against
the holder to ensure the device is in line with the edge of the rail. The laser rangefinder needs to
be secured in the holder to eliminate measurement error due to human error. The reflective panel
should also be aligned to edge of the rail. The reflective panel is sized 4” tall by 6” wide to
ensure the laser hits the reflective panel.
8.5 CAD Drawings
Solidworks was used to model the laser measuring system. Screenshots of the bracket design are
shown below. All dimensions are very precise to for a secure fit with the laser when 3D printed.
The laser and reflector system is shown on a 2’ section of rail for visibility, but in practice the
system will be on 30’ to 40’ sections of rail.
Figure 14: Laser Rangefinder in Bracket
26. Figure 15: Full Design in Isometric View
8.6 Test Procedure
With accuracy of measurement being of utmost importance for the design team, the test procedure
focuses on statistical analysis of length measurements. While on site at ArcelorMittal, the team
performed 81 length measurements of a rail cut to nominal length 40’. Analysing the data, the
standard deviation is very small at 0.0135”. The normal distribution curve doesn’t represent a bell
shape since, of the 81 measurements, all are either 40.72” (40-23/32”) or 40.69” (40-11/16”). With
the tolerance of 1/16” (0.0625”) and standard deviation of 0.0135”, over 99.99% of measurements
will be accurate within the margin.
8.7 Economic Analyses - Budget and Vendor Purchase Information
The majority of the cost for this project comes from the laser rangefinder itself and 3D printed
bracket. The reflector and bracket were redesigned after the site visit; these changes aided with
accuracy improvement and ease of use. The laser rangefinder worked well during the site test.
Hence no further action for the laser rangefinder is required. Table 10 shows the most updated
expense report.
28. 9.0 Final Discussion
Section 9.0.1 Modifications to Statement of Work and DSR Sections
Revisions to the Proposal and DSR Sections 1 through 8 are listed as 9.0.1.X:
9.0.1.1. Introduction - no change
9.0.1.2. Customer Needs – no change
9.0.1.3. External Search – no change
9.0.1.4. Engineering Specifications – no change
9.0.1.5. Concept Generation and Selection – no change
9.0.1.6. System Level Design – no change
9.0.1.7. Special Topics – no change
9.0.1.8 Detailed Design
Updated the CAD drawings, test procedure, budget, and Solidworks simulation results for
an aluminum reflector
9.1 Construction Process
The main method of construction is Solidworks modeling and 3D printing. The laser bracket was
exclusively 3D printed. The dimensions of this model are very precise, securing the laser tightly
while allowing enough flexibility to adjust for small corrections. Provided the CAD drawing, a
laser bracket can be 3D printed in under a day.
Table 11: Bracket Parts
Part Size Quantity
Tee nut 1/4-20 2
1/4-20 screw 1.5 inch length 2
Acorn nut 1/4-20 2
The reflector bracket was manufactured out of aluminum. A milling machine is required for
construction of the bracket.
Table 12: Reflector Parts
Part Size Quantity
0.25 inch aluminum plate 6 x 6 inch section 1
0.5 inch aluminum plate 4 x 2 inch section 1
10-24 screw 0.75 inch long 2
29. Instructions:
1. Cut out two 2 x 2 inch sections from the bottom corners of
the ¼ inch plate.
2. Drill two holes through the ¼ inch plate, 1.25 inches apart,
0.25 inches from the bottom edge, and 2.25 inches from
the side edges. Use a 0.1890 inch diameter drill bit.
3. If the ½ inch plate was cut into a 4 x 2 section, make sure
to square the edges on the mill, making sure all angles are
90°.
4. Use a 5/32 (25) drill bit to drill two holes, 1.25 inches apart
and centered 0.25 inches from the bottom, and 0.5 inches
deep.
5. Tap the hole using a 10-24 tap. Be sure to use a lot of
cutting oil.
6. Assemble the reflector using the two 10-24 screws. Apply Loctite if desired.
30. 9.2 Test Results and Discussion
The final tests were conducted on site at ArcelorMittal. The test procedure is listed in Section 8.6.
72 measurements were taken and analyzed. This test was performed twice to eliminate batch-to-
batch variability. A more detailed data analysis is attached in Appendix E. The laser measurements
provide consistent readings with low variability within single piece of rail and all data was
successfully transmitted to the laptop on site. In addition, the adjustability of the bracket provided
easy use for the operator on site.
Figure 16: Final Product Used in Measurement Study
The first group of data was collected by team members on site and second group of data was
collected by operators on site. The MSA data analysis indicate the laser measurement has good
repeatability. However, the piece-to-piece variability could be caused by error within the saw in
the mill.
32. 10.0 Conclusions and Recommendations
After many iterations of design, 3D printing for testing, analysing accuracy and usability, and
updating the design, a final product has been developed for use by ArcelorMittal. Initially, the
problem statement and customer needs were assessed to ensure the team and sponsor were in
agreeance on how to develop a solution to the problem. The design goal was to develop a system
that accurately measures lengths of rail. This system needed to be accurate, durable, and portable.
The final design allows for adjustability while still accurately measuring lengths of rail. Utilizing
a commercially developed laser rangefinder, the team designed a bracket that allows for
adjustability. Without adjustability, the rangefinder may miss the target on the far end of lengths
of rail. This is due to each rail being finished by hand with power tools; rails will not have the
same surface profile. The bracket is printed with ABS plastic. Excessive force is not expected in
the bracket so yield and failure are not of concern. Rapid prototyping provides sufficient accuracy
and is cheaper than manufacturing the bracket from a block of material. To ensure accuracy and
durability, the reflector has been machined from aluminium. A force applied to the top of the
reflector made of ABS plastic deforms sufficiently far to affect measurements.
Overall, the design goal was achieved through coordination with the team, the project sponsor, and
the academic advisor. At the time of publication of this report, ArcelorMittal is working to
integrate the laser rangefinder with their database. The plan is to output the measurements
(rangefinder is Bluetooth enabled) directly to a computer which reads rail identification
information from another device currently in use by ArcelorMittal. With communication between
the two systems, a rail length will be tied to the other information stored in the database.
ArcelorMittal can review individual rails to ensure they fall within the specified tolerances.
Should this project be revisited in future semesters, focus should be on usability of the bracket.
After many iterations of design, significant time had passed in the semester. While the current
design is adjustable in both pitch and yaw, the pitch adjustment is housed in the cavity underneath
the bracket and is not easily accessible. The team explored options for using a gearing system but
did not have time to implement this part of the design. Additionally, it would be beneficial if the
yaw control could be done with only one adjustment rather than adjusting both sides.
33. 11.0 Self-Assessment (Design Criteria Satisfaction)
11.1 Customer Needs Assessment
Team rating on a scale from 1-10: 9 – all requirements have fulfilled minimum requirement
The final product meets all customer needs. The cost for build for one complete set of laser
measurement system is about $300. The final design is small and light enough to be carried by
hand. The average adjustment time for different rails is 10 seconds on average. As requested by
the operator on site, the reflector is machined from aluminum and the laser holder is printed with
abs plastic. The aluminum will have no problem lasting more than three years, and the plastic laser
mount may also reach this lifespan if handled properly. The R&R study shows consistent
repeatability and reproducibility for the laser measurement system. In addition to that, the offset
bias for the laser itself is corrected by the bracket design. The laser’s Bluetooth capabilities allow
for wireless data output.
Table 13: Customer Needs Assessment
Number Metric Units Value Customer Need
Met?
1 Accuracy inches < 1/16 Yes
2 Weight pound < 3 Yes
3 Length inches < 10 Yes
4 Height inches < 5 Yes
5 Width inches < 4 No
6 Cordless - Yes Yes
7 Price USD < 700 Yes
8 Wireless data output
capabilities
- Yes Yes
9 Lifespan years > 3 Yes
10 Measurement time seconds < 10 Yes
34. 11.2 Global and Societal Needs Assessment
Team rating on a scale from 1-10: 8 – almost all needs have been met
Two major needs were identified earlier in this paper. These were abiding by the ASME Code of
Ethics and creating a device that is not harmful to the environment. The Code of Ethics has
guided the team in ensuring integrity, honor, and dignity while completing this project. The other
need, in regards to environmental impact, is small but still vital for this project. With rail being
produced in three shifts (24 hours), the laser rangefinder will be in use often. While during the
course of this semester the batteries have not required a change, the amount of use in the facility
will require a frequent change of batteries. At the conclusion of the project, regular batteries are
being used in the laser. These should be replaced with rechargeable batteries to decrease the
environmental impact.
50. Appendix E: Measurement System Analysis – Attempt #2
One of the shortcomings of the prior study was that the measured samples came from a rather short run
of product, so it is likely that they did not represent the range of piece-to-piece variability. In order to
measure a more representative range of variability, care was taken this time to select pieces that were
not cut at the same time. Different sizes (cross-sections) of product are cut in lots, so using material from
different cross-sections increases the likelihood of seeing a better long-term range of piece-to-piece
variation.
All rails were nominally 33’ 0” long and all were undrilled, therefore subject to the minus 0”, plus 4” length
tolerance. They were selected from four cross-sections – 100-8 (one sample), 115RE (three samples),
132RE (two samples), and 136RE (two samples).
Descriptive Statistics: Decimal length
Variable N N* Mean SE Mean StDev Minimum Q1 Median Q3
C9 72 0 33.009 0.000491 0.00416 33.000 33.005 33.008 33.012
Variable Maximum
C9 33.016
33.01533.01233.00933.00633.00333.000
18
16
14
12
10
8
6
4
2
0
Length
Frequency
Histogram of Length (Decimal feet)
Descriptive Statistics: dec length mod
Variable Operator N N* Mean SE Mean StDev Minimum Q1
dec length mod 1 24 0 33.010 0.000834 0.00409 33.003 33.008
51. 2 24 0 33.009 0.000854 0.00418 33.003 33.005
3 24 0 33.008 0.000837 0.00410 33.000 33.005
Variable Operator Median Q3 Maximum
dec length mod 1 33.010 33.013 33.016
2 33.008 33.012 33.016
3 33.008 33.010 33.016
See above for a look at statistics by operator to see if any one is significantly different from the others.
Looks like operator 2 is slightly more variable, i.e. higher standard deviation, but not otherwise very
different.
Descriptive Statistics: dec length mod
Variable Sample N N* Mean SE Mean StDev Minimum Q1
dec length mod 1 9 0 33.012 0.00116 0.00347 33.008 33.008
2 9 0 33.005 0.00101 0.00304 33.003 33.003
3 9 0 33.005 0.00106 0.00319 33.000 33.003
4 9 0 33.010 0.000915 0.00275 33.005 33.008
5 9 0 33.006 0.000766 0.00230 33.003 33.005
6 9 0 33.007 0.000981 0.00294 33.003 33.004
7 9 0 33.012 0.00104 0.00313 33.008 33.010
8 9 0 33.013 0.000679 0.00204 33.010 33.012
Variable Sample Median Q3 Maximum
dec length mod 1 33.010 33.016 33.016
2 33.005 33.008 33.010
3 33.005 33.008 33.010
4 33.010 33.013 33.013
5 33.005 33.008 33.010
6 33.008 33.009 33.010
7 33.010 33.016 33.016
8 33.013 33.016 33.016
So not very variable, huh?
Results for Sample = 1
Variable Operator N N* Mean SE Mean StDev Minimum Q1
dec length mod 1 3 0 33.016 0.000000 0.000000 33.016 33.016
2 3 0 33.010 0.00150 0.00260 33.008 33.008
3 3 0 33.009 0.000868 0.00150 33.008 33.008
Variable Operator Median Q3 Maximum
dec length mod 1 33.016 33.016 33.016
2 33.010 33.013 33.013
3 33.008 33.010 33.010
Results for Sample = 2
Variable Operator N N* Mean SE Mean StDev Minimum Q1
dec length mod 1 3 0 33.005 0.00260 0.00451 33.003 33.003
2 3 0 33.007 0.000868 0.00150 33.005 33.005
3 3 0 33.004 0.00174 0.00301 33.003 33.003
Variable Operator Median Q3 Maximum
dec length mod 1 33.003 33.010 33.010
2 33.008 33.008 33.008
3 33.003 33.008 33.008
Results for Sample = 3
52. Variable Operator N N* Mean SE Mean StDev Minimum Q1
dec length mod 1 3 0 33.006 0.00230 0.00398 33.003 33.003
2 3 0 33.005 0.00150 0.00260 33.003 33.003
3 3 0 33.004 0.00230 0.00398 33.000 33.000
Variable Operator Median Q3 Maximum
dec length mod 1 33.005 33.010 33.010
2 33.005 33.008 33.008
3 33.005 33.008 33.008
Results for Sample = 4
Variable Operator N N* Mean SE Mean StDev Minimum Q1
dec length mod 1 3 0 33.010 0.00150 0.00260 33.008 33.008
2 3 0 33.012 0.000868 0.00150 33.010 33.010
3 3 0 33.008 0.00150 0.00260 33.005 33.005
Variable Operator Median Q3 Maximum
dec length mod 1 33.010 33.013 33.013
2 33.013 33.013 33.013
3 33.008 33.010 33.010
Results for Sample = 5
Variable Operator N N* Mean SE Mean StDev Minimum Q1
dec length mod 1 3 0 33.009 0.000868 0.00150 33.008 33.008
2 3 0 33.005 0.000000 0.000000 33.005 33.005
3 3 0 33.005 0.00150 0.00260 33.003 33.003
Variable Operator Median Q3 Maximum
dec length mod 1 33.008 33.010 33.010
2 33.005 33.005 33.005
3 33.005 33.008 33.008
Results for Sample = 6
Variable Operator N N* Mean SE Mean StDev Minimum Q1
dec length mod 1 3 0 33.010 0.000868 0.00150 33.008 33.008
2 3 0 33.003 0.000868 0.00150 33.003 33.003
3 3 0 33.007 0.000868 0.00150 33.005 33.005
Variable Operator Median Q3 Maximum
dec length mod 1 33.010 33.010 33.010
2 33.003 33.005 33.005
3 33.008 33.008 33.008
Results for Sample = 7
Variable Operator N N* Mean SE Mean StDev Minimum Q1
dec length mod 1 3 0 33.010 0.000000 0.000000 33.010 33.010
2 3 0 33.014 0.00174 0.00301 33.010 33.010
3 3 0 33.013 0.00260 0.00451 33.008 33.008
Variable Operator Median Q3 Maximum
dec length mod 1 33.010 33.010 33.010
2 33.016 33.016 33.016
3 33.016 33.016 33.016
53. Results for Sample = 8
Variable Operator N N* Mean SE Mean StDev Minimum Q1
dec length mod 1 3 0 33.015 0.000868 0.00150 33.013 33.013
2 3 0 33.012 0.00174 0.00301 33.010 33.010
3 3 0 33.013 0.000000 0.000000 33.013 33.013
Variable Operator Median Q3 Maximum
dec length mod 1 33.016 33.016 33.016
2 33.010 33.016 33.016
3 33.013 33.013 33.013
Part-to-PartReprodRepeatGage R&R
80
40
0
Percent
% Contribution
% Study Var
% Tolerance
0.010
0.005
0.000
SampleRange
_
R=0.00391
UCL=0.01006
LCL=0
1 2 3
33.015
33.010
33.005
SampleMean
__
X=33.00890
UCL=33.01289
LCL=33.00490
1 2 3
87654321
33.016
33.008
33.000
Sample
321
33.016
33.008
33.000
Operator
87654321
33.015
33.010
33.005
Sample
Average
1
2
3
Operator
Gage name:
Date of study :
Reported by :
Tolerance:
Misc:
Components of Variation
R Chart by Operator
Xbar Chart by Operator
dec length mod by Sample
dec length mod by Operator
Operator * Sample Interaction
Gage R&R (ANOVA) for dec length mod
Gage R&R Study - ANOVA Method
Two-Way ANOVA Table With Interaction
Source DF SS MS F P
Sample 7 0.0006959 0.0000994 8.00433 0.001
Operator 2 0.0000582 0.0000291 2.34345 0.132
Sample * Operator 14 0.0001739 0.0000124 1.96802 0.042
Repeatability 48 0.0003029 0.0000063
Total 71 0.0012309
Alpha to remove interaction term = 0.25
54. Gage R&R
%Contribution
Source VarComp (of VarComp)
Total Gage R&R 0.0000090 48.33
Repeatability 0.0000063 33.73
Reproducibility 0.0000027 14.60
Operator 0.0000007 3.72
Operator*Sample 0.0000020 10.88
Part-To-Part 0.0000097 51.67
Total Variation 0.0000187 100.00
Process tolerance = 0.3333
Study Var %Study Var %Tolerance
Source StdDev (SD) (6 * SD) (%SV) (SV/Toler)
Total Gage R&R 0.0030070 0.0180422 69.52 5.41
Repeatability 0.0025121 0.0150727 58.08 4.52
Reproducibility 0.0016527 0.0099164 38.21 2.98
Operator 0.0008338 0.0050028 19.28 1.50
Operator*Sample 0.0014270 0.0085619 32.99 2.57
Part-To-Part 0.0031090 0.0186538 71.88 5.60
Total Variation 0.0043253 0.0259516 100.00 7.79
Number of Distinct Categories = 1
55. Left side is the first study, right is the second one.
Study Var %Study Var
%Tolerance
Source StdDev (SD) (6 * SD) (%SV)
(SV/Toler)
Total Gage R&R 0.0023468 0.0140806 38.11
4.22
Repeatability 0.0021494 0.0128965 34.91
3.87
Reproducibility 0.0009420 0.0056519 15.30
1.70
Operators 0.0000000 0.0000000 0.00
0.00
Operators*Samples 0.0009420 0.0056519 15.30
1.70
Part-To-Part 0.0056927 0.0341560 92.45
10.25
Total Variation 0.0061574 0.0369445 100.00
11.08
Study Var %Study Var %Tolerance
Source StdDev (SD) (6 * SD) (%SV) (SV/Toler)
Total Gage R&R 0.0030070 0.0180422 69.52 5.41
Repeatability 0.0025121 0.0150727 58.08 4.52
Reproducibility 0.0016527 0.0099164 38.21 2.98
Operator 0.0008338 0.0050028 19.28 1.50
Operator*Sample 0.0014270 0.0085619 32.99 2.57
Part-To-Part 0.0031090 0.0186538 71.88 5.60
Total Variation 0.0043253 0.0259516 100.00 7.79