1. STEPONE
Today we began to edit the bridge section of
our music video. This is the second final stage to
our editing process. We linked the chorus to the
bridge using a sequence where the artist drops
the phone onto the bed and then falls on to
the bed. So that this section still looked like a
pop video and didn’t feel more like a film
opening sequence, we used split screens to
illustrate this action. Using the transform and
crop tool we moved the shot of the artist
dropping the phone onto the bed to the left
hand of the screen. We then moved the shot of
the phone landing on the bed to the opposite
side. We matched the clips up so that the phone
would be thrown from one side of the frame onto
the other.(Similar to answering the phone in the
opening of our music video) We used the same
technique for the artist falling on to the bed, using a
shot from the front and behind.
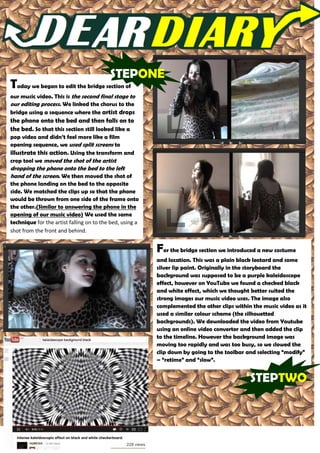
For the bridge section we introduced a new costume
and location. This was a plain black leotard and some
silver lip paint. Originally in the storyboard the
background was supposed to be a purple kaleidoscope
effect, however on YouTube we found a checked black
and white effect, which we thought better suited the
strong images our music video uses. The image also
complemented the other clips within the music video as it
used a similar colour scheme (the silhouetted
backgrounds). We downloaded the video from Youtube
using an online video converter and then added the clip
to the timeline. However the background image was
moving too rapidly and was too busy, so we slowed the
clip down by going to the toolbar and selecting “modify”
– “retime” and “slow”.
STEPTWO
2. STEPTHREE
We also used improvised dance sequences during this
section of the video. Including the black leotard sequence
and silhouette shots. We used mirror effects and split
screens in order to make these dance sequences more
effective. We used a split screen displaying the black
leotard shots and silhouette shots, we did this in the same
way as before, using the crop and transform tool and
placing the shots either side of the frame. We also used
the mirror effect as well, we dragged the effect over from
the effects bin and placed these on top of the desired
shots on our timeline. We could adjust the effect so that
the dancers either overlapped or stayed apart.