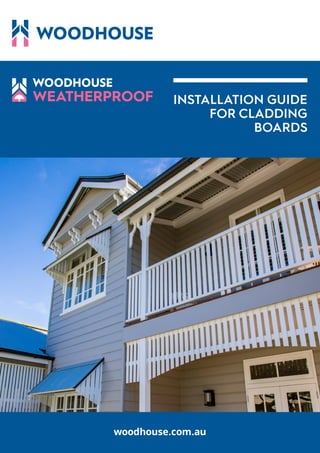
Woodhouse installation guide for cladding boards
•
0 likes•822 views

Woodhouse installation guide for cladding boards

Recommended
Recommended
More Related Content
What's hot
What's hot (20)
Similar to Woodhouse installation guide for cladding boards
Similar to Woodhouse installation guide for cladding boards (20)
More from Canberra Institute of technology
More from Canberra Institute of technology (20)
Recently uploaded
Recently uploaded (20)
Woodhouse installation guide for cladding boards
- 2. woodhouse.com.au 2 Installation Guide Woodhouse Timber Company has supplied timber claddings manufactured from finger-jointed and H3-LOSP treated Radiata pine to the Australian market under the Weatherproof® banner since the mid-1990s. All products in the Weatherproof® cladding range are produced from plantation New Zealand Radiata pine, and are available in the following sizes and profiles: CHAMFERBOARD • 90x19mm Chamferboard • 138x19mm Chamferboard • 158x19mm Chamferboard • 166x18mm NSW Chamferboard • 176x18mm WA Chamferboard • 185x19mm Chamferboard WEATHERBOARD • 138x18 Rusticated Weatherboard • 185x18 Rusticated Weatherboard • 175x22x6 Sawn Face Weatherboard • 185x18 Classic Weatherboard SHIPLAP • 138x18 VJ Shiplap (reversible - can also be used as a lining board) This guide is designed to assist the installer in understanding the requirements surrounding the installation of Woodhouse Weatherproof® cladding boards, and is based on good building practices and construction techniques. However, because each application is subject to a wide variety of variables, including different state and council-based legislative requirements, it is the responsibility of the end user to ensure that the design and installation of the cladding system satisfies all relevant building regulations, codes and Australian Standards. References to many of the guidelines and regulations that apply to timber cladding systems can be found throughout this manual. National Construction Code and Australian Standards Timber wall cladding systems in Class 1 and Class 10 buildings are required to satisfy several performance requirements under Volume Two of the National Construction Code, most notably Performance Requirement P2.1.1 which states that the cladding system must: • Perform adequately under all reasonably expected design actions; and • Withstand extreme or frequently repeated design actions; and • Be designed to sustain local damage, with the structural system as a whole remaining stable and not being damaged to an extent disproportionate to the original local damage; and • Avoid causing damage to other properties. Performance Requirement P2.2.2 further describes the importance of designing structures for weathertightness as follows: A roof and external wall (including openings around windows and doors) must prevent the penetration of water that could cause – a) Unhealthy or dangerous conditions, or less of amenity for occupants; and b) Undue dampness or deterioration of building elements. Similar provisions exist for Class 2 to Class 9 buildings under the National Construction
- 3. 3 woodhouse.com.au Code: Volume One – refer to Part B1: Structural Provisions; and Part F1: Damp and Weatherproofing – and reinforce the importance of carefully designing and installing cladding systems to ensure satisfactory long-term performance as a key element of the building envelope. Fire Safety – Class 1 and Class 10 Buildings Consideration should also be given to the role of timber wall claddings in Class 1 and Class 10 applications that require fire resistance under Part 2.3: Fire Safety of Volume Two of the National Construction Code. This Section requires that Class 1 buildings be protected from the spread of fire from another building on the same lot (where the external wall of the Class 1 building is located within 1.8m of the other building [other than a Class 10 building]); and from any allotment boundaries (where the external wall of the Class 1 building is located within 0.9m of an allotment boundary). The best method for achieving fire resistance under these provisions is to install the timber cladding over a compliant fire-resistant barrier such as Boral OutRWall™ or Gyprock Fyrchek™ that is designed and fitted according to the manufacturer’s guidelines. Fire Safety – Class 2 to Class 9 Buildings Class 2 to Class 9 buildings usually have specific requirements for fire-resistance that are based on the building’s purpose. For example, a four storey Class 3 residential aged-care facility will require non-combustible wall systems under Section C – Fire Resistance of Volume One of the National Construction Code in order to prevent the spread of fire between and within buildings on the same allotment or adjoining allotments. Because solutions are tailored to the building type under this section of the NCC, they fall outside the scope of this manual. For more information, contact your architect, building designer or building certifier. Bushfire Attack Level All Woodhouse Weatherproof® cladding products are manufactured from seasoned and finger-jointed Radiata pine (Pinus radiata) which has a density of 550kg/m3 and is therefore not considered a bushfire-resisting timber. Woodhouse Weatherproof® claddings may still be used on lots with a bushfire attack level (BAL) of BAL12.5 or above so long as it installed in accordance with the provisions laid out in AS3959 – Construction of buildings in bushfire-prone areas. For example, Woodhouse Weatherproof® claddings may be fitted to dwellings that require BAL12.5 certification assuming the following conditions: • All Woodhouse Weatherproof® cladding boards must be installed at least 400mm above any external horizontal surface; • And not within 400mm of any external horizontal surface, where embers collect during a bushfire. For more information, consult AS3959 – Construction of buildings in bushfire-prone areas; Wood Solutions 04 – Building with Timber in Bushfire-prone Areas; or a professional building designer or certifier in your area. Storage and Handling Upon delivery, Woodhouse Weatherproof® cladding boards should be stored in a covered area, out of direct sunlight and away from inclement weather. Unload boards by hand, crane or forklift. They should not be tipped off the deck of a truck. Stack on timber gluts at 450mm increments and at least 150mm from ground level to prevent moisture uptake. Cladding should be covered loosely in plastic to protect it from rain and condensation, while ensuring there is sufficient movement of air around the boards so that they establish equilibrium moisture content with the surrounding atmosphere and properly acclimatise with local conditions. For more information on this topic, refer to the section on Moisture and Movement below. When handling cladding on site, carry individual boards on their edge and do not drag or transport them in a way that will damage the primer or substrate. If the board is damaged, sand the area to a clean finish and apply a good quality oil-based primer to seal the timber against moisture ingress and egress.
- 4. woodhouse.com.au 4 Moisture and Movement Woodhouse Weatherproof® cladding is kiln- dried during production to a moisture content of between 12 and 15 per cent, which stabilises the timber substrate against dimensional changes via shrinkage and expansion throughout its service life. Nevertheless, timber is a hygroscopic material and will react to changes in prevailing weather conditions so consideration should be given to the way that boards will interact with their environment by absorbing moisture from or releasing moisture into the local atmosphere over time. Acclimatisation Preparation of the Woodhouse Weatherproof® cladding product for moisture and movement should begin as soon as the boards are delivered to site. The kiln-drying process removes free and bound water from the cellular structure of the timber, reducing the moisture content of the finished product to between 12 and 15 per cent. This moisture level suits the mild coastal conditions that are typical of large areas of eastern Australia, however where cladding boards are to be installed in humid conditions such as in Cairns, Queensland they may settle at a higher moisture content than levels shown during production and react by expanding to a larger nominal width. Alternatively, where cladding boards are to be installed in a dry, inland environment, they may settle at a lower moisture content which encourages the boards to shrink as they acclimatise to local conditions. Timber products are considered fully acclimatised to their local environment when they reach equilibrium moisture content (EMC) with the surrounding atmosphere, at which point they will exhibit maximum dimensional stability across and along each length. Rapid changes to the moisture content of cladding products (and the subsequent dimensional instability this causes) can be mitigated by ensuring that all boards are acclimatised to the local environment prior to installation. Best practice is to allow cladding boards to acclimatise for one to two weeks before they are fitted, however longer time periods may be required if the prevailing weather conditions are either very dry, hot, or wet. Failure to observe these recommendations may result in a phenomenon known as tenting, or in shrinkage as newly installed cladding boards adjust to the surrounding atmosphere in position on the wall. Moisture and Movement Woodhouse Weatherproof® cladding boards should also be designed and fitted within cladding systems that protect the timber from expansion or shrinkage following installation through prolonged periods of dry or wet weather. • Seal all cuts, holes, or notches with an in-can preservative such Tanalised® Enseal Timber Preservative or Koppers XJ™ Timber Protective and one coat of primer or topcoat prior to installation to prevent moisture uptake, especially through the end grain of the cladding board. Moisture can travel some distance through the straw-like cellular structure of timber and cause the product to expand, so particular attention should be paid to the cut ends of boards. • Design flashings so that they draw water and condensation away from the surface and end grain of cladding boards. This includes at locations where timber claddings are butted into bricks, blocks, or other masonry materials. • Install cladding in a way that does not expose the end of boards to water sitting on slabs, decks, or pavers, and so that there is sufficient clearance to allow for termite inspections. Best practice is to slope ground, slab or paving away from the house to allow water to run off away from the building. Timber framing Woodhouse Weatherproof Cladding Vapour permeable membrane Cavity batten Slope paving or slab away from building Provide at least 100mm clearance between first board and slab or paving
- 5. 5 woodhouse.com.au • Greater dimensional movement can be expected where the cladding is installed on north or western facing walls, and when it is painted in darker colours (with a low light reflective value) that cause elevated temperatures on the surface of the cladding boards. For more information on the topic of light reflective value (LRV), refer to the section on Finishing at the end of this document. Installation General Guidelines Woodhouse Weatherproof® cladding boards should be checked to ensure that moisture content is within factory specification and that there is dimensional consistency between boards before they are fitted to the building. External timber and steel framing should also meet the requirements of AS1684.2 – Residential timber-framed construction or AS4100 – Steel structures and be protected by from mould, rot, and corrosion through installation of a vapour- permeable membrane. These membranes allow for the controlled escape of water vapour from within the building, while restricting the ingress of moisture and condensation into areas behind the cladding board. Recommended practice in the application of timber claddings also provides for the installation of a cavity batten between the cladding and the framing so that any water that penetrates the exterior cladding is allowed to run off without being trapped between the board and membrane. This is known as a drainage cavity, and is achieved when battens at least 18mm thick and as wide as the stud – we recommend treated DAR Woodhouse Weatherproof® boards – are fitted over the top of the vapour-permeable membrane to framing per the figure below. For more information on this topic, refer to the section in this guide on installation methods for horizontal and vertical applications over cavity battens. Woodhouse Weatherproof® claddings can be installed in a horizontal or vertical direction, and should be fastened at the centres shown in the table below. (Note that dimensions shown in this table are the maximum spans that can be achieved with Woodhouse Weatherproof® claddings. Shorter spans, such as 450mm C/C between supporting battens are often more conducive to a smoother and straighter finish.) Recommendations for fasteners can be found under Fixing Requirements. Profile Installation Direction Stud / Batten Centres Horizontal Vertical Chamferboard Yes No 600mm Shiplap Yes Yes 600mm Weatherboard Yes No 600mm Before claddings are fitted, apply at least one preliminary coat of high-quality water- or oil- based topcoat to the front, back, edges and cut ends of each board. Topcoats slow down and harmonise the rate at which moisture moves in and out of the timber substrate, inhibiting moisture uptake and loss throughout the service life of the board. Furthermore, if changes do occur to the moisture content of the cladding, a preliminary topcoat will ensure that any subsequent expansion or contraction will be consistent across each surface of the board, preventing undesirable phenomena such as cupping and crook. It will also minimise the visual impact of colour variation at shared joints if the cladding shrinks. In addition to a preliminary top coat, all cuts, notches and holes that are sawn or drilled into H3 LOSP-treated Woodhouse Weatherproof® should be resealed with an in-can preservative such as Tanalised® Enseal Timber Preservative or Koppers XJ™ Timber Protective prior to installation in exterior applications. These treatments are applied before paint coats to freshly exposed surfaces and prevent moisture uptake into the face or end grain of the timber substrate. Vapour permeable membrane 50mm gun nails or hand nails 300mm maximum spacing Stagger 12mm either side of centre line Cavity batten Cavity batten Woodhouse Weatherproof Cladding Timber framing
- 6. woodhouse.com.au 6 Check that each board is level before moving onto the next board. 10. Minimise joints by planning the installation around full lengths of cladding board. Where butt joins are required, ensure they that are placed over a batten, and restrict potential for moisture ingress by angling cuts and facing them away from the prevailing weather. Butt joins should also be staggered up the wall to maximise the strength and integrity of the cladding system. Installation Method – Vertical Application over Cavity Batten 1. Check cladding boards for dimensional consistency and ensure that moisture content is within factory specifications. 2. Apply one preliminary topcoat to all surfaces of the cladding boards. Any cuts, holes or notches that are installed into boards during the construction process should also be resealed with Tanalised® Enseal and primed with a quality oil-based primer. 3. Check framing for straightness and plumb. Pack, level, or cripple studs in accordance with AS1684.2 or AS4100 to ensure an even surface for the installation of cavity battens. 4. Install vapour-permeable membrane over studs with brads (timber framing) or tek screws (steel framing) and washers at 300mm intervals in accordance with AS/NZS4200.2. Overlaps in the membrane should be faced downwards with a minimum lap of at least 150mm. 5. Install cavity battens perpendicular to studs and over vapour permeable membrane. Cavity battens should be Installation Method – Horizontal Application over Cavity Batten 1. Check cladding boards for dimensional consistency and ensure that moisture content is within factory specifications. 2. Apply one preliminary topcoat to all surfaces of the cladding boards. Any cuts, holes or notches that are installed into boards during the construction process should also be resealed with Tanalised® Enseal and primed with a quality oil-based primer. 3. Check framing for straightness and plumb. Pack, level, or cripple studs in accordance with AS1684.2 or AS4100 to ensure an even surface for the installation of cavity battens. 4. Install vapour-permeable membrane over studs with brads (timber framing) or tek screws (steel framing) and washers at 300mm intervals in accordance with AS/NZS4200.2. Overlaps in the membrane should be faced downwards with a minimum lap of at least 150mm. 5. Install cavity battens directly over studs and over vapour permeable membrane. Cavity battens should be as wide as the framing, and at least 18mm thick. Fixings should be installed at 300mm centres and staggered to allow the cladding to be secured to the middle of the batten. 6. Install flashings, dampcourse, and corner treatments. Flashings should be designed so that they discharge water away from the face and end grain of the boards, including where cladding is butted against bricks or blocks. 7. Mark out the position of each board on the battens. Boards should be loosely fitted to ensure that there is sufficient room for expansion, especially where the product is rebated (i.e. Chamferboard) or features a tongue and groove (i.e. Shiplap). 8. Install cladding to battens beginning with the bottom board. Provide for at least 150mm clearance between the bottom of the first board and unfinished ground or soil; and at least 100mm between the bottom of the first board and concrete slab or paving. 9. Fasten starter board and subsequent boards at each batten using the nails or screws specified in Fixing Requirements. Wall framing Woodhouse Weatherproof Cladding Vapour permeable membrane Cavity batten fastened to stud Position joints on battens and stagger up wall
- 7. 7 woodhouse.com.au at least 70x35mm; and of sufficient durability to withstand termite and fungal attack; and fastened at maximum 600mm centres. 6. Install flashings, dampcourse, and corner treatments. Flashings should be designed so that they discharge water away from the face and end grain of the boards, including where cladding is butted against bricks or blocks. 7. Mark out the position of each board on the battens. Boards should be loosely fitted to ensure that there is sufficient room for expansion between tongue and groove, and the tongue of each board should face the prevailing weather. 8. Install cladding to battens beginning with a starter board at one end. Provide for at least 150mm clearance between the bottom edge of the first board and unfinished ground or soil; and at least 100mm between the bottom edge of the first board and concrete slab or paving. Boards may also be cut at an angle to form a drip line toward ground level. 9. Fasten starter board and subsequent boards at each batten using the nails or screws specified in Fixing Requirements. Check that each board is plumb before moving onto the next board. 10. Minimise joints by planning the installation around full lengths of cladding board. Where joins are required, ensure they that are placed over a batten, and restrict potential for moisture ingress by angling cuts and facing them downwards, away from the prevailing weather. Installation Method – Horizontal Applications (Direct Fix) While cavity battens are recommended behind horizontal installations of Weatherproof® cladding, it is possible to fasten boards directly to timber or metal framing over a vapour permeable membrane where risk of moisture ingress behind the cladding is very low. 1. Check cladding boards for dimensional consistency and ensure that moisture content is within factory specifications. 2. Apply one preliminary topcoat to all surfaces of the cladding boards. Any cuts, holes or notches that are installed into boards during the construction process should also be resealed with Tanalised® Enseal and primed with a quality oil-based primer. 3. Check framing for straightness and plumb. Pack, level, or cripple studs in accordance with AS1684.2 or AS4100 to ensure an even surface for the installation of cavity battens. 4. Install vapour-permeable membrane over studs with brads (timber framing) or tek screws (steel framing) and washers at 300mm intervals in accordance with AS/NZS4200.2. Overlaps in the membrane should be faced downwards with a minimum lap of at least 150mm. 5. Install flashings, dampcourse, and corner treatments. Flashings should be designed so that they discharge water away from the face and end grain of the boards, including where cladding is butted against bricks or blocks. 6. Mark out the position of each board on the membrane. Boards should be loosely fitted to ensure that there is sufficient room for expansion, especially where the product is rebated (i.e. Chamferboard) or features a tongue and groove (i.e. Shiplap). 7. Install cladding to studs beginning with the bottom board. Provide for at least 150mm clearance between the bottom of the first board and unfinished ground or soil; and at least 100mm between the bottom of the first board and concrete slab or paving. 8. Fasten starter board and subsequent boards at each batten using the nails or screws specified in Fixing Requirements. Check that each board is level before moving onto the next board. Wall framing Woodhouse Weatherproof Cladding Vapour permeable membrane Horizontal cavity battens at maximum 600mm centres
- 8. woodhouse.com.au 8 9. Minimise joints by planning the installation around full lengths of cladding board. Where joins are required, ensure that they are placed over a stud, and restrict potential for moisture ingress by angling cuts and facing them away from the prevailing weather. Butt joins should also be staggered up the wall to maximise the strength and integrity of the cladding system. Control Joints Larger installations of timber claddings should also be designed to accommodate dimensional changes as a system during prolonged periods of wet or dry weather. Where the cladding features a rebate (i.e. Chamferboard) or tongue and groove (i.e. Shiplap), boards should be loosely fitted with a 1 to 2mm expansion gap that allows for longitudinal movement across each length of cladding material. This clearance is best achieved through the use of a spacer that should be removed once installation is complete. Alternatively, mark out the stud, batten, or membrane with a gauging rod that allows for the spacing of each board plus an expansion gap before the cladding is fitted. Do not over-cramp cladding boards. If cladding boards are to be installed over multiple stories, an additional 10mm control joint should be provided at each storey and under windowsills. This joint should be formed between boards and then covered with a metal flashing to ensure that the cladding system is weathertight. Corner Treatments Timber trims, or ‘stops,’ and sheet metal flashings should be installed at internal and external corners to protect the end grain of the cladding boards from moisture uptake, and to prevent water and condensation from unnecessarily entering the drainage cavity behind the boards. Trims also create a neat finish around corners and abutments, adding further interest to the the home’s facade. Examples of internal and external corner treatments can be found below. Note that we recommend treated and primed Woodhouse Weatherproof® mouldings for all applications where trims and stops are required. Timber framing 31x31 DAR Weatherproof stop Woodhouse Weatherproof Cladding Vapour permeable membrane Corrosion resistant flashing Timber framing Woodhouse Weatherproof Cladding 42x42 DAR Weatherproof stop 66x42 DAR Weatherproof stop Vapour permeable membrane Corrosion resistant flashing Wall framing Woodhouse Weatherproof Cladding Vapour permeable membrane Cavity batten fastened to stud Position joints on battens and stagger up wall Vapour permeable membrane Timber framing 10mm control joint Woodhouse Weatherproof cladding Corrosion resistant flashing over control joint` I-beam joists and blocking or rim board
- 9. 9 woodhouse.com.au PROFILE GUN NAILING HAND NAILING Profiled Boards 90x19 Chamferboard Paslode® B40022 50x2.5 HDG Impulse™ Coil Nail or Paslode® B40024 50x2.5 SS Impulse™ Coil Nail 50x2.8mm Annual (Ring) Shank Nail 138x19 Chamferboard 158x19 Chamferboard 185x18 Chamferboard 166x18 NSW Chamferboard 176x18 WA Chamferboard 138x18 VJ Shiplap 138x18 Rusticated Weatherboard 185x18 Rusticated Weatherboard Bevelled Boards 185x18 Classic Weatherboard Paslode® B20562V 65x2.87mm DekFast Impulse™ Nail 65x3.05mm Annual (Ring) Shank Nail 175x22x6 Sawn Face Weatherboard Fixing Requirements General Guidelines Woodhouse Weatherproof® claddings should be secured to framework with high quality timber fasteners per the table below. Woodhouse Timber Company recommends Paslode® Impulse™ pneumatic fasteners and tools, although Woodhouse Weatherproof® claddings can also secured with hand driven nails. Cladding boards should be fitted to steel frames with screws that are equal in performance to the nails specified above. Screws should penetrate steel framing members by at least two full screw threads in accordance with Section 3.4.5.2 in Volume 2 of the National Construction Code. Where pneumatic nails guns are used, care should be taken to ensure that nails are not over-driven as this may cause boards to split or distort. For a typical finishing gun, a pressure of 120psi is usually sufficient to drive the head of the nail flush with the surface of the cladding board. Fastener Durability Fasteners should have the appropriate level of durability required for the intended application. Galvanised fasteners are usually sufficient for most installations, however stainless steel fasteners should be selected when the cladding system is located in a coastal or corrosive environment. Consideration should also be given to the compatibility of timber fasteners with the materials they are secured to. Timber treatments like copper-chromium-arsenate (CCA) and copper-quaternary (ACQ) are known to accelerate the corrosion of galvanised steel fasteners, so a minimum 304-grade stainless NOTES: 1. For hardwood frames, select a plain shank fastener of a corresponding gauge and length. 2. Fasteners must penetrate a minimum of 30mm into timber framing. 3. Profiled boards should be fastened to framework with two fixings per batten or stud. 4. Bevelled boards should be fastened to framework with one fixing per batten or stud. 5. Fasteners should be located so that they do not penetrate the tongue or edge of adjacent boards.
- 10. woodhouse.com.au 10 Resin Bleed and Light Reflective Value Dark paint colours are known to cause several issues when applied to Radiata pine in exterior applications because of the way these colours absorb solar radiation instead of reflecting it away from the timber substrate. The most common of these issues is known as resin bleed, and it occurs when hidden pockets of terpenes and resins within the timber substrate mobilise on the surface of the finished product as a sticky, honey- coloured substance. If it has occurred, resin bleed is typically found on timbers that have been coated with dark coloured paints as these finishes tend to increase the surface temperature of the wood and cause undetected resin pockets to soften and bleed. It is for this reason that Woodhouse recommends the application of lighter- coloured paints that demonstrate a Light Reflective Value (LRV) of 45 or above to Weatherproof® products. (Where 0 = pure black and 100 = pure white.) Light reflective values are published by all major paint manufacturers and can usually be found online. Maintenance Paint finishes typically ‘coalesce’ or harden within 14 days of application assuming an ambient air temperature of 20ºC to 25ºC, and 50% relative humidity. When the prevailing weather conditions are cooler and more humid – such as in the winter months – more time may be required for coalescence to occur. Care should be taken following the application of paint finishes in these conditions to ensure that they are not damaged while the coating is hardening. General maintenance should otherwise be carried out every six to twelve months in accordance with the following: • Wash down cladding boards to remove dirt, mould, and salt deposits. • Check sealants and replace them if they are showing any degradation or loss of adhesion. • Check flashings and replace them if they are damaged or allowing moisture past the boards and into the dwelling. steel fixing should be used where timber battens or studs are finished with these types of treatments. Finishing All Woodhouse Weatherproof® cladding products are factory primed with one coat of oil-based Industrial Primer and will accept top coats with minimal preparation. Before claddings are fitted, apply at least one preliminary coat of high-quality water- or oil- based topcoat to the front, back, edges and cut ends of each board. Topcoats slow down and harmonise the rate at which moisture moves in and out of the timber substrate, inhibiting moisture uptake and loss throughout the service life of the board. Furthermore, if changes do occur to the moisture content of the cladding, a preliminary topcoat will ensure that any subsequent expansion or contraction will be consistent across each surface of the board, preventing undesirable phenomena such as cupping and crook. It will also minimise the visual impact of colour variation at shared joints if the cladding shrinks. The preparation and painting of boards should be completed in a tradesman-like manner to the requirements laid out in AS/NZS2311 – Guide to the painting of buildings, and according to the following guidelines: 1. Fill any nail holes with a quality wood filler and lightly sand to an even finish. 2. Sand and spot prime any areas that require additional attention with a quality oil-based primer and sealer. 3. Ensure that the surface of the cladding board is free of dirt and contaminants. If necessary, clean gently with detergent and water to prepare for final finishing. 4. Apply two topcoats of a high-quality water- or oil-based exterior paint per the manufacturer’s recommendations. Where possible, topcoats should be applied within two months of installation of the Woodhouse Weatherproof® cladding. If this cannot be achieved and the surface of the product appears chalky, boards should be sanded back to a smooth, even finish and areas of exposed timber should be reprimed with a quality oil-based primer.
- 11. 11 woodhouse.com.au Paint finishes should also be maintained and reapplied in accordance with the paint manufacturers recommendations. Disposal of Offcuts and Waste For any treated timber, do not burn offcuts or sawdust. Preservative treated offcuts and sawdust should be disposed of by approved local authority methods. Additional Resources AS1684.2-2010 (2010), Residential timber- framed construction AS3959:2018 (2018), Construction of buildings in bushfire-prone areas National Construction Code (2019), Building Code of Australia – Volume Two QTimber (2017), Seasoning and timber moisture content Available at: https://qtimber.daf.qld.gov.au/ guides/seasoning-and-timber-moisture-content Timber Queensland (2014), Technical Data Sheet 3 – Treated Pine Cladding Available at: https://www.timberqueensland. com.au/ Wood Solutions (2020), Building with Timber in Bushfire-prone Areas Disclaimer: This guide is intended to assist the end user by providing general information on best practices relating to the installation of Woodhouse Weatherproof® cladding products. This information is not a substitute for professional building advice, and it is the responsibility of the purchaser to ensure that the design and installation of the cladding system satisfies all relevant building regulations, codes, and Australian Standards. Woodhouse Timber Company accepts no responsibility for work or systems performed in conjunction with its cladding products and their ability to satisfy the provisions of the relevant regulations and standards.
- 12. woodhouse.com.au 12 woodhouse.com.au Toll Free: 1300 880 662 | info@woodhouse.com.au BRISBANE 7 Brickworks Place Darra QLD 4076 T: 07 3217 0622 F: 07 3217 0551 SYDNEY Warehouse B 31-39 Sturt Street Smithfield NSW 2164 T: 02 9892 1055 F: 02 9892 1066 MELBOURNE 70 Logis Boulevard Dandenong South VIC 3175 T: 03 9791 8064 F: 03 9791 8069 ADELAIDE 5 Lafitte Road Wingfield SA 5013 T: 08 8260 1644 F: 08 8262 3392 PERTH 33 Fargo Way Welshpool WA 6106 T: 08 6254 2315 F: 08 6253 8622 JUNE 2020_V1