Revit Understanding Reference Planes and Reference lines in Revit for Family ...
How pictures were edited
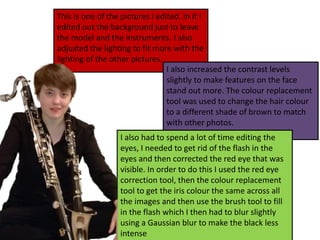
1. This is one of the pictures I edited. In it I
edited out the background just to leave
the model and the instruments. I also
adjusted the lighting to fit more with the
lighting of the other pictures.
I also increased the contrast levels
slightly to make features on the face
stand out more. The colour replacement
tool was used to change the hair colour
to a different shade of brown to match
with other photos.
I also had to spend a lot of time editing the
eyes, I needed to get rid of the flash in the
eyes and then corrected the red eye that was
visible. In order to do this I used the red eye
correction tool, then the colour replacement
tool to get the iris colour the same across all
the images and then use the brush tool to fill
in the flash which I then had to blur slightly
using a Gaussian blur to make the black less
intense
2. Photoshop was the only tool I used for
editing my images. In it I used lots of
tools including fx effects to create drop
shadows, correction tools like the spot
healing tool and red eye correction.
I also was able to
use different
colours to edit
parts of the images
that were not
consistent with
other photos. I also
used lots of
layering to make
sure that I could
edit separate things
without it affecting
other areas.
As well as using Photoshop for my
images I used it for putting together my
magazine, for which I was able to layer
text behind text to create shadows on it
as well as being able to have more
options behind the editing of things like
text where I could use specific
measurements to make the text go a
certain way to fit better on the page.