AutoSTEM - Automata for STEM Learning
•Download as PPTX, PDF•
0 likes•35 views

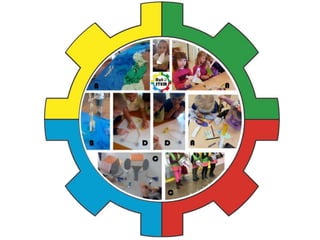
The AutoSTEM project aims to introduce STEM concepts to children aged 4 to 8 using innovative automata resources. The project is funded by the Erasmus+ Programme of the European Union and involves partners from several European universities. The resources produced include step-by-step guides for teachers and students to construct various automata from readily available materials. The automata can then be used to teach children concepts in physics, biology, geology and other subjects in an interactive way. Evaluation of the project emphasizes allowing time for open exploration and creativity with automata in small groups.

Recommended
Recommended
More Related Content
Similar to AutoSTEM - Automata for STEM Learning
Similar to AutoSTEM - Automata for STEM Learning (20)
More from Joel Josephson
More from Joel Josephson (20)
Recently uploaded
Recently uploaded (20)
AutoSTEM - Automata for STEM Learning
- 2. With the support of the Erasmus+ Programme of the European Union. The content reflects only the author’s view and the European Agency and the European Commission are not responsible for any use that may be made of the information it contains AutoSTEM – automata to teach STEM subjects to young learners Partners University of Coimbra Portugal, Queen Maud University College Trondheim Norway, 32 SU School “Sv.Kliment Ohridski” Sofia Bulgaria, Eurek@ Perugia Italy, Kindersite UK Erasmus KA201 large-scale project to create innovative resources For students from 4 to 8 years How to they introduce STEM areas? What are automata? What are they made from?
- 4. AutoSTEM – Resources produced Step by Step Teacher Guide •What are automata and STEM •The theoretical framework and pedagogical concepts •Key concepts for constructing automata Automata Pedagogical Guidelines and Construction Instructions •Details in the next section Scenarios to implement Automata •Ideas how to take the ideas further holistically and in to additional subject areas Resources for planning and reflection Videos •29 videos to date
- 5. With the support of the Erasmus+ Programme of the European Union. The content reflects only the author’s view and the European Agency and the European Commission are not responsible for any use that may be made of the information it contains AutoSTEM – automata to teach STEM to young learners
- 6. AutoSTEM – Choosing an Automata to Use What areas of STEM learning are included How to make video Full teachers step by step guide Media examples of children making the automata Templates to print off
- 7. AutoSTEM – Automata Step by Step guide •Introducing STEM Concepts •How to construct the JellyBird Parts and tools Method •How the JellyBird can be used to learn STEM The body is round, but not a circle. It is pointed at one end and round at the other There is a left-hand side and a right-hand side of the body. The wings are rectangles. A rectangle has four sides and is an oblong. There will be one wing on either side of the bird. The eyes are round, almost like circles. There will be one eye on either side of the body. The beak is a triangle. It has three corners. The sharp corner points outwards. The bird uses the beak to pick. The beak will be in the front. The tail is a trapezium. It has four sides. The widest side points outwards. The bird uses the tail to steer. The tail will be in the back.
- 8. AutoSTEM – Evaluation Children’s play with automata is important The project facilitates creativity and wonder The workshop is interdisciplinary Do not do too much Provide enough time to build automata for exploration to test and play with the automata Do not have too many children in the group
- 9. Website Videos Facebook Email : https://www.autostem.info : https://www.youtube.com/channel/UCaVYKg0qYXnUNNdqwNtLAVQ : https://www.facebook.com/AutomataforStem : joel@kindersite.info Thank you for your attention