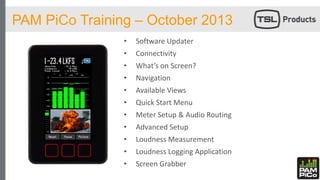
1. PAM PiCo Training – October 2013
• Software Updater
• Connectivity
• What’s on Screen?
• Navigation
• Available Views
• Quick Start Menu
• Meter Setup & Audio Routing
• Advanced Setup
• Loudness Measurement
• Loudness Logging Application
• Screen Grabber
2. PAM PiCo – Software Updater
• Online updater
• Offline updater
• Drivers
• Software mode
- Update and retain memories
• Factory mode
- Update and return to factory
default
• How to clone units
3. PAM PiCo – Software Updater
• Online updater
• Offline updater
• Drivers
• Software mode
• Factory mode
• How to clone units
4. PAM PiCo – Software Updater
• Online updater
• Offline updater
• Drivers
• Software mode
• Factory mode
• How to clone units
5. PAM PiCo - Connectivity
• HD-SDI In / Loop (Five only)
• Stereo analogue / LTC
• 3x AES via BNC
• USB
6. PAM PiCo – What’s on screen?
SDI Eye Width / AES Lock Starfish – Multichannel
Phase and Amplitude
Loudness Test Readout
and Logging
Start/Stop
Loudness
Phase
Correlation
SMPTE timecode readout Bargraph Displays
7. PAM PiCo - Navigation
• The general navigation on the PAM PiCo is achieved through the three capacitive
touch sensitive buttons below the screen.
• Each touch button corresponds to the on-screen legend which in turn dynamically
changes depending on the screen view
10. PAM PiCo - Portrait Views
View 2 – PPM + History View 1 – PPM with StarFish/Picture
11. PAM PiCo – Quick Start Menu
• Select Preset Number
• Choose Input Type
• Select Scale and Loudness
Settings
• Choose Meter Text Readout
• Assign Timecode Source
• Backlight Level and Standby
12. PAM PiCo – Quick Start Menu
• Select Preset Number
• Choose Input Type
• Select Scale and Loudness
Settings
• Choose Meter Text Readout
• Assign Timecode Source
• Backlight Level and Standby
13. PAM PiCo – Quick Start Menu
• Select Preset Number
• Choose Input Type
• Select Scale and Loudness
Settings
• Choose Meter Text Readout
• Assign Timecode Source
• Backlight Level and Standby
In Quick Setup, the selected preset name will dynamically reflect your
choices.
The dynamic preset name includes the following information:
Input Source – Channel Count and Order – Loudness Setup – Scale
Preset number
14. PAM PiCo – Quick Start Menu
• Select Preset Number
• Choose Input Type
• Select Scale and Loudness
Settings
• Choose Meter Text Readout
• Assign Timecode Source
• Backlight Level and Standby
15. PAM PiCo – Quick Start Menu
• Select Preset Number
• Choose Input Type
• Select Scale and Loudness
Settings
• Choose Meter Text Readout
• Assign Timecode Source
• Backlight Level and Standby
16. PAM PiCo – Quick Start Menu
• Select Preset Number
• Choose Input Type
• Select Scale and Loudness
Settings
• Choose Meter Text Readout
• Assign Timecode Source
• Backlight Level and Standby
17. PAM PiCo – Quick Start Menu
• Select Preset Number
• Choose Input Type
• Select Scale and Loudness
Settings
• Choose Meter Text Readout
• Assign Timecode Source
• Backlight Level and Standby
18. PAM PiCo – Quick Start Menu
• Select Preset Number
• Choose Input Type
• Select Scale and Loudness
Settings
• Choose Meter Text Readout
• Assign Timecode Source
• Backlight Level and Standby
The Meter Text Read Out allows you to customize which
parameter each of the four text lines at the top of the
PAM PiCo screen displays
Each text line has its own selection folder and can be
independently programmed to meet the users particular
needs
Line 1
Line 2
Line 3
Line 4
19. PAM PiCo – Quick Start Menu
• Select Preset Number
• Choose Input Type
• Select Scale and Loudness
Settings
• Choose Meter Text Readout
• Assign Timecode Source
• Backlight Level and Standby
20. PAM PiCo – Quick Start Menu
• Select Preset Number
• Choose Input Type
• Select Scale and Loudness
Setting
• Choose Meter Text Readout
• Assign Timecode Source
• Backlight Level and Standby
21. PAM PiCo – Meter Setup and Audio Routing
Terminology applicable to Meter Setup and Routing Menus
• Source Selection – Routing a source to the meter
• Source List – Choice of meter input sources
• Internal Sources – Non-physical input sources defined by the meter
• Source Labels – Fixed and user defined source names
• Channel Role Label – Fixed and user defined names for bargraph channel
representations
• Global Label Master – A library of ‘labels’ for naming sources and channels
22. PAM PiCo – Meter Setup and Audio Routing
• Source Selection – Advanced Setup > Preset > Matrix Output Assign > Meter
• Source List
• Internal Sources
• Source Labels
• Channel Role Label
• Global Label Master
>Tap for Source List
Select to route to
meter
23. PAM PiCo – Meter Setup and Audio Routing
• Source Selection – Advanced Setup > Preset > Matrix Output Assign > Meter
• Source List
• Internal Sources
• Source Labels
• Channel Role Label
• Global Label Master
‘Internal Sources’ are setup within the PiCo
and refer to non-physical meter source types
TonL, TonR > Unused
Mix > Used for Sum (M) signal in MS
viewings, or as Left ch. when Downmix
mode
Diff > Used for Diff (S) signal in MS viewings,
or as Right ch. when in Downmix mode
Loud > For Loudness Bar
24. PAM PiCo – Meter Setup and Audio Routing
• Source Labels - Advanced Setup > Preset > Labels Assign > Input
• Channel Role Label
• Global Label Master • Choose the source label appropriate to
your application
• Use the preset list of labels
• Select from a list of User labels that can
be pre-programmed with custom names
in the User Define folder
25. PAM PiCo – Meter Setup and Audio Routing
• Channel Role Label - Advanced Setup > Preset > Labels Assign > Output
• Global Label Master
• Choose the channel label appropriate to
your application
• Use the preset list of labels
• Select from a list of User labels that can
be pre-programmed with custom names
in the User Define folder
• Note that certain labels must be defined
using standard terminology (Left, Right,
Centre etc) for StarFish to work correctly
26. PAM PiCo – Meter Setup and Audio Routing
• Global Label Master - Advanced Setup > Audio Global > Labels > Signal
• Global Label Master is a default list of all
the labels available for Source and
Channel Roles
• Each may be customised to suit user
requirements
27. PAM PiCo – Meter Setup and Audio Routing
• Audio Routing Parameters included within a Preset
• All of the Audio routing criteria and label
functions are stored instantly in the
current preset, with Global Label Master
as the only exception
• Routing and labeling may be completely
altered by the flick of a preset change,
while the Global Label Master stays fixed
and independent
28. PAM PiCo – Advanced Setup Menu
• User Modes and Restrictions
• Presets – described previously
• Matrix Output Assign – described previously
• Display Mode
• Colours
• Meter Text Readout
• StarFish Setup and Mode
• Loudness Preset and Modes
• Loudness Option
• Labels
• Audio Global
29. PAM PiCo – Advanced Setup Menu
• User Modes and Restrictions • Four levels of user access, allowing for the meter
to be protected against unintended use and
changes to the setup
• Restricted – locks the meter in a single view and
prevents changes
• Basic – access to all views, menus are blocked
• Full – full access and editing capability but
storing is blocked. Reboot to restore
• Administrator – full access and editing capability
30. PAM PiCo – Advanced Setup Menu
• Display Mode – including moving coil
• Colours
• Meter Text Readout – described previously
• StarFish Setup and Mode
• Loudness Preset and Modes
• Loudness Option
• Labels
• Audio Global
31. PAM PiCo – Advanced Setup Menu
• Colours
Peak
Red
Colour
Normal
Green
Colour
Under -
Blue
• Colours for areas defined as Peak, Normal
and Under may be changed to suit user
preference
• Each scale includes a defined ‘Peak’ level
• The ‘Under’ threshold defines when the
input signal is considered below the
‘Normal’ level
• Normal level is defined as the area between
reference and peak
32. PAM PiCo – Advanced Setup Menu
• StarFish Setup and Mode
• Loudness Preset and Modes
• Loudness Option
• Labels
• Audio Global
• Fast / Slow compression
parameters control the
Phase correlation
response time
33. PAM PiCo – Advanced Setup Menu
• Loudness Preset and Modes
• Loudness Option
• Labels
• Audio Global
34. PAM PiCo – Loudness Measurement
• Loudness Capture Mode – Capture Start Pause
• A manual mode that allows you to decide when the
Loudness capture starts, pauses, restarts or is reset
• Pause / Start button reports active state – ‘Pause’
means ‘paused measurement ’, ‘Start’ means
‘Started measurement’
• ‘Reset’ re-initiates measurement and zeros the
capture process
35. PAM PiCo – Loudness Measurement
• Loudness Capture Mode – Capture Auto Start
• The Auto-Start mode, has controls and options
similar to those of the Start-Pause Mode, with the
addition of an automatic start/reset facility triggered
by the incoming audio level
• If the audio is higher than -70dBFS, Loudness
Capture automatically Starts, as well as being
automatically stopped and Reset when the audio
drops below -70dBFS again for more than 2 seconds
• Useful when working with shorter projects freeing
you from having to manually reset the loudness
capture every time you need a new reading
36. Loudness Logging Application
• Free PC Download
• SQL Lite Database Management
Software included
• Store and manage graphical and
numerical log files
• True Peak and all key Loudness
parameters recorded
• Create .pdf or .csv files
• Timecode reference
• Partial data analysis
• Branded report publishing
37. Screen Grabber Application
• Free PC Download
• Take snapshots of
menus and bargraphs
• Simple means to
record loudness
• Capture StarFish and
JellyFish images of
poor sound sources
• Use to construct
training courses!