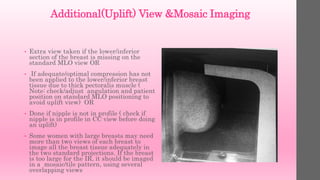
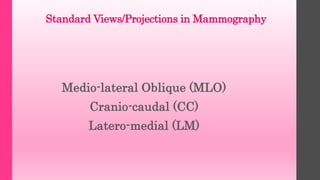
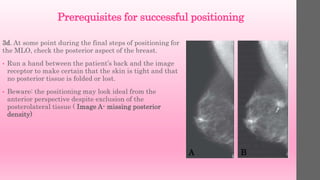
The document provides guidance on proper positioning technique for medio-lateral (MLO) mammography views. Key points include:
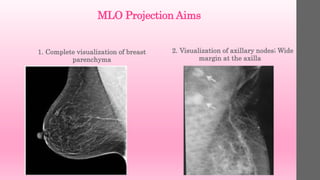
1. Positioning aims to visualize the entire breast parenchyma while avoiding superimposition of structures.
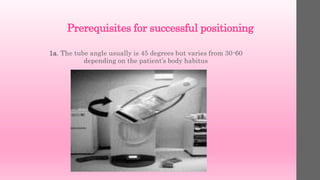
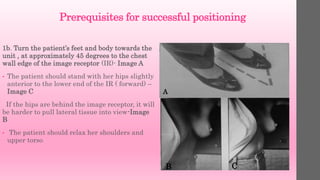
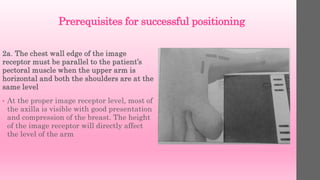
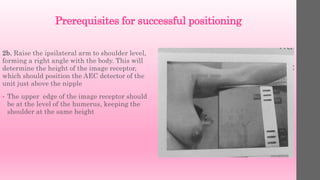
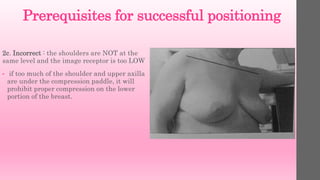
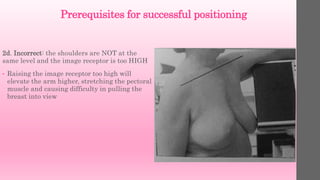
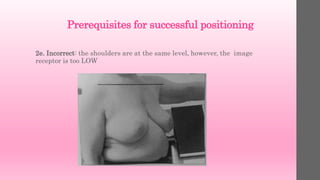
2. Prerequisites for successful positioning include choosing an appropriate tube angle and image receptor height/position based on the patient's anatomy.
3. Technique involves pulling the breast gently but firmly upward and outward, away from the chest wall, while applying compression to separate tissues for clear visualization.


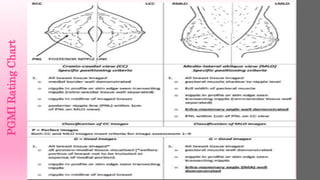
![Criteria to Assess MLO Image
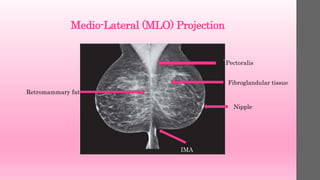
1. The breast should not appear to droop on the
image, although with some large-breasted
women, drooping is unavoidable. In these cases,
add a third projection of a latero-medial lateral
or mediolateral lateral to image anterior
structures.
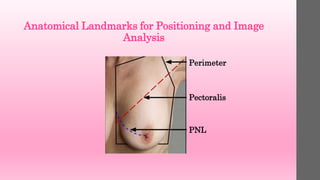
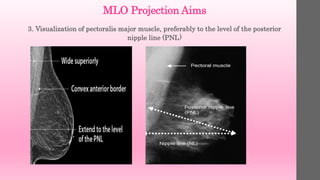
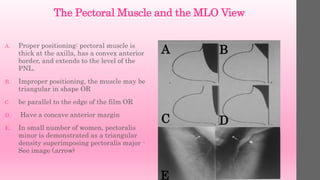
2. The pectoral muscle should be visualized to
the nipple (posterior nipple line [PNL]. This may
not be possible on all patients; however, it should
be the rule rather than the exception. The
muscle should also be imaged as convex, rather
than concave or flat. A concave or flattened
muscle indicates lack of relaxation of the muscle,
an inappropriate angle of obliquity, inadequate
use of the mobile medial border, or allowing the
patient to lean back slightly
3. The IMF should be “open” rather than
falling on itself, indicating that the breast
is in the “up and out” position
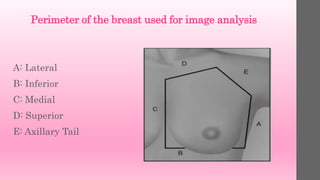
4. breast between these two lines. It will
not be possible to include all the medial
tissue on the MLO projection on all
patients, but the CC projection covers this
portion of the breast well. However, the
lateral line should include the lateral and
posterior breast tissue. If not, demonstrate
this area of the breast with an extra view](https://image.slidesharecdn.com/mammographypositioningtechniqueformloprojection-linkedinshare-200316083621/85/Mammography-positioning-technique-for-MLO-View-34-320.jpg)